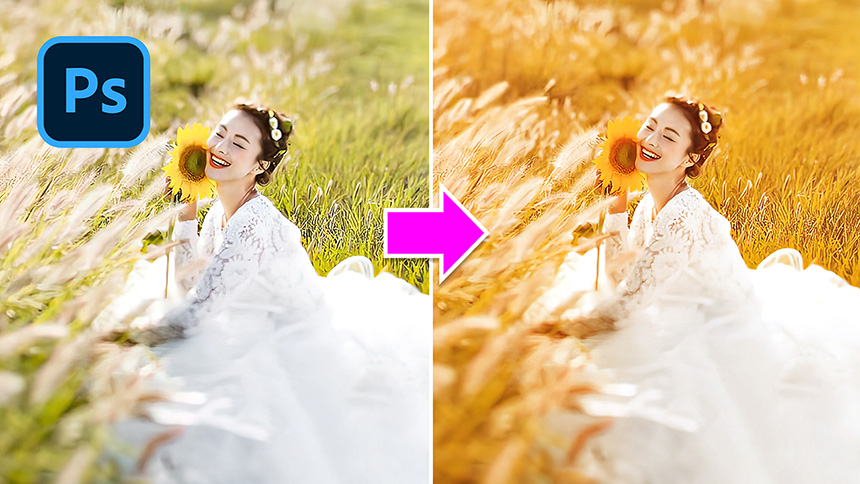
Add Natural Background Light Effects in Photoshop
Hey hey, welcome to SaDesign channel, in this video I’m going to share with you how to create the natural background light effect in Photoshop.
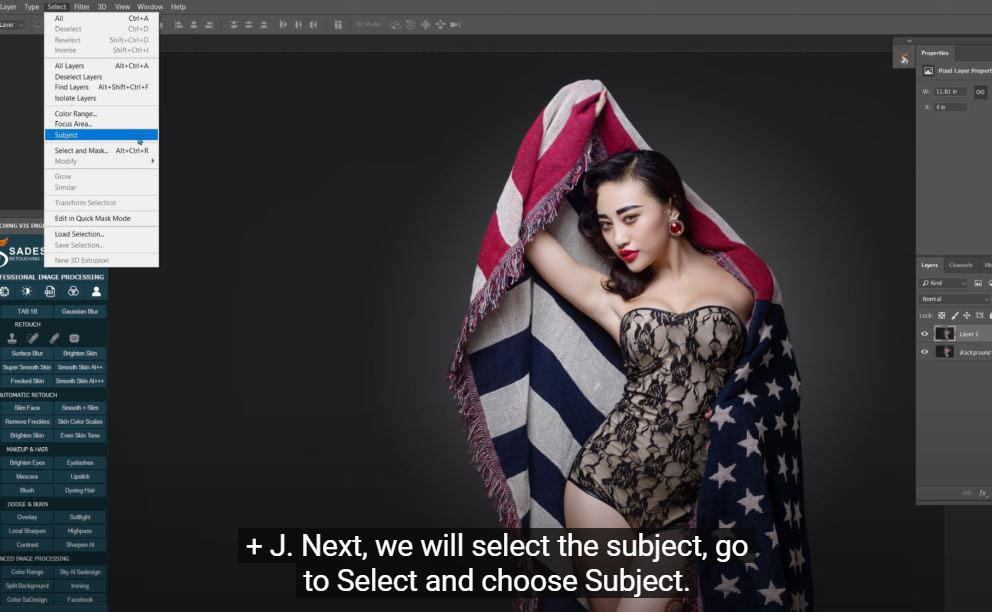
(1). The first thing we have to do that is copy the background layer by pressing CTRL or CMD + J. Next, we will select the subject, go to Select and choose Subject. Boom! Photoshop now ) utomatically select the subject for us and it looks quite good. For some areas that are still not selected, you can use Quick selection tool to add the selection.
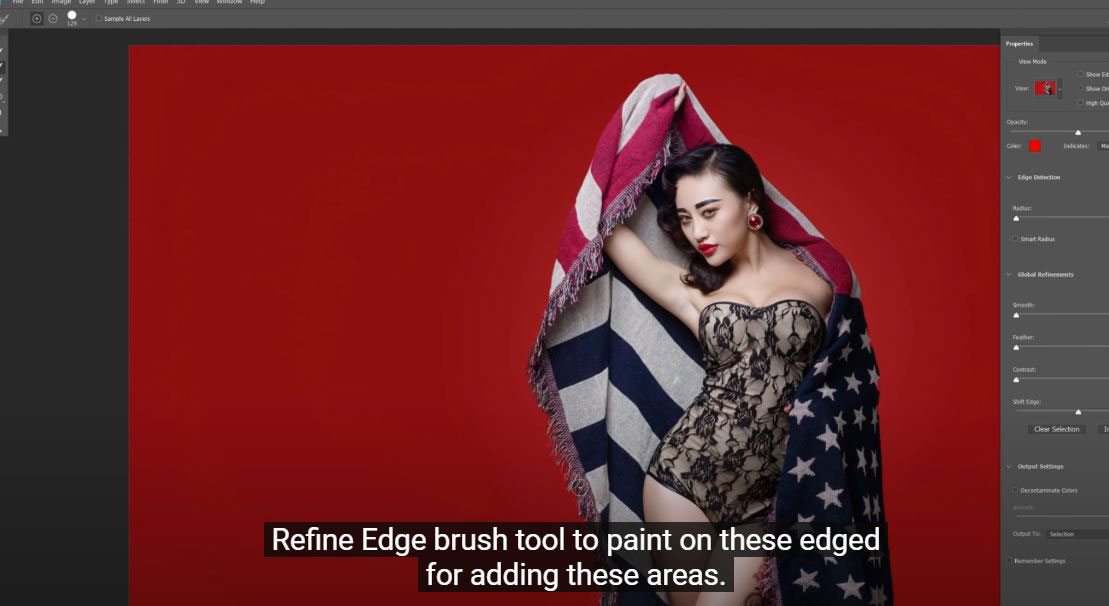
(2). We will notice the edge of towel is not selected, go to Select > Select and Mask and using the Refine Edge brush tool to paint on these edged for adding these areas. Once you’re done, choose “Selection” in output to box, and OK.
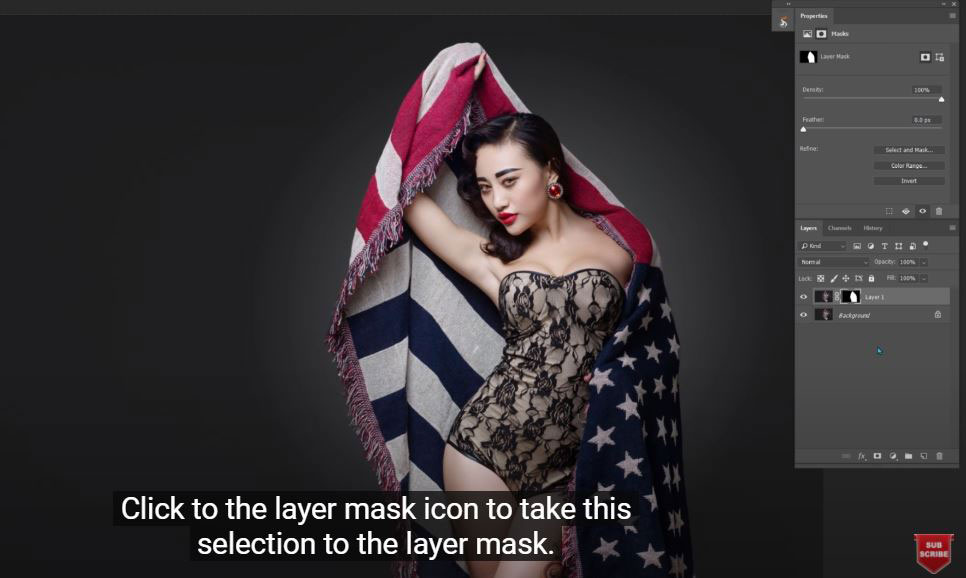
(3). Click to the layer mask icon to take this selection to the layer mask. Next, create a new layer above the background layer. Simply, just choose the background layer first and click to new layer icon so that the new layer will appear above the background layer.
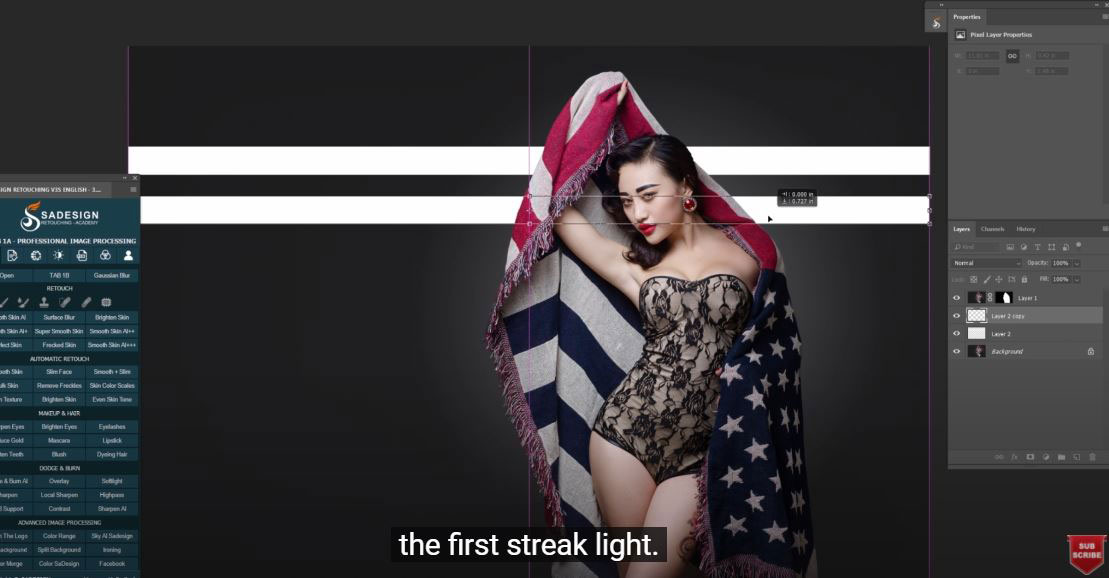
(4). As I tend to create the light in rectangle shape, I’ll choose the Rectangular Marquee Tool (M shortcut) to create the light. Draw a streak of light that falling from the window to the background and fill it with white, to do that, make sure the background color is white and press CTRL + DELETE. Next, we have to copy lots of this streak light, I’ll show you the way to do that more accuracy and precisely than copy and paste. For Win, Hold CTRL + ALT + T, for Mac, Hold CMD + OPTION + T, now move and place it below the first streak light. Hit enter when you satisfy with it.
(5).Now, Photoshop already remembers of your action so you just need to press CTRL + ALT + SHIFT + T or CMD + OPTION + SHIFT + T. Other streak lights will appear every time you press key combination.
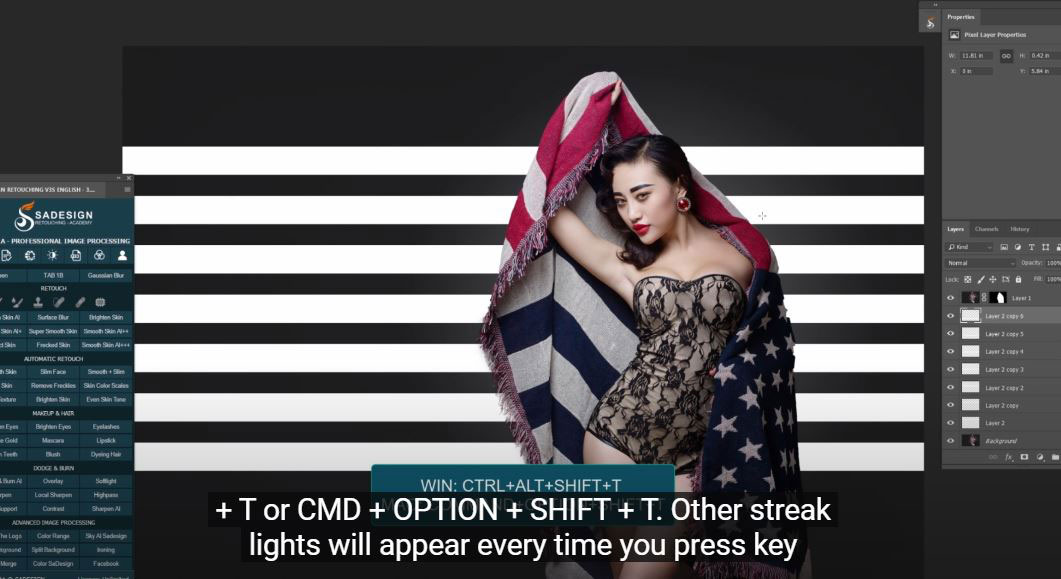
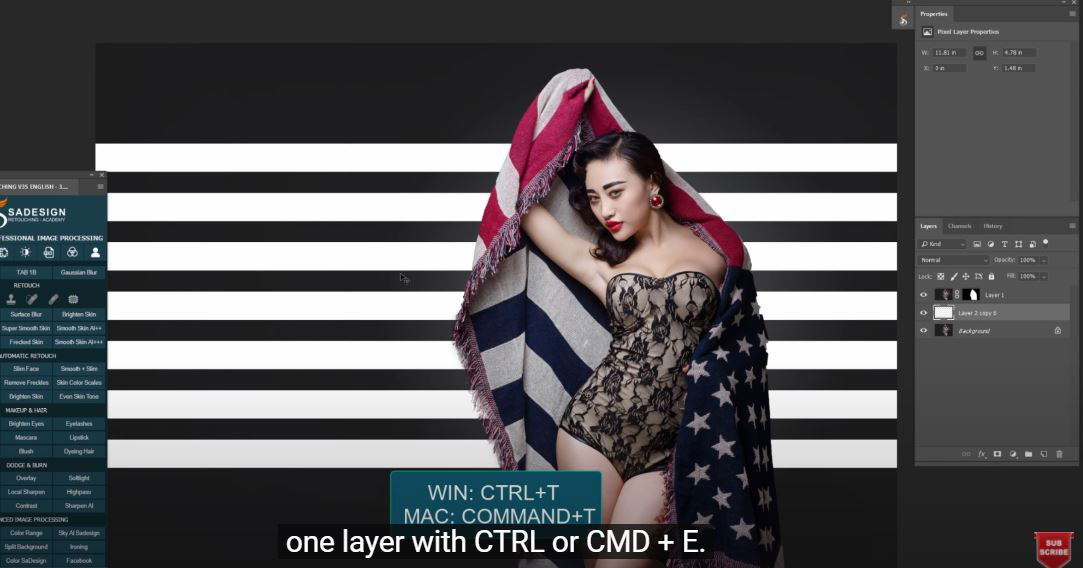
(6). It will 100% exactly result for you, now select all layers of the light and merge them into one layer with CTRL or CMD + E.
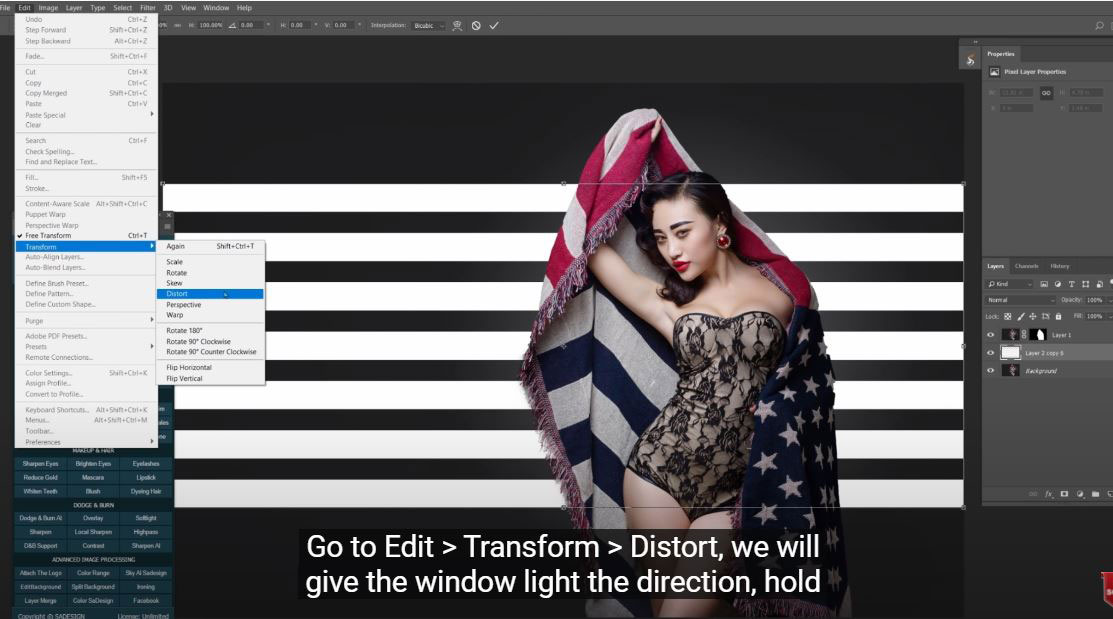
(7). Go to Edit > Transform > Distort, we will give the window light the direction, hold SHIFT, click to the corner and drag it to make the direction. If you’re not use SHIFT, the movement when you dragging it can be hard to control. Let’s move it a little down and press Enter.
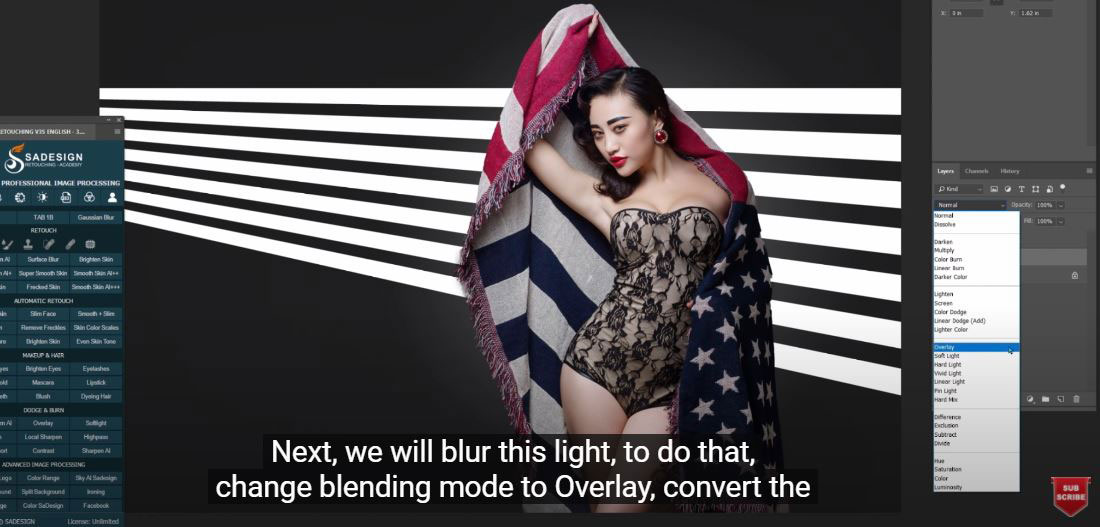
(8). Next, we will blur this light, to do that, change blending mode to Overlay, convert the window light layer to smart object by simply right click to the layer and choose “convert to smart object”. Head to Filter > Blur Gallery > Field Blur > increase the blur pixels to around 18. Check to “Tilt-Shift”, this will make blur gradually. We have to move it there, the blur now is in horizontal, to rotate it vertical, match to the light direction, hover your mouse to the tiny dot over the circle, when the icon change to the arrows, you click and rotate it to 90 degrees, now it will the same direction with the window light.
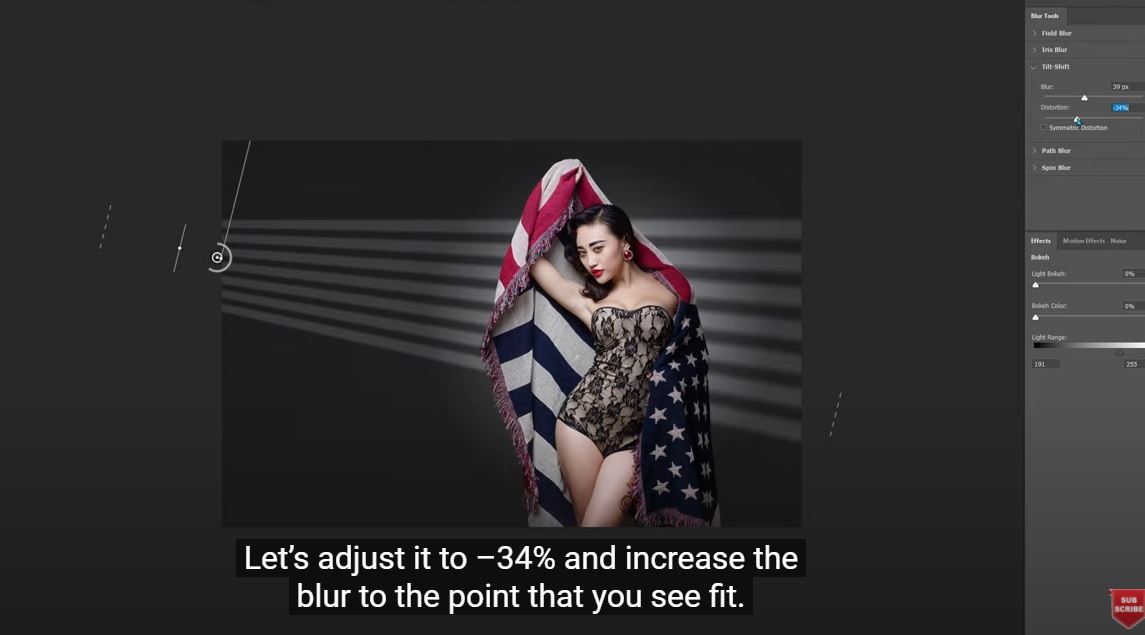
(9). Take the dashed line out, the area between the solid line and the dashed line will gradually blur.
You can control distortion as well if you want to. Let’s adjust it to –34% and increase the blur to the point that you see fit. Press Enter when you are finished with the adjustment.
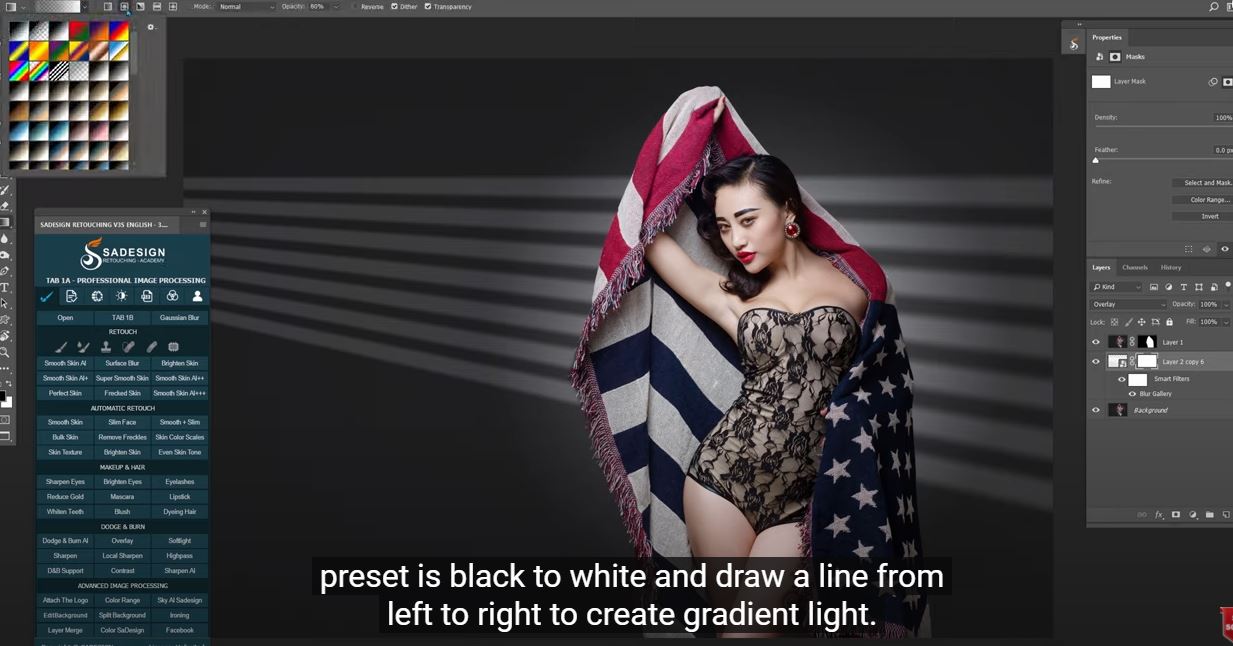
(10). Now, we will masking it and keep the light around the subject, not on the outside. Click to the layer mask button to create a mask, choose gradient tool and make sure the preset is black to white and draw a line from left to right to create gradient light. Let’s increase the opacity to maximum. Depend on the shape of your imagine window, you can estimate the source of light will hit on the subject and the background. Once, you are done with the left side, let’s move to the right one, this time, we have to choose the preset of gradient map is black to transparent, not black to white or something else. Now, add a bit of light to the right.
(11). Next, we will add the shadow of the vertical bars of window to the background. If you think it’s good already, you can skip this step. Select the mask, use eraser tool, click to the start point, hold Shift and click at the end point to create a straight line.
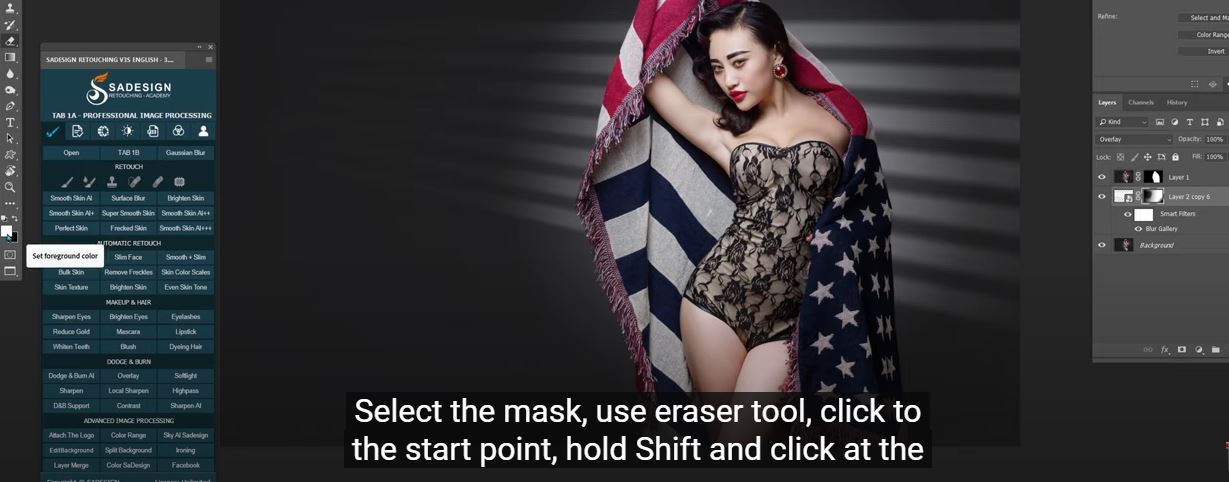
(12). Use bracket {} to increase or decrease the size.
Put this layer into group.
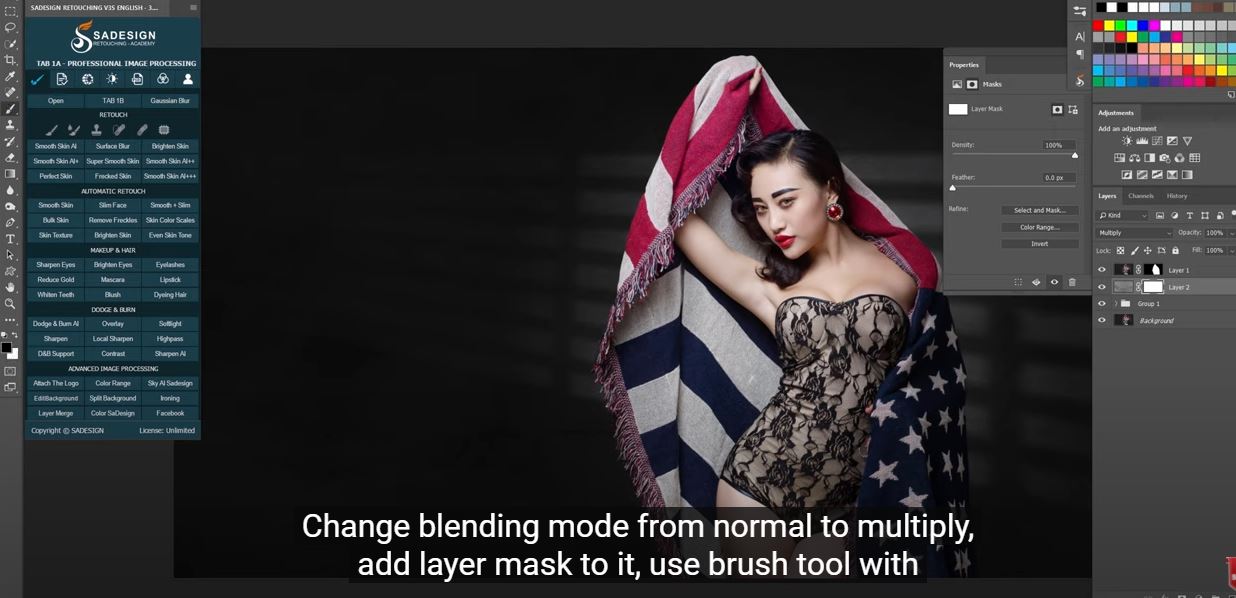
Final step, I’ll add some texture to the background, let’s take the texture of this photo, select and copy it, move to the original project and paste it.
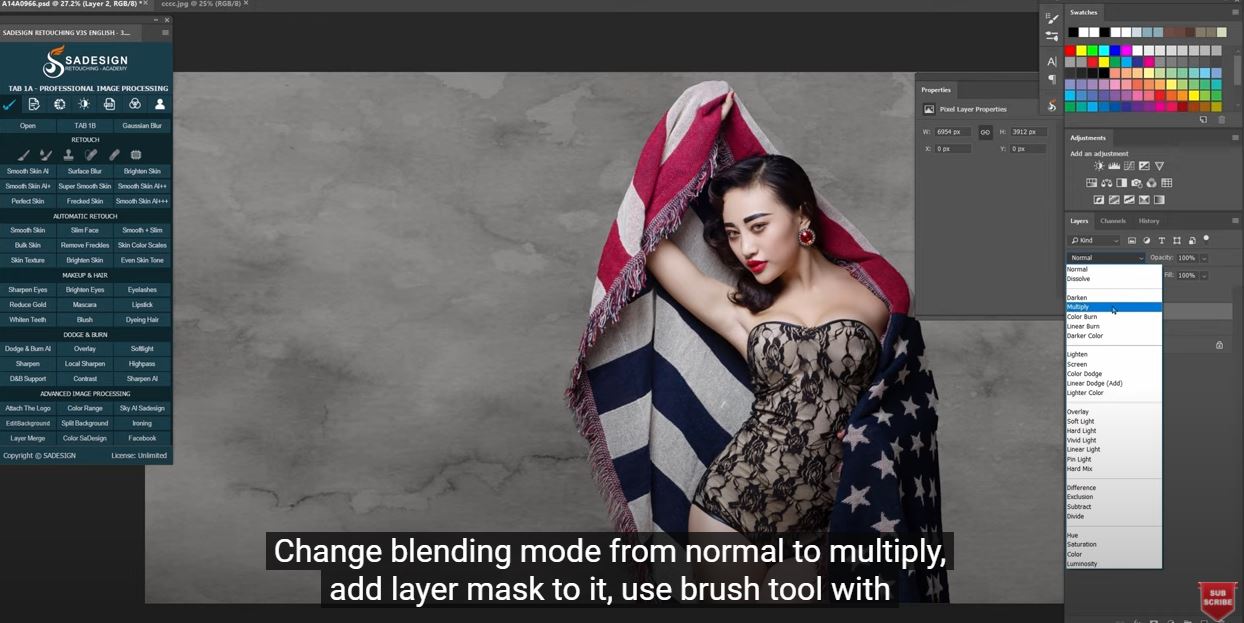
(13). Change blending mode from normal to multiply, add layer mask to it, use brush tool with back in foreground and paint on the subject since we don’t want the texture apply on her.
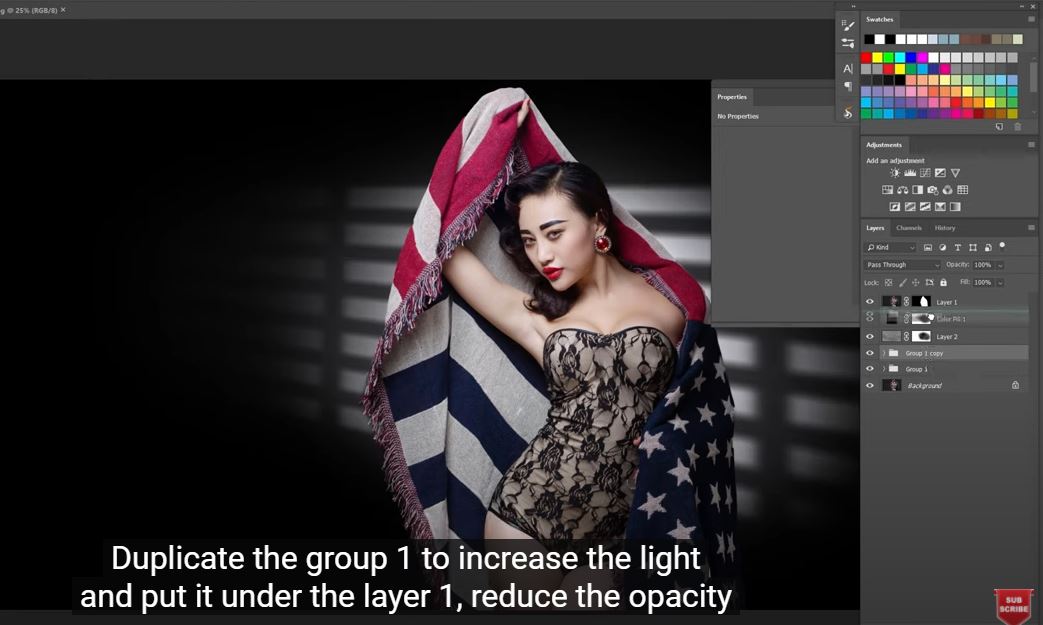
(14). Create a solid adjustment layer in black color, put it under layer 1, use black brush to paint on the background to reveal the window light that you want to show. Duplicate the group 1 to increase the light and put it under the layer 1, reduce the opacity to 40%.
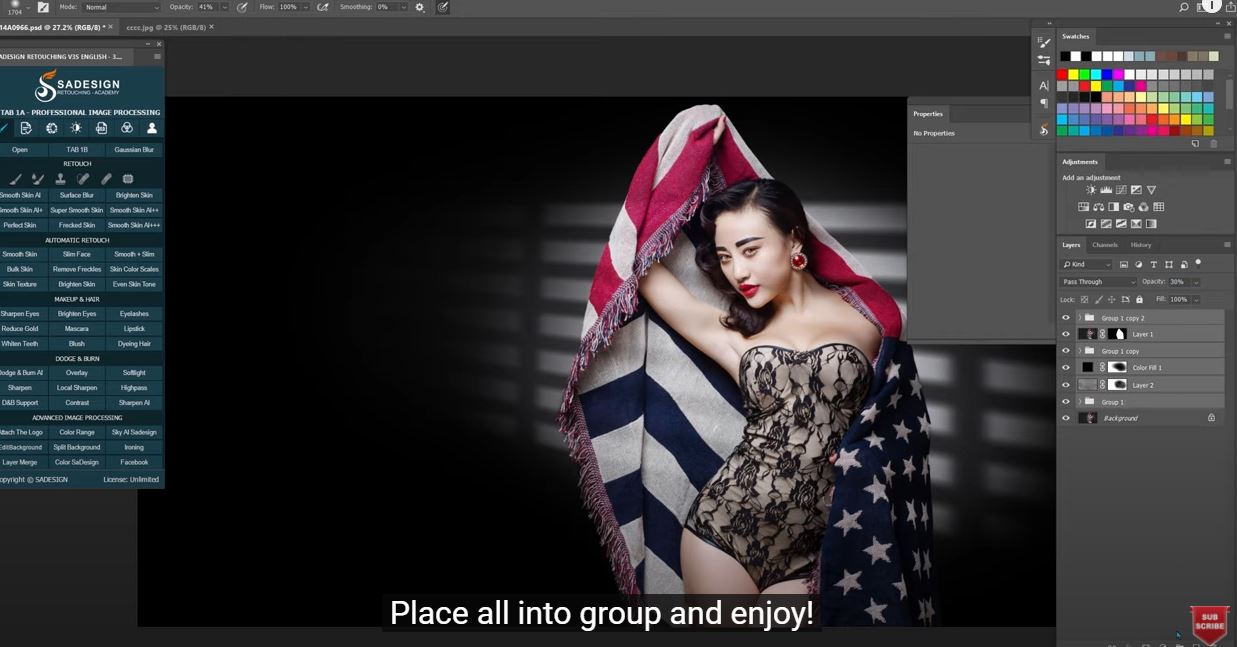
(15). Duplicate one more time, and this time we will put in on top of layers, this will create the shadow of window light on the subject and make the photo looks natural. Place all into group and enjoy! If you find this tutorial is helpful, please hit like and subscribe buttons and you can enjoy our tutorials about Photoshop
REGISTER FOR FREE PHOTOSHOP LEARNING
============================
The most powerful Retouch tool processor
DOWNLOAD:
✅ SADESIGN PANEL ENGLISH: https://sadesign.ai/retouching/
✅ SADESIGN PANEL VIETNAM: https://www.retouching.vn/