How to Create a Beautiful Torn Paper Portrait Effect
Nội dung
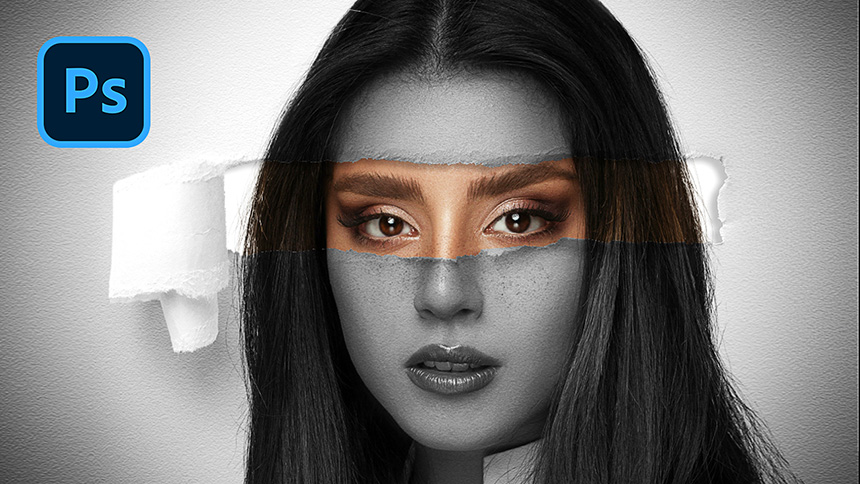
What if we make portraits out of torn paper? Things about this idea like? Let's try it.
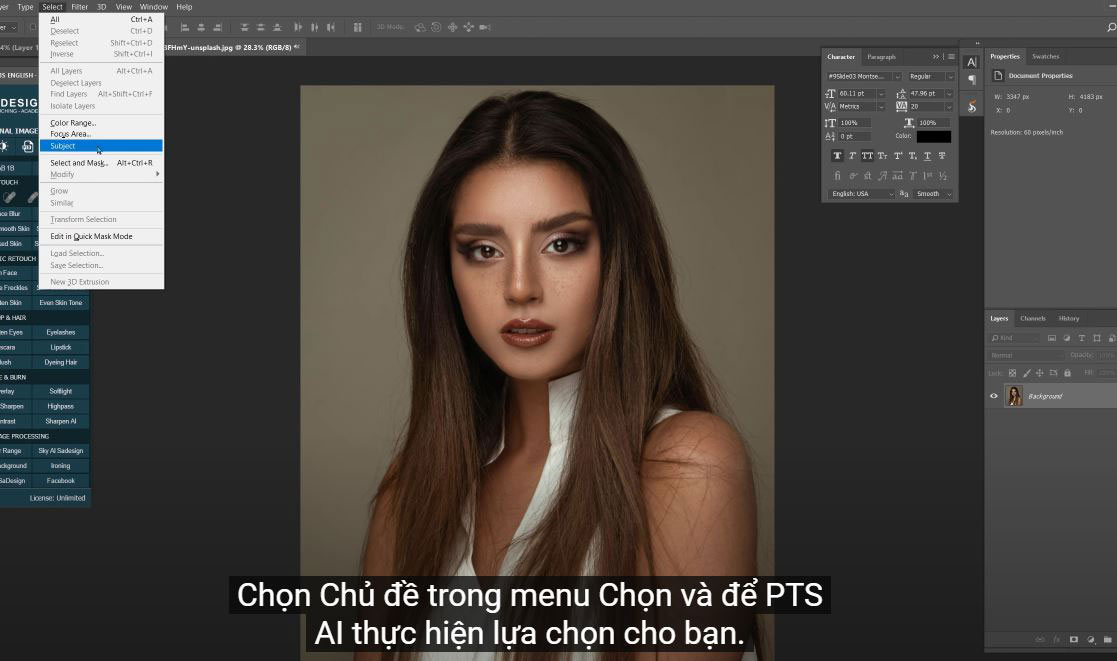
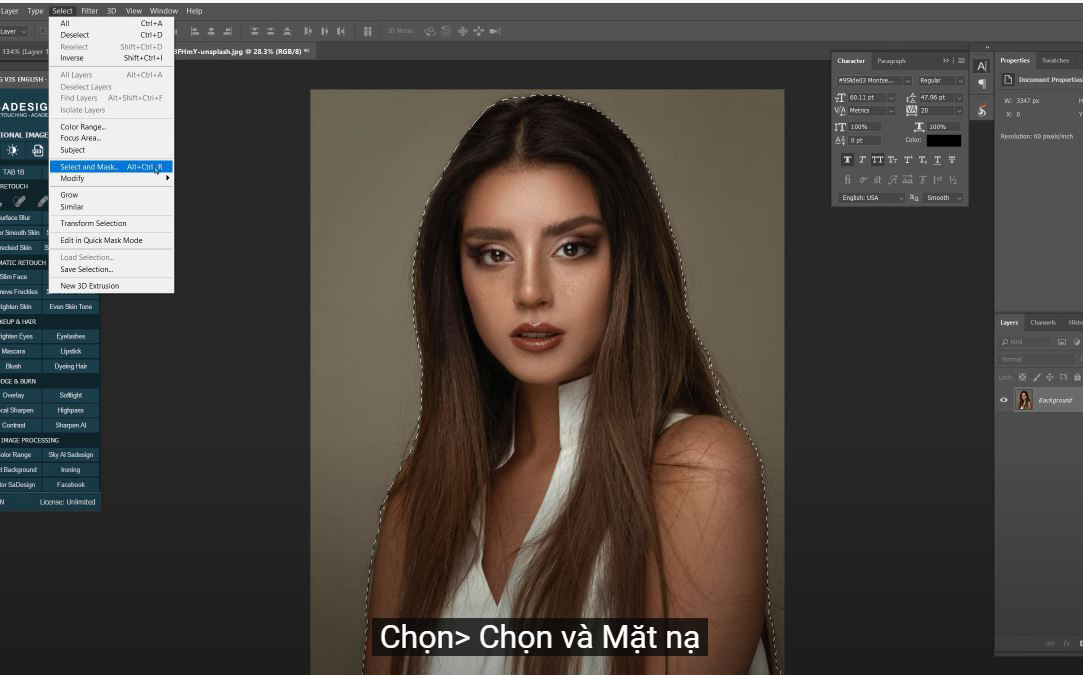
(1). First of all, we're going to take this beautiful girl out of context. Select Theme in the Select menu and let PTS AI make the selection for you.
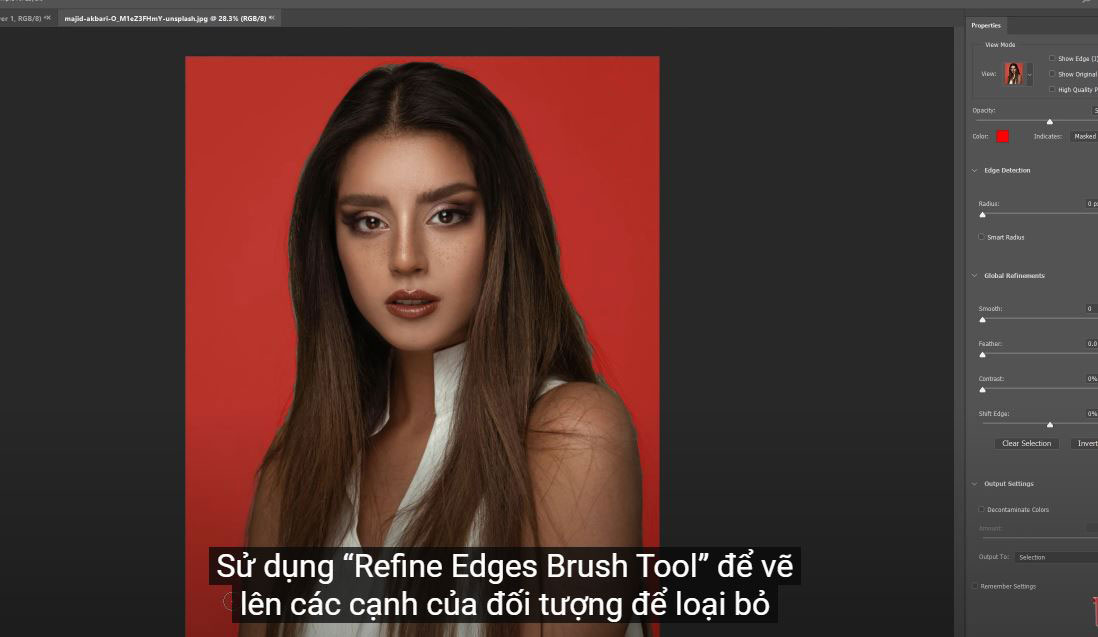
(2). There was still some hair left over from her, so we had to select it manually. Select > Select and Mask
(3). This tool is really useful when it comes to object selection. Then check the "decontaminate" box on the right side, adjust the amount to about 50%
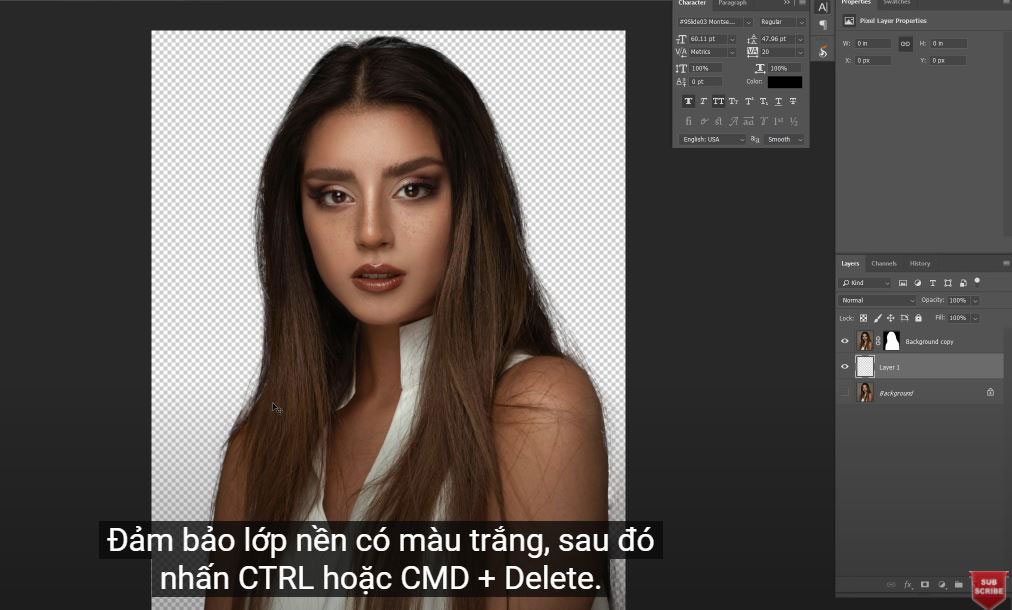
(4). Print the output to the box: drop down the menu and select “New layer with layer mask”, then confirm
Turn off the background layer to see the changes. The subject is now separated from the background. Create a new layer and fill it with white. Make sure the background layer is white, then press CTRL or CMD + Delete.
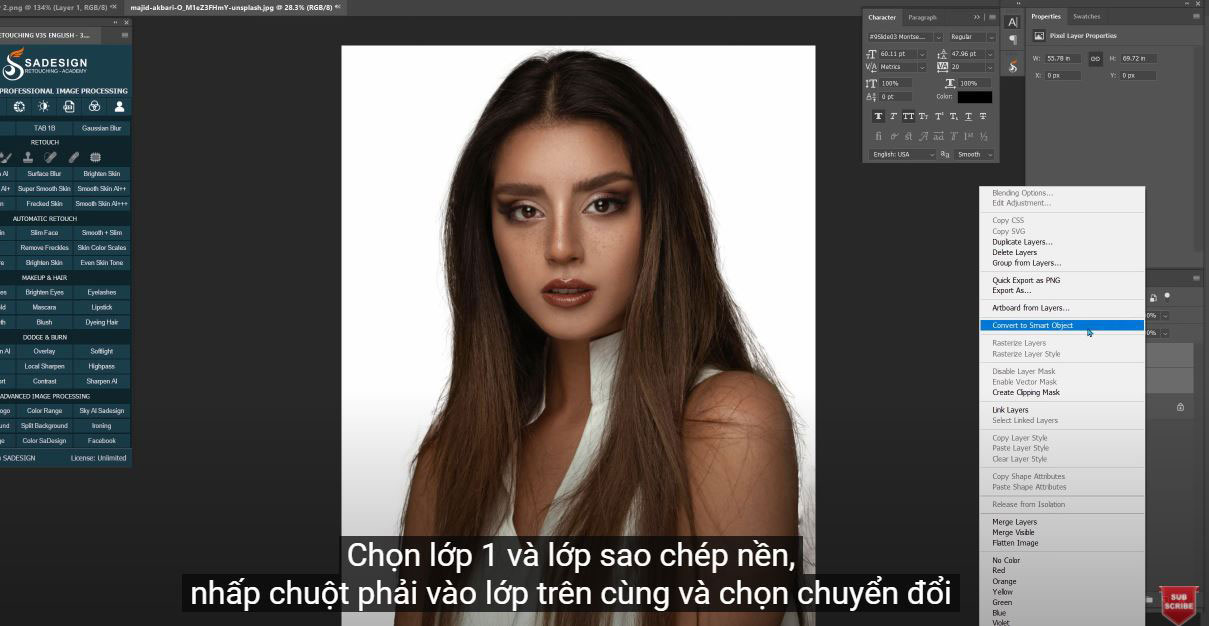
(5). Select layer 1 and copy background layer, right click on top layer and choose convert to smart object. PTS will convert it to smart object and merge it into layer 1 at the same time.
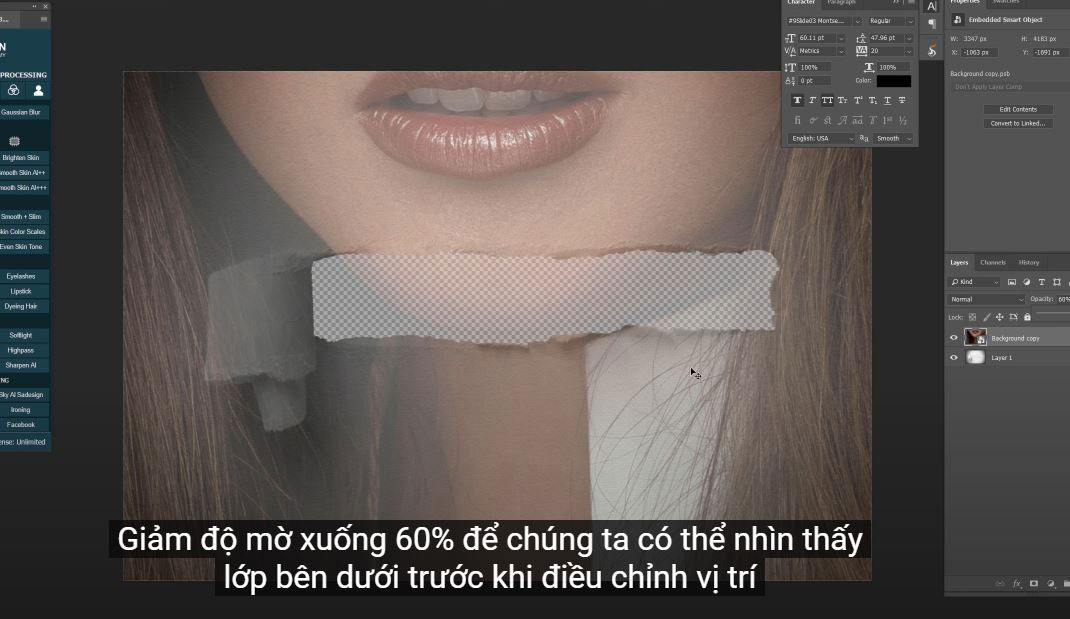
(6). Lower the opacity to 60% so we can see the layer underneath before adjusting the object's position.
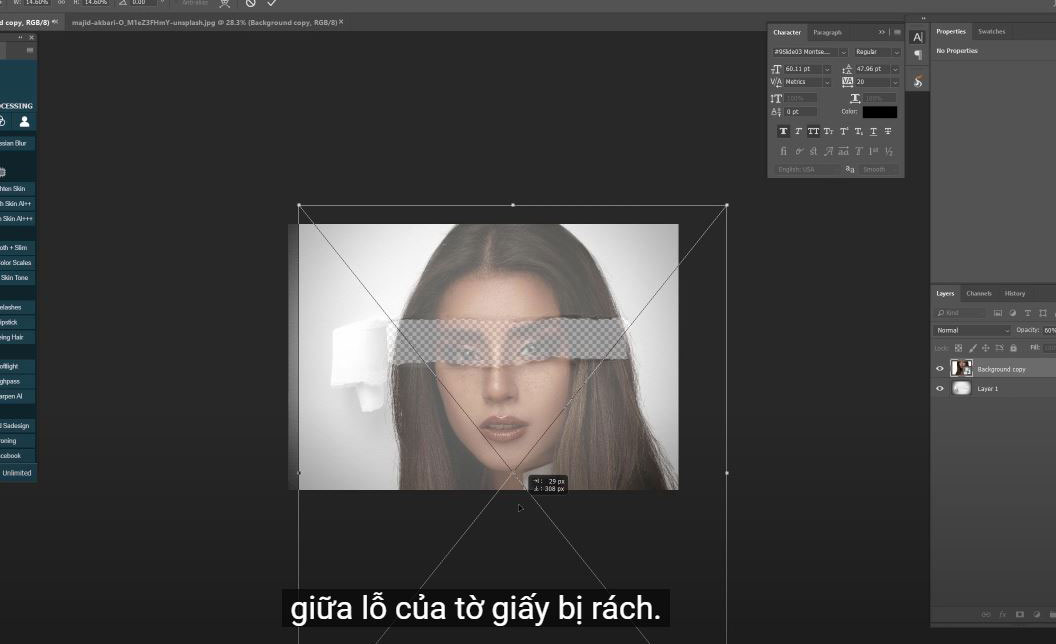
(7). Zoom out for more viewing space, press CTRL or CMD + T to resize the image, hold ALT + SHIFT, click the corner and drag in to shrink the object until her eye is in the center of the hole of the sheet torn paper.
(8). Bring the opacity back to maximum, duplicate the subject layer with CTRL or CMD + J 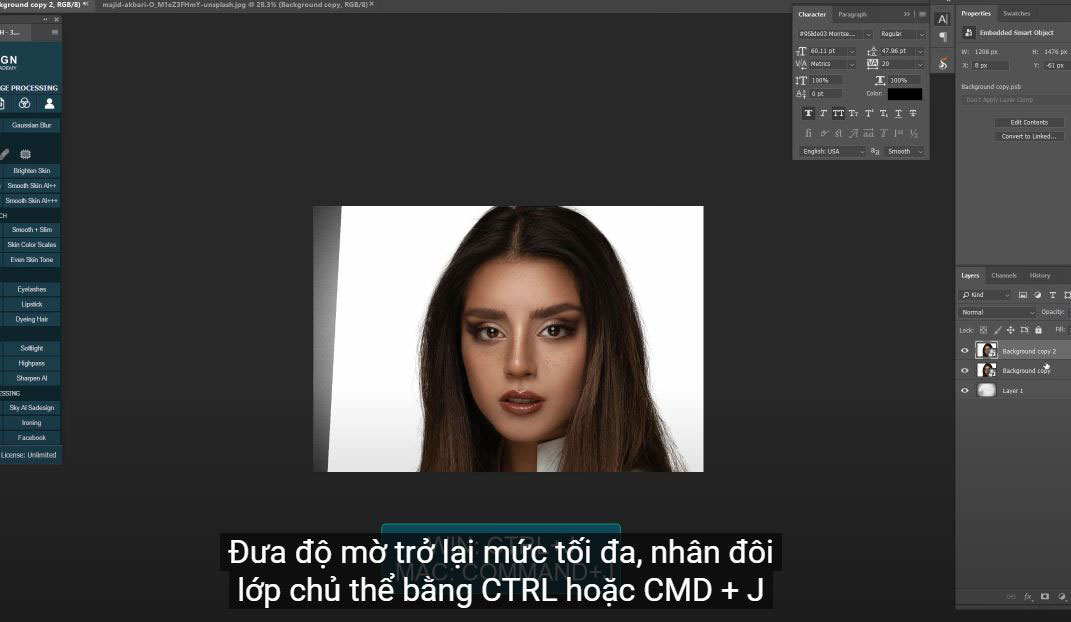
(9). Place one of them below layer 1. select layer 1 by holding CTRL and clicking on it. 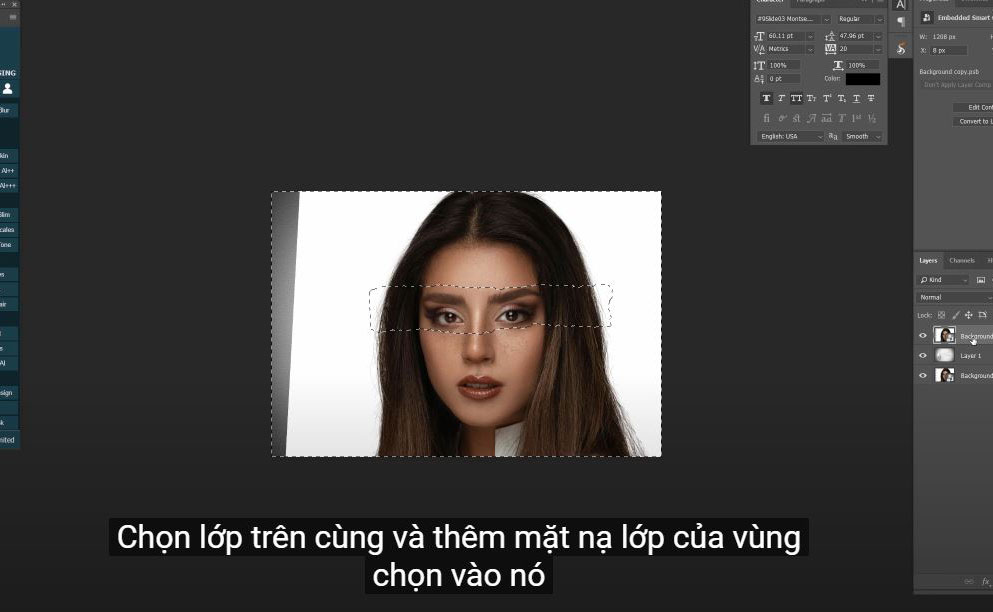
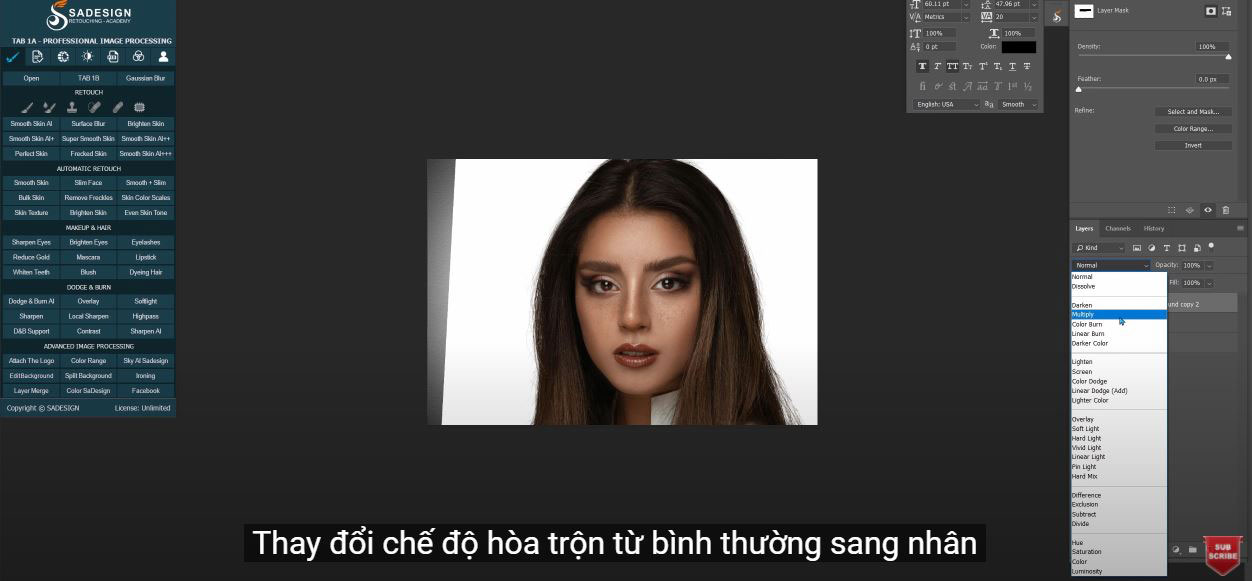
(11). Select the top layer and add the layer mask of the selection to it Change the blend mode from normal to multi
(12). Create a black and white adjustment layer, mask it to the layer below with the square icon or keyboard shortcut CTRL + ALT + G for Win or CMD + OPTION + G for MAC.

(13). Create a level adjustment layer, increase the black by 3 and decrease the white to 248 
(14).Add a little contrast to it using a curve adjustment layer.
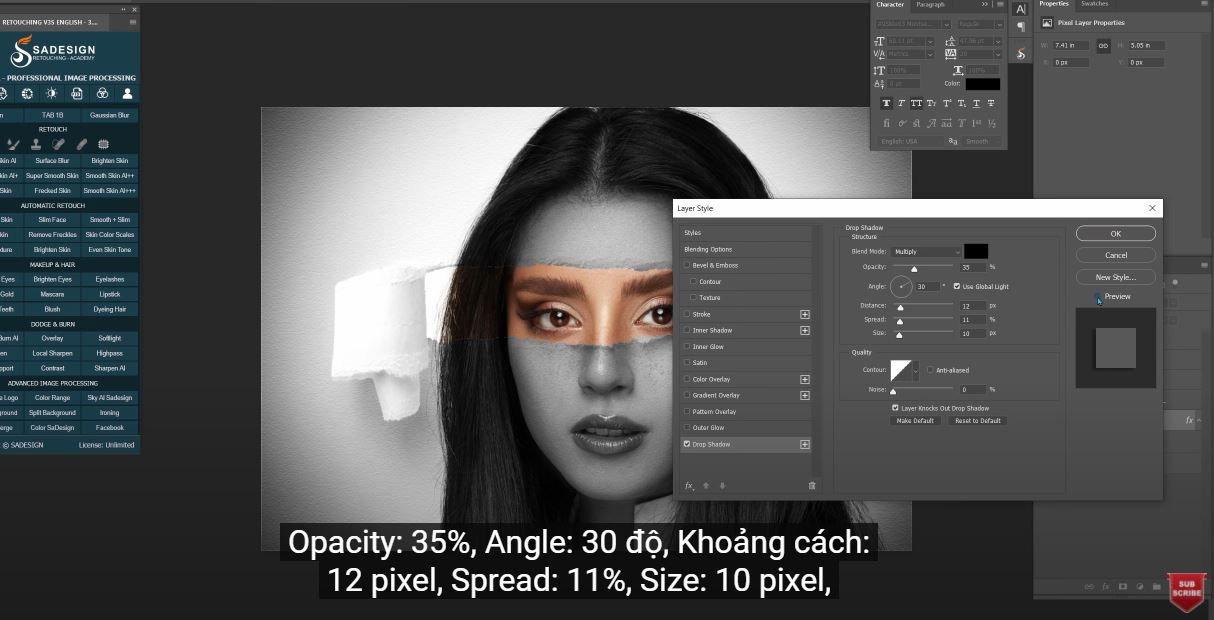
Print layer 1, open Blending Options, enable “Drop shadow” and set the values as follows: Opacity: 35%, Angle: 30 degrees, Distance: 12 pixels, Spread: 11%, Size: 10 pixels,
Alright! If you liked this tutorial, please like, subscribe and press the bell to receive the latest PTS learning videos every day.
REGISTER FOR FREE PHOTOSHOP LEARNING
============================
The most powerful Retouch tool processor
DOWNLOAD:
✅ SADESIGN PANEL ENGLISH: https://sadesign.ai/retouching/
✅ SADESIGN PANEL VIETNAM: https://www.retouching.vn/