How to remove hair and body hair in photoshop
In today's quick tip, I want to share with you how to remove the hair and length on the neckline and shoulders from the body. I'm a big fan of cleaning things up in camera when shooting, but this is one of those little issues that often get overlooked in post-production. I usually process my images when my skin and makeup are well edited. Here's my take on separating the hair from the neck. Step 1: Open the image you want to edit Open > image > Ok or Ctrl + O Then you will duplicate the background layer: Ctrl + J 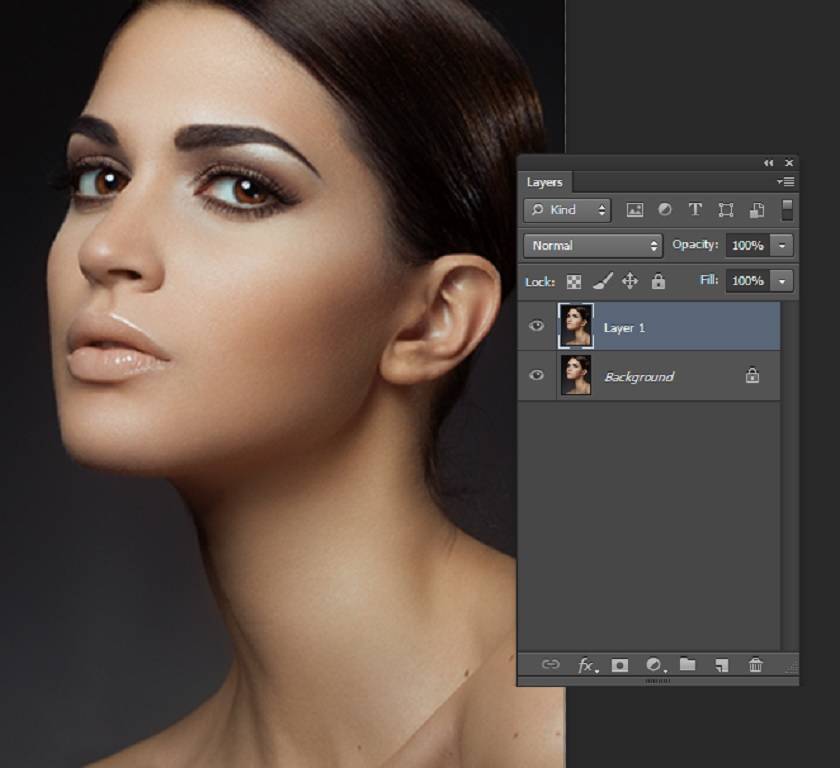 Step 2: Make a selection on the part of the hair to be removed Make a relatively precise selection of the hair that I want to remove along the contours of the neck, head, and shoulders using the Polygonal Lasso tool - my personal favorite selection tool.
  Step 3: Use Refine Edge to soften the outline Compare the softness of my selection with the softness of the contour that I'm trying to clean from my hair with the Refine Edge tool.
 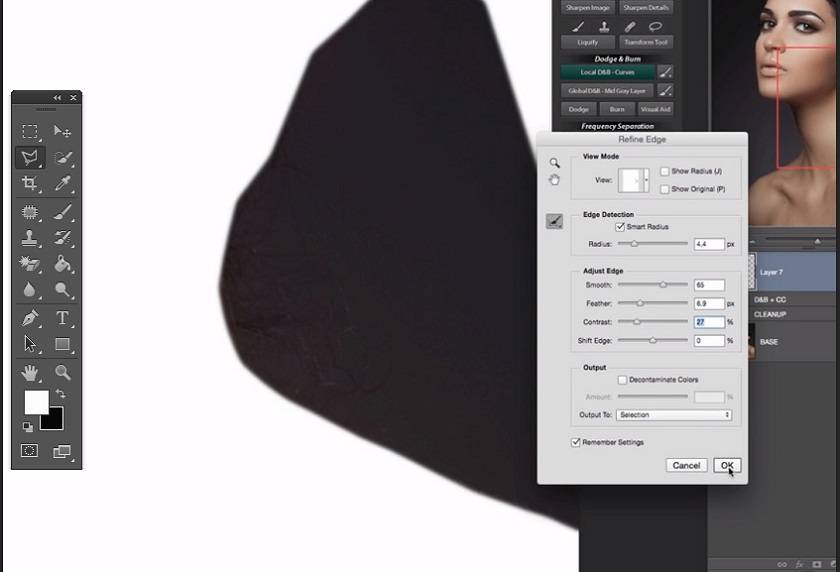 At the Refine Edge toolbox I usually just adjust the Feathering and Contrast sliders to get the selection edge as soft or sharp as I need for a particular task. I keep the Smooth slider in the same position most of the time; it will mainly be useful when you have sharp corners that you want to soften in your selection, or need to straighten a curve; And I'll just use the Shift Edge slider if I'm not doing a good job of selecting the correct border. If I am working on a dark image, I will usually set my View mode to “On white” and “On black” for a light image. I always select the Remember Settings option at the bottom of the Refine Edge dialog window, so I don't have to start over every time I need to adjust my selection. Because I work with female faces most of the time, my basic Refine Edge settings are usually very similar for different images. Step 4: Use the Clone Stamp tool Once the edge of my selection is adjusted, I'll choose the Clone Stamp tool at around 100% Opacity and the Flow somewhere between 30% and 70% depending on the background behind the hair I'm removing.
 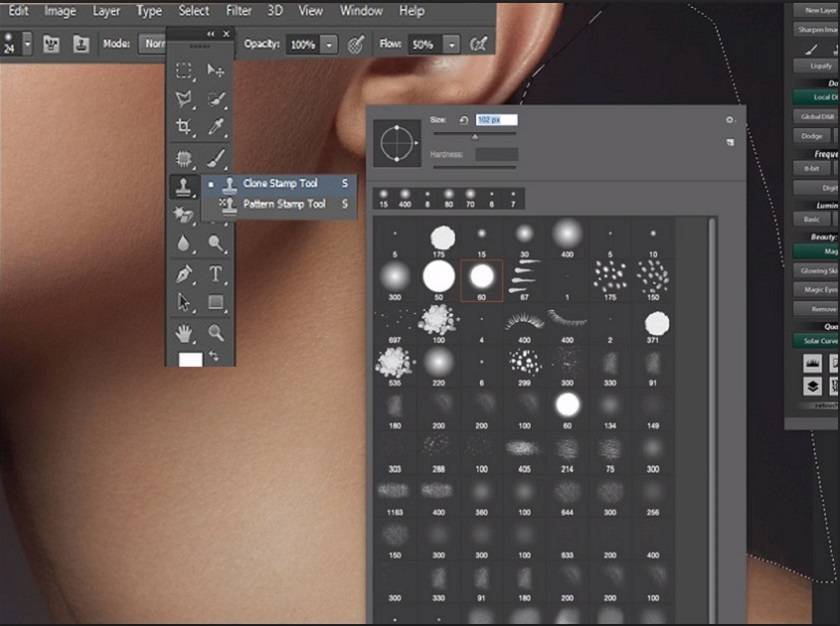 The more uniform the background color, the higher the Flow percentage I can choose;
 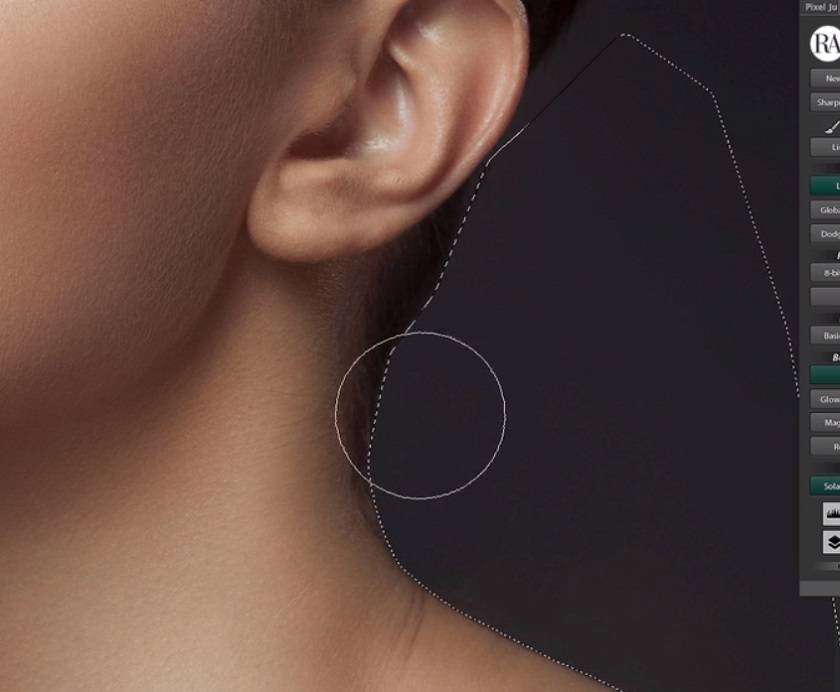 Note: I sometimes use Adjustments and Clipping masks to adjust the brightness of the cleaned areas. Sometimes, after getting rid of the messy hair, I draw strands of hair to make the areas around the model's head look more realistic. Step 5: Use the Brush Tool I also prefer working with Custom Brush tricks and for this particular job I like the brush tip to be not too soft, so I don't soften the background texture, but also not too hard as a stiff brush can cause damage. difficult to avoid leaving residual brushstrokes in the areas that I worked on.
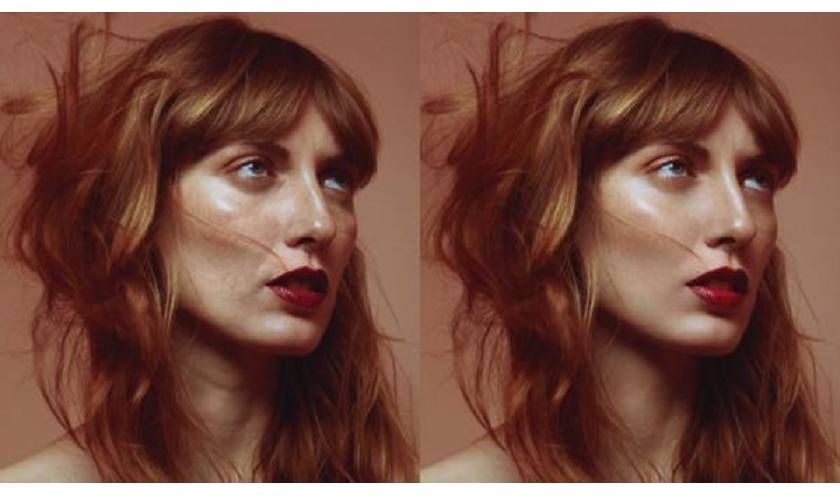
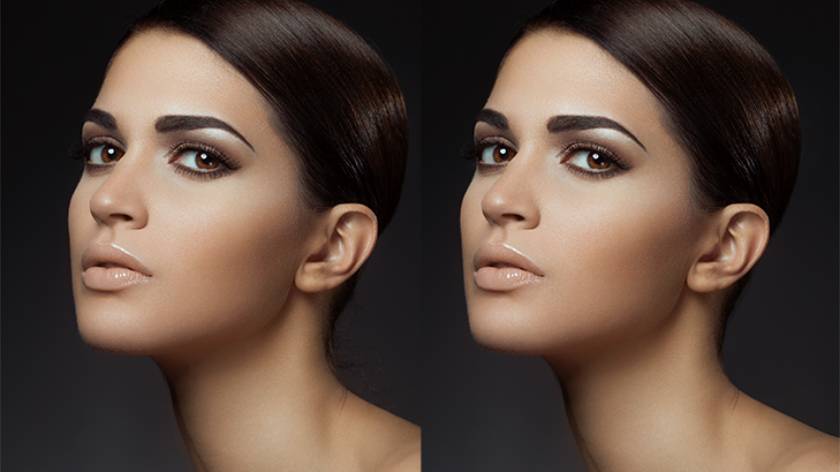
 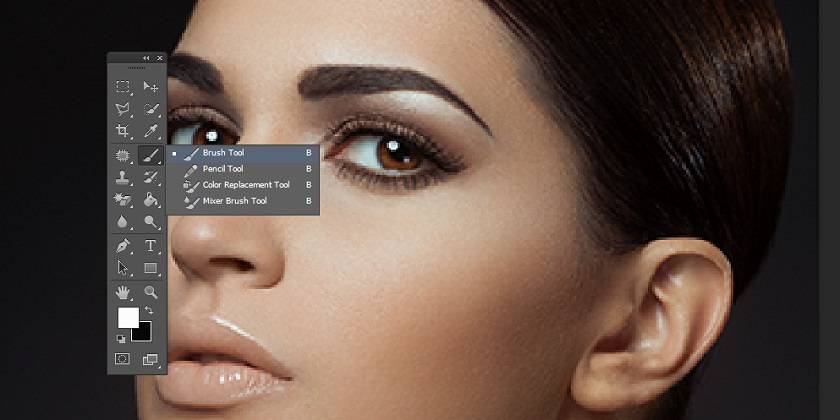 Here are the results that I did
 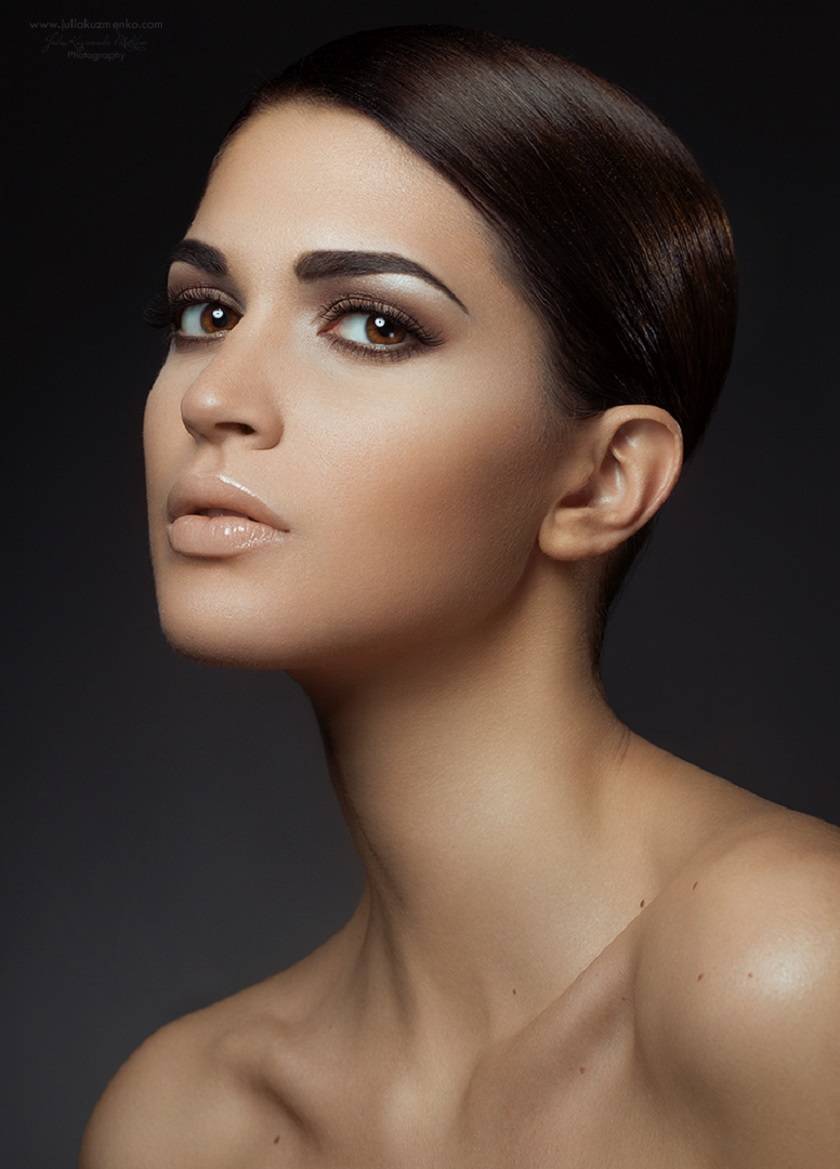 This newly set beauty image is where I can work right along the contour of the model's neck and don't have to worry about the hair falling over the neck, so my retouching is very quick. It also didn't take me too long to fine-tune the new contour once I got rid of the clutter, so I was able to quickly adjust the sharpness and precision of this selection first. when starting to edit it. I have been using this method for many years and I also love it because it saves me a lot of time. In addition to this, I also have many different ways to get rid of messy hair, you can learn more through articles or videos available online. I hope this article will help you gain more knowledge about Photoshop as well as remove unwanted hair from the sample image.
I'm a big fan of cleaning things up in camera when shooting, but this is one of those little issues that often get overlooked in post-production. I usually process my images when my skin and makeup are well edited. Here's my take on separating the hair from the neck. Step 1: Open the image you want to edit Open > image > Ok or Ctrl + O Then you will duplicate the background layer: Ctrl + J Step 2: Make a selection on the part of the hair to be removed Make a relatively precise selection of the hair that I want to remove along the contours of the neck, head, and shoulders using the Polygonal Lasso tool - my personal favorite selection tool. Step 3: Use Refine Edge to soften the outline Compare the softness of my selection with the softness of the contour that I'm trying to clean from my hair with the Refine Edge tool. At the Refine Edge toolbox I usually just adjust the Feathering and Contrast sliders to get the selection edge as soft or sharp as I need for a particular task. I keep the Smooth slider in the same position most of the time; it will mainly be useful when you have sharp corners that you want to soften in your selection, or need to straighten a curve; And I'll just use the Shift Edge slider if I'm not doing a good job of selecting the correct border. If I am working on a dark image, I will usually set my View mode to “On white” and “On black” for a light image. I always select the Remember Settings option at the bottom of the Refine Edge dialog window, so I don't have to start over every time I need to adjust my selection. Because I work with female faces most of the time, my basic Refine Edge settings are usually very similar for different images. Step 4: Use the Clone Stamp tool Once the edge of my selection is adjusted, I'll choose the Clone Stamp tool at around 100% Opacity and the Flow somewhere between 30% and 70% depending on the background behind the hair I'm removing. The more uniform the background color, the higher the Flow percentage I can choose; Note: I sometimes use Adjustments and Clipping masks to adjust the brightness of the cleaned areas. Sometimes, after getting rid of the messy hair, I draw strands of hair to make the areas around the model's head look more realistic. Step 5: Use the Brush Tool I also prefer working with Custom Brush tricks and for this particular job I like the brush tip to be not too soft, so I don't soften the background texture, but also not too hard as a stiff brush can cause damage. difficult to avoid leaving residual brushstrokes in the areas that I worked on. Here are the results that I did This newly set beauty image is where I can work right along the contour of the model's neck and don't have to worry about the hair falling over the neck, so my retouching is very quick. It also didn't take me too long to fine-tune the new contour once I got rid of the clutter, so I was able to quickly adjust the sharpness and precision of this selection first. when starting to edit it. I have been using this method for many years and I also love it because it saves me a lot of time. In addition to this, I also have many different ways to get rid of messy hair, you can learn more through articles or videos available online. I hope this article will help you gain more knowledge about Photoshop as well as remove unwanted hair from the sample image.