Show How To Make Clothes Invisible in Photoshop
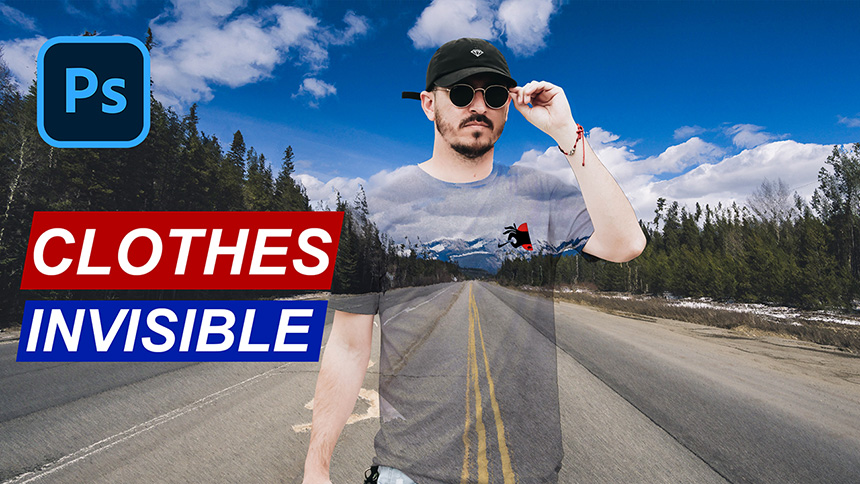
Hi guys, today I’m going to show you the way to make your clothes invisible. Stay tuned!
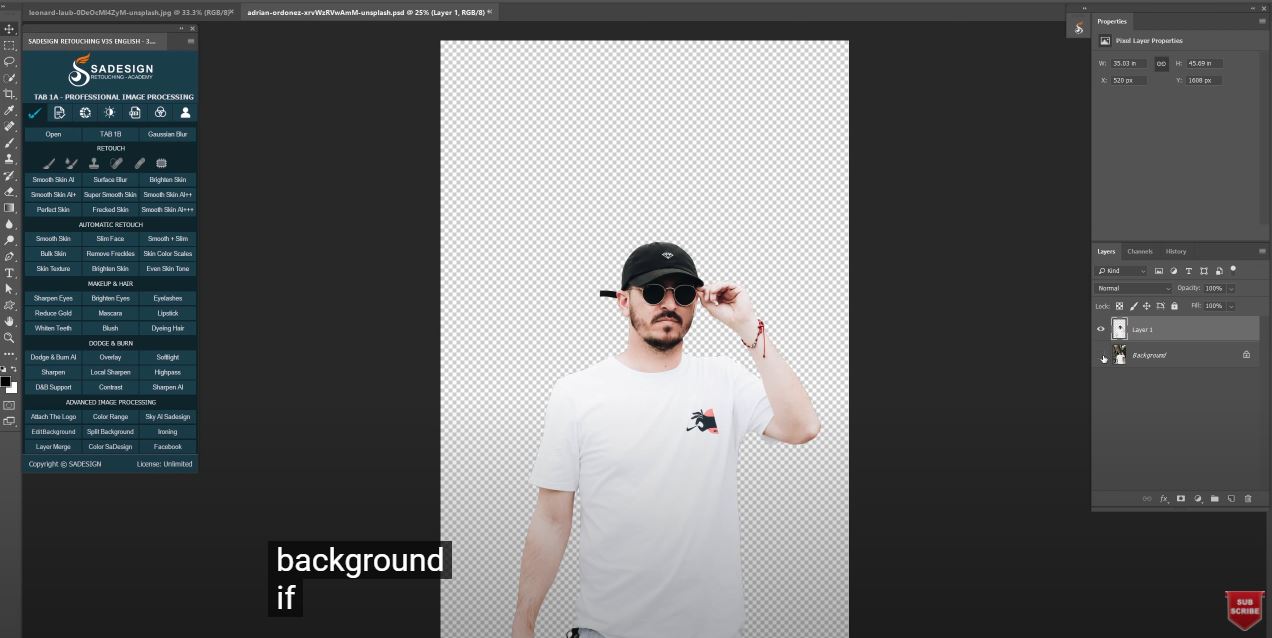
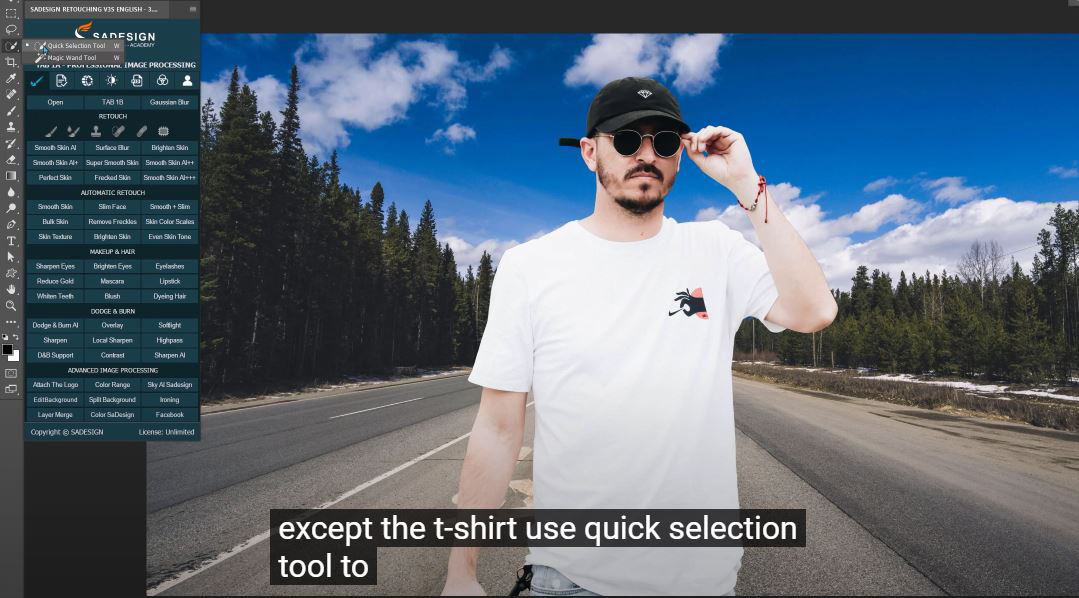
Here, I have a man in white t-shirt who is already separated from the background. If you don’t know how to cut the subject out of the background, please check on previous tutorials to learn this technique.
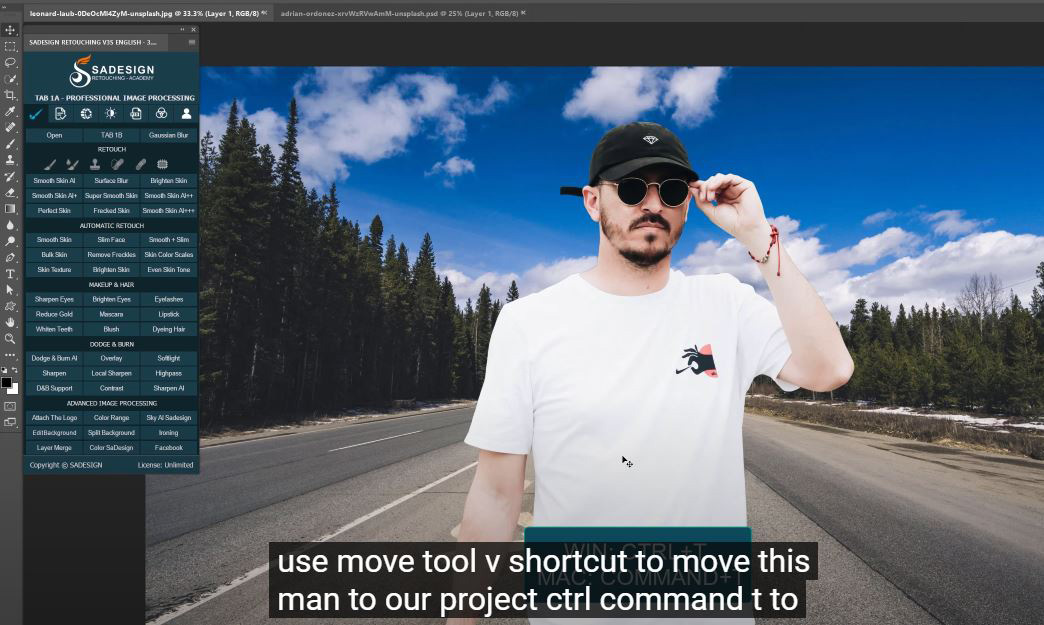
Now, use move tool (V shortcut) to move this man to our project. CTRL or CMD + T to scale down a bit to match with the road.
Next, we will make the selection of him except the t-shirt. Use Quick selection tool to select, hold SHIFT to add the selections.
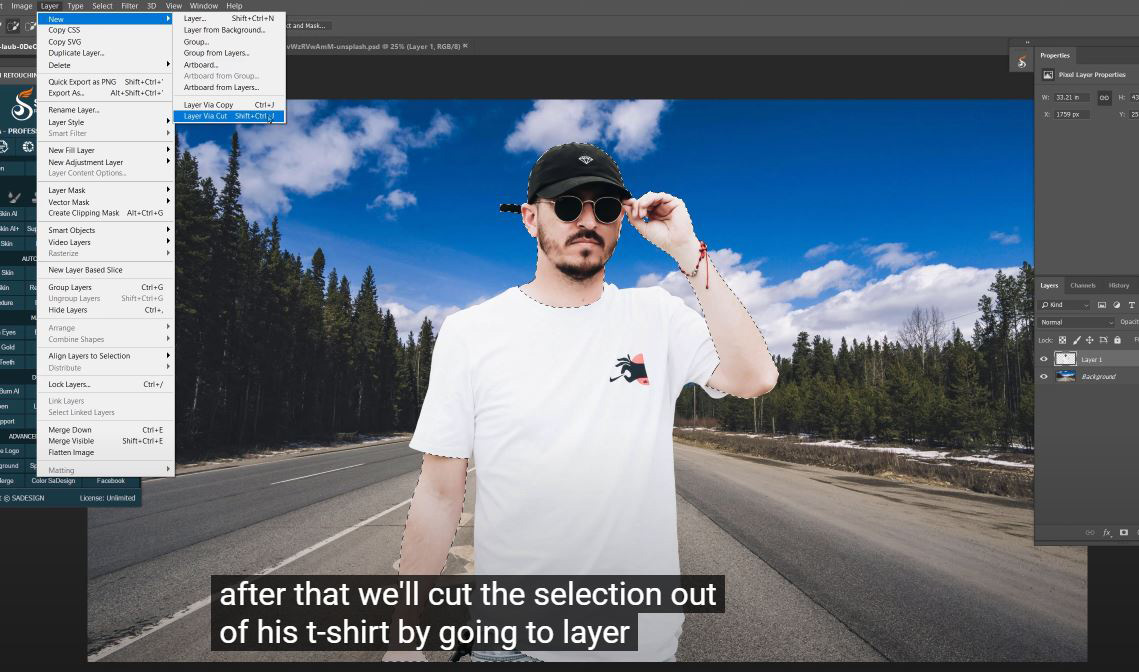
After that, we will cut the selection out of his shirt by going to Layer > New > Layer Via Cut or CTRL+SHIFT+J Let’s check it back. There you go!
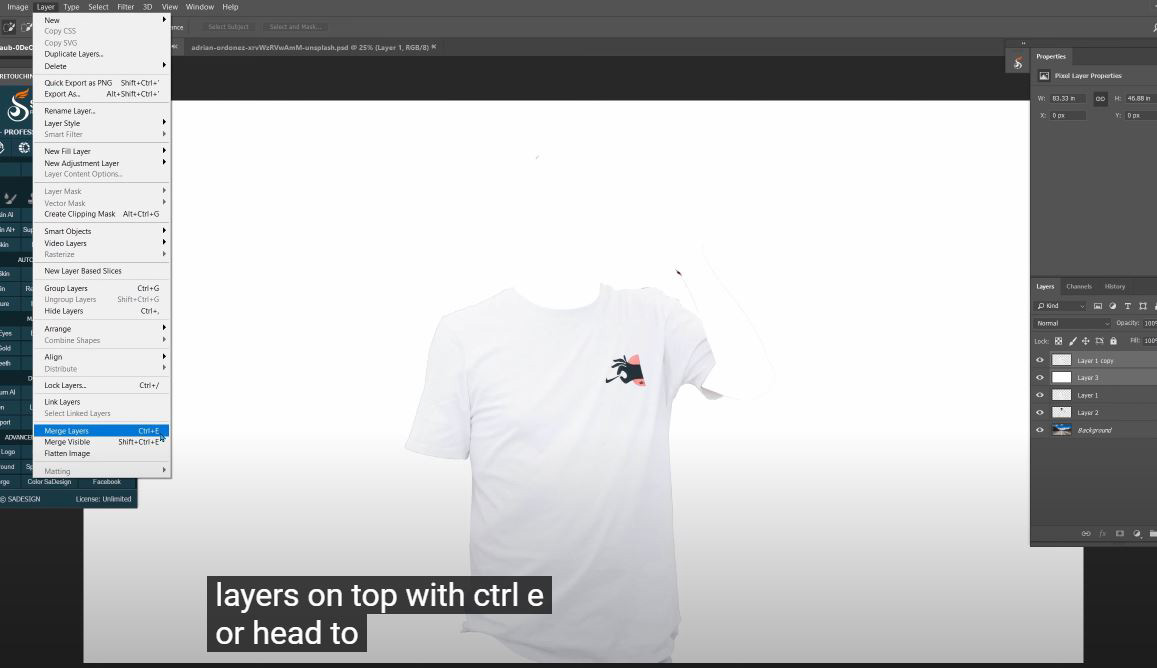
We are going to make the t-shirt invisible so we can see the background through it. Put layer 1 which is the t-shirt layer on top and duplicate it with CTRL+J Create a new layer above layer 1 and fill it with white. Make sure background color is white and press CTRL or CMD + Delete. Merge 2 both layers on top with CTRL+E or head to Layer > Merge Layers
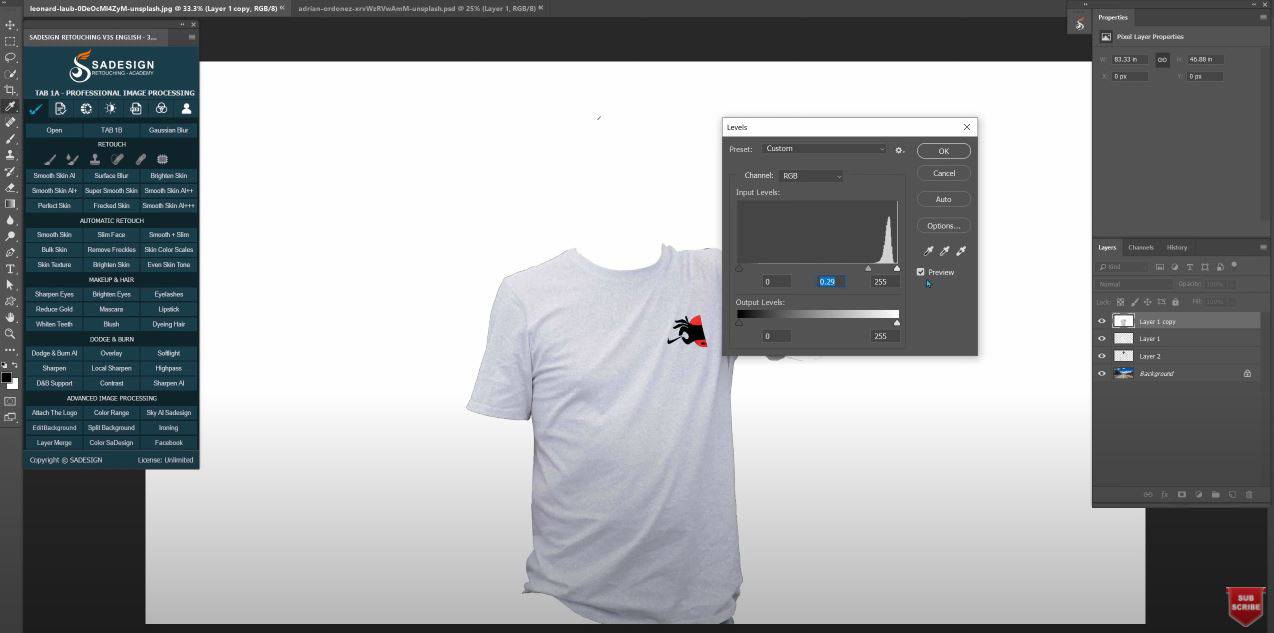
Open Levels and drag the midtone to the right then OK Save this layer in PSD format, go to File > Save as > Put the name, select PSD format and hit Save. You can delete this layer for now, we don’t need to use it anymore
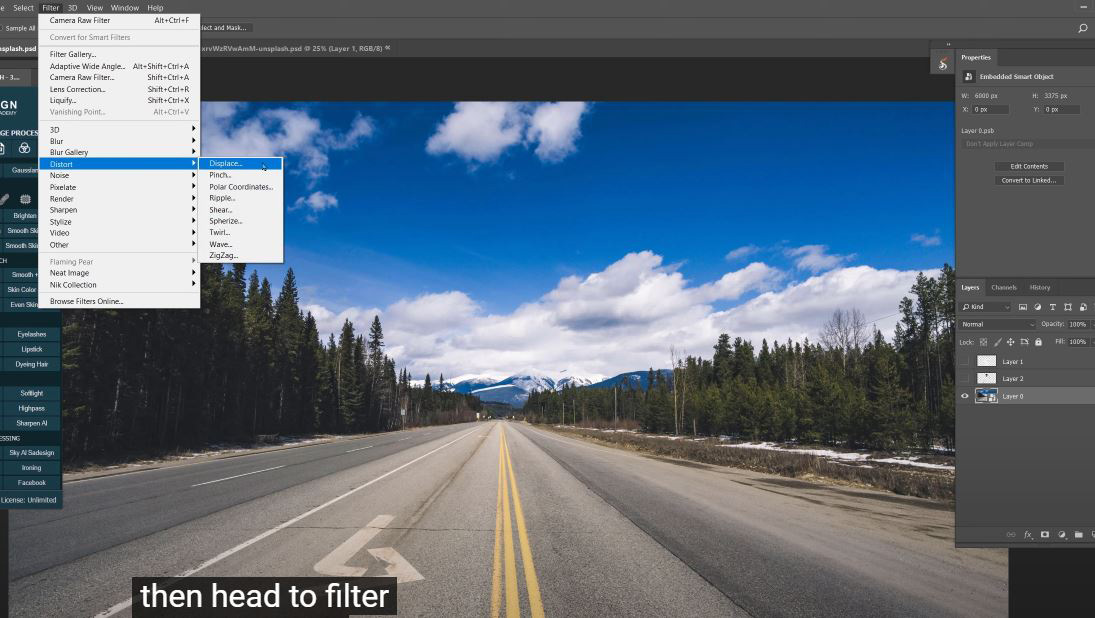
Turn off the subject layer and t-shirt layer. Convert background to smart object, then head to Filter > Distort > Displace > set Horizontal scale and Vertical scale at 40. Displacement Map: Stretch to fit and Undefined areas: Repeat Edge Pixels.
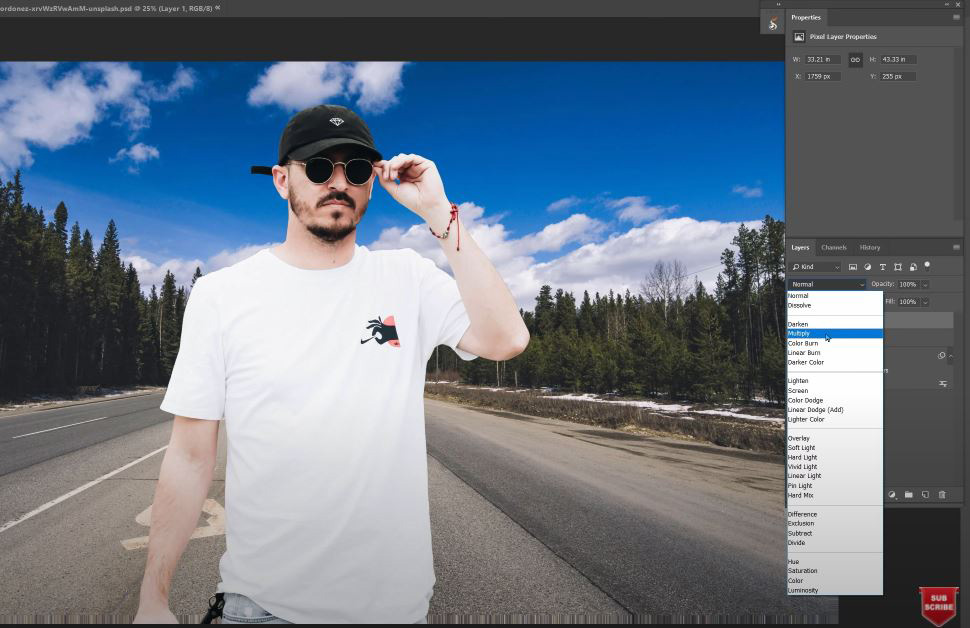
Open the t-shirt file. Turn back on 2 top layers and change blend mode of layer 1 to “Multiply” There you go! It’s super cool right?
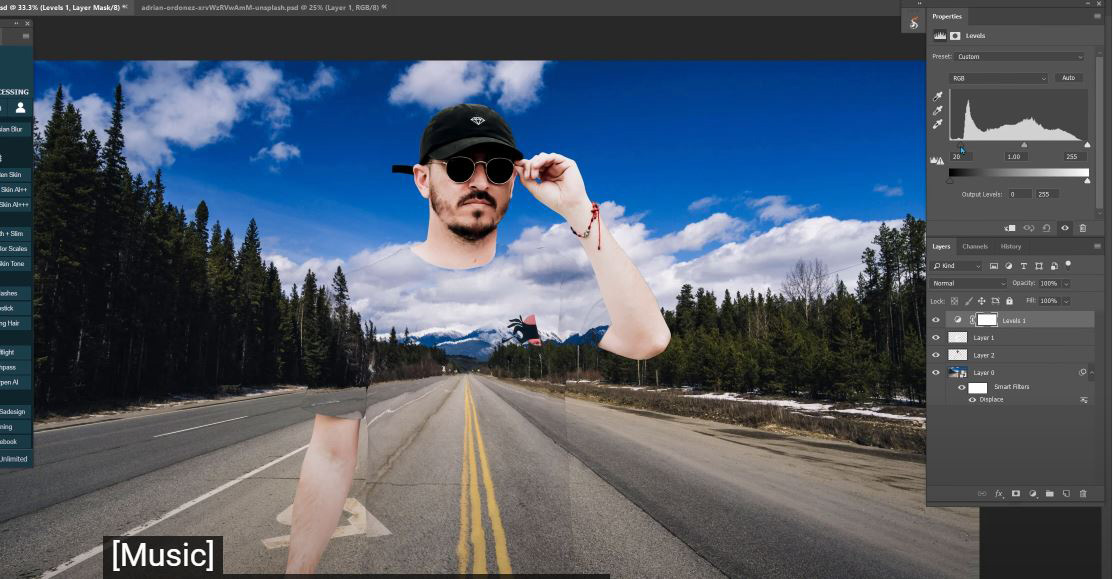
Click the adjustment icon and select “Levels”, in here, you can adjust the intensity of color. I’ll Increase black area so that we can see the form of t-shirt clearly. Remember to clipping mask it to the t-shirt layer so that the effect won't apply to the background or the subject. Just t-shirt only.
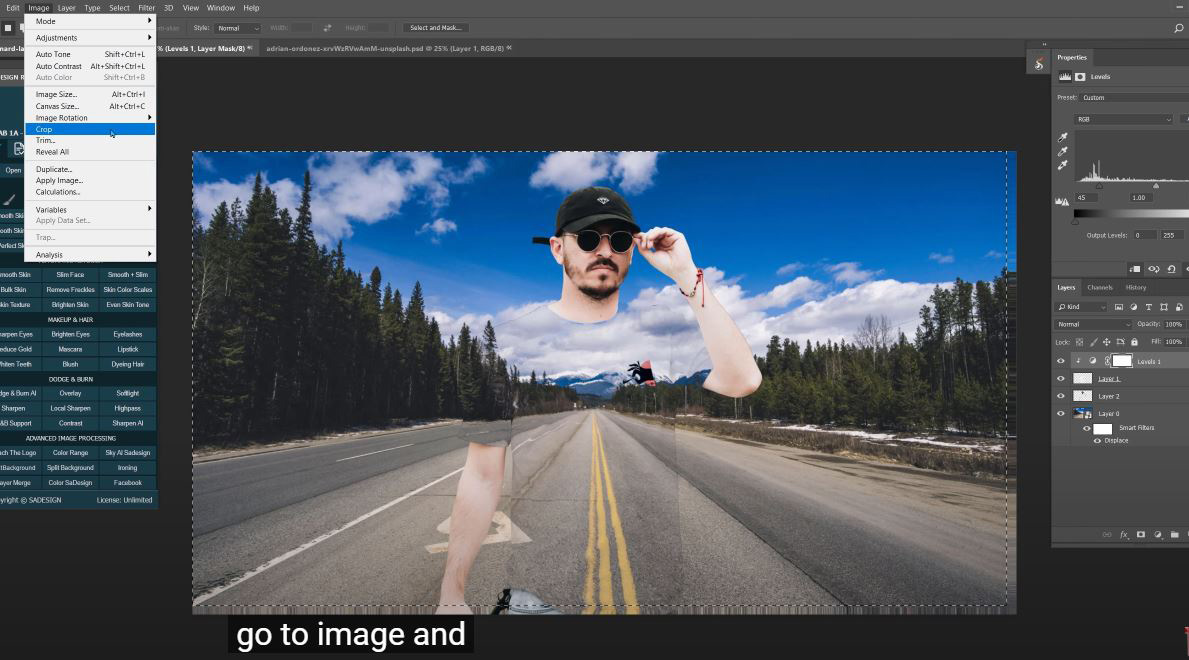
You might notice the distortion along the edges of the document, let’s crop it. Use rectangular marquee tool (M shortcut), drag it on the top left corner to the lower right corner, stop right above the distortion. Go to Image and Crop
In case you want the shirt more visible, just duplicate layer 1. Alright! That’s all for this tutorial, if you like Photoshop and Photograph just like SaDesign and you want to get more and more tips, techniques, experience from us. Make sure to subscribe our channel by simply clicking the subscribe button and you will get lots of free tutorials that we share everyday. See you guys in the next video. Bye Bye!
REGISTER FOR FREE PHOTOSHOP LEARNING
============================
The most powerful Retouch tool processor
DOWNLOAD:
✅ SADESIGN PANEL ENGLISH: https://sadesign.ai/retouching/
✅ SADESIGN PANEL VIETNAM: https://www.retouching.vn/