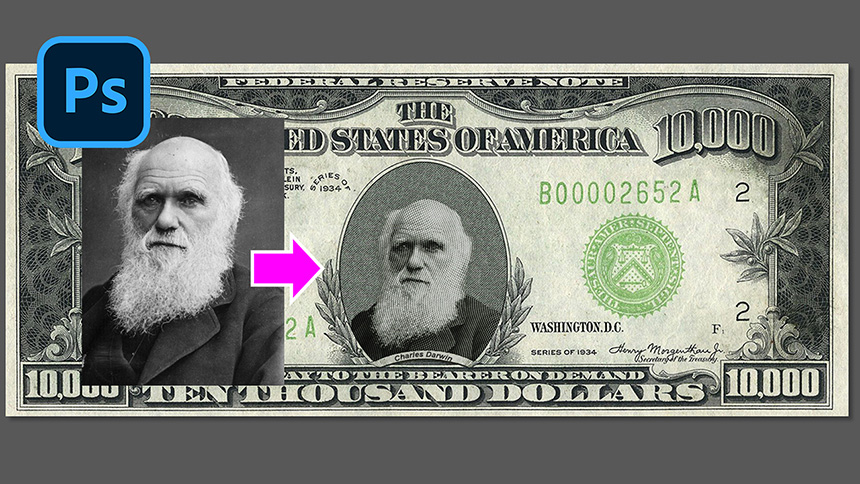
How to Turn a Photo of Someone into The Look of a Currency Steel Engraving
Hello everyone, this is SaDesign channel and today I will show you how to change the background with just a few steps.
First, select the Eyedropper tool with the keyboard shortcut I and choose the color of her veil in the foreground color, and the background color to be the same black as the background color. Then, select Background Eraser with keyboard shortcut E. Select Unclear in the Limit box. Tolerance is about 60% and now just paint the entire background to remove all the black.
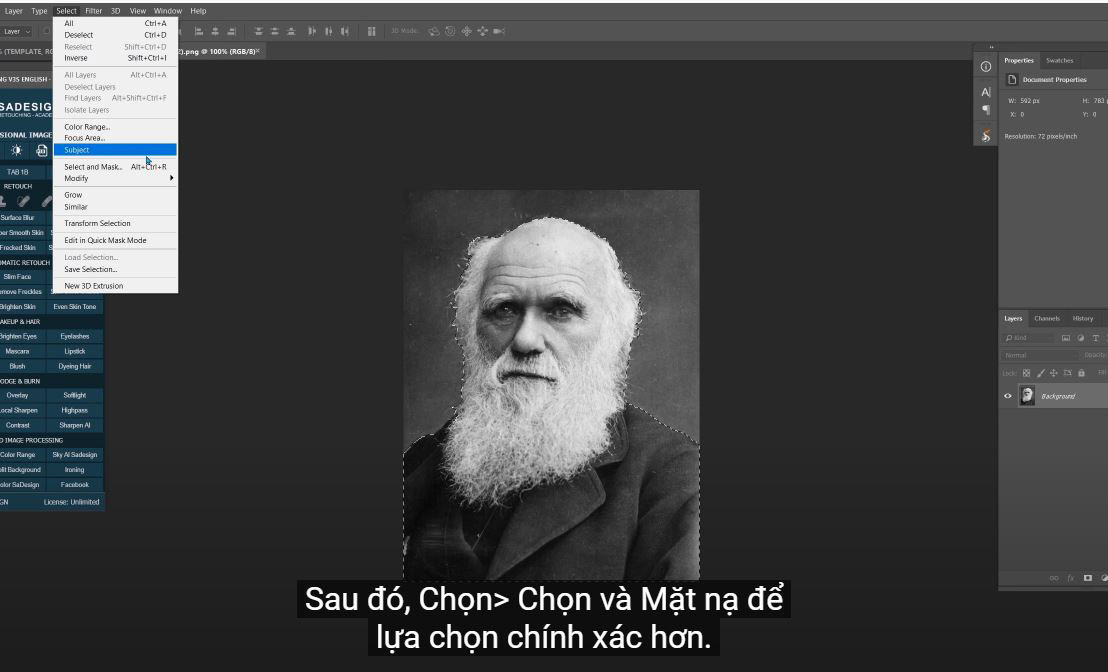
Go to Select > Subject to let Photoshop AI choose him for us, we have to separate him from the background.
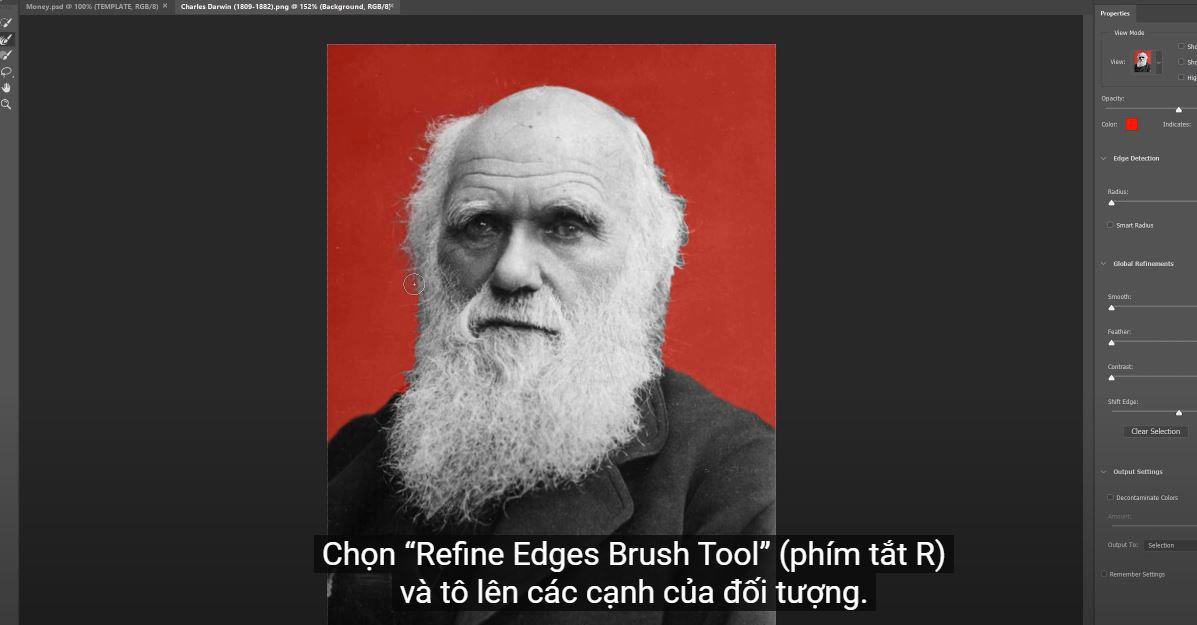
Then Select > Select and Mask for a more precise selection. Select the “Refine Edges Brush Tool” (shortcut R) and paint over the edges of the object. While drawing, you can see that this tool will remove the background but keep his hair intact.
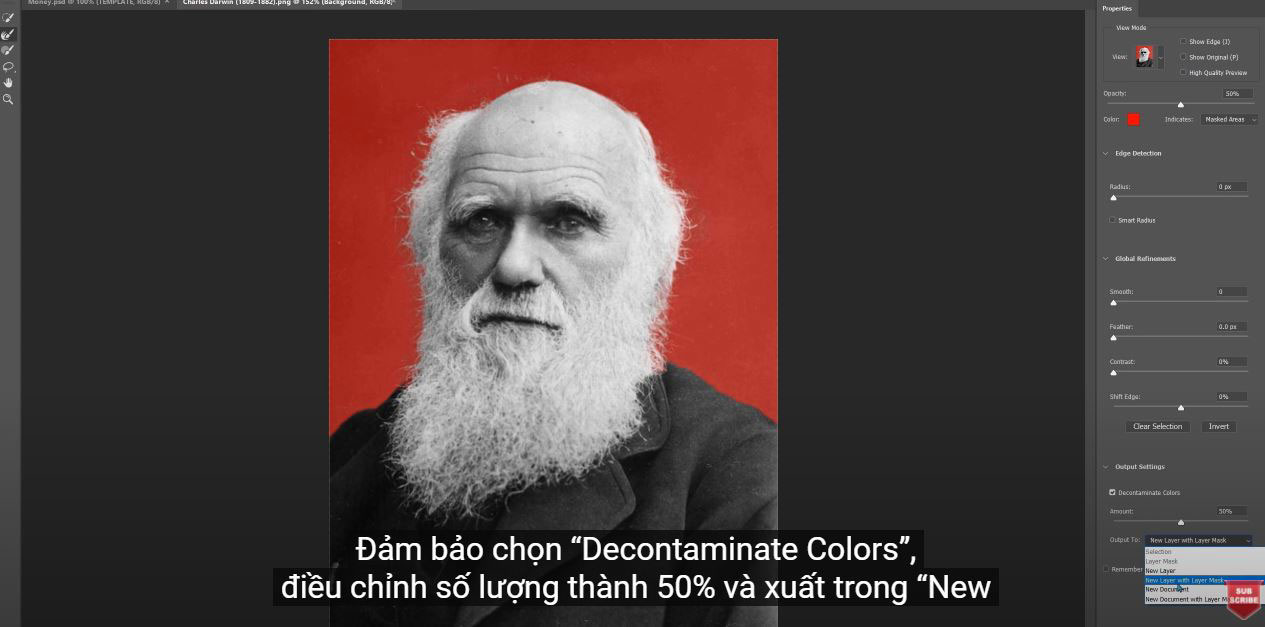
Make sure to select "Decontamination", adjust the amount to 50% and export in "New Layer"
First step done, next, create a new layer, fill it with 50% gray, then OK
Make sure it's black in the foreground and white in the background. If not, press D to set it back to default.
Go to Filter > Filter Gallery > we'll add the Halftone Pattern filter, it's in the sketch folder.
Set Size to 1, contrast to maximum and pattern style to Line. YES

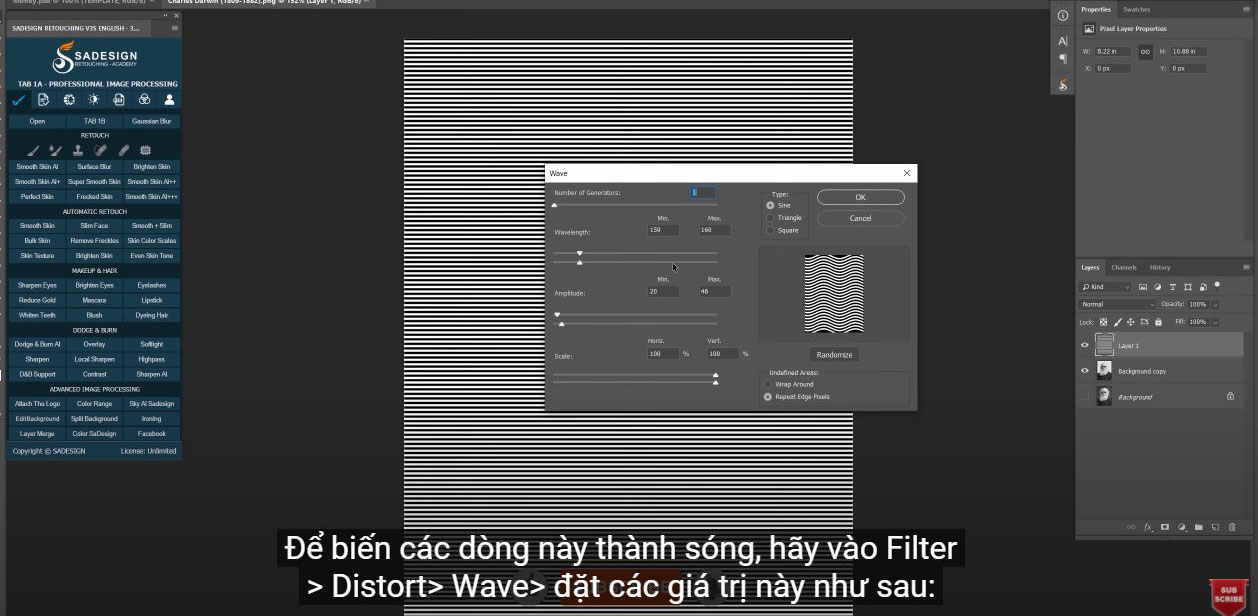
To turn these lines into waves, go to Filter > Distort > Wave > set these values like below:
Number of generators: 1
Wavelength: Min (159) Max (160)
Amplitude: Min (20) Max (48)
Scale: 100% for both horizontal and vertical
Unknown types and regions as default
Hold CTRL and click on the second layer to select the object. Then click this icon to add the object's layer mask to layer 1.
Change normal to overlay in blend mode
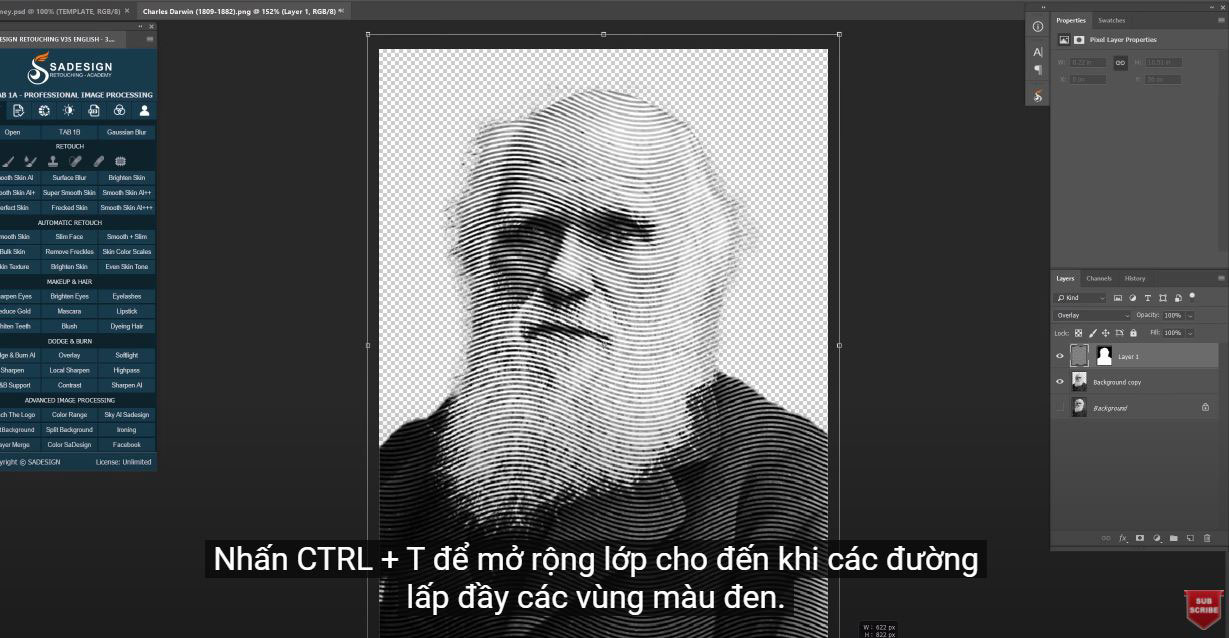
There are 2 black areas at the bottom so we have to expand the lines to fill it. Click the chain icon to unlink the layer and mask. Press CTRL + T to expand the layer until the lines fill the black areas. Tip: to expand from the center, you must hold SHIFT and ALT while dragging outward at the same time.
Copy it with CTRL or CMD + J
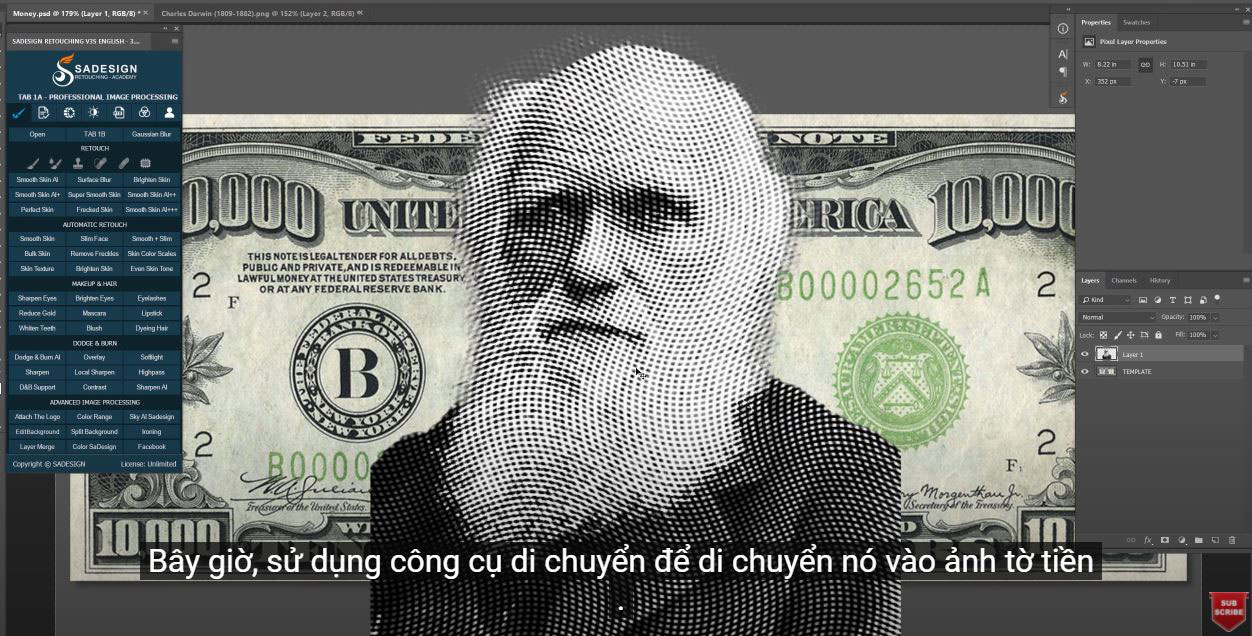
Now use the move tool to move it to the bill image.
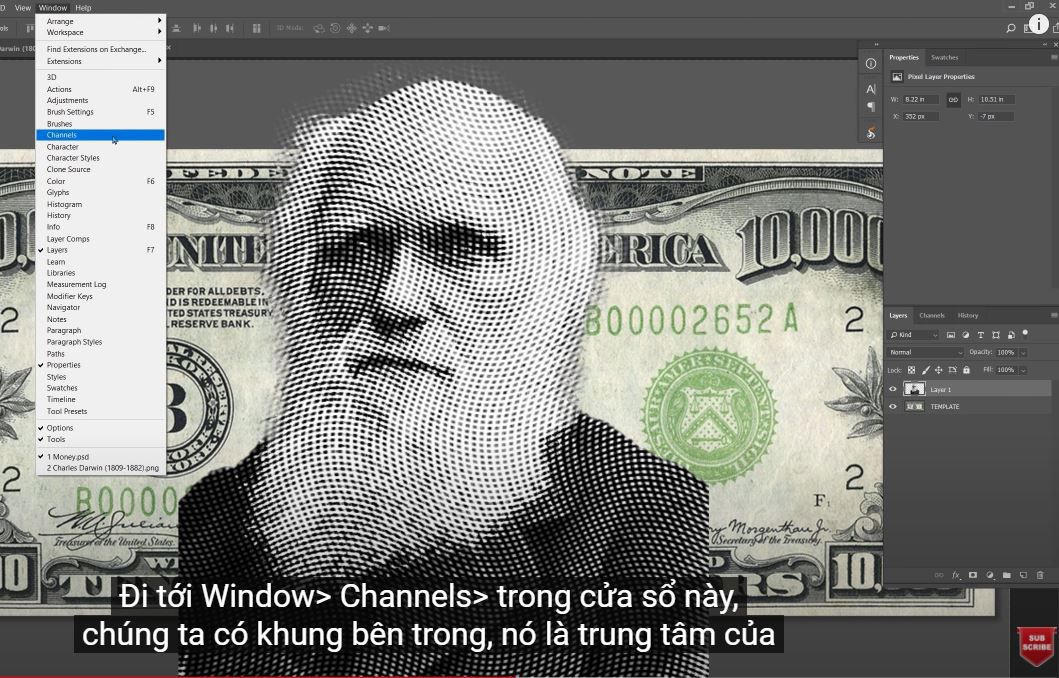
Go to Window > Channels > in this window we have the inner frame, it's the center of the note, where most bills tend to put pictures of famous people.
Hold CTRL and click on it to select.
Move back to the Layers channel, add a layer mask to layer 1. Now you see the subject inside the shape but we have to shrink it with CTRL + T
Then change the multiplier in blend mode. Duplicate it and change the copy layer's blend mode back to normal. It's pretty bright so let's reduce the opacity to 80%.
REGISTER FOR FREE PHOTOSHOP LEARNING
============================
The most powerful Retouch tool processor
DOWNLOAD:
✅ SADESIGN PANEL ENGLISH: https://sadesign.ai/retouching/
✅ SADESIGN PANEL VIETNAM: https://www.retouching.vn/