Best Selling Products

Capcut Pro 1 Year
39 USD

Plugin Retouch4me
69 USD

Genuine Cheap Canva Pro
39 USD

Genuine Adobe Illustrator account
99 USD

MidJourney Account
29 USD

Autodesk All App Account Copyright
120 USD

Upgrade Duolingo Super
29 USD

ChatGPT Plus Account (GPT-4)
16 USD

Adobe Premiere Pro Account
99 USD

Upgrade Genuine Office 365
49 USD

Adobe Photoshop Copyright - Full App
120 USD

Copyright Adobe Lightroom Account
59 USD

Freepik Premium Account
59 USD

Upgrade genuine Capture One account
120 USD

Windows 10 & 11 Pro Key
36 USD
How to Use Select and Mask in Photoshop
Nội dung
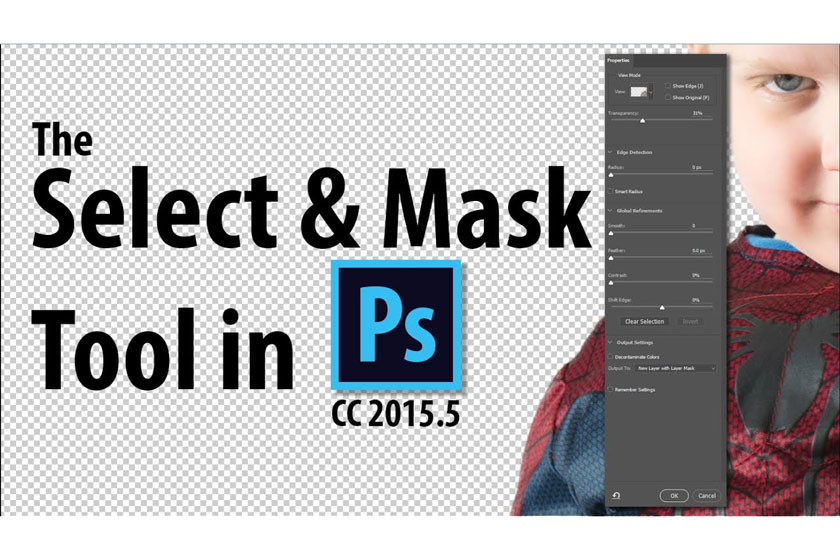
Adobe Photoshop CC 2015 has released a new 5.0 update that brings a very useful tool enhancement and is called Refine Edge. We'll learn what's new in this toolkit and they ways we'll take advantage of this new update.
select and mask in photoshopSome CC Photoshop updates still keep Refine Edge instead of updating the new one into “Select” and “Mask” ...
Select and Mask will help us to improve the quality of the area that we have selected and allow us to see the selection with different background colors for easier adjustment, bring us optimum accuracy. Besides, the Select and Mask function is also used to refine the selection for the layer mask.
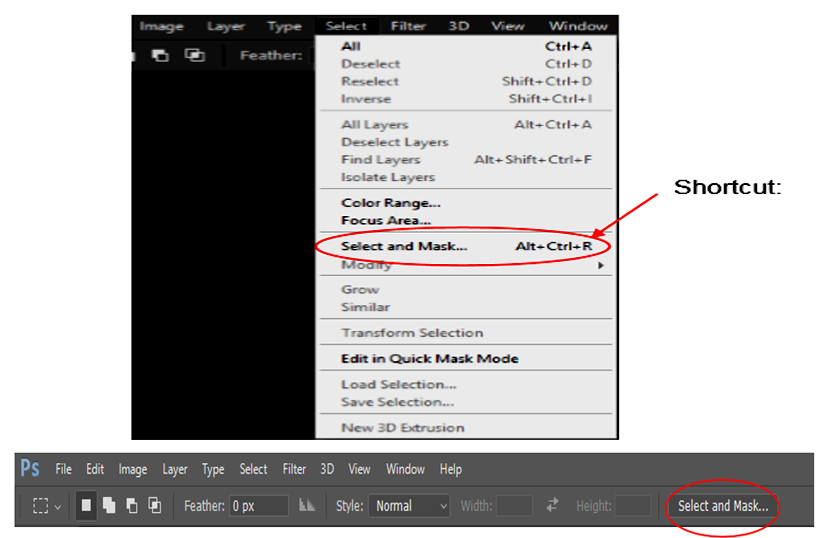
How to access the Select and Mask function in Photoshop
We can access the Select and Mask function from the options bar when using any selection tool or you can select on the toolbar by manipulation: Select => Select and Mask ... or you can press Alt + Ctrl + R
 Select and Mask function in Photoshop
After opening the Select and Mask function, a property sheet will appear for you to work with. That is similar to what you would do when using the Liquify tool. In the Select and Mask properties panel, we will have the Tool bars on the left with the Tool options on the top and the Properties panel on the right.
 Liquify tool
Find out the tools on the Tool bar
The toolbar will include 6 tools that we can use to refine our selections:
- Quick Selection: Has the function of making a selection based on similar pixels and recognizing the edges of the selection (although not as accurate as the Refine Edge Brush).
- Refine Edge Brush Tool: A brush is capable of detecting Edge, this tool will help you to extract images with small details like hair and photo collage.
- Brush Tool: Create a selection by painting with Brush. This tool is for drawing and creating simple brushes, you can quickly and easily draw any shape with any color.
- Lasso Tool: With this tool you can draw freely on the working area to create a selection as you like
- Hand Tool: With a hand icon, with this tool will help us move the image to where you need to fine tune the most.
- Zoom Tool: Allows you to zoom in and out of images.
All of these tools work outside of the Select and Mask function, but with the Refine Edge Brush tool still resides in the Select and Mask workspace.
The tool options allow adding or subtracting and adjusting the size and shape of the tool.
 Refine Edge Brush tool
Find out the functions in Properties panel
Properties panel will be some ways to adjust and work on the options we choose. The first entry is on the top “View Modes”. It provides us 7 ways to see our options, these choices will make you easier to adjust.
Onion Skin (O): This is the newest view mode in the recent update for Photoshop CC 2015 v 5.0. Working in this view mode brings a new type of style, which means the selection area will be covered in a class of the same size below.
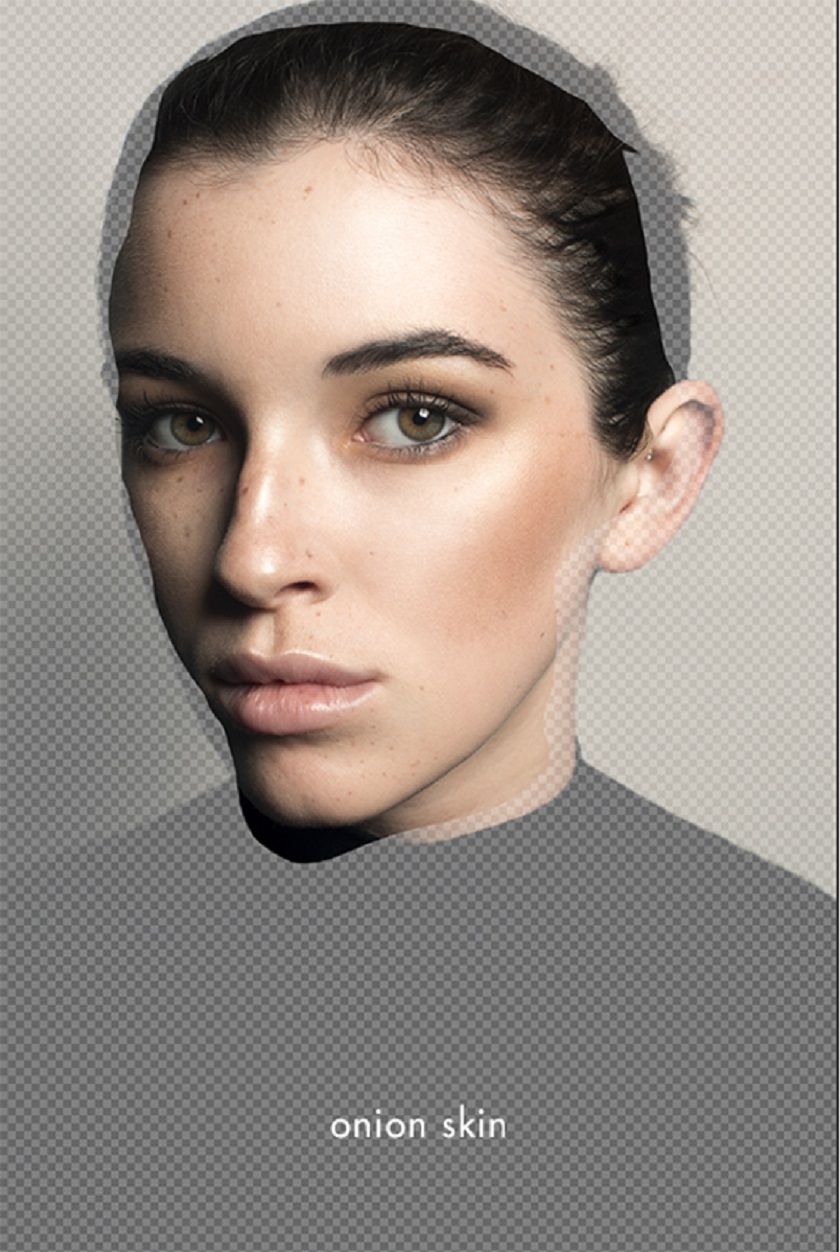 Onion Skin
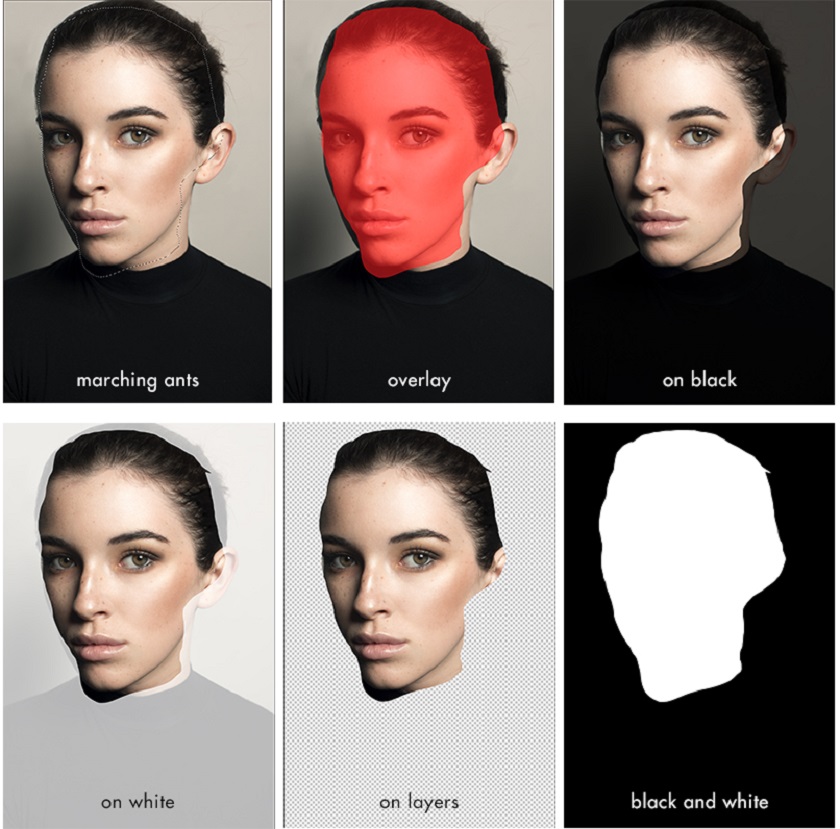
In this panel there are six views similar to the update in the Refine Edge tool before.
- Marching Ants (M): View a selection with its outlines
- Overlay (V): View a selection with a defined color overlay (default red).
- On Black (A): View a selection on a black background.
- On White (T): View the selection on a white background.
- Black & White (K): View the selection as a Layer Mask.
- On Layers (Y): Surround the selection with transparent areas
 Refine Edge tool
Press the "F" keyboard shortcut to switch View Modes and "X" will turn off all modes. Besides, there are some options "Show Edge" which shows only the screening area and "Show Original" which shows the original selection. Some View Modes also have transparency or opacity which help to make reference image and sampling better when refining our selection.
Essentially, all of these View Modes are the ways we can visualize our choices to help us in the process of refining them. We can add or remove selections using the Selection and Brush tools. Let's see how to use View Modes Onion Skin, but the best for you is choosing other View Modes to get used to them better.
 View Modes
As you can see from the animation above, I intentionally made a pretty poor initial selection using the Selection tool, now I want to refine it using Select and Mask.
Using the Refine Edge Brush tool in View Modes Onion Skin, we can paint in the area where I want to enlarge the selection. The Refine Edge Brush tool is using the basic transparency layer to figure out the numbers to add or remove to that selection.
We can do the same thing using the Quick Selection and Brush tools, but it doesn't bring precision to the edges.
Lưu ý: Việc chọn Select and Mask ở chế độ 16-bit sẽ làm ảnh hưởng xấu đến hiệu suất của hệ thống, do đó chúng ta có khắc phục nó bằng cách giảm xuống chế độ 8 bit, sau khi hoàn thành công việc bạn có thể trở lại chế độ 16 bit. Để thực hiện được điều bạn thực hiện thao tác
Note: Selecting Select and Mask in 16-bit mode will adversely affect the performance of the system, so we can fix it by reducing it to 8-bit mode, after your work is done, you can return it to 16 bit mode.
You should know that working with Select and Mask while being in 16-bit mode can negatively affect system performance. You can deal with this thing by temporarily reducing it to 8-bit mode, then reverting back to 16-bit mode after you finish your task. This is done in the Menu bar by choosing "Image => Mode => 8 Bits / Channel or 16 Bits / Channel".
 8 bit or 16 bit
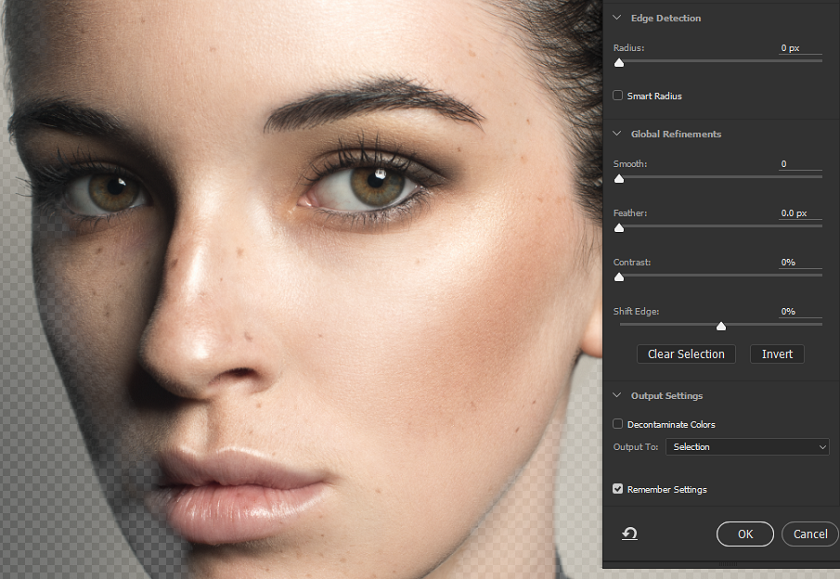
Edge Detection function
In the Edge Detection feature, there are 2 options for you to use:
- Radius: This feature will help you to fine-tune the edges to be sharper or to make edges softer, for sharp edges you should reduce pixels down, and to make the edge softer, increase px.
- Smart Radius: This is the function that automatically adjusts the radius according to the edges of the image.
Global Refinement function
In the Global Refinement function there are 4 options for you to fine-tune
- Smooth: Will help you create a smoother border around the selection's border
- Feather: soften the border of the selection
- Contrast: increase the contrast of the selection, apply only when combining with the Feather bar
- Shift Edge: enlarge or narrow the selection.
Output Settings function
When you have finished tweaking the above and you are satisfied with that, in the Output Settings section you can choose the method to save it.
- Selection
- Layer Mask
- New Layer
- New Layer with Layer Mask
- New Document
- New Document with Layer Mask
In addition you also have a check box Decontaminate Colors which help you fix every color border problems and replace them with similar pixels to fix problems it finds.
Finally, ticking the Remember Settings box, this will help you save all the property settings you have chosen for the next time you use the Select and Mask tool.
Above are all the functions of the Select and Mask photoshop tool, hopefully through the article you will understand and apply to refine your photos more perfectly.
If you have any questions, please immediately contact SaDesign Retouching for a detailed consultation.
See More: How to remove dark circles in Photoshop using the Patch tool and Curves


VIP Products


Best Selling Products
Capcut Pro 1 Year
39 USD
Plugin Retouch4me
69 USD
Genuine Cheap Canva Pro
39 USD
Genuine Adobe Illustrator account
99 USD
MidJourney Account
29 USD
Autodesk All App Account Copyright
120 USD
Upgrade Duolingo Super
29 USD
ChatGPT Plus Account (GPT-4)
16 USD
Adobe Premiere Pro Account
99 USD
Upgrade Genuine Office 365
49 USD
Adobe Photoshop Copyright - Full App
120 USD
Copyright Adobe Lightroom Account
59 USD
Freepik Premium Account
59 USD
Upgrade genuine Capture One account
120 USD
Windows 10 & 11 Pro Key
36 USD