Best Selling Products

Genuine Cheap Canva Pro
39 USD

Freepik Premium Account
59 USD

Upgrade genuine Capture One account
120 USD

Adobe Premiere Pro Account
99 USD

ChatGPT Plus Account (GPT-4)
16 USD

Upgrade Duolingo Super
29 USD

Genuine Adobe Illustrator account
99 USD

Plugin Retouch4me
69 USD

Autodesk All App Account Copyright
120 USD

Adobe Photoshop Copyright - Full App
120 USD

Capcut Pro 1 Year
39 USD

MidJourney Account
29 USD

Windows 10 & 11 Pro Key
36 USD

Copyright Adobe Lightroom Account
59 USD

Upgrade Genuine Office 365
49 USD
How to remove dark circles in Photoshop using the Patch tool and Curves
Nội dung
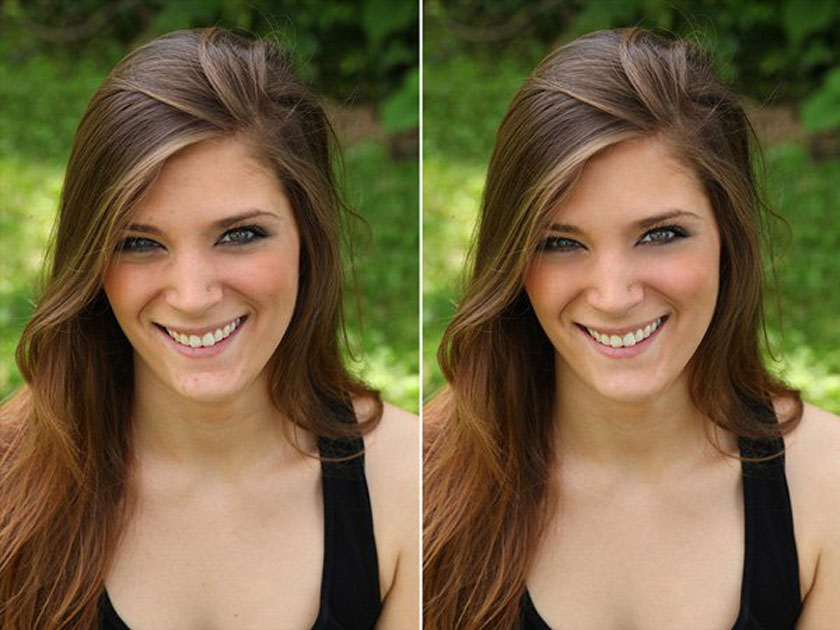 remove dark circles
Using the patch tool
Basically, tools in Photoshop Patch tool will sample the pixels at the beautiful skin to cover the defect on the image to fix. Therefore, the patch tool will give a more natural photo than other tools. To remove dark circles on the model's skin and dark circles in the photo, do the following: Step 1. Open the photo you need to edit in Photoshop by going to File => Open. Step 2. Select the patch tool and the defective part of the picture. You can find the Patch tool hidden in the Healing Brush tool. Then you create a Layer Mask in case you correct the image wrongly. Next, after you have selected the patch tool, select the area you want to fix by drawing a circle around the skin. Next, you drag and drop them at the beautiful skin you want to overwrite. The beautiful skin, you can also take the skin from any area of the body, as long as it is beautiful.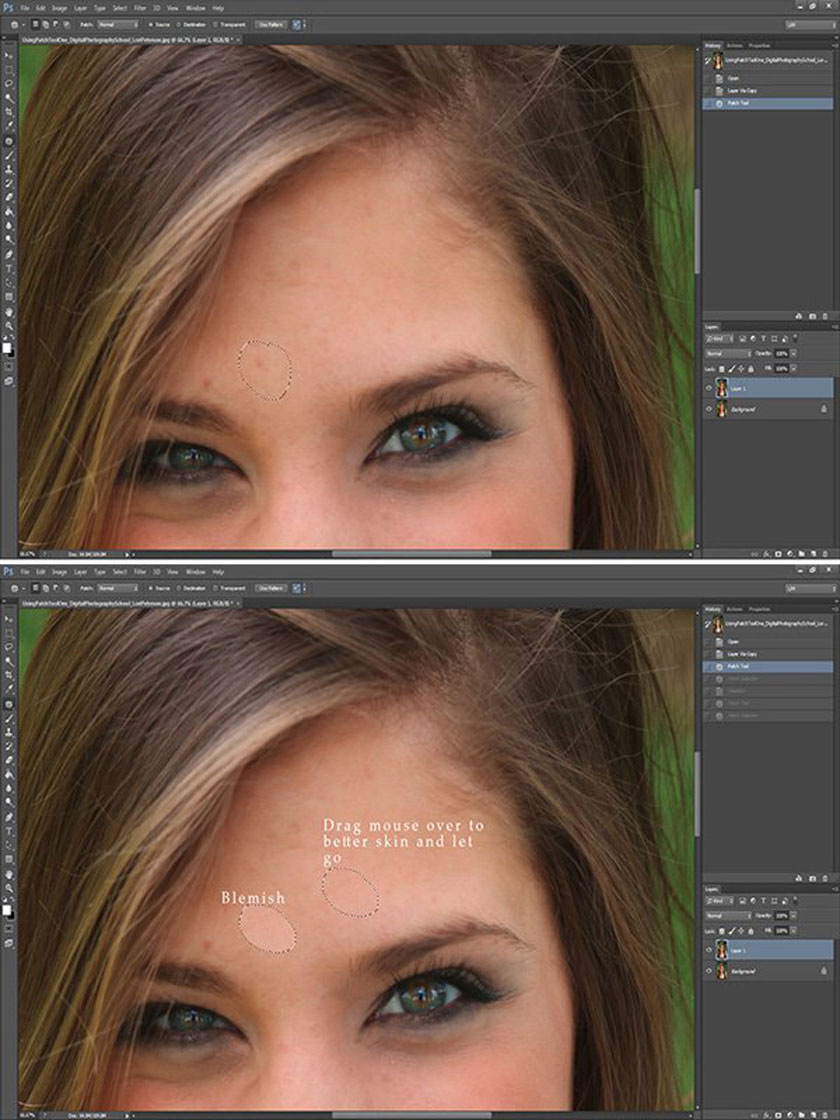 use patch tool
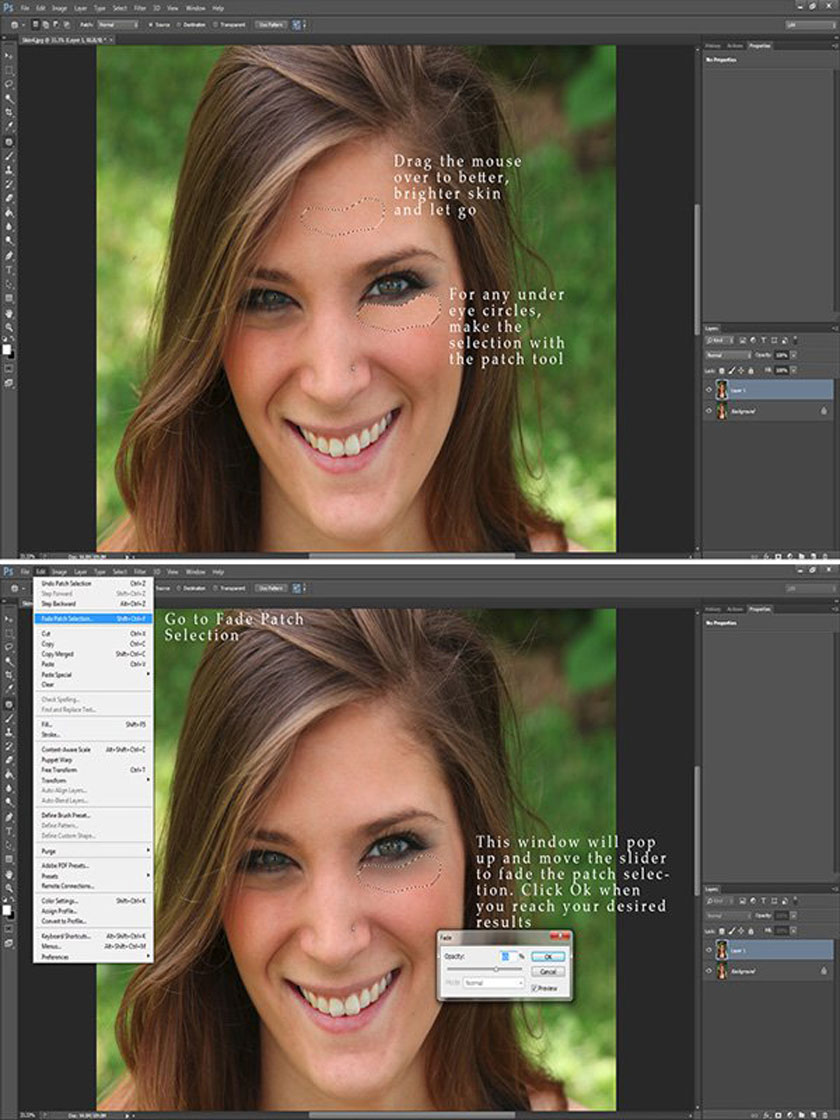 Reduce eye bags
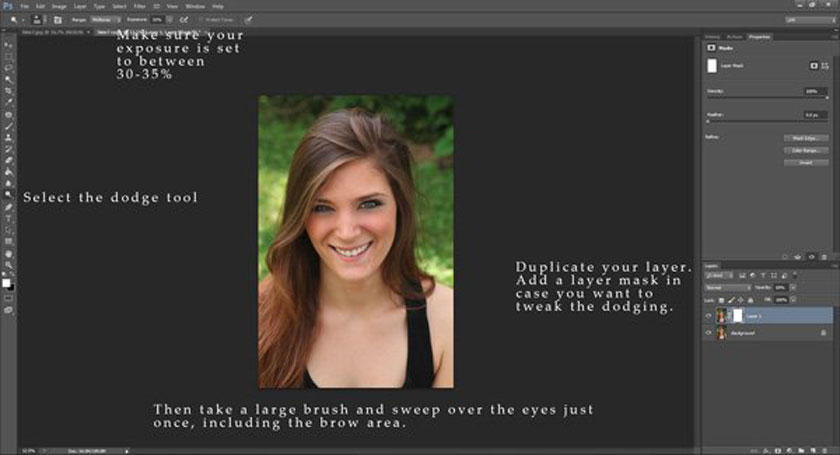 Brighten the eye area
Using curves
The tip of erasing the dark areas of the skin or under the eyes of the model on the photo with Curves in Photoshop will help you to perform effectively and easily. Use the Curves tool in Photoshop instead of using Patch or Dodge / Burn / Clone in Photoshop with many cumbersome operations. The Curves tool will improve the dark areas of the image to become brighter very quickly, without affecting the image and also giving the most natural results. First of all, you need to localize the area that needs to be edited in the photo. Then to create a Adjustment Curves Layer, firstly you left-click on the layer to be created, then go to Layer => New Adjustment Layer => Curves. In the Histogram section, the pixel area on the left side of the graph will contain dark pixels (dark pixels – shadows). Pixels in the middle are called midtones, and pixels in the right are areas of bright pixels (bright pixels - highlights). If these pixels go up, their light intensity is also increasing, is brighter. Likewise, if the pixels go down, the pixels get darker as well.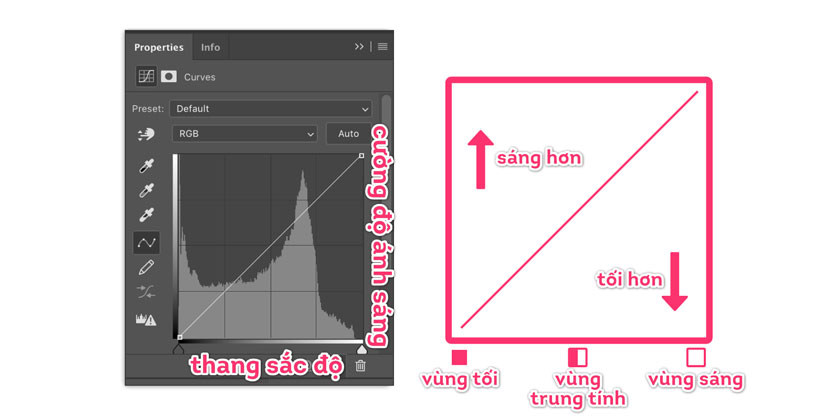 Using curves


VIP Products


Best Selling Products
Genuine Cheap Canva Pro
39 USD
Freepik Premium Account
59 USD
Upgrade genuine Capture One account
120 USD
Adobe Premiere Pro Account
99 USD
ChatGPT Plus Account (GPT-4)
16 USD
Upgrade Duolingo Super
29 USD
Genuine Adobe Illustrator account
99 USD
Plugin Retouch4me
69 USD
Autodesk All App Account Copyright
120 USD
Adobe Photoshop Copyright - Full App
120 USD
Capcut Pro 1 Year
39 USD
MidJourney Account
29 USD
Windows 10 & 11 Pro Key
36 USD
Copyright Adobe Lightroom Account
59 USD
Upgrade Genuine Office 365
49 USD