Best Selling Products
Delete logos in Photoshop for beginners!
Nội dung
- 1. How to delete a Logo in Photoshop with Content Aware Fill
- 2. How to remove Logo on photos with Content Aware Remove
- 3. Delete Logo in Photoshop with Spot Healing Brush
- 4. Delete the logo on the image with the Clone stamp tool
- 5. How to delete a logo on a photo with Photoshop online
- 6. Frequently asked questions
- 6.1. Is there the fastest way to delete a Logo in Photoshop?
- 6.2. Why is the logo blurred after being erased?
- 6.3. Is there a way to completely erase the Logo on a photo using Photoshop?
Sometimes your photos will contain unwanted objects or logos. To remove them, immediately refer to 5 simple and easy ways to delete logos in Photoshop that Sadesign shares in the following article!

Sometimes your photos will contain unwanted objects or logos. To remove them, immediately refer to 5 simple and easy ways to delete logos in Photoshop that Sadesign shares in the following article!

1. How to delete a Logo in Photoshop with Content Aware Fill
We can delete the logo extremely simply and easily thanks to the Content Aware Fill tool. The following instructions are done in Photoshop 2023 with the following specific steps:
- First, you need to open the image in Photoshop by pressing File -> Open or pressing the shortcut Ctrl + O. Next, click on the Lasso Tool or press the keyboard shortcut Shift+L to open the Lasso Tool.
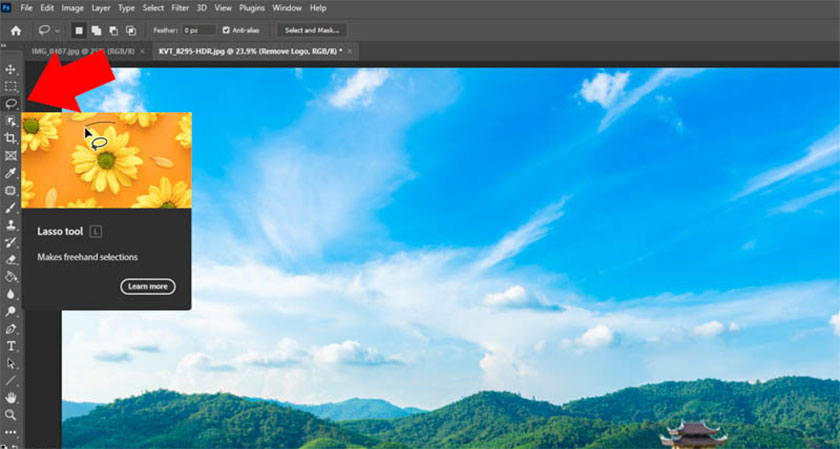
- Next, draw around the logo, note that you should draw a little larger than the logo to help bring better results. If you create a selection close to the logo, the image will be blurred and unaesthetic.
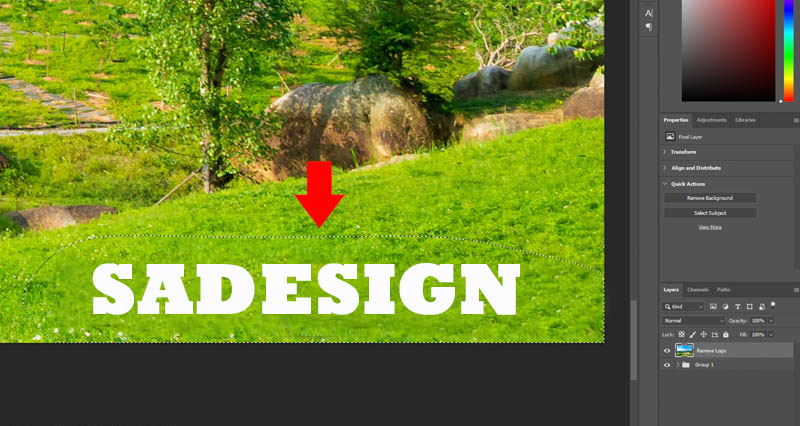
- Once you have created a selection around the logo with the Lasso Tool, right-click to select Content Aware Fill, this feature is available in both Photoshop versions 2022 and 2023.
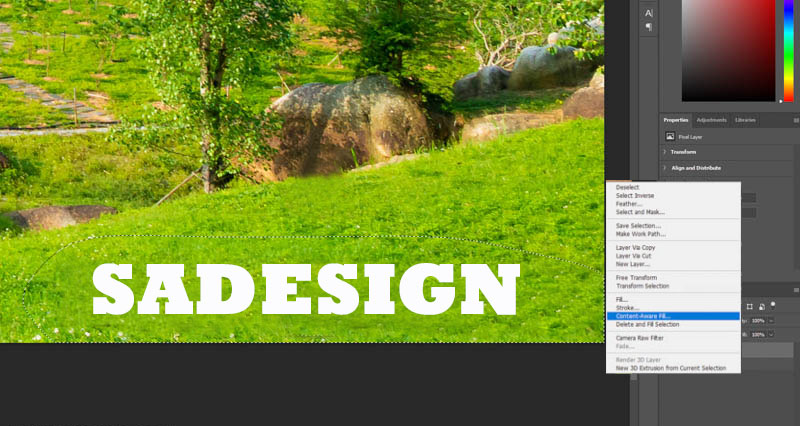
Content Aware Fill does a nice job of removing the logo, for example, photoshop uses the red area instead of the logo, you can limit this area to help bring about better results. For simple logos, the results are much more realistic. - Next, press Ctrl + D to hide the grid lines left by the Lasso Tool. You will see a new layer containing the deleted image area. You can turn this layer on and off to view before and after images. With the Content Aware Fill feature we can easily delete the Logo.
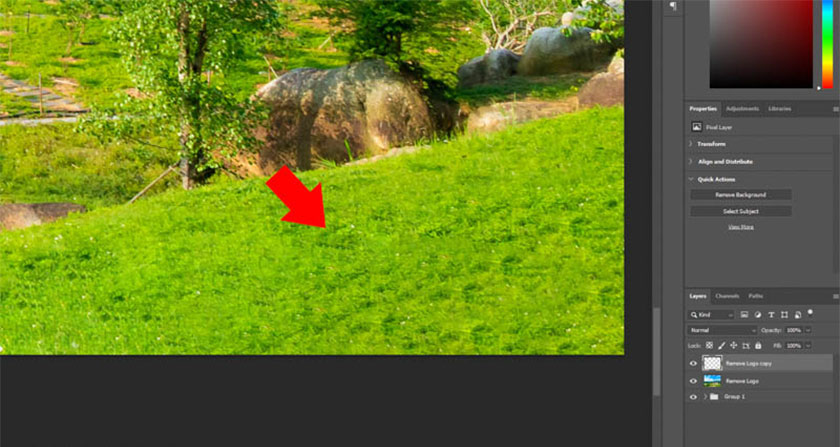
In some cases, if you are not satisfied with the results of Content Aware Fill, you can use the Lasso Tool to create a selection around the Logo. Right-click and select the Delete and Fill Selection feature. Note that this feature is only available in Photoshop version 3023. Photoshop will automatically delete the Logo to replace it with other suitable details without having to make any further edits.
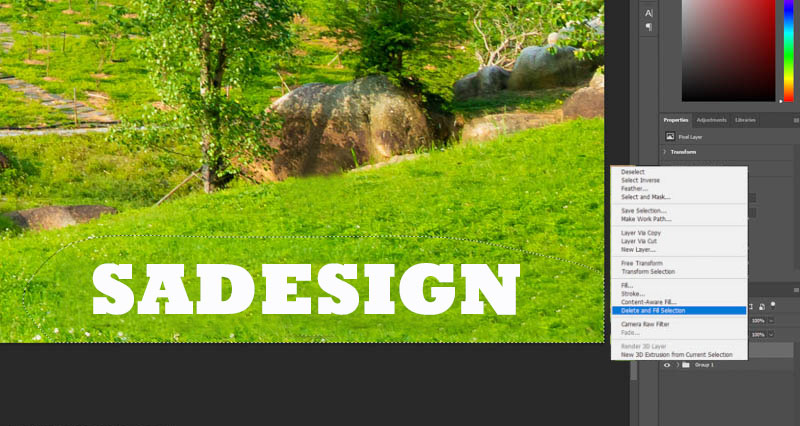
The image after deleting the logo with Delete and Fill Selection is very beautiful and natural, just test a few times and you will achieve the desired result.
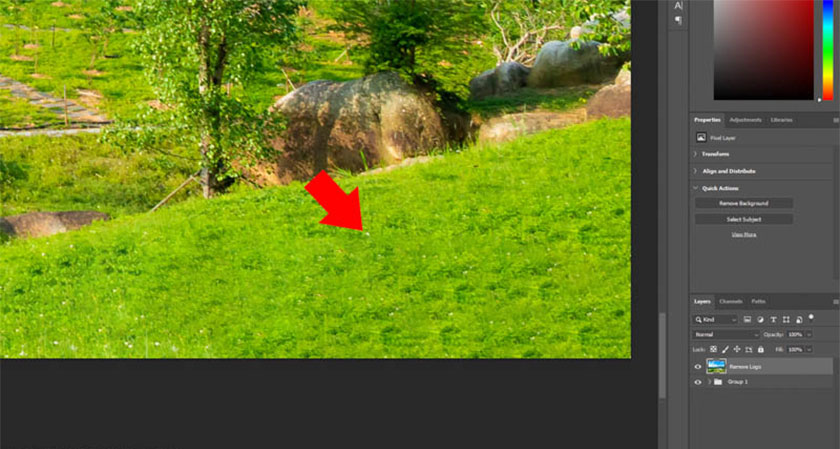
2. How to remove Logo on photos with Content Aware Remove
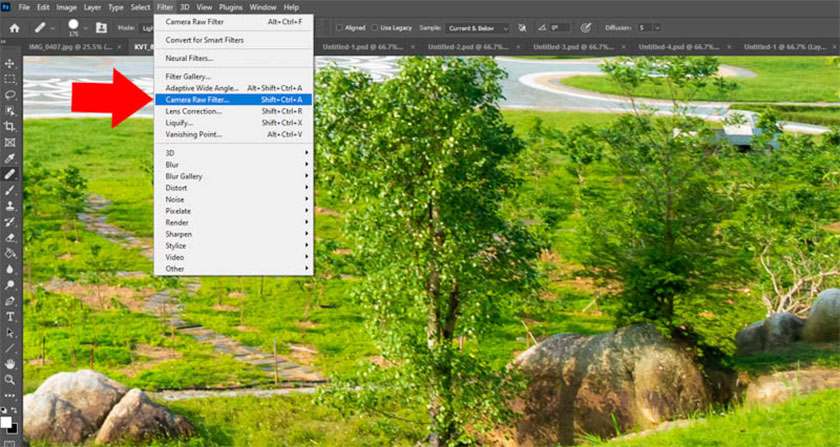
With the Content Aware Remove feature you need to use Photoshop 2023 and Camera Raw 15. Next click File -> select Camera Raw Filter or press the shortcut Ctrl+Shift+A to open Camera Raw faster.
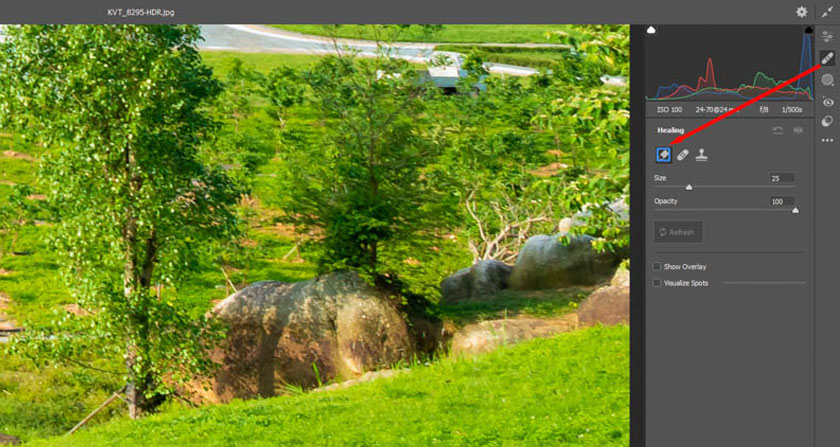
In Camera Raw, select Heal -> Content Aware Remove -> Size to change the size and adjust the Opacity to suit the image.
Next, hold down the mouse button to create a selection around the logo. Make the selection a little larger than the logo to help bring better results.
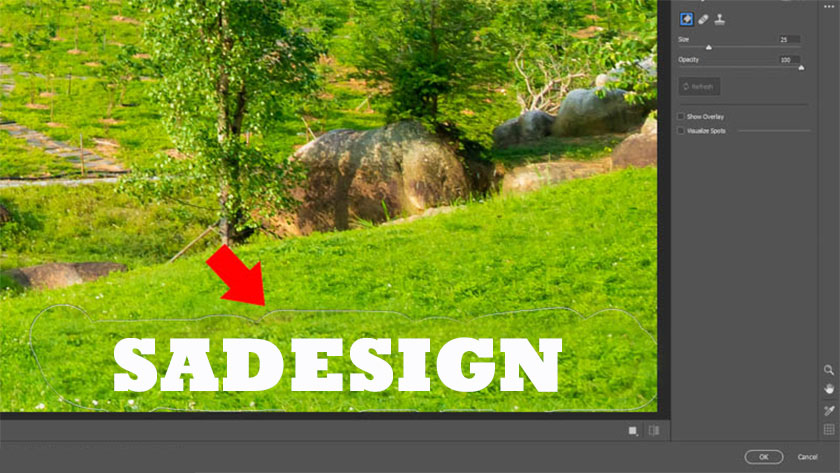
But the results returned are not beautiful and natural, however this is only one part of this feature.
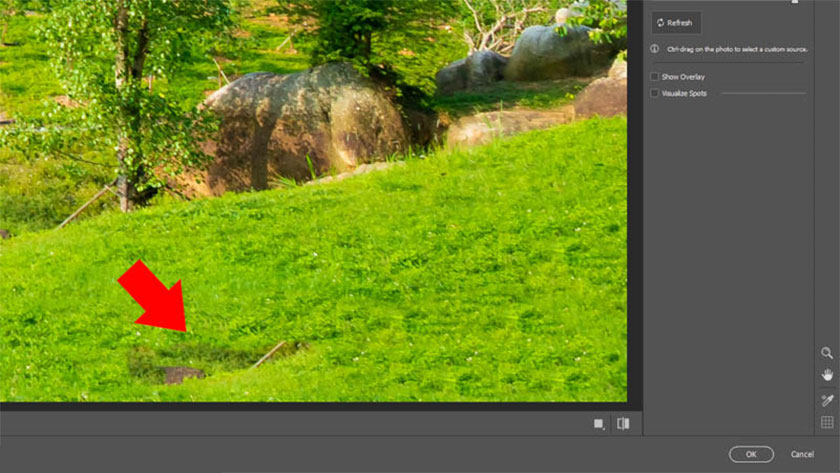
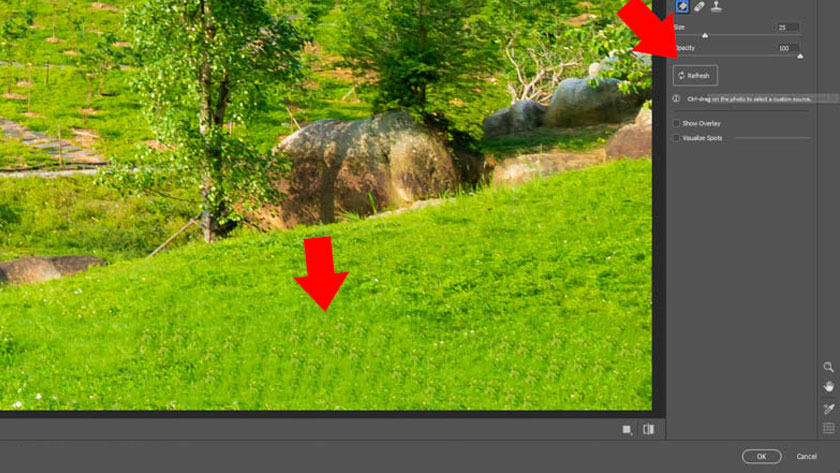
If you see unsatisfactory results, click Refresh. After each re-entry, Photoshop will produce a new result. This is a feature that uses Adobe's artificial intelligence, so you just need to press until you get the desired result.
3. Delete Logo in Photoshop with Spot Healing Brush
In addition to the above two ways, we can also delete logo in Photoshop with the Spot Healing Brush feature, you can click directly on the Spot Healing Brush tool or press the shortcut J.
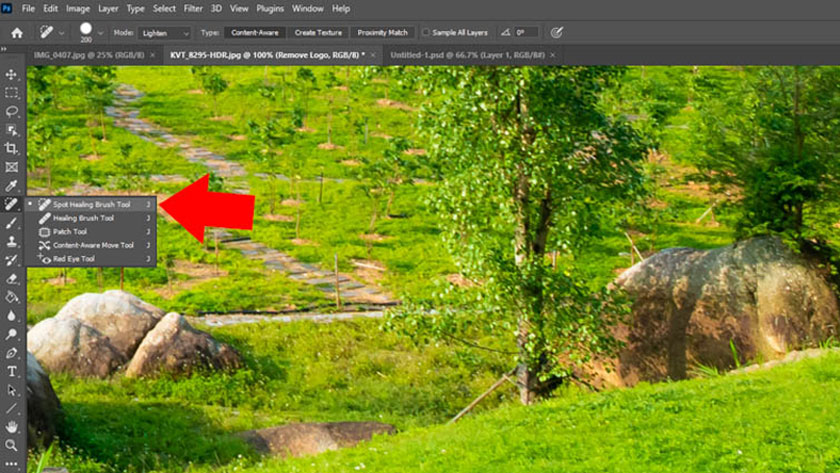
Continue resizing the Spot Healing Brush to match the size of the logo. Additionally, you can change the size of the image by using the [ ] key. Next, hold the left mouse button to create a selection around the logo. Photoshop will delete the selection to replace it with appropriate details.
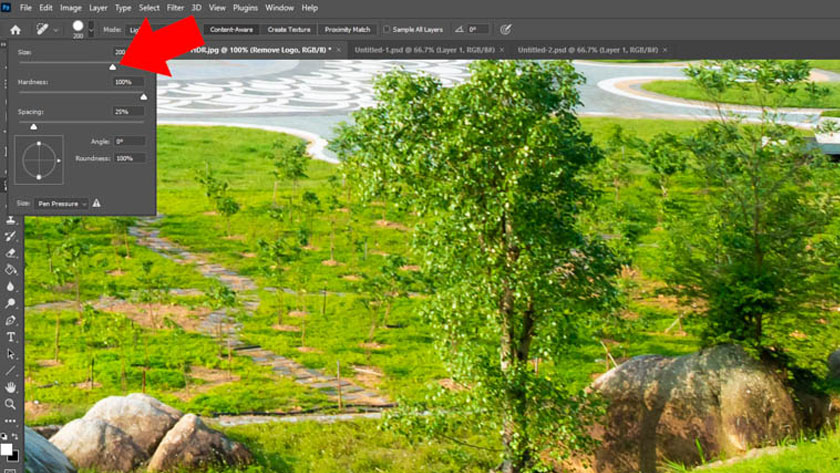
Spot Healing Brush will automatically select the sampling location without wasting time manually selecting it, instead, you just need to select the location to delete. The results can be seen that the Spot Healing Brush helps remove the logo quite well. If you need more control when removing the logo, you can use the Healing Brush Tool feature.
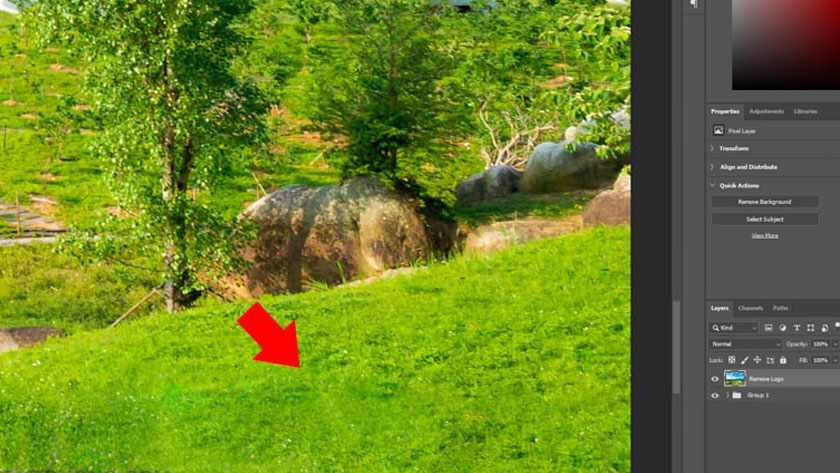
You can select the Healing Brush Tool then press the keyboard shortcut Shift+J. Unlike the Spot Healing Brush, the Healing Brush Tool will let you select an alternate area to give you more control. The more careful and meticulous you are, the more realistic the logo removal image will be.
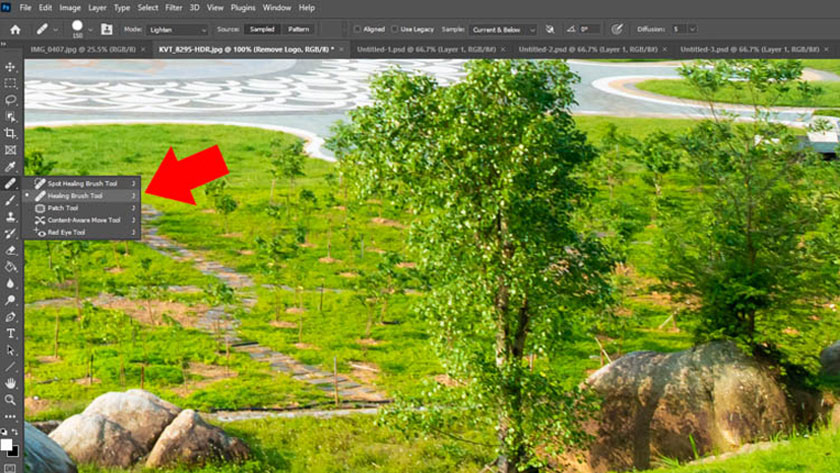
Next, press the shortcut [ ] to change the size of the Healing Brush Tool. Hold down the Alt key, then left click to sample the area you want to replace the logo with. Release the Alt key and click on the photoshop logo which will use the sample location and replace it with the location you just clicked. You should choose a sampling location close to the logo to ensure similarity in color and brightness, making the photo more natural.
4. Delete the logo on the image with the Clone stamp tool
Clone STamp Tool is a quite common tool in Photoshop, this tool has the effect of replacing pixels with pixels, so they are used a lot in removing redundant details from objects.
To delete the logo on an image with the Clone STamp Tool, do the following:
● Step 1: In the menu bar, select the Clone Stamp tool or press S on the keyboard.
● Step 2: Locate the text and logo you want to delete.
● Step 3: Press the Alt key, click on a location with a similar background in the area where you want to delete the logo.
● Step 4: Click on the area containing the logo you want to delete.
Note, to avoid rough logo deletion, you should take samples continuously.
5. How to delete a logo on a photo with Photoshop online
To delete a logo on a photo with Photoshop online, we need to follow these basic steps:
● Step 1: Click to search for Photoshop online here
● Step 2: Open the photo to delete by pressing Ctrl + O or choosing File -> Open.
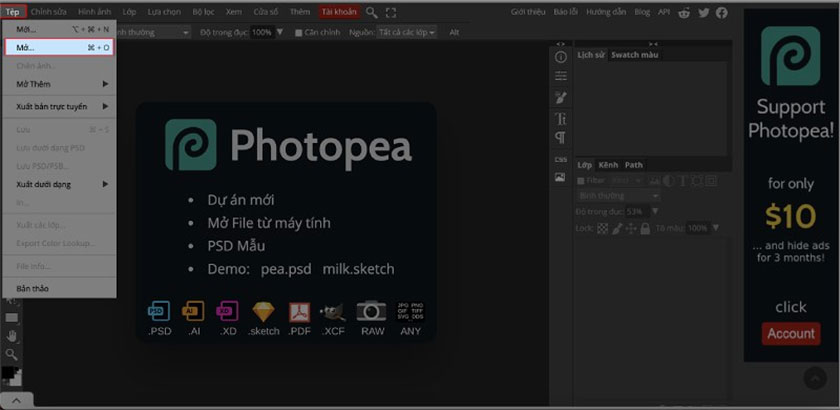
● Step 3: Duplicate the layer by pressing Ctrl + J so that the editing steps do not affect the original image.
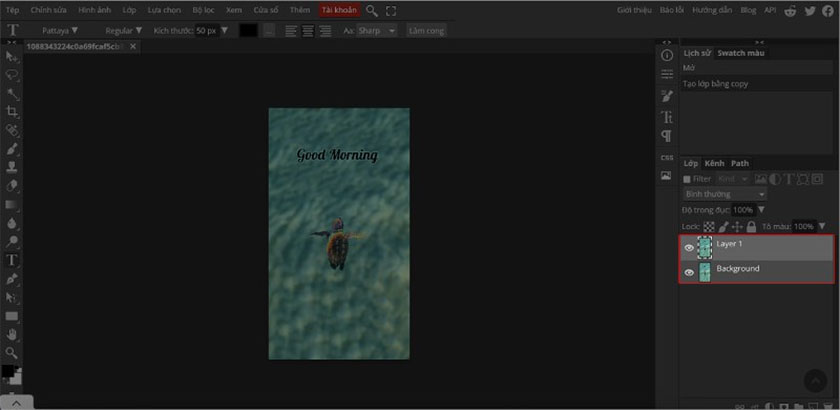
● Step 4: Select the text area by pressing the L key or clicking the free area icon on the toolbar. Select the area you want to delete.
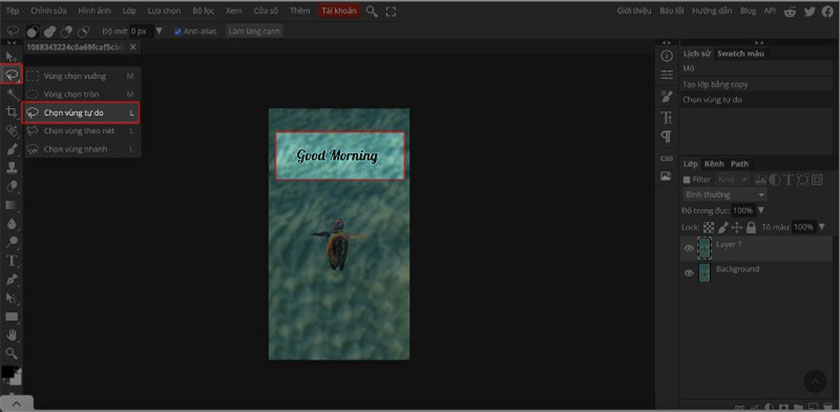
● Step 5: Move the mouse over the selected area to the area to be deleted

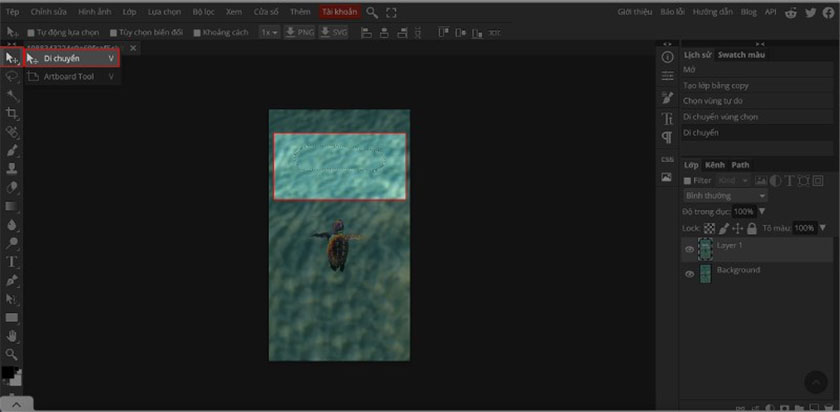
● Step 6: Press the V key or select the move icon on the toolbar. Click on the selection and drag and drop over the logo you want to delete.
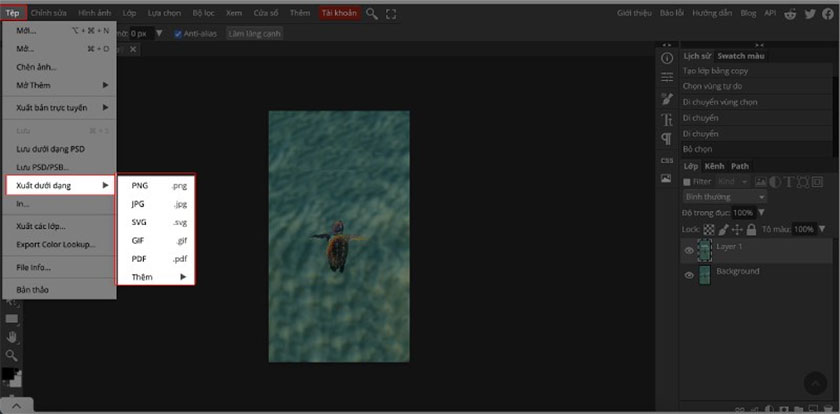
● Step 7: Save the image by selecting File -> Export As -> the format you want to save.
6. Frequently asked questions
6.1. Is there the fastest way to delete a Logo in Photoshop?
=> To delete the logo as quickly as possible, you can use the Content Aware Fill or Delete and Fill Selection feature. Here are 2 ways to delete the Logo in Photoshop faster and more naturally.
6.2. Why is the logo blurred after being erased?
=> You need to delete the logo more meticulously and carefully, otherwise use new features like Content Aware Remove to delete the Logo to make it more beautiful.
6.3. Is there a way to completely erase the Logo on a photo using Photoshop?
=> You just need to create a selection around the Logo and use features such as Content Aware Fill, Delete and Fill Selection or the Content Aware Remove feature to help completely remove the logo from the image.
So, in the above article, we have thoroughly learned about the 5 simplest and easiest ways to delete logos in Photoshop. It can be seen that each method will have its own advantages and limitations, so you should experiment to find the method that best suits you. Doing this over time will help you remove the logo more quickly and simply. SaDesign wishing you success in applying the methods we share in this article.


