Best Selling Products
Steps to batch edit photos in Photoshop
Nội dung
- Steps to batch edit photos in Photoshop
- Step 1: Add photos to edit
- Step 2: Record the operations applied to the current photo.
- Step 3: Apply the saved action to the remaining photos
- Question and answer
- 1. How many photos can I batch edit at once with Photoshop?
- 2. How can I save an edited photo as JPG?
- 3. What types of photos should be used for batch editing in Photoshop?
Batch editing photos in Photoshop is an extremely useful feature, allowing you to apply the same effects and actions on multiple photos. This saves maximum time and effort for photo editing. Specifically, how to do it, please read with Sadesign to find out in the following article.
Batch editing photos in Photoshop is an extremely useful feature, allowing you to apply the same effects and actions on multiple photos. This saves maximum time and effort for photo editing. Specifically, how to do it, please read with Sadesign to find out in the following article.
Steps to batch edit photos in Photoshop
Step 1: Add photos to edit
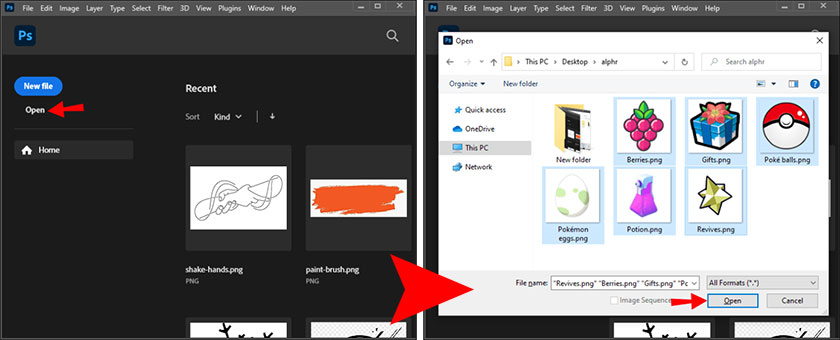
First you need to open all the photos you want to batch edit in Photoshop by launching Photoshop. On the main screen, click “Open” from the sidebar and navigate to the folder containing the images you want to batch edit. To select multiple photos at once on a Windows PC, click on the first photo and hold down the “Ctrl” key. Next, press the "Open" button after selecting the images and all images will be opened in Photoshop.
Note: You should create copies of batch-edited photos in another folder so you can use them if the edits don't turn out as expected.
Step 2: Record the operations applied to the current photo.
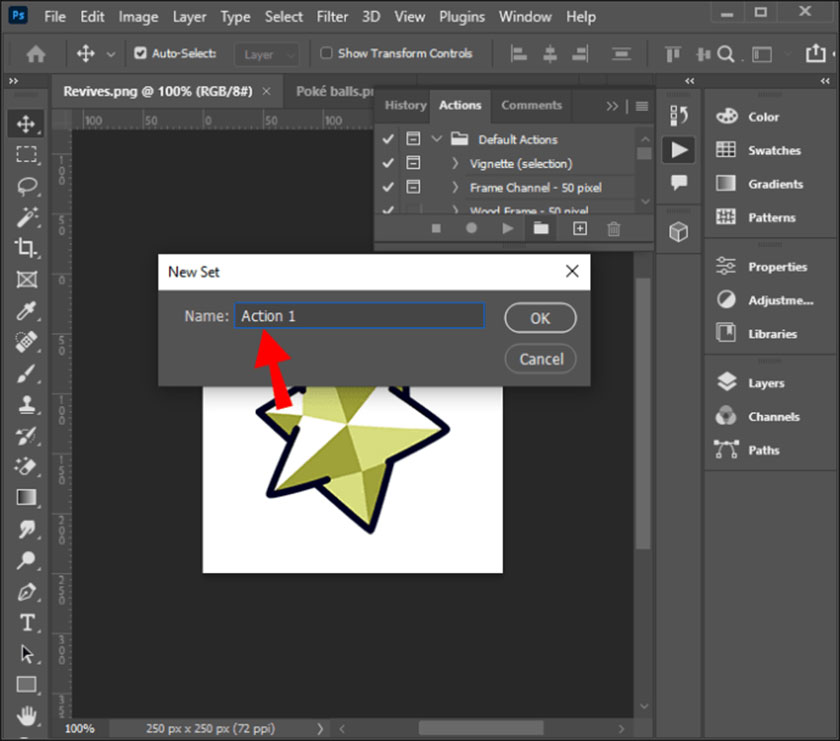
In this step, you will save the editing steps you are currently working on so you can apply them to all remaining images. Remember that any edits you make to an existing photo will affect the other photos in the photo set you choose to batch edit, so be careful in the editing process. Follow the following process to batch edit photos: Click on Window -> Actions -> at the bottom of the operation panel, click on the folder icon to create a new folder -> name the folder, for example, “Action 1” -> click OK
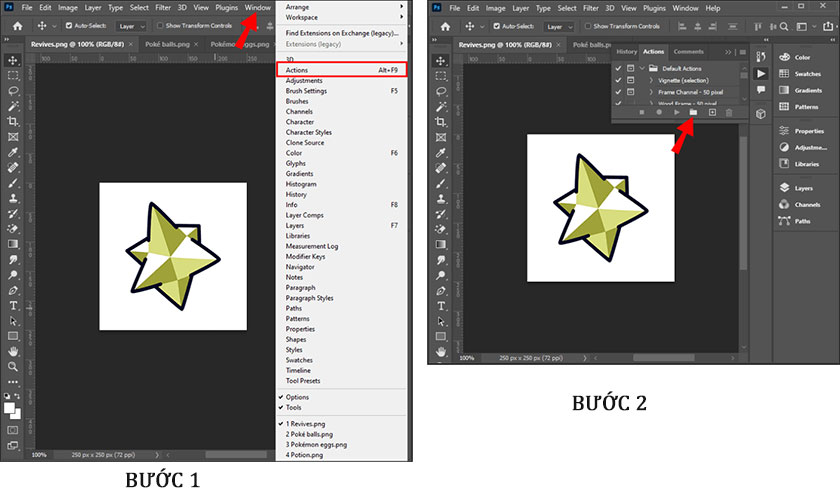
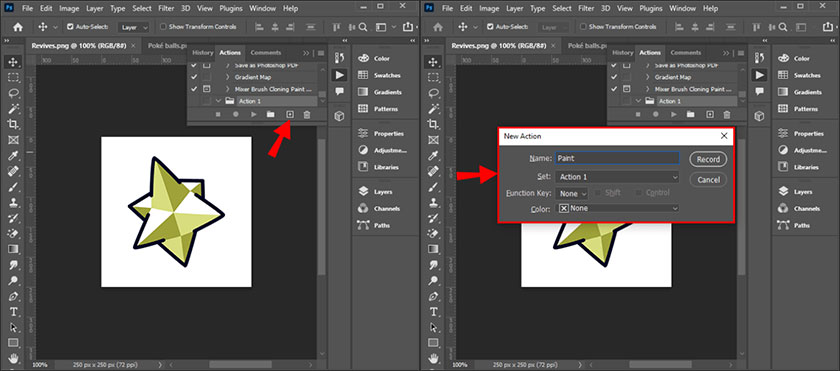
In the folder you just created, click on the square icon with a plus sign right next to the trash can icon at the bottom of the Actions panel to create a new action -> name it, you should choose a name that is descriptive and easy to remember, for example “Paint”.
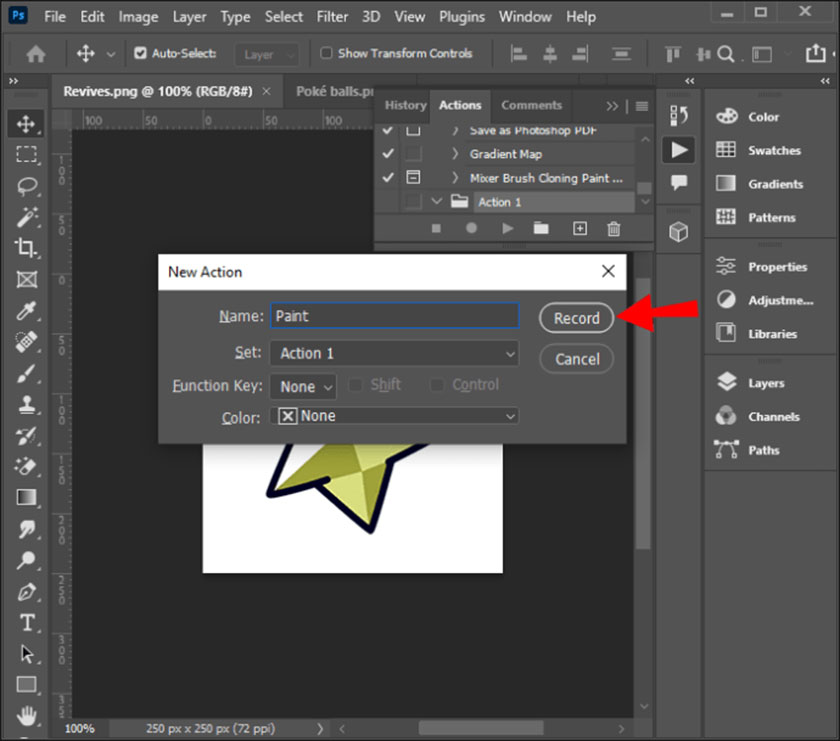
Other options Function Key is None, and Color is None. Then click Record and start editing the current photo.
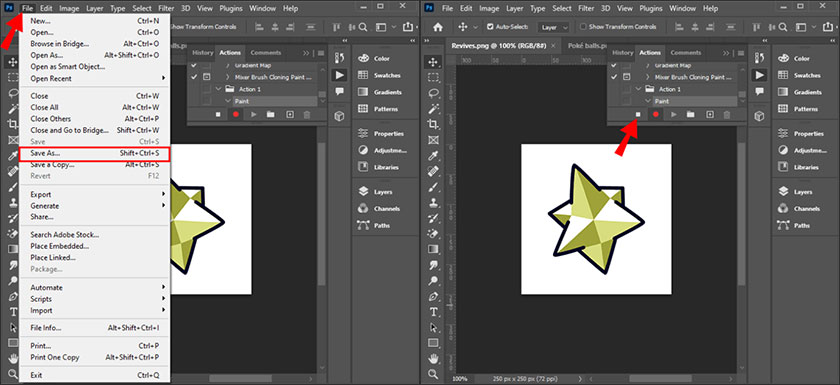
You can verify actions are being recorded by checking the red dot right at the bottom of the Actions section.
Your subsequent edits will be recorded and applied to all remaining photos. After you finish, click File -> Save As to save the photo you just edited -> go to Actions -> select the white square icon to stop recording the action.
Step 3: Apply the saved action to the remaining photos
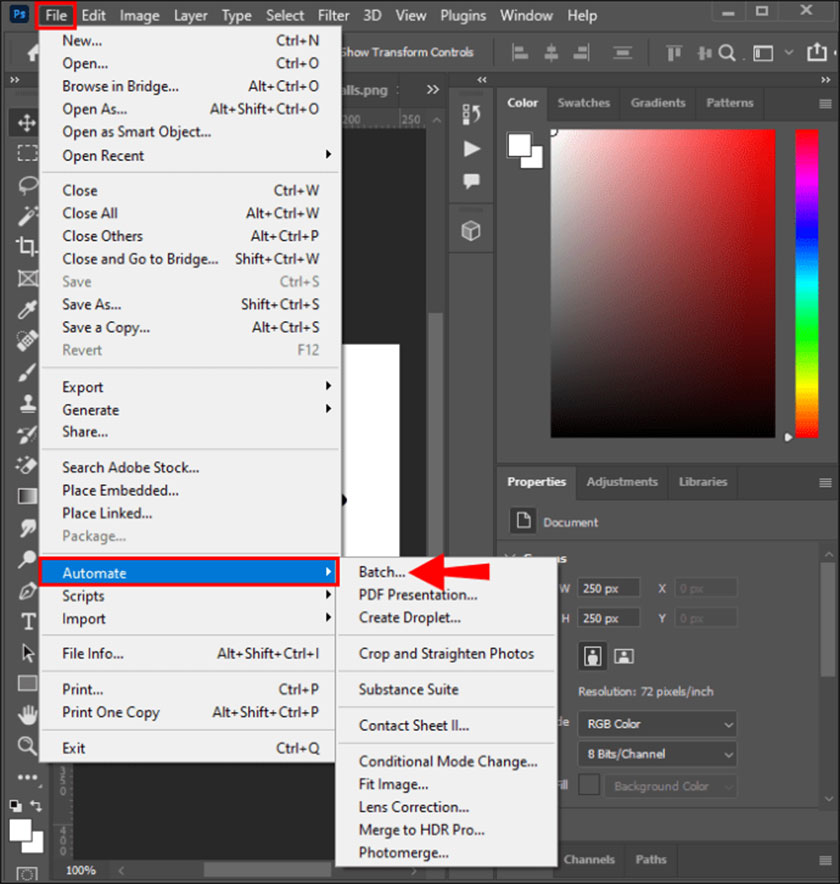
Now we have the previous editing process to apply to the remaining photos by: Click File -> select Automate -> batch and Fill in the following information one by one:
- Set: select the folder’s name “Actions 1”
- Actions: select the file’s name “Paint”
Next, select Errors, select Stop for errors. In the Destination section, you can select Save and close or Folder -> complete and click "OK".
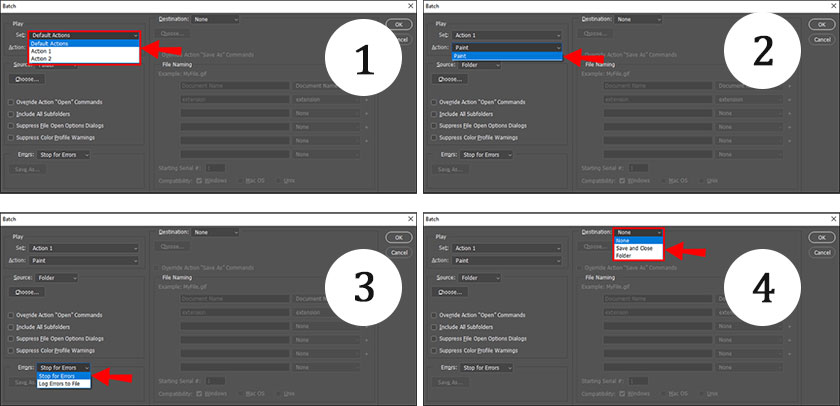
Wait a few minutes for the task to apply to other images in the folder. The waiting time will depend on your computer speed and the number of photos you edit to complete.
Question and answer
1. How many photos can I batch edit at once with Photoshop?
Answer: There is no limit the number, but it depends on your computer. If your computer has low capacity and low configuration, you should choose few photos so that the editing process does not encounter errors or wait too long.
2. How can I save an edited photo as JPG?
Answer: To save edited photos as JPG, do the following: - Select batch photos opened in Photoshop -> Click the "Save" icon in the top right corner of the screen -> in the format select “JPEG” -> “Save”.
3. What types of photos should be used for batch editing in Photoshop?
Answer: To use this feature, you should apply it to photos with the same subject and lighting conditions to help photo editing get the best results. However, you can still batch edit photos if you don't meet these requirements.
Hopefully the specific steps shared above will help readers successfully perform mass photo editing in Photoshop. SaDesign Wishing you success with your photos!


