Best Selling Products

Genuine Cheap Canva Pro
39 USD

MidJourney Account
29 USD

Genuine Adobe Illustrator account
99 USD

Upgrade Duolingo Super
29 USD

Upgrade genuine Capture One account
120 USD

Windows 10 & 11 Pro Key
36 USD

Autodesk All App Account Copyright
120 USD

Copyright Adobe Lightroom Account
59 USD

Upgrade Genuine Office 365
49 USD

Freepik Premium Account
59 USD

Capcut Pro 1 Year
39 USD

Plugin Retouch4me
69 USD

Adobe Photoshop Copyright - Full App
120 USD

Adobe Premiere Pro Account
99 USD

ChatGPT Plus Account (GPT-4)
16 USD
2 simple ways to make skin pink and white in Photoshop
Nội dung
Instead of using blush as makeup, Photoshop users combine tools to "blush" the subject in each photo. In fact, changing skin tone in Photoshop is not simple. But don't worry, let's refer to 2 simple ways to make skin white and pink in Photoshop right below.

Instead of using blush as makeup, Photoshop users combine tools to "blush" the subject in each photo. In fact, changing skin tone in Photoshop is not simple. But don't worry, let's refer to 2 simple ways to make skin white and pink in Photoshop right below.
How to make skin white and pink in Photoshop using LAB Color.

If you want to make the subject in your photo more vivid and natural, you can absolutely try the method of making skin pink and white in Photoshop using LAB Color right below.
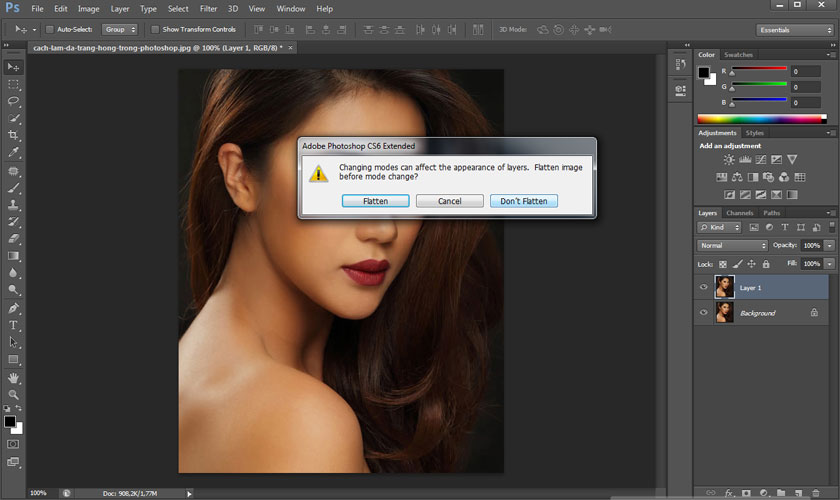
Step 1: Open the photo that needs to be whitened in Photoshop. Then press Ctrl + J to duplicate the layer.

Step 2: In the new layer, select Image, then select Mode, select Lab Color to use the LAB color system. Then press Don't Flatten.
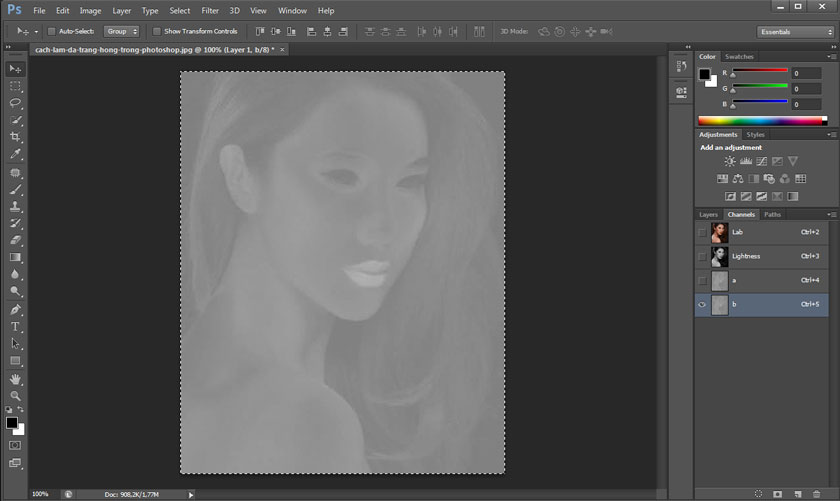
Step 3: Go to Window and click Channels to open the Channels. At this point, the LAB color system will separate the image into 3 channels:
● Lightness channel: contains the light and dark areas of the image
● Channel a: contains the area with green and red pixels in the image.
● Channel b: contains the area with blue and yellow pixels in the image.
Step 4: In channel a, press Ctrl+A to select the entire image, then press Ctrl+C to copy the selected parts. Then go to channel b and press Ctrl+V to paste the light on. This will eliminate the yellows in channel b and replace them with reds in channel a.

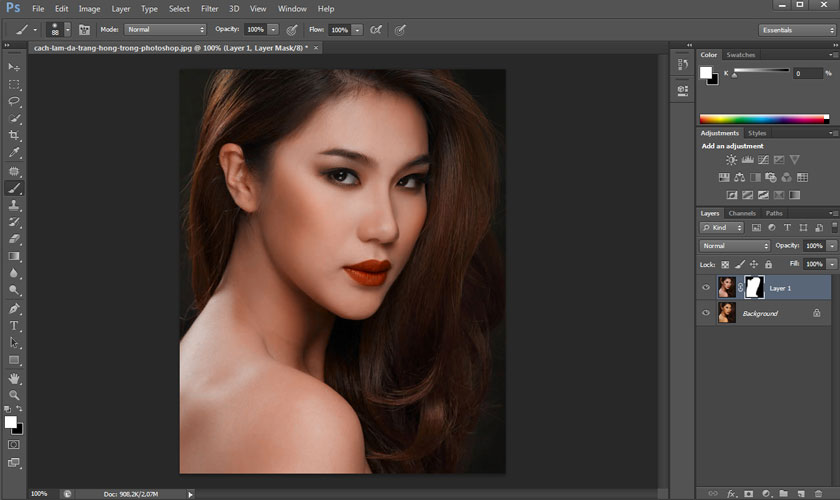
Step 5: Open all channels. Return to the Layers panel, now you will see that Layer 1 has changed color, the yellow color on the skin has been removed and replaced with red, however, the image will be red and slightly darker. If you only want to process skin color while preserving the tone of the outside scene, click Add Layer Mask to create a Layer Mask for the layer.

Step 6: Press Ctrl+I to invert the selection then select the Brush Tool and set Set foreground color to white.
Step 7: Repaint the skin area that needs to be whitened for the photo. You can reduce the Fill or Opacity of the Layer Mask if you find this effect too virtual. Finally, save the image file to complete how to make pink and white skin in Photoshop.
How to make skin white and pink in Photoshop by using Channel Mixer
In addition to how to make skin white and pink in Photoshop by using LAB Color, we also have a way to make skin white and pink in Photoshop with Channel Mixer through the following steps:

Step 1: Open the photo that needs to be whitened in Photoshop. In the Adjustment layer, on the right side of the screen, select Channel Mixer.
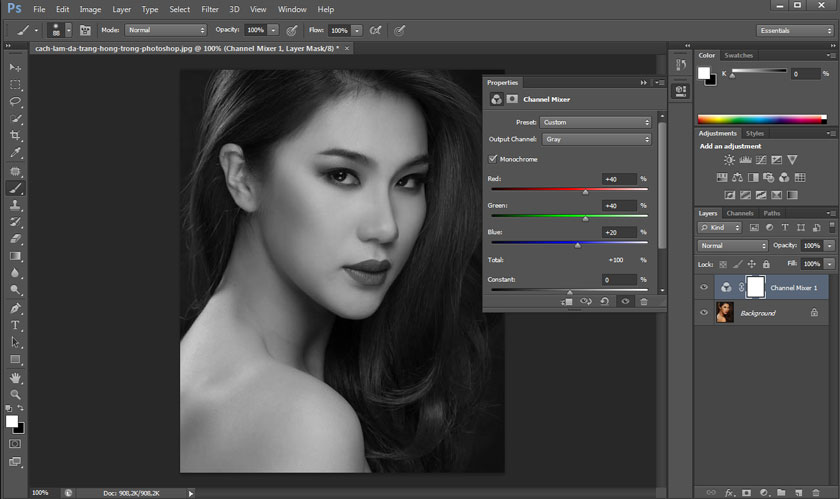
Step 2: At the Channel Mixer options panel that appears, select Monochrome, your image will convert to black and white.
Step 3: With the new Channel Mixer layer, press Ctrl+J twice to duplicate this layer twice into 2 new layers, then turn those 2 layers off. Then select the original Channel Mixer layer and customize the parameters in the options panel. If you want your photo to be a bit brighter, then reduce the Opacity to around 15%-20%.
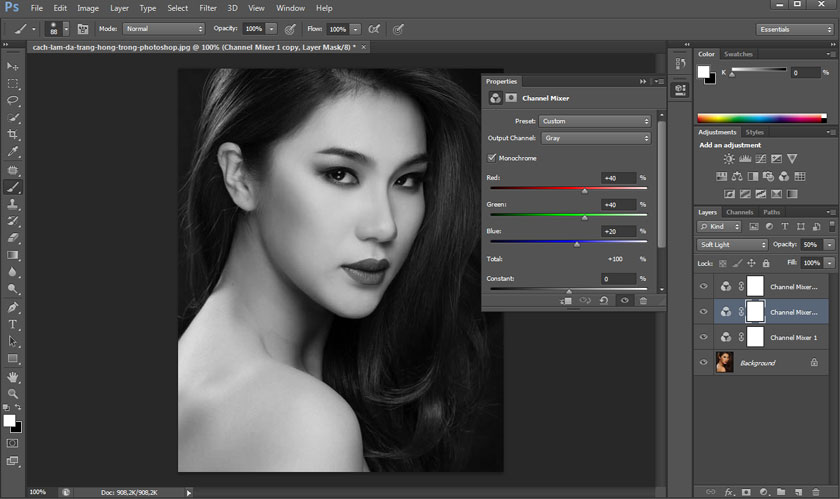
Step 4: Select Channel Mixer 1 just created, then select Blending Mode for this layer as Screen. With this blending mode, reduce the opacity to about 20 - 30% to reduce the brightness of the image. Open the Channel Mixer options panel, adjust the brightness and darkness by adjusting the parameters in the panel.

Step 5: Open Channel Mixer 2 then change Blending Mode to Soft Light. With this blending mode, reduce the Opacity to about 30% - 50% so that your image is brighter and has more contrast than the original image.
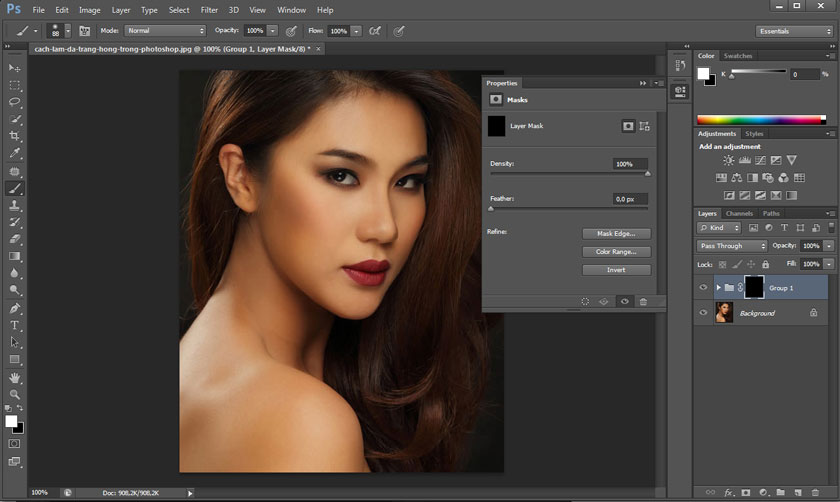
Step 6: Group the 3 Channel Mixer layers, then add a black layer mask to this group. Next, use a white Brush like the way to make skin pink and white in Photoshop above to paint in the skin area to make it pink and white. If you feel the skin area is a bit too white, you can reduce the Opacity to best suit your wishes.
Then, save the photo, and you've completed how to make skin white and pink in Photoshop using Channel Mixer.
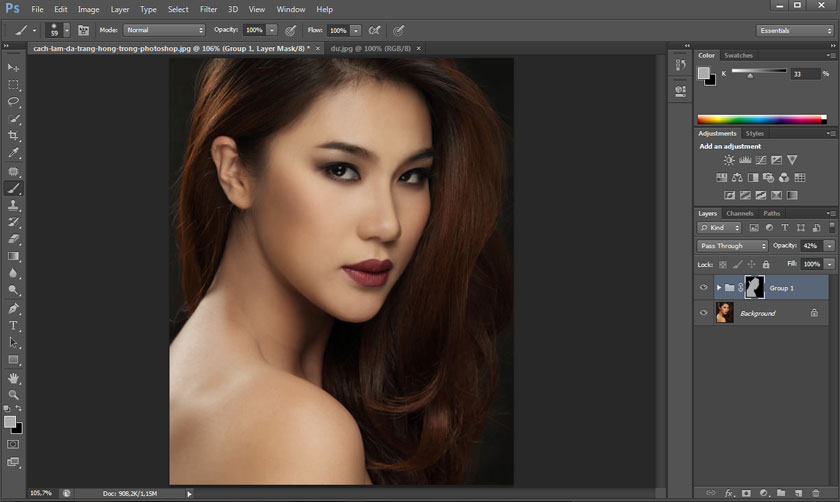
Here are two simple ways to create pink skin in Photoshop, which can help you "makeup" your character in Photoshop. SaDesign hope the above sharing be helpful to everyone.


VIP Products


Best Selling Products
Genuine Cheap Canva Pro
39 USD
MidJourney Account
29 USD
Genuine Adobe Illustrator account
99 USD
Upgrade Duolingo Super
29 USD
Upgrade genuine Capture One account
120 USD
Windows 10 & 11 Pro Key
36 USD
Autodesk All App Account Copyright
120 USD
Copyright Adobe Lightroom Account
59 USD
Upgrade Genuine Office 365
49 USD
Freepik Premium Account
59 USD
Capcut Pro 1 Year
39 USD
Plugin Retouch4me
69 USD
Adobe Photoshop Copyright - Full App
120 USD
Adobe Premiere Pro Account
99 USD
ChatGPT Plus Account (GPT-4)
16 USD