Turn a Photo into a Vintage image Security Camera Image
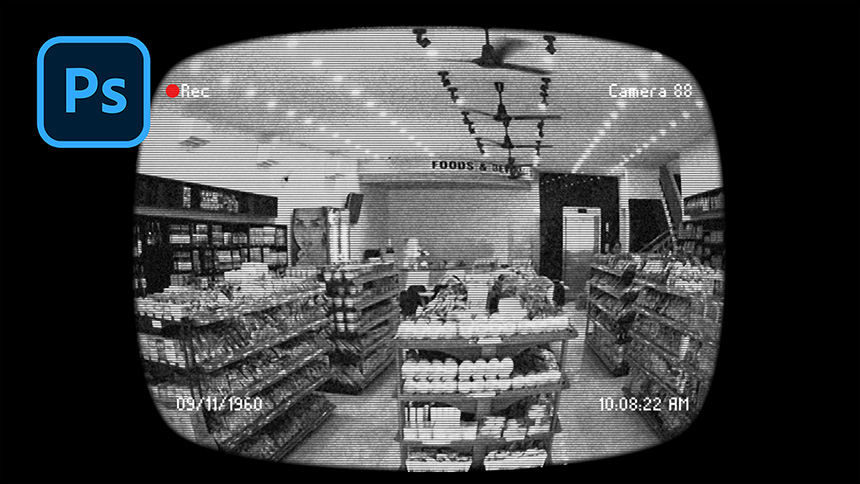
Is it difficult to fake a security camera photo? No, let's follow this tutorial to understand this technique.
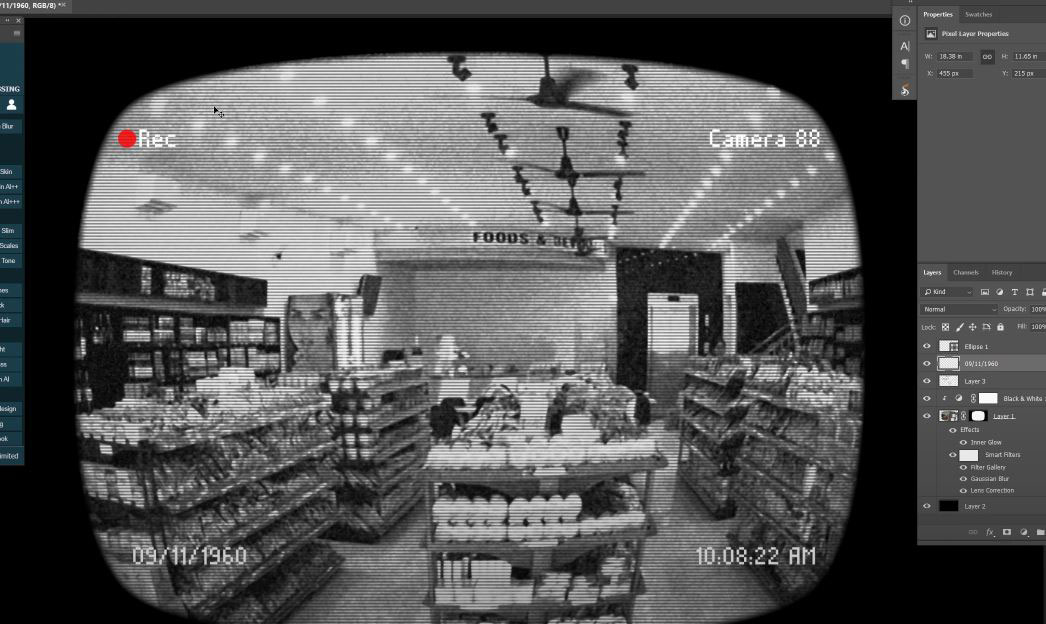
Here you can download all the stock of this video in the link above description. I have a grocery store image and a background layer of a TV screen shape.
(1). Let's unlock the background layer, place it on top and reduce the opacity to 50% so we can see the image below

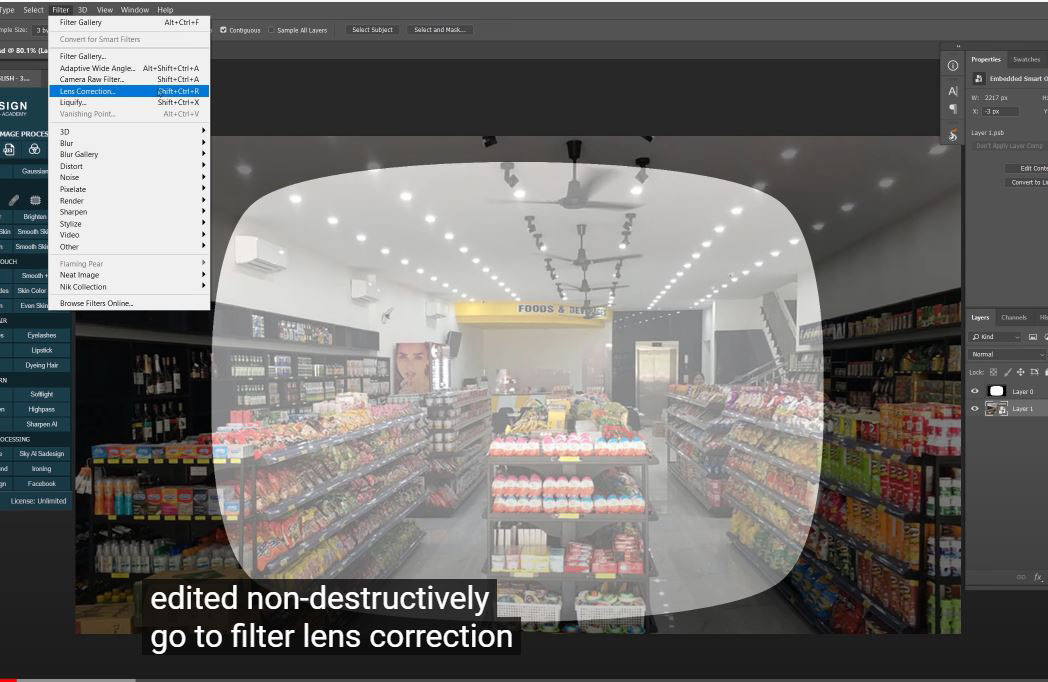
(2). Convert layer 1 to smart object, so it can be edited without being destroyed.
Go to Filter > Len Correction > go to Custom tab, set distortion removal to -50,
Ratio 80%, number of textures -100 and midpoint is 24
(3). Increase the opacity of the top layer to 100, go to Window > Channels > we will select the RGB channel by holding CTRL and clicking on it. Then put it on the mask of layer 1.

(4).Create a new layer, place it below layer 1. Fill it with black by pressing ALT or OPTION + Delete. Before that, make sure the foreground color is black.

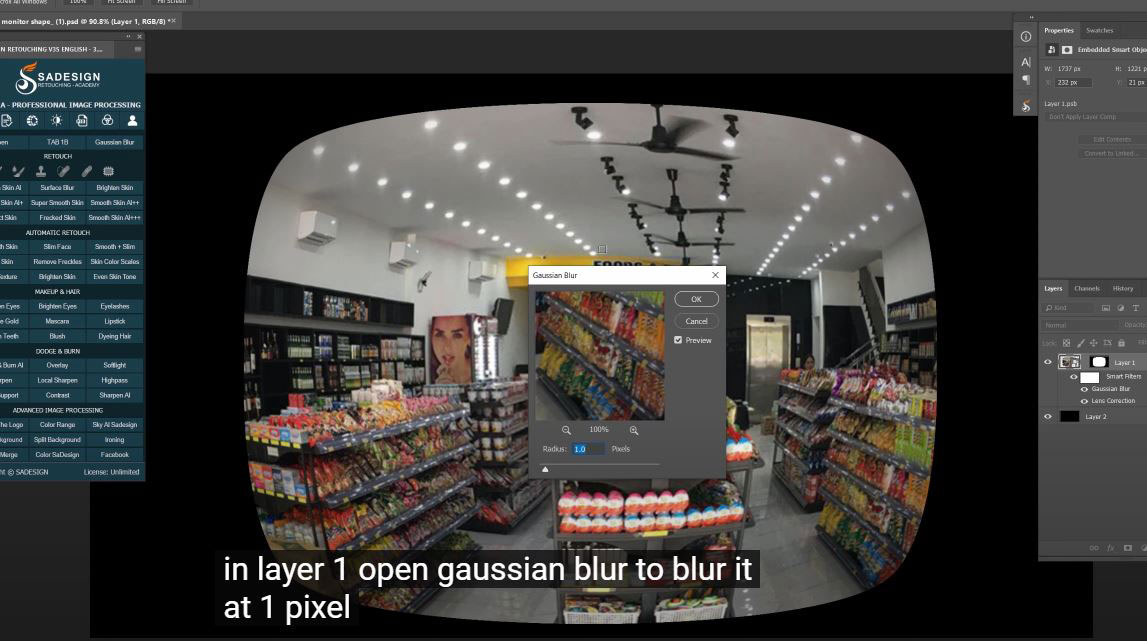
(5).
In layer 1, open Gaussian Blur to blur it at 1 pixel
Click the fx icon and select Blending Options, select "inside light" and OK
(6). Add particles to it, go to Filters > Filters Collection > select the particle filter in the textures folder.
Strength 40
Contrast 40
Seed Type: Clumped
Remove all of its colors by clicking the adjustment icon and choosing Black and White.

(7). Clipping mask it to layer 1 with keyboard shortcut CTRL + ALT + G for Win or CMD + OPTION + G for MAC
Create a new layer, fill it with 50% gray.

(8).We'll add some lines to it using a Filter. Go to Filters > Filters Collection > open outline folder and select Halftone swatch, under Pattern Type make sure Line is selected

(9). Change normal to overlay in blend mode.
Do it. It's almost like a security camera photo.
Move to the Channels tab, if you don't see this Channels tab here. To open it, go to Window > select Channels.
In this tab, hold CTRL and click RGB to make its selection.
Press CTRL + SHIFT + I or CMD + SHIFT + I to invert the selection. And delete

(10).Return to the layers tab. Adjust layer 3 opacity to 80%
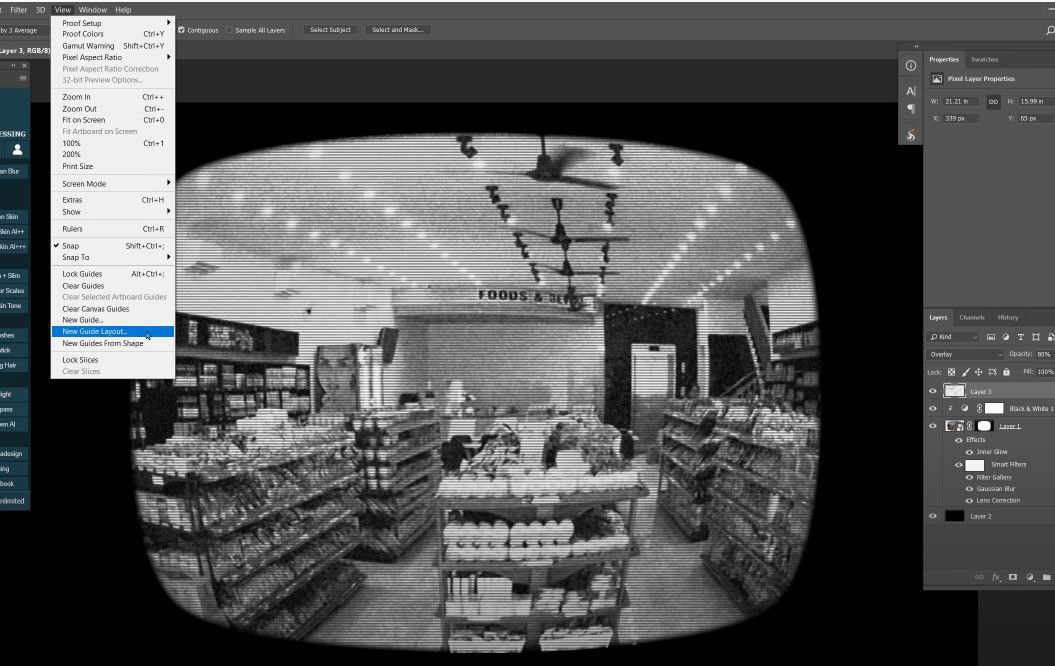
Next, we will add some information to it like time, location, etc. Go to View > New Guide Layout > uncheck the margin box if it's checked.
(11). Select the text tool and choose your font, making sure it's not a fancy font. Just use a basic.
The guide lines here help us align the text.
Duplicate it with CTRL + J, move the copied layer to another corner and change the text.
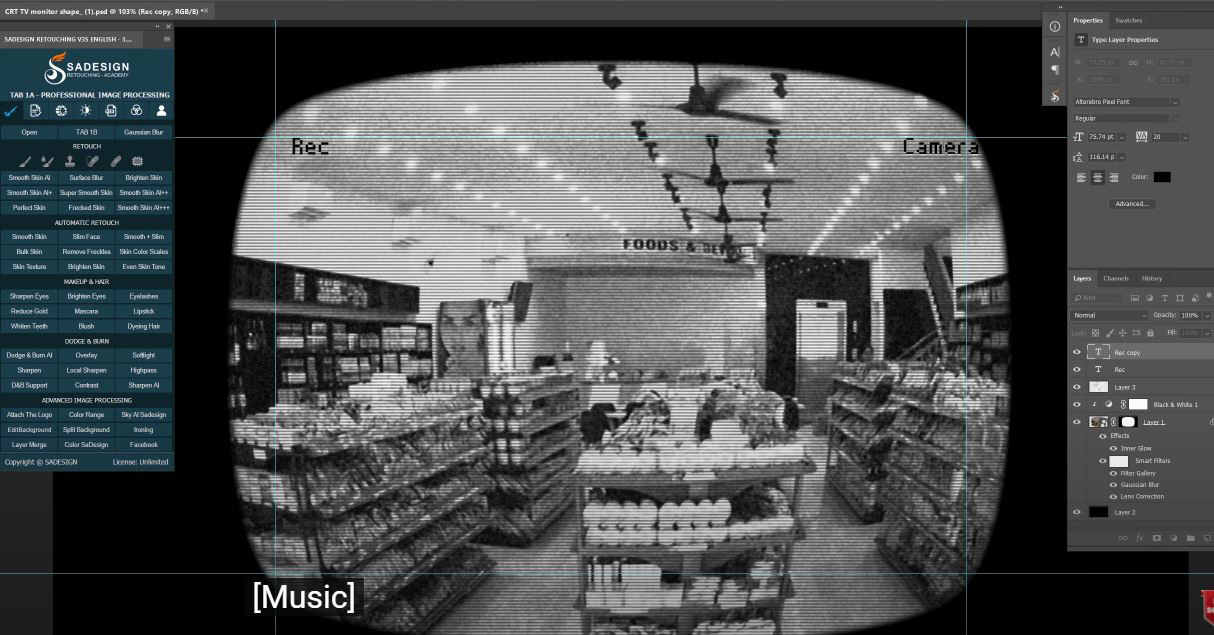
(12). Do the same things for the rest of the information (time and date).
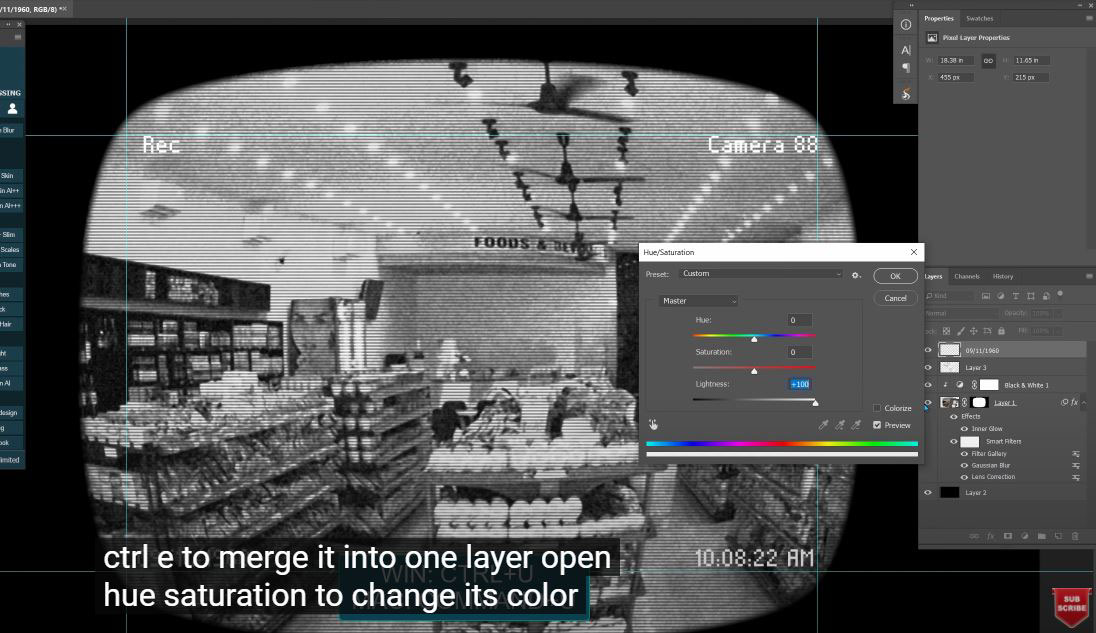
Once you are done. Select all 4 text layers and press CTRL + E to merge into 1 layer.
(13). Next, we will create a red dotted circle next to the text Rec.
Close zoom, select Ellipse tool, choose red color in Fill. Hold down the Shift key and draw a circle next to the text. Then Enter. Reduce opacity to 80%
Let's blur these texts a bit with Gaussian Blur.
That's all for this tutorial, hope that you enjoy this video. If you like it, hit the like button and subscribe. Thanks very much!
REGISTER FOR FREE PHOTOSHOP LEARNING
============================
The most powerful Retouch tool processor
DOWNLOAD:
✅ SADESIGN PANEL ENGLISH: https://sadesign.ai/retouching/
✅ SADESIGN PANEL VIETNAM: https://www.retouching.vn/