Best Selling Products

Copyright Adobe Lightroom Account
59 USD

Freepik Premium Account
59 USD

MidJourney Account
29 USD

Plugin Retouch4me
69 USD

Genuine Cheap Canva Pro
39 USD

Capcut Pro 1 Year
39 USD

Upgrade Genuine Office 365
49 USD

Windows 10 & 11 Pro Key
36 USD

Autodesk All App Account Copyright
120 USD

Adobe Photoshop Copyright - Full App
120 USD

Upgrade genuine Capture One account
120 USD

Adobe Premiere Pro Account
99 USD

Upgrade Duolingo Super
29 USD

ChatGPT Plus Account (GPT-4)
16 USD

Genuine Adobe Illustrator account
99 USD
4 simple and easy ways to adjust skin color in Photoshop
Nội dung
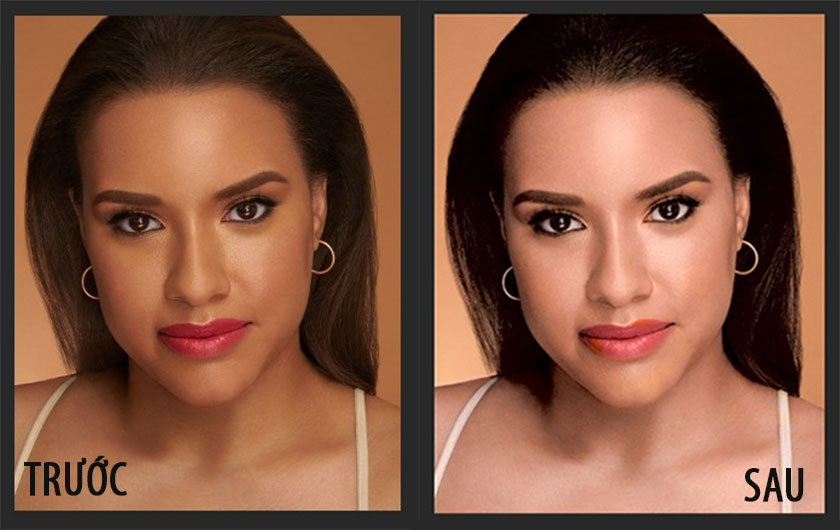
Skin color correction is an extremely useful feature in Photoshop that helps highlight the subject's face, contributing to create a more vivid and attractive photo. Refer to SADESIGN's following 4 simple and easy ways to adjust skin color in Photoshop to apply to editing your characters!

Skin color correction is an extremely useful feature in Photoshop that helps highlight the subject's face, contributing to create a more vivid and attractive photo. Refer to SADESIGN's following 4 simple and easy ways to adjust skin color in Photoshop to apply to editing your characters!
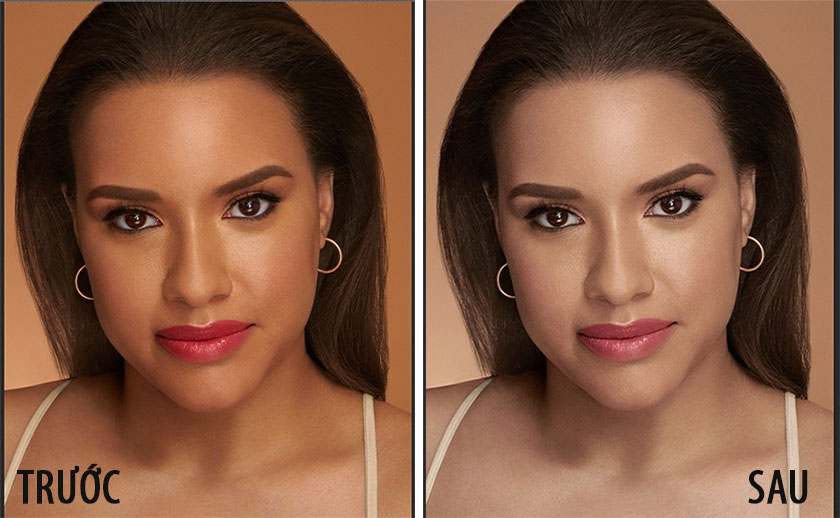
1. How to adjust skin color in Photoshop CS6 with LAB Color
To edit skin color with LAB Color we need to follow these steps:
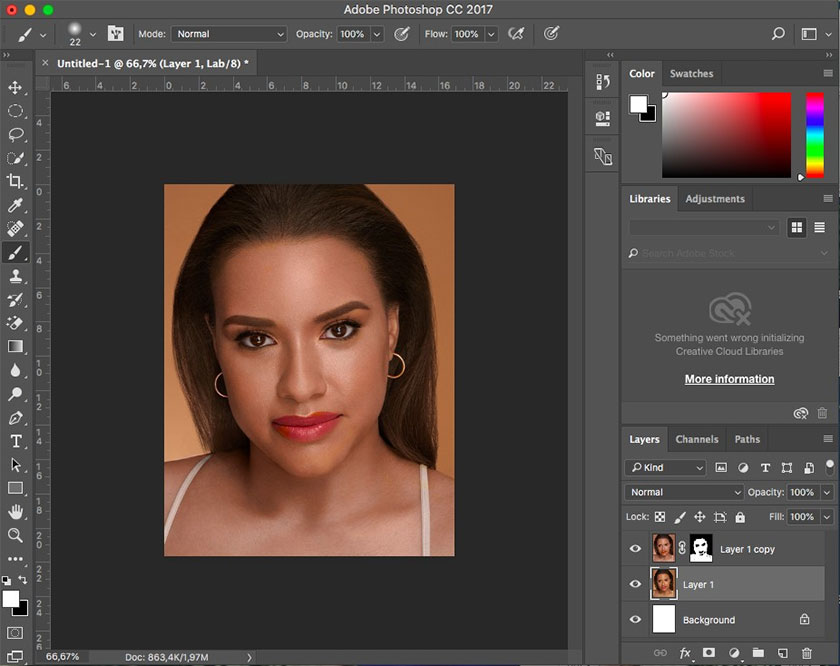
● Step 1: Open the image in Photoshop -> press Ctrl + J to duplicate the layer.
● Step 2: In the Image section of the new layer -> select Mode -> select Lab Color -> click Don't Flatten. Converting the new layer's color mode to LAB Color helps to create 3 different color channels: Lightness channel (light), a channel (red and green) and b channel (yellow and blue).
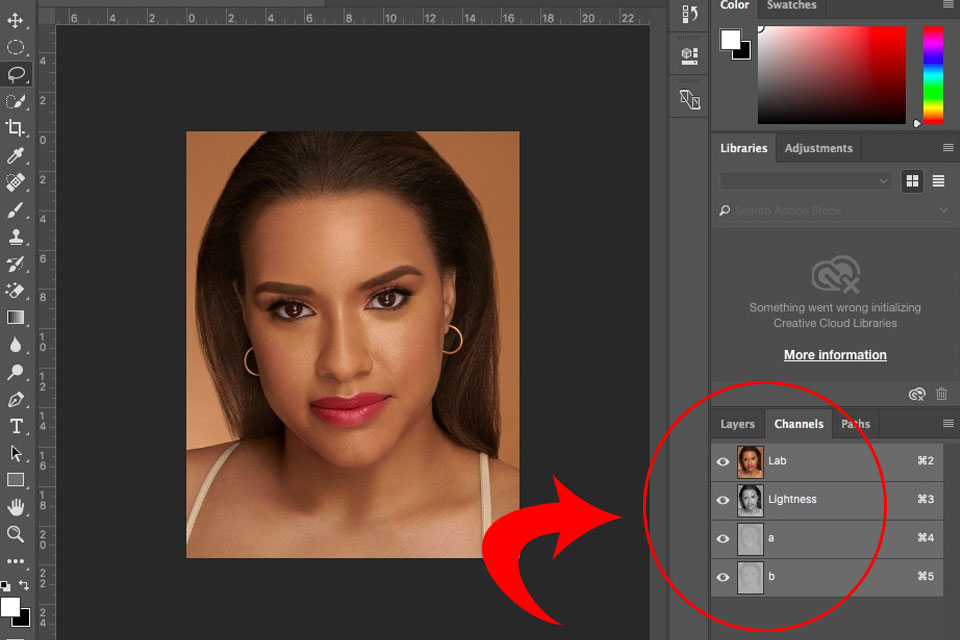
● Step 3: Open the Channels panel by going to Window -> Select Channels. Here we will work with channels a and b.
At channel a, press Ctrl + A to select the entire image -> Press Ctrl + C to copy and switch to channel b -> Press Ctrl + V to paste -> Cancel the selection by pressing Ctrl + D. This helps remove yellow from channel b and replace it with red from channel a.
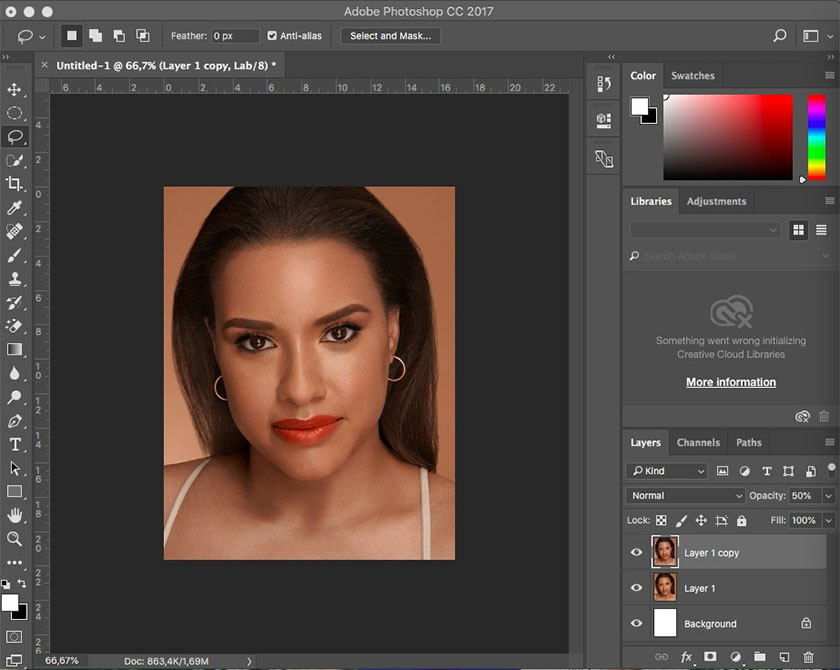
● Step 4: Returning to the Layers panel, we will see that the color on the layer has changed, but the image is red and a bit dark. To solve this problem, you need to reduce the opacity so that the image is slightly blurred to the appropriate level.
● Step 5: To adjust the color on the skin, you need to create a Layer Mask by holding Alt -> select Add Layer Mask under the Layers bar -> use the Brush tool with a Hardness of 0% to get skin color.
● Step 6: If the skin color is still not suitable, you can reduce the transparency of the layer to make the skin natural and rosy.
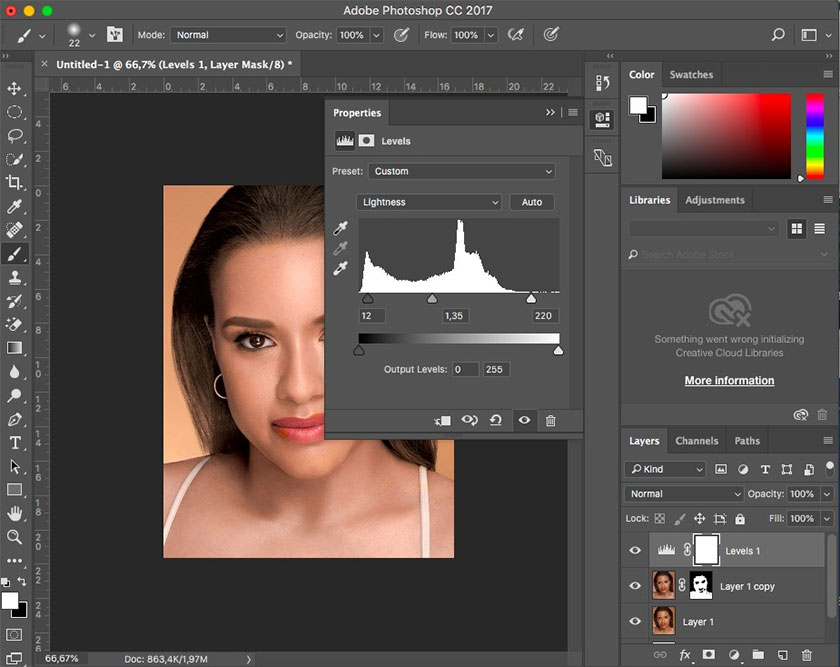
● Step 7: Create a new Adjustment Layer -> select Curves or Levels to adjust light and dark, as well as create contrast for the image -> group 2 edited layers by pressing Ctrl + G and turn on/ turn off layers to compare images before and after editing.

If you want to make other edits, you should change the color mode to RGB Color to make the editing process easier.
2. Adjust skin color in Photoshop CS6 using Channel Mixer
In addition to the above method, to edit skin color in Photoshop you can use Channel Mixer. This is considered a delicate method, helping the character's skin become brighter and more contrasting:
● Step 1: First you need to create a new Adjustment layer by selecting Channel Mixer from the list of options at the end screen.
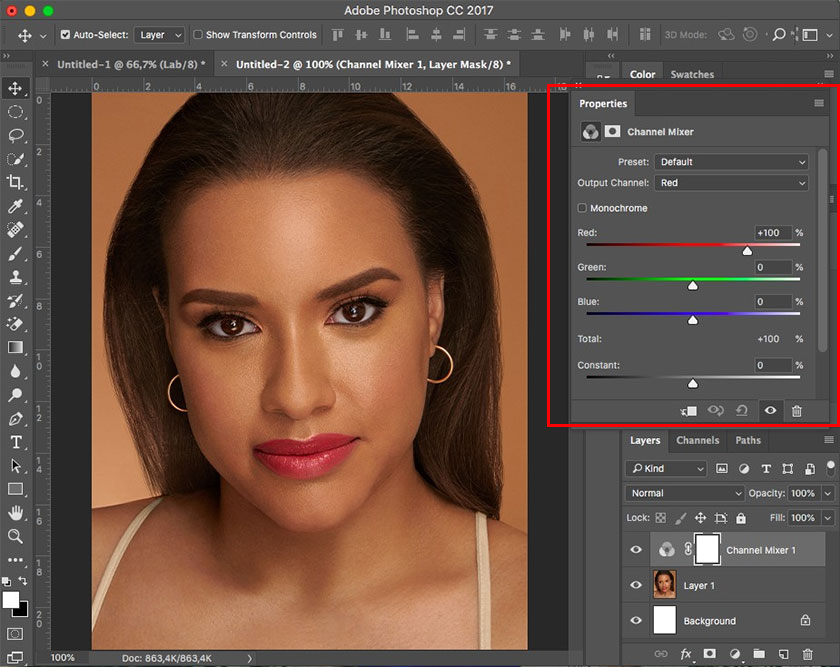
● Step 2: In the Channel Mixer options panel -> click on the Monochrome box to convert the image to black and white.
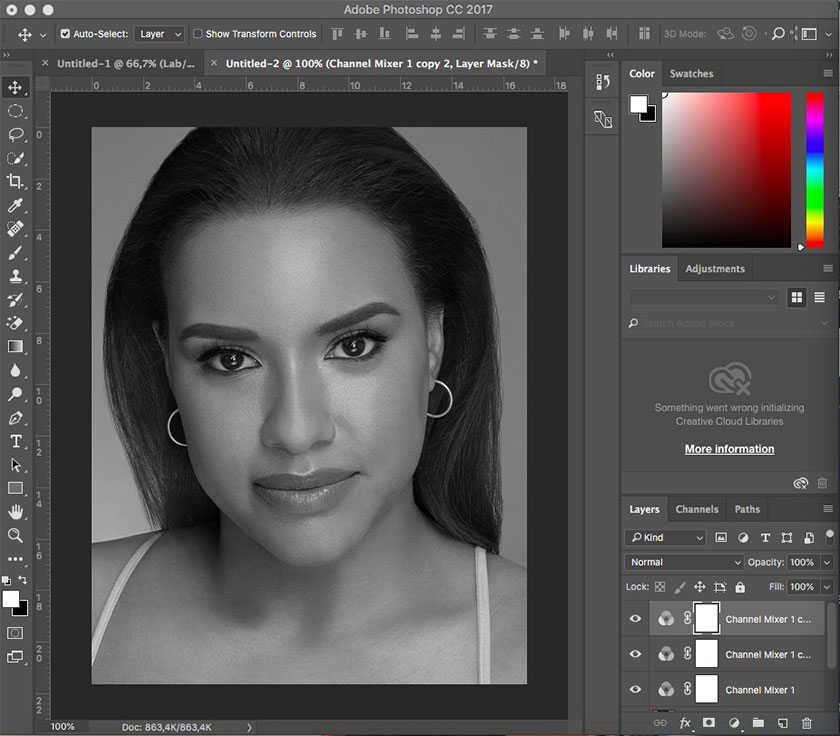
● Step 3: Duplicate the Channel Mixer layer by pressing Ctrl+J twice, then turn them off. Select the original Channel Mixer layer to customize the parameters. If you want a brighter image, reduce the opacity to about 15% - 20%.
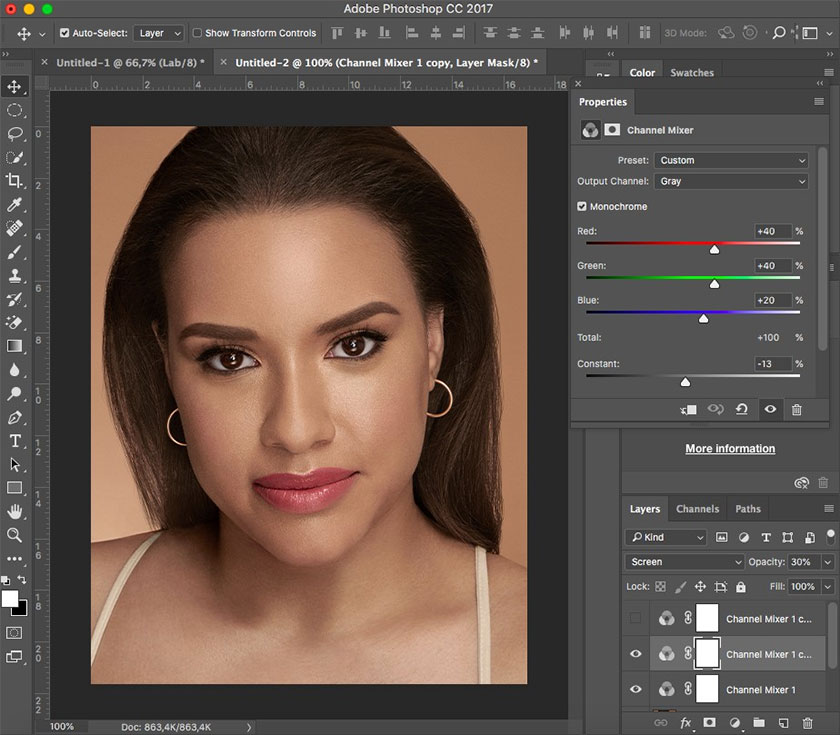
● Step 4: Click on the Channel Mixer 1 layer and select Blending Mode as Screen. With blending mode, reduce the opacity to about 20% - 30% to reduce the brightness of the image. In the Channel Mixer options panel, adjust the brightness and darkness with the parameters in the table. This is also the time when you can whiten skin in Photoshop CS6.
● Step 5: Open the Channel Mixer 2 layer and select Blending Mode as Soft Light. With blending mode, reduce the opacity to about 30%-50% to make the image brighter and increase the contrast compared to the original image.
● Step 6: Merge 3 Channel Mixer layers together, then add a black layer mask to this merged group -> Use the white Brush tool to paint in the skin area where you want to keep the edited color.
.jpg)
If you find the skin area is too white, reduce the opacity until the skin color is as bright as desired. This helps create beautiful, more natural portraits.
3. How to adjust skin color in Photoshop online
If you don't want to spend a lot of time editing skin with the above tools, you can completely whiten your skin with Photoshop online very simply as follows:
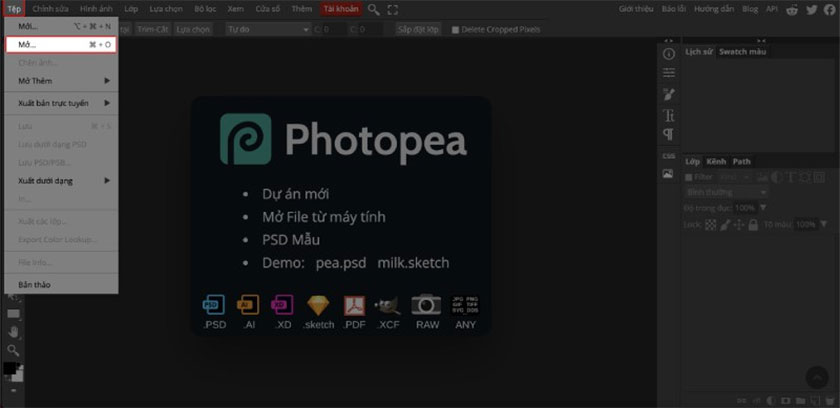
● Step 1: You need to access the Photoshop online site
● Step 2: Open the photo you want to edit by pressing Ctrl + O or select File -> select Open.
● Step 3: Duplicate the layer by pressing Ctrl + J to perform editing operations without affecting the original image.
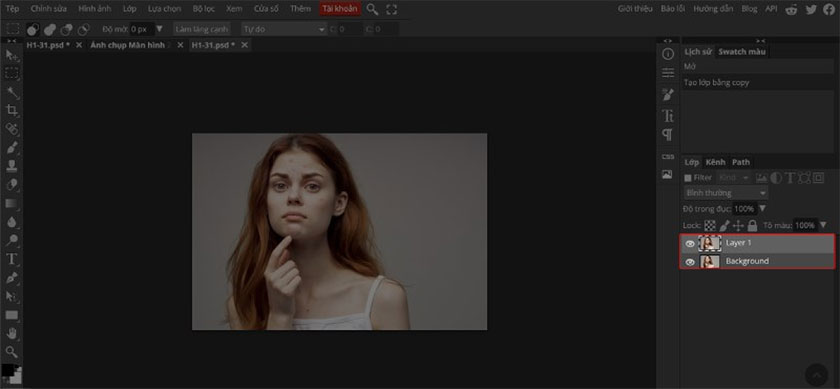
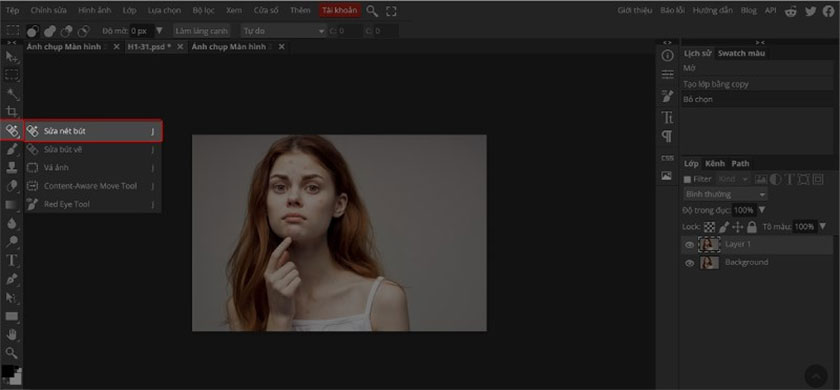
● Step 4: Press the J key to use the Pen Stroke Correction tool to erase acne on the face (if any).
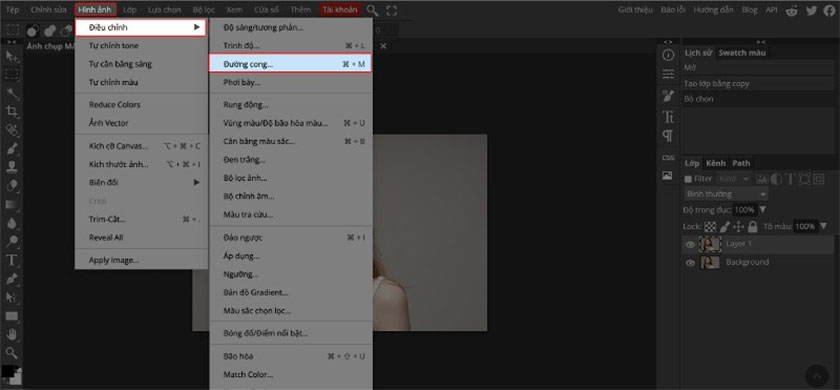
● Step 5: Proceed to brighten the face by pressing the key combination Ctrl + M or selecting Image -> Adjustments -> Curves.
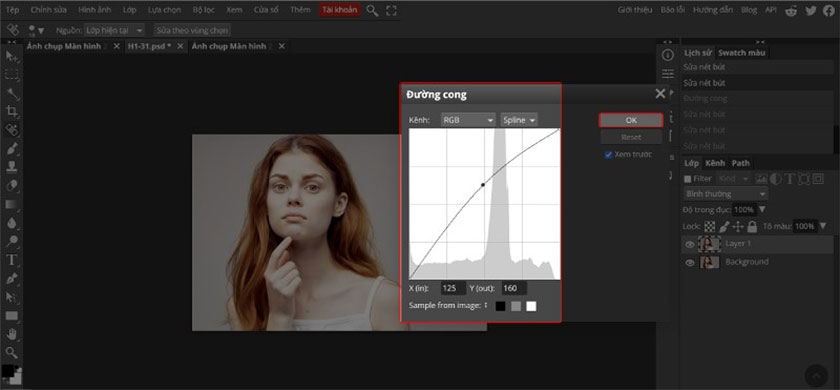
● Step 6: In the Curve chart, adjust the brightness and contrast on the chart suitably -> click OK.
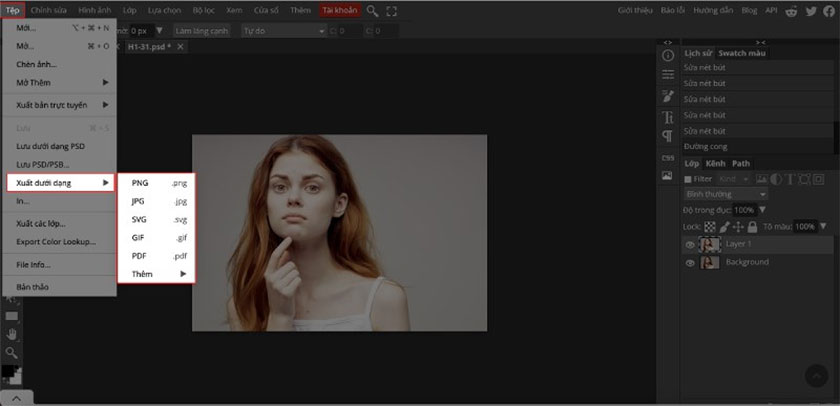
● Step 7: To save the edited photo to your computer, select File -> Export as -> Select the format you want to save and you're done.
4. How to adjust color selection in Photoshop
In addition to the above 3 ways, you can completely adjust color in Photoshop by choosing colors. Specifically, after selecting the object that needs to be edited, you will see a border surrounding the selection area.
You can change the color by applying the menu: Image -> Adjustment
For example:
● To make continuous color changes, click on Image -> Adjustment -> Color Balance
● Change the selection to black or white in Image by selecting Adjustments -> Black and White
● To change color and adjust saturation, select Image -> Adjustments -> Hue/Saturation
● If you want to change brightness or adjust contrast in a photo, choose Image -> Adjustments -> Brightness/Contrast.
Hopefully the above suggestions will help you choose the most suitable way to adjust skin color in Photoshop. Don't forget to follow SADESIGN to update many other useful shares in designing and editing photos with Photoshop software!


VIP Products


Best Selling Products
Copyright Adobe Lightroom Account
59 USD
Freepik Premium Account
59 USD
MidJourney Account
29 USD
Plugin Retouch4me
69 USD
Genuine Cheap Canva Pro
39 USD
Capcut Pro 1 Year
39 USD
Upgrade Genuine Office 365
49 USD
Windows 10 & 11 Pro Key
36 USD
Autodesk All App Account Copyright
120 USD
Adobe Photoshop Copyright - Full App
120 USD
Upgrade genuine Capture One account
120 USD
Adobe Premiere Pro Account
99 USD
Upgrade Duolingo Super
29 USD
ChatGPT Plus Account (GPT-4)
16 USD
Genuine Adobe Illustrator account
99 USD