Best Selling Products
Basic Photoshop Tutorial: From A-Z for Beginners
Explore basic Photoshop tutorials for beginners. Learn basic operations, important tools, and optimal tips to help you master Photoshop software easily.
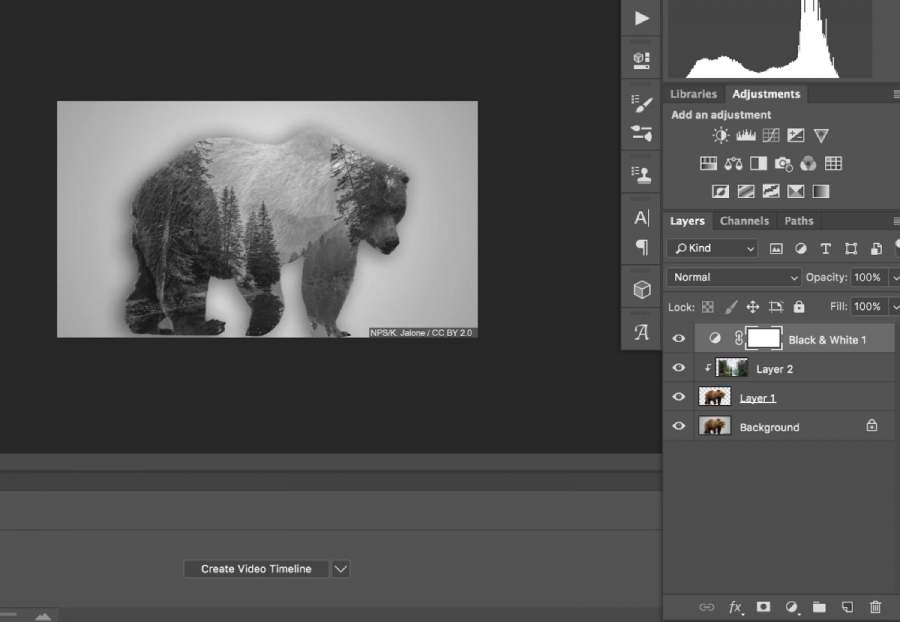
Photoshop is basically the leading photo editing software, indispensable in the fields of graphic design and photography. However, for beginners, getting acquainted with this software can be difficult. In the following article, Sadesign will guide you through basic Photoshop operations, helping you master this tool step by step in the easiest and most effective way.
1. Photoshop Basics: Understanding the Interface
Photoshop is basically a powerful software with a flexible interface designed to support users in optimal image editing. Understanding the components in the interface is an important first step to familiarizing and using the software effectively.
.jpg)
1.1 Overview of the basic Photoshop interface
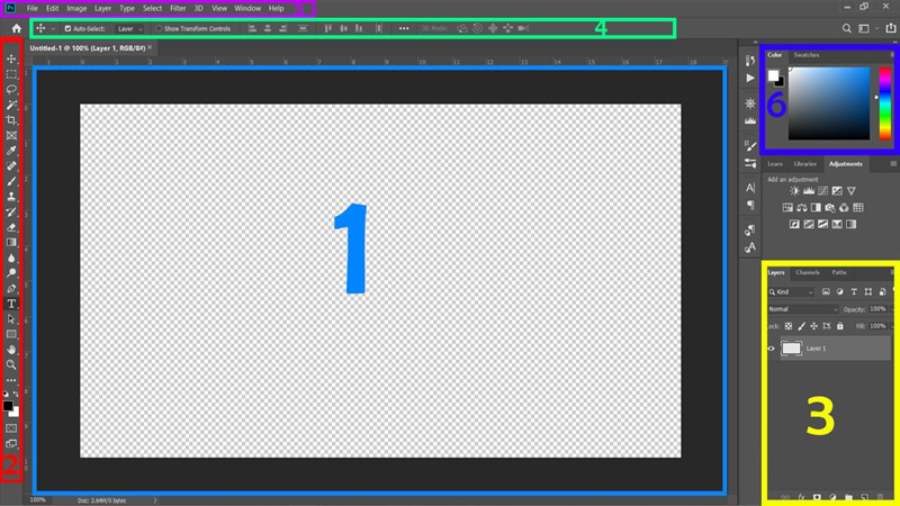
The basic Photoshop working interface is divided into main areas:
- Toolbar: Located on the left side of the screen, it contains basic tools such as Move, Brush, Text, and Crop. This is the area you use most often for editing.
- Top Menu: Located at the top of the screen, provides access to functions such as File, Edit, Image, Layer, and Filter.
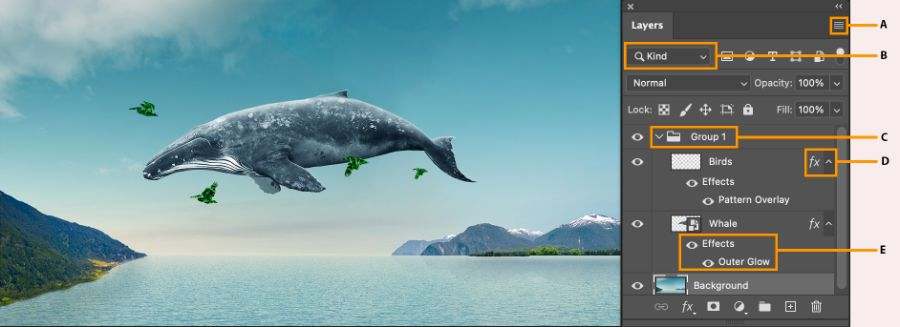
- Layers Panel: Located on the right, this is where you manage layers, layer groups, and effects. Layers act as separate “layers,” allowing you to edit individual parts of an image without affecting the entire design.
- Canvas: This is the basic central Photoshop area where you work directly on the image.
- Properties Panel: Photoshop basically provides properties related to the currently selected tool or layer.
1.2 How to Customize Basic Photoshop Interface
To optimize your basic Photoshop experience, you can customize the interface to your needs:
Choose the right basic Photoshop interface: Go to Window > Workspace , select "Essentials (Default)" to use the basic interface. If needed, you can switch to other workspaces such as Graphics and Web, Photography or Motion.
Rearrange panels in Photoshop: Drag and drop panels to arrange them as you like. Close unused panels to expand your workspace.
Customize the basic Photoshop toolbar: Right-click on the Toolbar, select Edit Toolbar to add or remove tools.
Save your basic Photoshop custom layout: Once finished, go to Window > Workspace > New Workspace to save your layout.
2. Tips to Get Familiar with the Basic Photoshop Interface
Learn tips to get familiar with the basic Photoshop interface specifically as follows:
- Start by exploring the tools in the Toolbar. Hover over each icon to see its name and function.
- Use the Tab key combination to hide or show panels, helping to focus more on the work area.
- Spend some time practicing basic Photoshop operations on sample image files to memorize the location and function of areas in the interface.
Understanding the interface is an important step towards mastering the basics of Photoshop. Once you are familiar with the layout and tools, you will easily move on to more advanced editing operations.
3. Important Basic Photoshop Tools
Learn and practice using basic Photoshop tools for precise manipulation:
3.1 Selection Tools
Basic Photoshop with Selection Tools helps you to select areas to edit or move:
- Marquee Tool: Select a rectangular or elliptical area.
- Lasso Tool: Select freehand areas along hand-drawn lines.
- Quick Selection Tool: Automatically select areas based on similar colors.
3.2 Basic Photoshop tools
- Move Tool: Move objects on the canvas.
- Crop Tool: Crop the image to the desired size.
- Brush Tool: Draw or paint on the image with custom definition.
3.3 Basic Photoshop tools for working with text
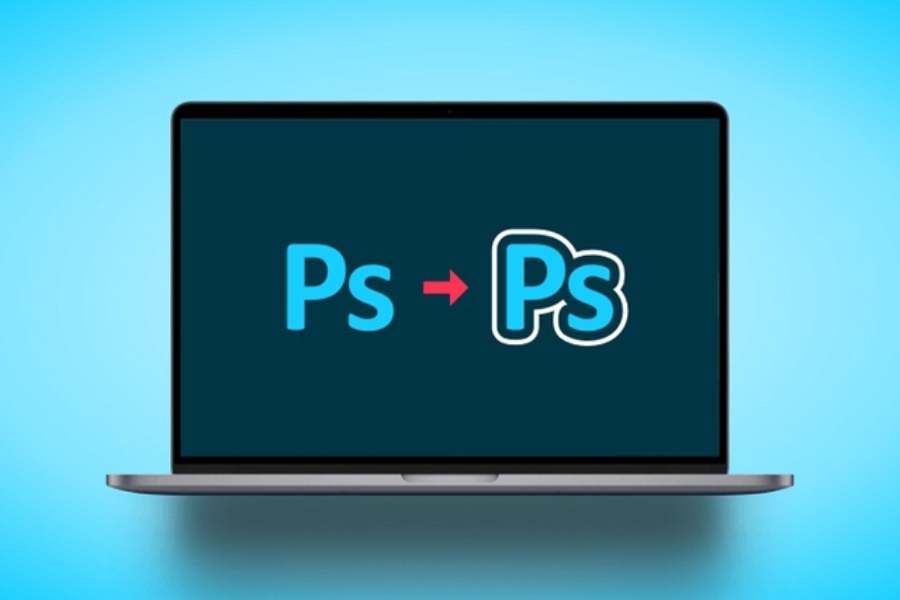
The Text Tool in Photoshop basically allows you to add and edit text. Some commonly used options:
- Choose font, size, color.
- Align text and add basic Photoshop effects like shadows or borders.
4. Basic Photoshop Steps For Beginners
Basic Photoshop is a powerful tool in the field of image design and editing. Especially suitable for both beginners and basic Photoshop experts.
4.1 Step 1: Create or open a new file
- Select File > New to create a new file, enter the desired size and resolution.
- Or select File > Open to open an existing image file.
4.2 Step 2: Use layers to manage photos
Layers are an important element in basic Photoshop:
- Each element of the image is separated into its own layer, allowing for independent editing.
- Use the Create New Layer button to add a new layer.
- Can hide/show or change layer order easily.
4.3 Step 3: Edit color and light
- Go to Image > Adjustments , use options like Brightness/Contrast, Hue/Saturation for basic Photoshop lighting and color adjustments.
- Use the Gradient Tool in Photoshop to create soft color transitions.
5. Tips to Learn Basic Photoshop Quickly and Effectively
Photoshop is basically a powerful and popular photo editing tool. However, to use it effectively, you need to master the basic skills.
5.1 Get familiar with basic Photoshop with shortcuts
First, familiarize yourself with the software interface, focusing on the main tools. Use keyboard shortcuts to speed up your work:
- Ctrl + S: Save file.
- Ctrl + T: Resize object.
- Ctrl + Z: Undo the last action.
Learning how to use keyboard shortcuts will help you work faster and save time.
5.2 Practice basic Photoshop regularly
Learning the basics of Photoshop isn’t difficult if you put in the time. Start by editing simple photos, then gradually work your way up to more complex ones. Practice basic operations like cropping, color correction, and applying basic effects to get a feel for how the software works.
5.3 Refer to basic Photoshop design templates
Look at professionally designed products to learn about layout, color, and editing styles. Don’t forget to take advantage of free resources like video tutorials, industry blogs, or take online courses to improve your skills.
6. Common Mistakes When Doing Basic Photoshop
When starting to learn and work with basic Photoshop, users often encounter some common errors due to unfamiliarity with the software's interface and tools.
6.1 Forgetting to save files regularly
One of the common mistakes that many Photoshop beginners make is forgetting to save their files frequently while working. This can lead to the loss of important data if unexpected problems such as software crashes, power outages, or system failures occur.
To avoid this, users should form the habit of saving files periodically, preferably using the shortcut Ctrl+S (or Command+S on Mac) after each important editing step. In addition, using the "Save As" feature to create different versions of the file also helps reduce the risk of data loss and makes it easy to go back to previous steps if needed.
Making sure to store files in multiple secure locations, such as an external hard drive or cloud storage service, is also an effective data protection measure. Make it a habit to press Ctrl + S regularly.
6.2 Using the wrong layer
A common mistake that many beginners make when learning Photoshop is using layers incorrectly. Layers are an important part of Photoshop, helping users manage image elements easily and flexibly.
Without mastering how to use layers, users may end up editing the wrong object, losing control and making it difficult to process images.
To avoid this error, users need to pay attention to clearly naming each layer, using layer groups when necessary, and regularly checking which layer they are working on. Understanding and using layers correctly not only helps optimize the basic Photoshop editing process but also improves the quality of the final product.
6.3 File size is too large
In the process of learning and working with basic Photoshop , the problem of too large file size is a common error that many beginners often encounter. This not only makes it difficult to save files and share, but also reduces work efficiency.
Solution to Fix Too Large File Size
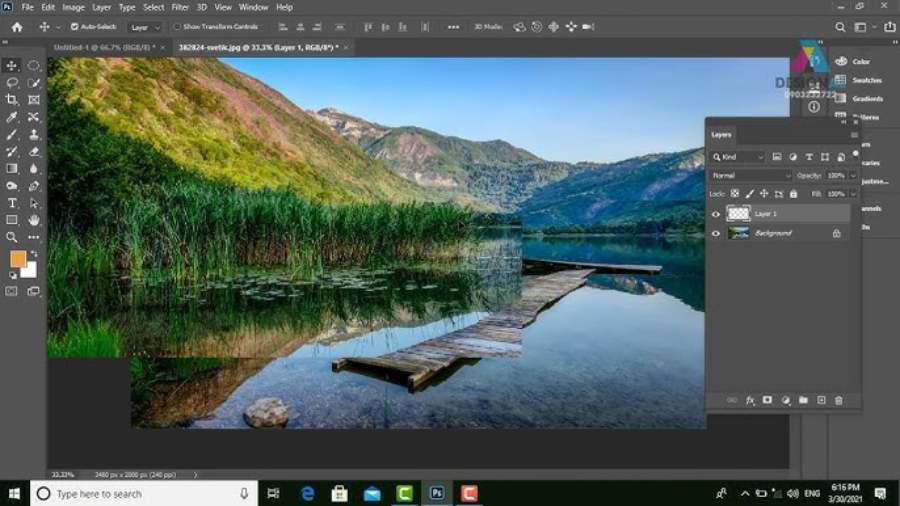
Check and Optimize Layers
- Delete unnecessary or hidden layers.
- Merge completed layers to reduce the number of layers.
- With Smart Objects, if no further editing is needed, convert them to regular layers by Rasterizing Layer .
Reduce Image Size and Resolution
- Use Image > Image Size to adjust the image size to suit your needs.
- If working on the web, reduce the resolution to 72 DPI instead of 300 DPI.
Use the Appropriate File Format
- When saving the file, choose JPEG or PNG format to compress the size.
- If you need to keep the PSD format, enable the File > Save As > Maximize Compatibility option to compress the file without losing necessary data.
Optimize Effects and Adjustment Layers
- Check and remove unnecessary effects or adjustment layers.
- Merge the effect layers when finished.
Save Web Optimized Files
- Use File > Export > Save for Web (Legacy) to reduce file size when publishing online.
Photos with multiple layers or effects will increase the file size. Combine unnecessary layers by selecting Merge Layers to optimize.
Conclude
Basic Photoshop is not too complicated if you understand how to use the interface, tools and basic editing operations. Through this article, hopefully you have understood the necessary things to start the journey to master Photoshop. Be patient and practice to gradually become a talented designer!


