Best Selling Products
Create Photo Effects With Splash Brush | SADESIGN
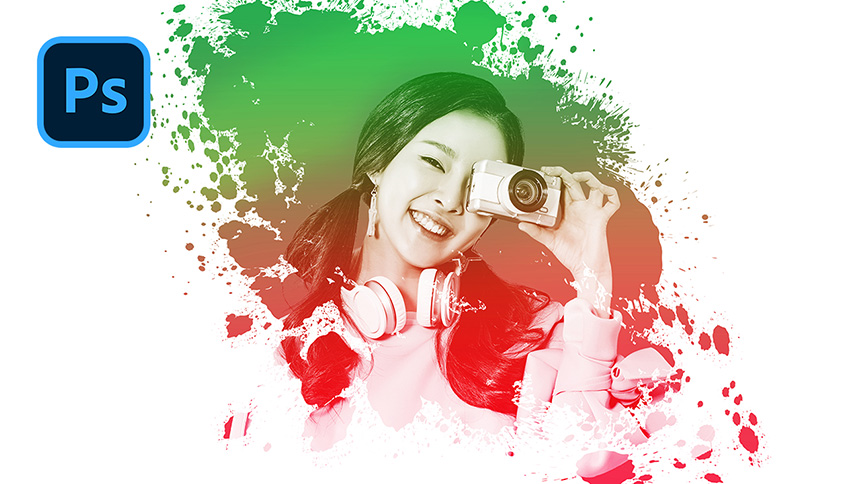
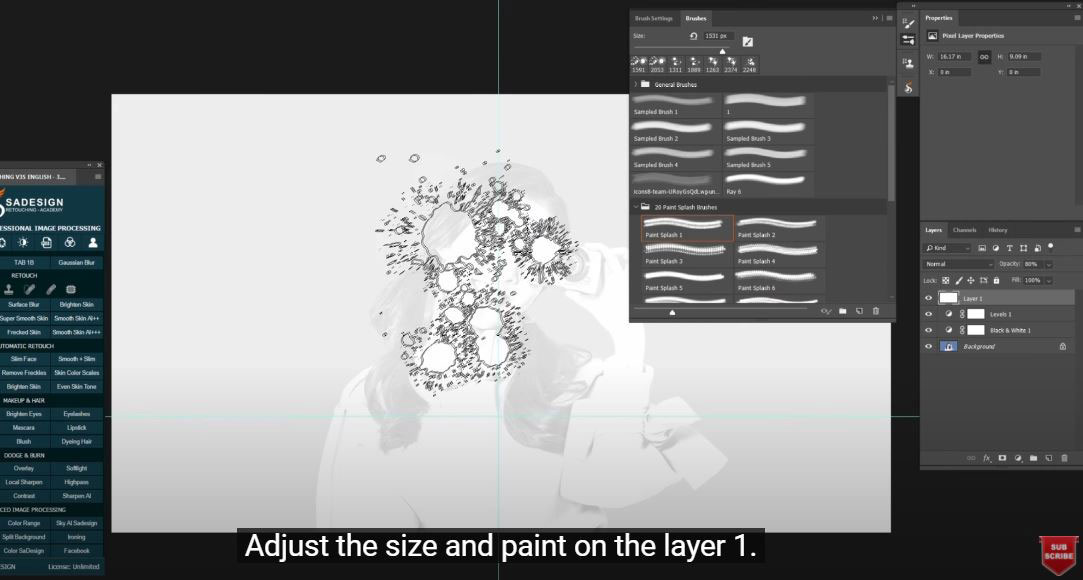
Hello friends, welcome back to SaDesign channel, in this tutorial, I will show you how to create photo effects with splash brush. Get started right away! First, change the image to black and white by right-clicking on the adjustment icon and choosing “Black and White”. In the preset box, change the default to “Maximum Black”. Create a “Level” and increase the black area even more. Then create a new layer, fill this new layer white with CTRL or CMD + Delete, reduce the opacity to 80%. Select the “Brush tool” (shortcut B), go to Window > Brushes > click on the top right corner and select import brush > Select “20 paint splash brushes”. In case you don't have the splash brush, I'll leave it in the description so you can download it whenever you want. 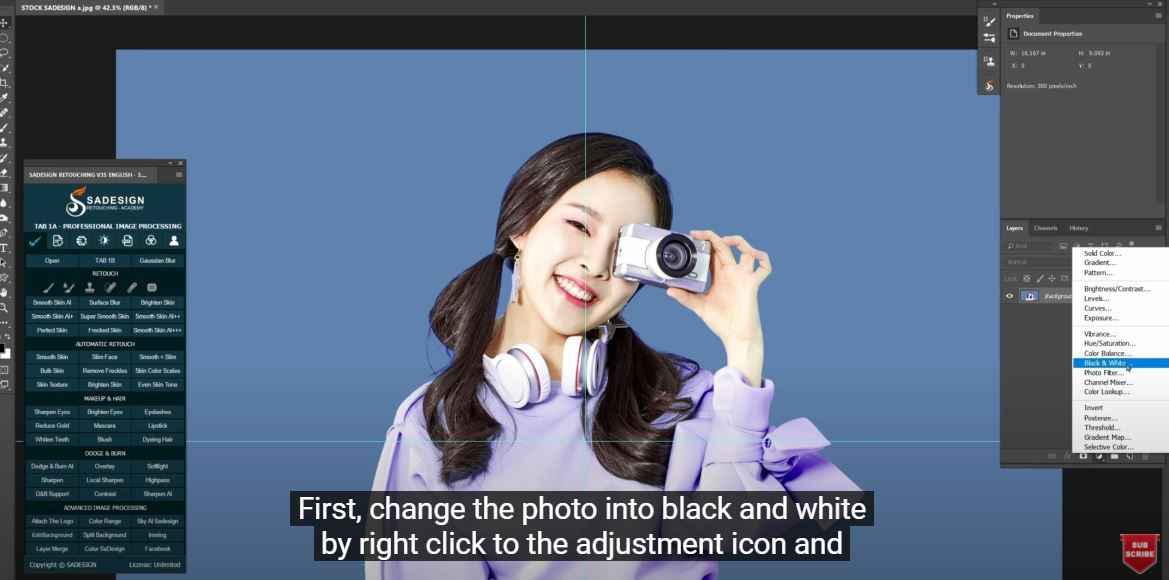 Now, open the splash brush folder and grab a splash brush. Adjust the size and fill on layer 1. Similarly, select the splash you like and fill. Use curly braces {} to increase or decrease the size of the brush while drawing. When you're done, create a new layer. Select Layer 1 and go to Select > Color Range > use the eyeropper tool and select all the brushes you painted. Increase the opacity until all brushes are selected.
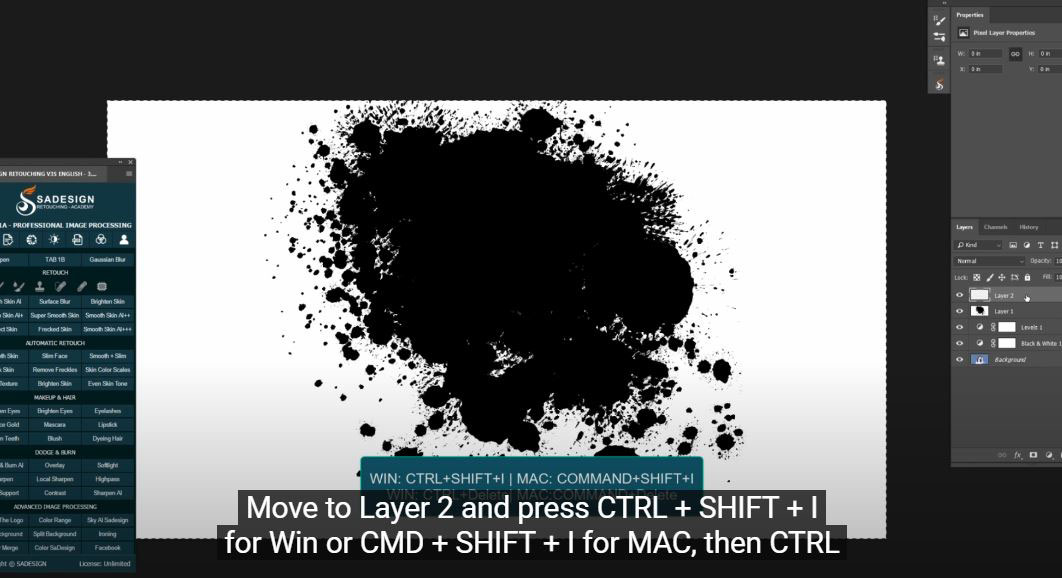
  Move to Layer 2 and press CTRL + SHIFT + I for Win or CMD + SHIFT + I for MAC, then press CTRL or CMD + Delete. Turn off Layer 1, now you can see the girl appear. You can delete class 1 now. Adjust the size of the brush layer slightly using CTRL or CMD + T.
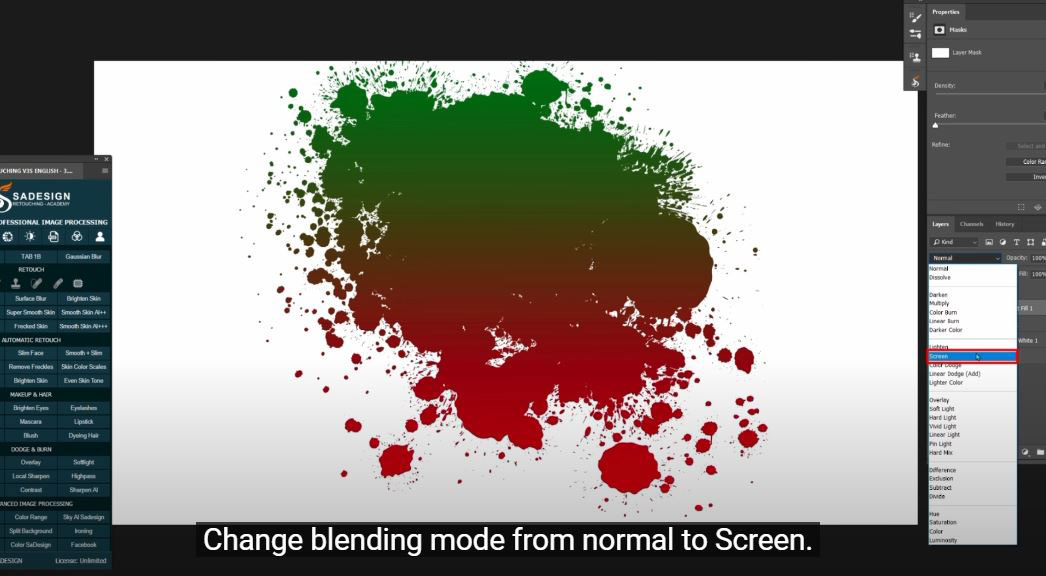
  Create a gradient layer under layer 2, double click on the gradient and choose the preset color you want. I would go with Red and Green. Change the blend mode from normal to Screen.
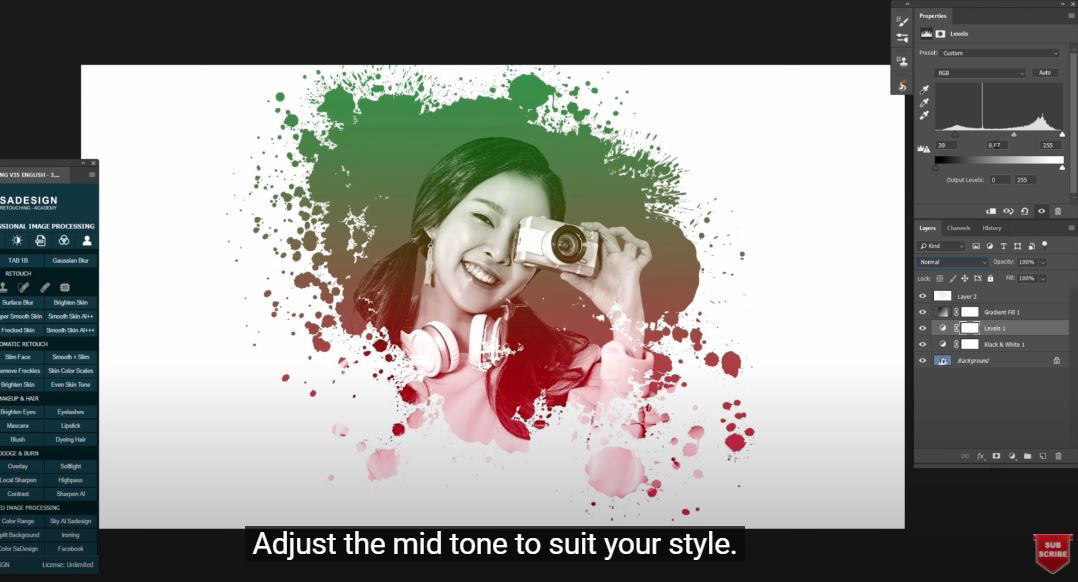
  In the "Levels" layer, increase the black to 39 to increase contrast. Adjust the mids to suit your style.
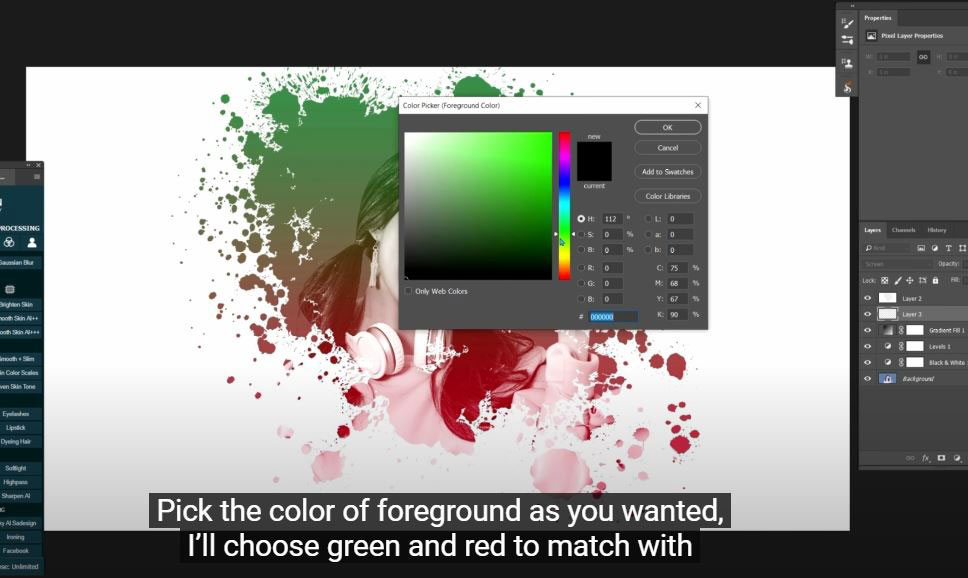
  Create a new layer with "Screen" in blend mode. Use a brush with a soft round tip. Choose the foreground color as you want, I will choose green and red to match the color of the gradient. Lower the opacity to about 30% and erase the color in her hair.
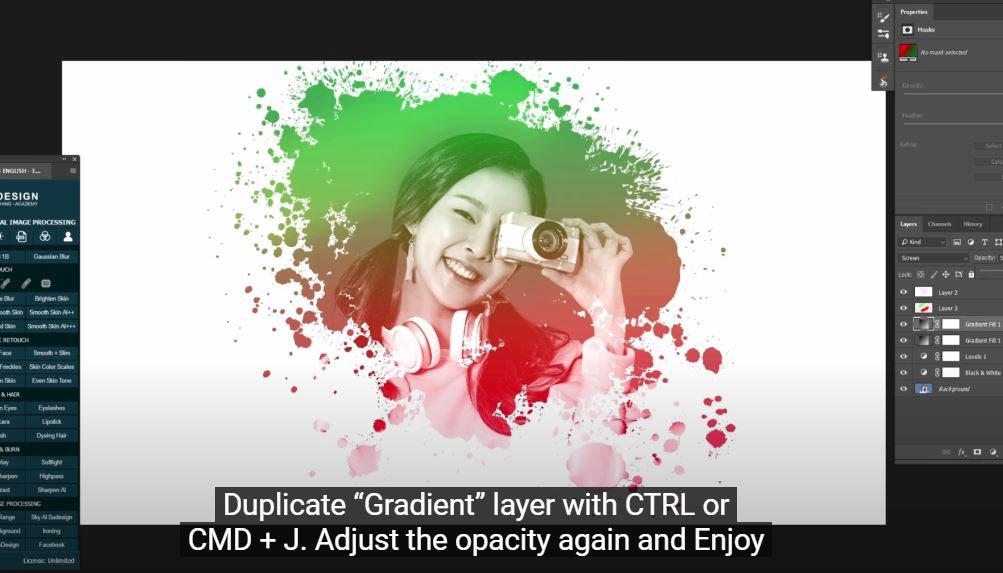
  Duplicate the "Gradient" layer with CTRL or CMD + J. Adjust the opacity and enjoy your results.
  If you like Photoshop and Photograph like SaDesign and you want to get more tips, techniques, experience from us. Make sure to subscribe to our channel by just clicking the subscribe button and you'll get tons of free tutorials that SaDesign shares on basic Photoshop techniques on a daily basis. If you have any ideas, don't hesitate to leave a comment right below the video. We look forward to seeing your thoughts. Thank you very much for following and supporting SaDesign. See you in the next tutorials. Bye! ? DOWNLOADS Practical pictures: https://drive.google.com/file/d/1-wM9_2dWTMkL1fnrmYwmAVOSGct1oYEH/view
 Now, open the splash brush folder and grab a splash brush. Adjust the size and fill on layer 1. Similarly, select the splash you like and fill. Use curly braces {} to increase or decrease the size of the brush while drawing. When you're done, create a new layer. Select Layer 1 and go to Select > Color Range > use the eyeropper tool and select all the brushes you painted. Increase the opacity until all brushes are selected.
  Move to Layer 2 and press CTRL + SHIFT + I for Win or CMD + SHIFT + I for MAC, then press CTRL or CMD + Delete. Turn off Layer 1, now you can see the girl appear. You can delete class 1 now. Adjust the size of the brush layer slightly using CTRL or CMD + T.
  Create a gradient layer under layer 2, double click on the gradient and choose the preset color you want. I would go with Red and Green. Change the blend mode from normal to Screen.
  In the "Levels" layer, increase the black to 39 to increase contrast. Adjust the mids to suit your style.
  Create a new layer with "Screen" in blend mode. Use a brush with a soft round tip. Choose the foreground color as you want, I will choose green and red to match the color of the gradient. Lower the opacity to about 30% and erase the color in her hair.
  Duplicate the "Gradient" layer with CTRL or CMD + J. Adjust the opacity and enjoy your results.
  If you like Photoshop and Photograph like SaDesign and you want to get more tips, techniques, experience from us. Make sure to subscribe to our channel by just clicking the subscribe button and you'll get tons of free tutorials that SaDesign shares on basic Photoshop techniques on a daily basis. If you have any ideas, don't hesitate to leave a comment right below the video. We look forward to seeing your thoughts. Thank you very much for following and supporting SaDesign. See you in the next tutorials. Bye! ? DOWNLOADS Practical pictures: https://drive.google.com/file/d/1-wM9_2dWTMkL1fnrmYwmAVOSGct1oYEH/view
 REGISTER FOR FREE PHOTOSHOP LEARNING
Sadesign Co., Ltd. provides the world's No. 1 warehouse of cheap copyrighted software with quality: Panel Retouch, Adobe Photoshop Full App, Premiere, Illustrator, CorelDraw, Chat GPT, Capcut Pro, Canva Pro, Windows Copyright Key, Office 365 , Spotify, Duolingo, Udemy, Zoom Pro...
Contact information
SADESIGN software Company Limited


