Best Selling Products
Autodesk All App Account Copyright
120 USD
Windows 10 & 11 Pro Key
36 USD
Adobe Premiere Pro Account
99 USD
Genuine Adobe Illustrator account
99 USD
Copyright Adobe Lightroom Account
59 USD
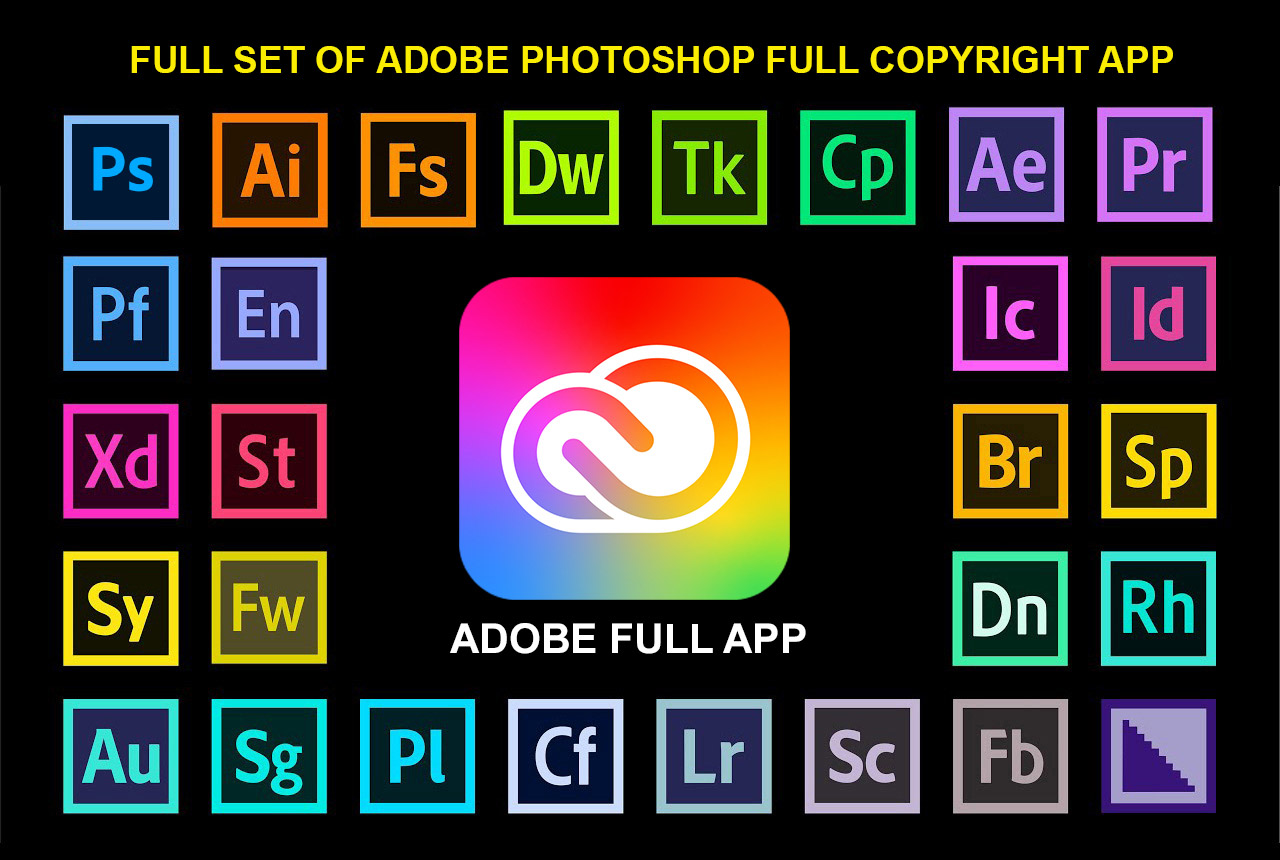
Adobe Photoshop Copyright - Full App
120 USD
Genuine Cheap Canva Pro
39 USD
Upgrade genuine Capture One account
120 USD
Capcut Pro 1 Year
39 USD
Upgrade Genuine Office 365
49 USD

MidJourney Account
29 USD

ChatGPT Plus Account (GPT-4)
16 USD
Plugin Retouch4me
69 USD

Freepik Premium Account
59 USD

Upgrade Duolingo Super
29 USD
Discover how to use Adobe Premiere to edit videos more professionally.
Nội dung
- 1. What is Adobe Premiere? Why should you use it for video editing?
- 2. How to use Adobe Premiere for beginners
- 2.1. Create a new project and add videos.
- 2.2. Cutting, splicing, and arranging clips on the timeline
- 2.3. Adjusting lighting and color
- 2.4. Creating motion effects for photos and videos
- 2.5. Create automatic subtitles for videos
- 2.6. Add a title and illustrative text.
- 2.7. Add background music and edit audio.
- 2.8. Choose an aspect ratio suitable for the platform.
- 2.9. Setting Resolution and Frame Rate
- 2.10. Export videos and share them on social media.
- 3. Tips for using Adobe Premiere to edit videos more professionally.
- 4. Conclusion
Do you want to create visually stunning videos with harmonious colors, clear sound, and smooth transitions? Adobe Premiere is a video editing tool worth exploring, whether you''re a beginner or an experienced content creator. With its flexible features for cutting, splicing, color grading, adding subtitles, inserting music, and exporting videos, you can transform simple clips into more engaging content. In this article, let''s explore how to use Adobe Premiere step-by-step, in a clear and easy-to-understand manner.
1. What is Adobe Premiere? Why should you use it for video editing?
Adobe Premiere is the commonly used name for Adobe's video editing tools, including Premiere Pro on computers and the Adobe Premiere app for mobile devices. These tools support users in video editing from basic to advanced levels, serving the needs of creating YouTube videos, TikTok videos, commercials, product introductions, or personal content. The appeal of Adobe Premiere lies in its ability to combine multiple editing operations in a single process. You can trim unwanted scenes, adjust colors, add text, process audio, and control video quality before uploading. Some notable benefits of using Adobe Premiere include:
-
Flexible editing: Cut, splice, arrange clips, and change the duration as desired.
-
Enhance image quality: Adjust brightness, contrast, and color for a more harmonious frame.
-
Enhance professionalism: Add titles, subtitles, animations, and background music.
-
Compatible with multiple platforms: Customize your videos to fit TikTok, YouTube, Instagram Reels, or Facebook formats.
-
Creative support: Helps content creators, marketers, and business owners create product introduction videos more conveniently.
2. How to use Adobe Premiere for beginners
If you've never edited videos before, you should go through each step individually instead of using too many effects right from the start. The process below focuses on practical steps to help you quickly complete a finished video.
2.1. Create a new project and add videos.
First, prepare the video clips, images, and audio files you need. Then, open Adobe Premiere and create a new project to begin editing. Depending on the computer or mobile version, the interface and the names of some buttons may differ. The basic operations include:
-
Open the Adobe Premiere application and select create a new project.
-
Select videos or images from your device to include in the project.
-
Name the project if the application requires one.
-
Double-check the imported files to ensure no essential content is missing.
After adding the files, you'll work with the timeline area, where the video and audio clips are arranged in order. Prepare your materials clearly from the start to save time during editing.
2.2. Cutting, splicing, and arranging clips on the timeline
Editing is a crucial step in creating a concise video with a natural rhythm. A well-shot video can lose viewer interest if it contains too many pauses, unnecessary scenes, or repetitive segments. To edit, select the clip you want to process on the timeline, move it to the desired cutting point, and use the appropriate cutting tool. Then, delete unnecessary sections or drag and drop clips to change their order.
-
Trim unnecessary elements: Remove silences, glitches, or scenes that don't serve the main content.
-
Sequence arrangement: Arrange the scenes in a logical sequence to make them easy for the viewer to follow.
-
Adjust the length: Keep important sections long enough to convey the information.
-
Check for transitions: Replay the cut area to detect abrupt scene changes.
A helpful tip is to review the video after every few edits. This helps you identify any transitions that aren't smooth and fix them immediately before continuing.
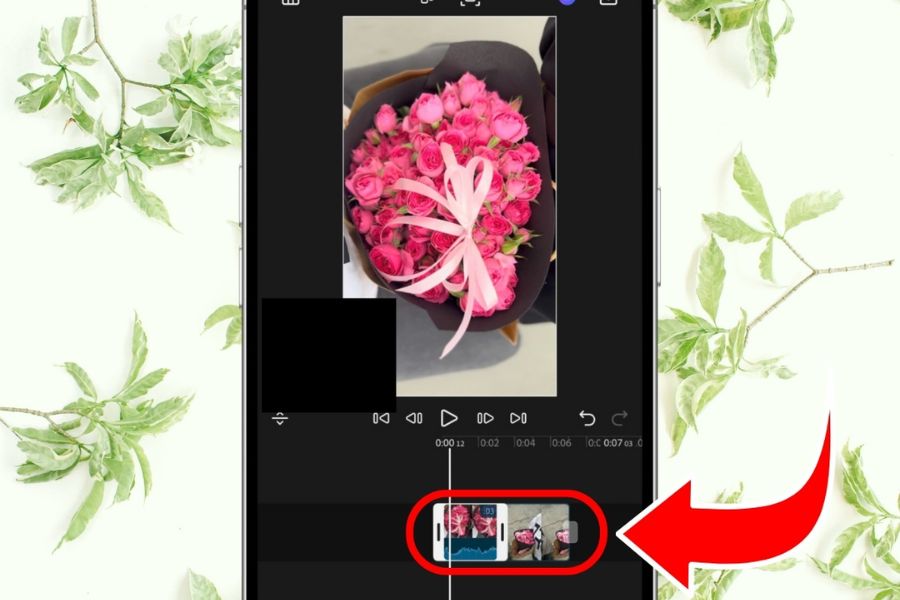
2.3. Adjusting lighting and color
Color directly impacts the viewer's perception. Videos that are too dark, overexposed, or have different color tones in each scene will lack overall consistency. Therefore, you should adjust the image before adding complex effects. On the color correction interface, select the clip you want to edit and open the image adjustment tools group. Depending on the version, you may encounter parameters such as exposure, contrast, highlights, shadows, saturation, and color temperature.
-
Exposure: Increases or decreases the overall brightness of the frame.
-
Contrast: Creates a distinction between bright and dark areas.
-
Highlights and shadows: Restore detail in areas that are too bright or too dark whenever possible.
-
Saturation: Adjusts the level of color vibrancy.
-
Color temperature: Makes the image warmer or cooler depending on the style.
Avoid increasing all parameters to high levels. Prioritize natural colors, maintain relatively consistent tones between scenes, and review on a screen with appropriate brightness.
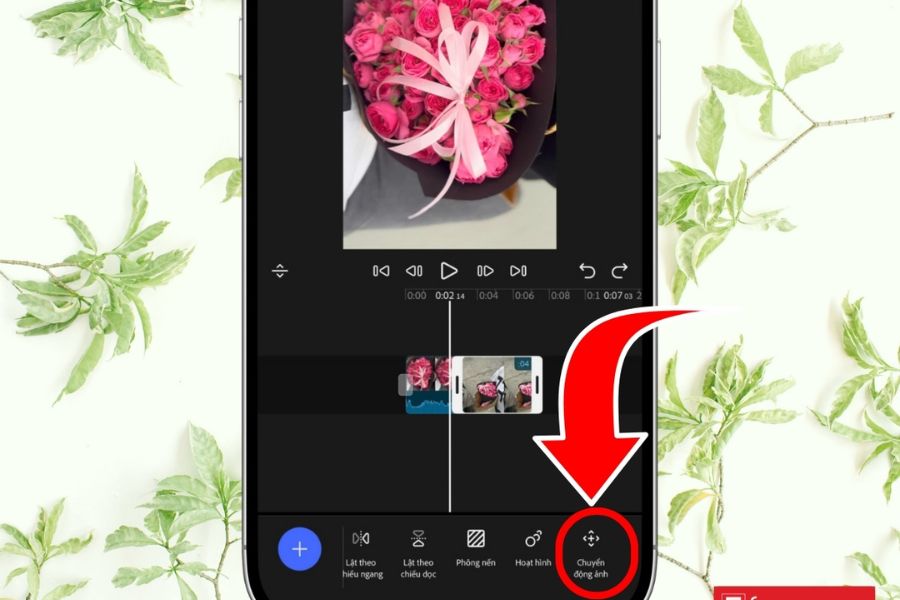
2.4. Creating motion effects for photos and videos
Still images can be made more dynamic by adding subtle motion. This is commonly used in storytelling videos, product introductions, photo slideshows, or social media content. If your version of Adobe Premiere supports motion capture, select a clip or image and then choose the appropriate motion style. On Premiere Pro for desktop, you can also create motion by adjusting properties such as position, zoom ratio, and anchor points over time. Some easy-to-apply motion styles include:
-
Zoom in slowly to highlight the subject.
-
Slightly zoom out to widen the field of view.
-
Slide the frame left or right to guide the viewer's eye.
-
Combine movement with emphasis in dialogue or background music.
Use purposeful movement instead of applying effects to every scene. Smooth movement often feels more polished than effects that are too fast or constantly changing direction.
2.5. Create automatic subtitles for videos
Subtitles help viewers understand the content even when the sound is muted. This is especially useful for tutorial videos, sales videos, knowledge-sharing content, and social media clips. If your version has speech recognition and automatic subtitle generation, you can open the annotation or subtitle tool, select the area to process, and start creating. On Premiere Pro desktop, the process and item names may differ from the mobile app. After the system finishes processing, read the entire content aloud to correct any misidentified words.
-
Correct spelling, punctuation, and proper noun errors.
-
Break the sentence into short, easy-to-read phrases.
-
Adjust the timing of the subtitles so they match the speech.
-
Choose a font size that is large enough, an easy-to-read color, and a position that doesn't obscure the subject.
Don't rely entirely on automated results. Manual review will help ensure more accurate subtitles and provide a better viewing experience.
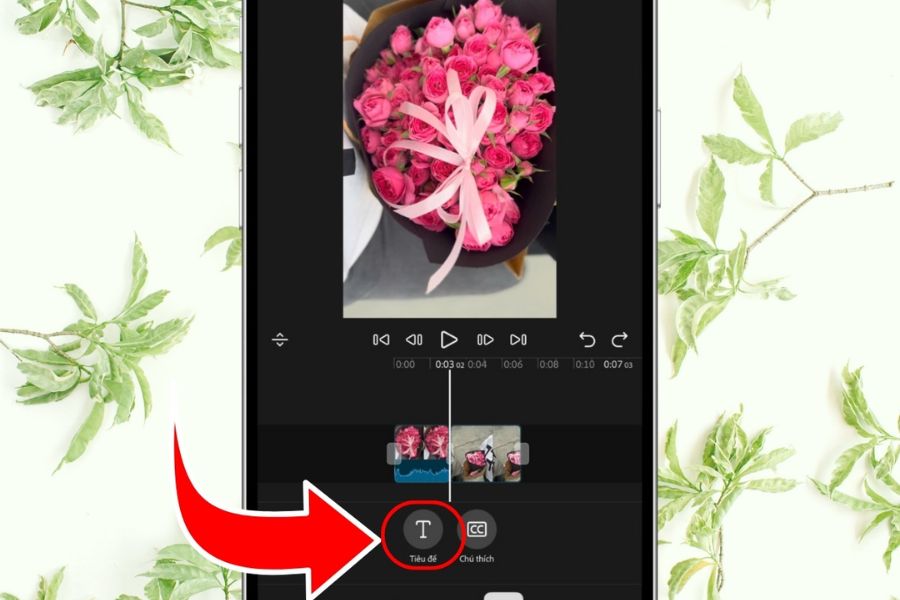
2.6. Add a title and illustrative text.
The title is the highlight that helps viewers quickly understand what the video is about. For advertising videos, you can use a short introductory sentence, the product name, or a key benefit. For tutorial videos, step-by-step text will make the content easier to follow. To add text, open the text or title creation tool, enter the content, and then customize the display style. You can adjust the font, size, color, position, and duration of appearance on the timeline. Some principles to help the text look more professional:
-
Prioritize short sentences that convey a single main idea.
-
Choose a font that is easy to read and consistent throughout the video.
-
Use text in a color that contrasts with the background.
-
Position the text so that it doesn't obscure the face or important details.
-
Adjust the display timing according to the dialogue and editing rhythm.
In particular, check the text on your phone screen if the video is posted to TikTok or Reels. Text that is too small or too close to the edge of the screen can be difficult to read in person.
2.7. Add background music and edit audio.
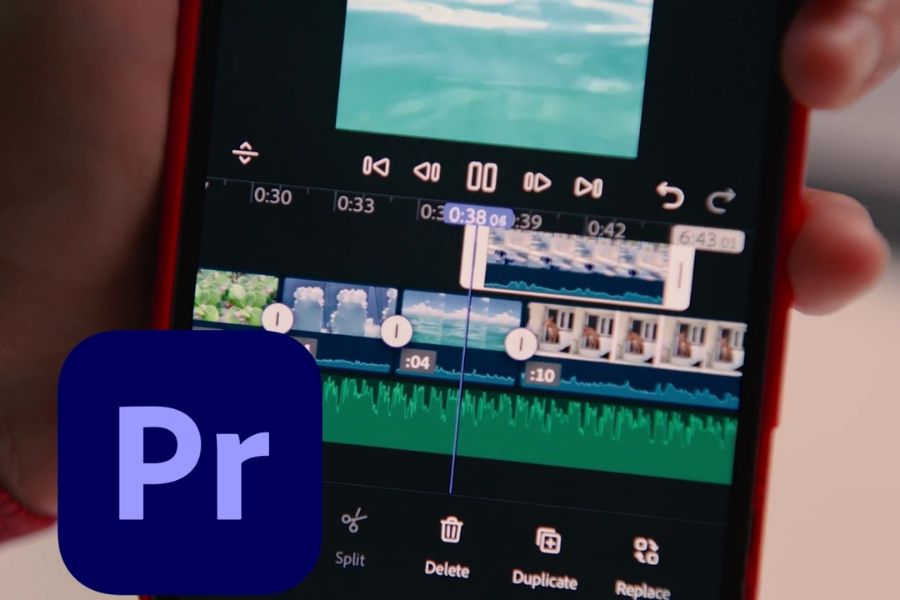
Sound contributes to creating emotion, maintaining attention, and making videos more engaging. A suitable piece of music can liven up a product introduction video, while clear voiceovers help viewers easily absorb information. In Adobe Premiere, you can import audio files, place them on the appropriate track on the timeline, and adjust the volume. With supported versions, you can also use additional voice processing or noise reduction tools.
-
Background music: Choose music that matches the content and pace of the video.
-
Sound effects: Create emphasis at the necessary moments.
-
Voiceover: Adds narration to explain or introduce the content.
-
Adjust the volume: Reduce the background music during dialogue so that the voice stands out.
-
Sound cleaning: Use appropriate tools to reduce noise when assistance is available.
Don't forget to check music copyright before uploading. Also, listen to the video again using headphones or regular speakers to ensure the sound isn't too quiet, too loud, or inconsistent between sections.
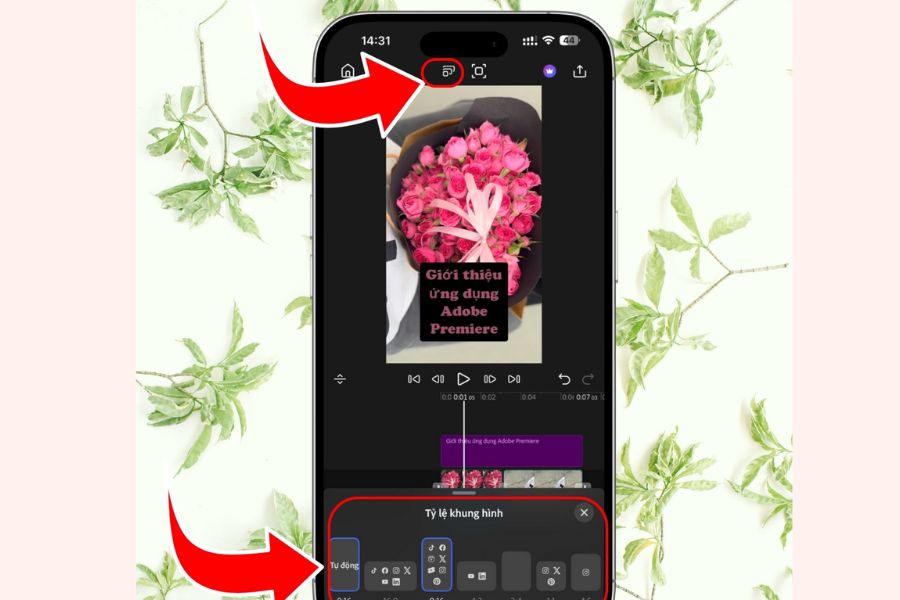
2.8. Choose an aspect ratio suitable for the platform.
Each platform displays videos differently. Choosing the wrong aspect ratio can result in black borders, cropped subjects, or poor screen utilization. Therefore, determine where you'll be posting your video before finalizing the editing. Here are some common aspect ratios you should know:
-
9:16: Compatible with TikTok, Instagram Reels, and YouTube Shorts.
-
16:9: Commonly used for traditional YouTube videos and horizontal slideshow content.
-
1:1: Suitable for some square-shaped social media posts.
-
4:3: Can be used for content with a traditional frame style or existing footage.
Look for the frame size or image string size settings depending on your version. After changing the aspect ratio, double-check the position of the subject, title, and subtitle to avoid them being cropped out of the display area.
2.9. Setting Resolution and Frame Rate
Before exporting a video, you need to select the appropriate parameters for your intended use. Resolution affects detail, while frame rate determines the smoothness of motion. Setting it too high when unnecessary can increase file size and processing time. Common parameters include:
-
720p: Suitable for content that requires a relatively small file size.
-
1080p: A popular choice for social media videos due to its good quality and wide compatibility.
-
4K: Suitable when high detail is required and the equipment and materials meet the requirements.
-
24 fps: Provides a cinematic feel in many situations.
-
30 fps: Suitable for most general video and social media content.
-
60 fps: Useful for fast-moving scenes or videos that require high smoothness.
You should prioritize settings that are appropriate for the original video and the uploading platform. Choosing the highest resolution doesn't necessarily mean the video will look better, especially when the quality of the original footage is limited.
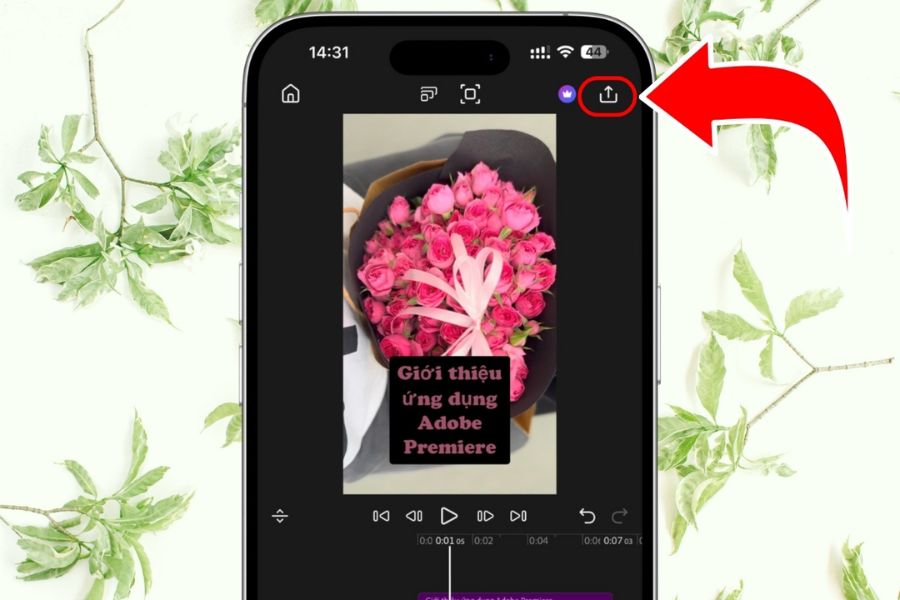
2.10. Export videos and share them on social media.
After completing the editing steps, review the entire video from beginning to end. This is when you check for minor errors such as abrupt scene cuts, incorrect subtitles, out-of-tune audio, or titles appearing at the wrong times. When ready, open the video export feature (Export or Export/Share depending on the version), select the format and necessary parameters, and start exporting the file. On Premiere Pro PC, you can further customize the export settings to suit your needs. Before sharing, perform a few checks:
-
Play back the exported video file to ensure there are no errors.
-
Check the resolution, frame rate, and sound.
-
Give your files clear names to make them easy to find and manage.
-
Ensure the file size is compatible with the publishing platform.
-
Check the copyrights of the music, images, and other materials used.
Finally, you can upload the video to your desired platform or save it for use in future content campaigns.
3. Tips for using Adobe Premiere to edit videos more professionally.
Mastering the basics is the first step. To improve video quality, you should develop a habit of working systematically, focusing on content, and thoroughly checking your finished product before uploading.
-
Create an outline before filming: Determine the main message, the order of scenes, and the opening sequence to avoid multiple revisions.
-
Optimize the opening: Put compelling information or a topic of interest to the viewer in the first few seconds.
-
Maintain a consistent style: Use colors, fonts, and transitions that are appropriate to the theme.
-
Limit unnecessary effects: Only use effects when they help clarify the content or enhance the emotional impact.
-
Scientific file management: Divide videos, images, background music, and export files into separate folders.
-
Review on a real device: Check the video on the phone or screen the viewer usually uses.
-
Save your project regularly: This helps minimize the risk of losing effort if the application crashes.
If you're just starting out, you should focus on three key elements first: clear content, visually appealing images, and pleasant audio. Once you've mastered those, you can move on to learning more advanced techniques to create your own unique style.
4. Conclusion
Knowing how to use Adobe Premiere will give you more control over the video creation process, from cutting and splicing clips, color grading, creating subtitles, to processing audio and publishing the final product. With practice, you can improve video quality without needing to apply too many complex techniques right from the start. Begin with a short video, experiment with each tool, and take time to review the results after each edit. Once you understand how to combine images, audio, and content, you will gradually create polished, engaging videos that suit your goals.













VIP Products

Best Selling Products
Autodesk All App Account Copyright
120 USD
Windows 10 & 11 Pro Key
36 USD
Adobe Premiere Pro Account
99 USD
Genuine Adobe Illustrator account
99 USD
Copyright Adobe Lightroom Account
59 USD
Adobe Photoshop Copyright - Full App
120 USD
Genuine Cheap Canva Pro
39 USD
Upgrade genuine Capture One account
120 USD
Capcut Pro 1 Year
39 USD
Upgrade Genuine Office 365
49 USD
MidJourney Account
29 USD
ChatGPT Plus Account (GPT-4)
16 USD
Plugin Retouch4me
69 USD
Freepik Premium Account
59 USD
Upgrade Duolingo Super
29 USD