Best Selling Products

Upgrade genuine Capture One account
120 USD

ChatGPT Plus Account (GPT-4)
16 USD

Autodesk All App Account Copyright
120 USD

Upgrade Genuine Office 365
49 USD

Adobe Premiere Pro Account
99 USD

Genuine Cheap Canva Pro
39 USD

Adobe Photoshop Copyright - Full App
120 USD

Genuine Adobe Illustrator account
99 USD

Upgrade Duolingo Super
29 USD

Capcut Pro 1 Year
39 USD

Copyright Adobe Lightroom Account
59 USD

Windows 10 & 11 Pro Key
36 USD

Plugin Retouch4me
69 USD

MidJourney Account
29 USD

Freepik Premium Account
59 USD
Exposure Bracketing: The Secret to Taking Perfect Photos in Any Lighting Conditions
Nội dung
Exposure Bracketing is a technique that helps photographers take many different exposures to choose the perfect photo.

Exposure Bracketing is a photography technique commonly used by photographers to ensure that photos are properly exposed, especially in environments with constantly changing lighting conditions. This is a great technique to increase dynamic range, supporting the recording of more detailed and vivid images, especially useful when shooting landscapes, architecture or high-contrast scenes. Let's learn more about this technique with SaDesign in the article below!
1. Learn about Exposure Bracketing
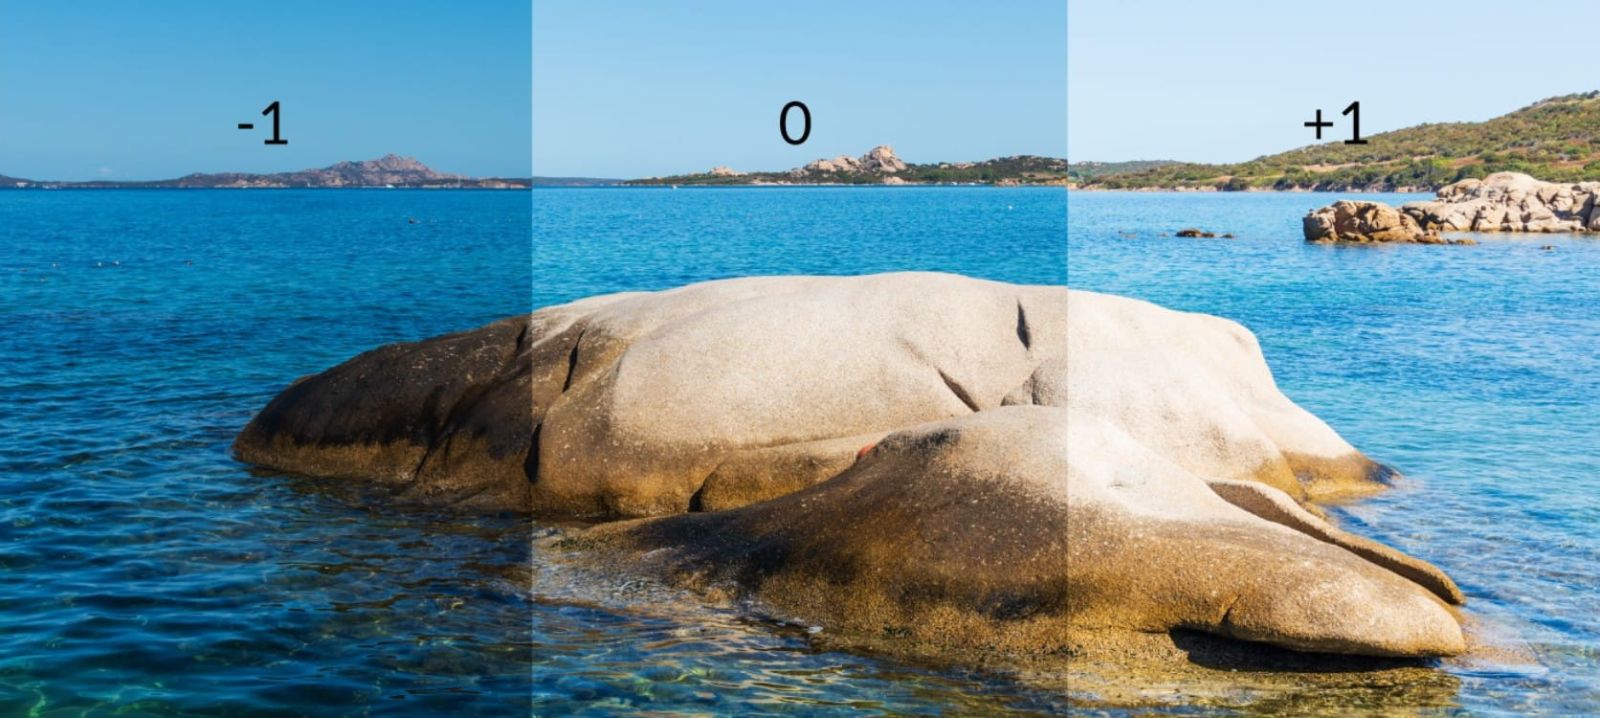
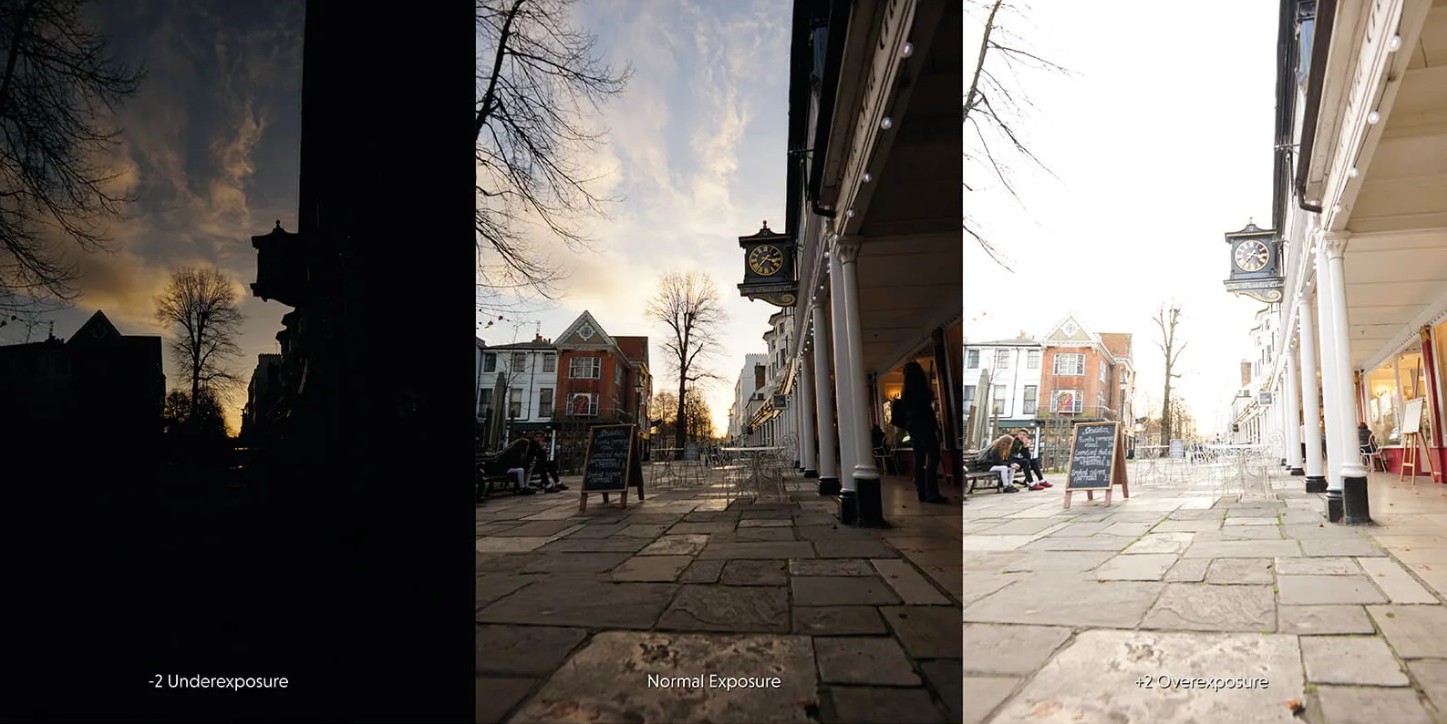
Exposure Bracketing is a technique in photography where instead of taking a single photo, the photographer will take multiple photos of the same frame but at different exposure levels. Usually, this set of photos includes three photos: one properly exposed photo (as judged by the light meter to be appropriate), one underexposed photo and one overexposed photo. The purpose of this shooting is to ensure that even in difficult lighting conditions, the photographer can still choose the best photo or combine them into a perfect photo.
Basically, it is not easy to expose a frame correctly , especially when the light is uneven, there is a difference between the bright and dark areas. Many factors affect the exposure, such as the way the camera measures the light, the dynamic range of the sensor, or the settings of aperture, ISO, shutter speed. Therefore, Exposure Bracketing allows the photographer to be more proactive in controlling the light and avoid situations where the photo is overexposed or loses details in the dark areas.
One thing to note is that this technique is especially useful when shooting in RAW format . RAW images retain more light data than JPEG, allowing the photographer to recover details in post-production without losing image quality. When shooting Exposure Bracketing, you can take the best highlights from overexposed photos, detailed shadows from underexposed photos and combine them to create a complete photo.
When performing this technique, the camera should be fixed on a tripod to ensure that the frames match. If shooting by hand, even a small deviation will make it difficult to combine the photos later. In addition, during the shooting process, you should ensure that there is no moving object in the frame, because the change in position between photos can create a “ghosting” phenomenon in post-production.
Another big benefit of Exposure Bracketing is the ability to create HDR (High Dynamic Range) images . HDR is a technique that combines multiple exposures to create images with more contrast and detail than the human eye can see. Scenes with strong highlights and deep shadows, such as sunsets, sunrises, or landscapes with complex lighting, are where this technique comes into its own.
However, Exposure Bracketing is not suitable for all situations. This technique works best with static subjects such as landscapes, architecture, and stationary objects. Meanwhile, with moving subjects such as people, vehicles, or animals, taking multiple photos in succession at different exposure levels can ruin the composition or create an unmanageable blurry image.

In short, Exposure Bracketing is a powerful tool that helps photographers control light more precisely and improve image quality. Whether you are new to photography or experienced, understanding and applying this technique will help you achieve beautifully balanced light photos in all conditions.
2. How to shoot Exposure Bracketing
There are two common methods for performing Exposure Bracketing: Manual and Auto Bracketing . Both methods provide similar results, but differ in convenience and speed of operation.
2.1. Manual exposure bracketing
This is the traditional way that many photographers still use to have complete control over the light in the frame. When shooting manually, you need to set the camera to Manual (M) mode and adjust the exposure parameters as desired.
First, you should take a base photo at what your camera’s light meter thinks is “correct” exposure. Then, change the shutter speed or ISO to take an underexposed photo (decrease exposure by a stop or two) and an overexposed photo (increase exposure by a stop or two). The aperture should usually be kept constant to avoid changing the depth of field, as changing the aperture will create a noticeable difference in the area of focus, making post-processing difficult.
When taking photos, you should use a tripod to ensure that the three photos are completely identical. In case you do not have a tripod, you need to hold the camera very firmly and take photos quickly in succession to avoid frame distortion. A small tip is to use Burst Mode , combined with Remote Shutter or Timer to reduce camera shake.
The big advantage of the manual method is that you have complete control over the exposure parameters, which can be easily adjusted to your creative intent. However, the downside is that it is more time-consuming and difficult to apply when shooting in rapidly changing lighting conditions.
2.2. Automatic Exposure Bracketing
Nowadays, most DSLR and mirrorless cameras have built-in Auto Exposure Bracketing (AEB) mode that helps you do it quickly with just a few steps. Depending on the camera brand, the name may be different, for example Exposure Comp./AEB Setting on Canon or Auto Bracketing on Nikon, Sony.
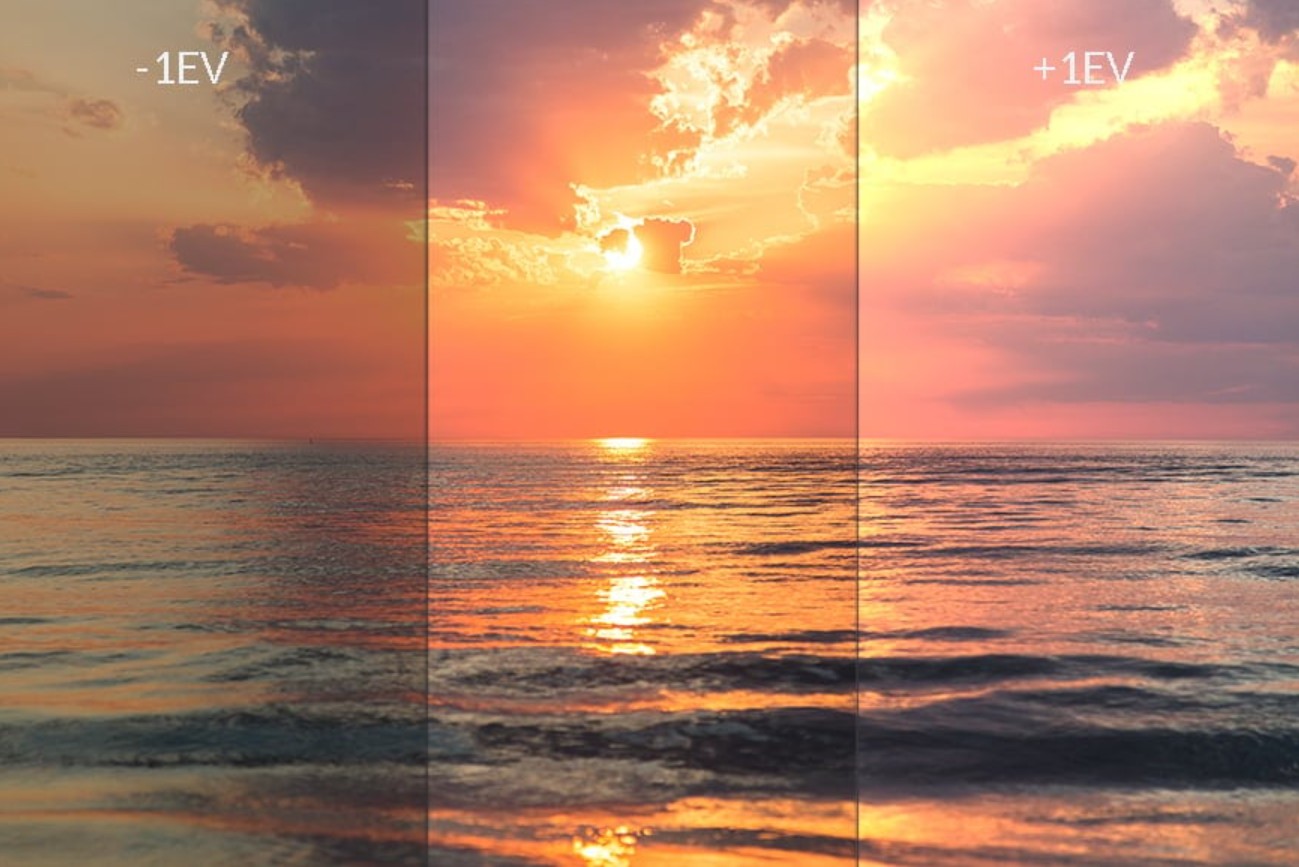
When this mode is enabled, you can set the desired exposure interval between shots, for example ±1 EV or ±2 EV. Then, just hold down the shutter button and the camera will automatically take three or more photos in a row with different exposure levels. Some high-end cameras even allow you to take 5, 7, or even 9 consecutive shots to create a wider exposure range, serving as a basis for advanced HDR post-production.
The strength of AEB is its high speed and accuracy. You do not need to manually adjust each parameter between each shot, which saves time, especially useful when shooting landscapes or rapidly changing light such as sunsets and sunrises.
In the camera settings, you can choose the shooting order (e.g., underexposure → standard → overexposure) for easy recognition when reviewing. When combined with continuous shooting mode, the entire series of photos will be recorded in less than a second, minimizing errors due to hand shake or changes in light.

2.3. Comparison of manual and automatic shooting
Both methods have their own advantages and the choice depends on the shooting purpose, equipment and personal style .
With the manual method, you can control each lighting element in detail, easily adjusting according to your artistic sense. This is the favorite choice of professional photographers when they want to ensure that each frame achieves maximum accuracy. However, this method requires a lot of time, difficult to apply when shooting quickly or in conditions of constantly changing light.
On the contrary, the automatic method is suitable for beginners or quick outdoor shooting, reducing technical operations while ensuring consistent results. This feature is especially convenient for travel photography, sunset and sunrise photography or when there is no time to try many exposure measurements.
The most important thing is to understand how your camera meters and processes exposure so you know when to leave it on auto and when to intervene manually. Both techniques are creative tools and it is the flexibility to combine them that determines success.
2.4. When to use Exposure Bracketing
You don't always need to use this technique, but in certain situations Exposure Bracketing can really come in handy.
A typical example is landscape photography : where natural light is often constantly changing and has high contrast. When the sun is shining brightly, the sky can be overexposed while the land is dark, making it difficult for the camera to handle evenly. At this point, Exposure Bracketing helps you retain details in both bright and dark areas to balance them out later.
This technique is also useful for interior or architectural photography where there is a mix of artificial and natural light. Multiple exposures help to recreate the space realistically, ensuring windows, lights and shadows are clearly visible.
However, with moving photos such as portraits, events, sports, Exposure Bracketing is not really effective. Taking many consecutive photos causes the subject to move, causing frame distortion. In these situations, you should prioritize standard light metering and adjust the exposure directly according to actual conditions.
Exposure Bracketing is one of the important techniques that helps photographers control light, increase dynamic range and optimize image quality in all conditions. Whether you shoot landscapes, architecture or still life, mastering this technique will help you always be proactive in handling complex lighting.
Once you understand how your camera works and how light affects the sensor, you'll see that Exposure Bracketing is not just a technical tool, but also a creative means to help you express your ideas more perfectly.
If you're just starting out, try shooting at ±1 EV to get used to it. Once you understand how changes in light affect your images, you can expand to ±2 EV or more, depending on the scene.
Combine Exposure Bracketing with HDR post-production in Lightroom or Photoshop and you'll get photos with depth, soft contrast, and vibrant detail.


VIP Products


Best Selling Products
Upgrade genuine Capture One account
120 USD
ChatGPT Plus Account (GPT-4)
16 USD
Autodesk All App Account Copyright
120 USD
Upgrade Genuine Office 365
49 USD
Adobe Premiere Pro Account
99 USD
Genuine Cheap Canva Pro
39 USD
Adobe Photoshop Copyright - Full App
120 USD
Genuine Adobe Illustrator account
99 USD
Upgrade Duolingo Super
29 USD
Capcut Pro 1 Year
39 USD
Copyright Adobe Lightroom Account
59 USD
Windows 10 & 11 Pro Key
36 USD
Plugin Retouch4me
69 USD
MidJourney Account
29 USD
Freepik Premium Account
59 USD