Best Selling Products

Upgrade Duolingo Super
29 USD

Genuine Cheap Canva Pro
39 USD

Autodesk All App Account Copyright
120 USD

Upgrade Genuine Office 365
49 USD

Copyright Adobe Lightroom Account
59 USD

Freepik Premium Account
59 USD

Capcut Pro 1 Year
39 USD

Plugin Retouch4me
69 USD

Genuine Adobe Illustrator account
99 USD

Adobe Photoshop Copyright - Full App
120 USD

ChatGPT Plus Account (GPT-4)
16 USD

Adobe Premiere Pro Account
99 USD

MidJourney Account
29 USD

Windows 10 & 11 Pro Key
36 USD

Upgrade genuine Capture One account
120 USD
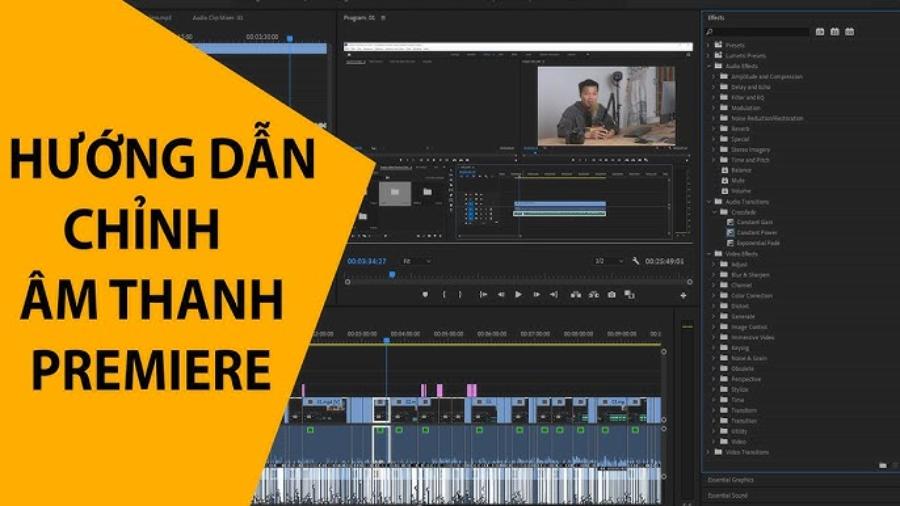
Guide to Optimizing Professional Audio Adjustment in Premiere Pro CC
Nội dung
- 1.Basic Audio Editing Tools In Premiere Pro CC
- 1.1 Audio Track Mixer
- 1.2 Essential Sound Panel
- 1.3 Effects Panel
- 2. Audio Editing Techniques in Premiere Pro CC
- 2.1 Background Noise Removal
- 2.2 Sound Balance
- 2.3 Creating Sound Effects
- 2.4 Voice Editing
- 3. Optimizing Audio In Premiere Pro CC
- 3.1. Understanding Audio in Premiere Pro CC
- 3.2. Using the Essential Sound Panel Tool
- 3.3. Noise and Noise Removal
- 3.4. EQ Adjustment
- 3.5. Using Compressor And Limiter
- 3.6. Synchronize Audio With Image
- 3.7 Sound Check Before Publishing
- 3.8 Use Appropriate Audio Formats
- 4. Conclusion
Discover how to edit audio like a pro in Premiere Pro CC with this step-by-step guide. Learn how to improve audio quality, use powerful tools, and create smooth audio tracks in your videos.
1.Basic Audio Editing Tools In Premiere Pro CC
Premiere Pro CC offers a range of basic audio editing tools that help users optimize the sound quality in video projects. These tools include the ability to adjust volume, balance audio, reduce noise, and apply professional audio effects.
(2).jpg)
1.1 Audio Track Mixer
One of the most important tools for editing audio in Premiere Pro is the Audio Track Mixer. This is where you can adjust the volume of your audio tracks, creating balance between the different audio elements in your project. From here, you can make changes like:
Volume Control : Balance the sound between different tracks, from music, sound effects to dialogue.
Apply audio effects : You can apply effects like Reverb, Delay, EQ, and many more to create a richer and more dynamic sound space.
With an intuitive interface, this tool allows you to adjust volume, balance audio, apply audio effects, and process individual tracks or entire projects. By using features such as EQ, compressor, and reverb, you can optimize audio quality, creating perfect mixes that match the video content. Audio Track Mixer not only saves time but also brings high precision in the editing process, making Premiere Pro CC a top choice for professional video producers.
1.2 Essential Sound Panel
Essential Sound Panel is a powerful feature that helps you edit audio quickly and easily. Designed for both beginners and professionals, Essential Sound Panel helps you categorize different types of audio in your project, from dialogue, music, to sound effects. This feature helps you optimize and enhance audio quality with just a few clicks.
Some of the outstanding features of Essential Sound Panel include:
Auto Volume Leveling : Helps you maintain even volume levels between audio clips.
Noise Reduction and Voice Clarity : This feature will help remove unwanted noise and clarify speech in your videos.
Background Noise Reduction : You can adjust the background noise level to create a cleaner recording.
With an intuitive interface, this tool allows you to easily categorize audio types such as dialogue, background music, sound effects, and ambience. You can apply basic edits such as noise reduction, volume balancing, and voice clarity enhancement with just a few simple steps. Additionally, the Essential Sound Panel offers advanced options to fine-tune audio to your specific needs, helping to ensure optimal audio quality for your project. This is an indispensable tool for those working in the field of professional video editing.
1.3 Effects Panel
The Effects Panel provides a variety of tools for you to fine-tune your audio, including effects such as Equalizer (EQ), Compressor, Limiter, DeNoiser, and many more. These effects will help you enhance the sound quality, creating a rich and pleasant sound space for the listener.
Equalizer (EQ) : Helps you adjust the frequency of the sound to create clearer sound or create special sound effects.
Compressor : A tool to reduce the difference between loud and soft sounds, making the sound smoother and more even.
DeNoiser : Helps remove unwanted background noise, such as wind, machinery, or studio noise.
Additionally, you can use effects like Volume to adjust the overall volume level or Highpass and Lowpass Filter to remove unwanted frequencies. Flexible use of these tools will help you create professional audio that matches the video content.
2. Audio Editing Techniques in Premiere Pro CC
Premiere Pro CC is one of the leading professional video editing tools, providing many audio editing techniques to enhance the sound quality in your project.
(1).jpg)
2.1 Background Noise Removal
In Premiere Pro CC, editing audio to remove background noise is an important technique for improving the sound quality of your videos. Background noise can degrade the sound quality of your videos, especially when recording in less than ideal environments. First, identify the audio segment to be processed and apply noise reduction, then adjust parameters such as Reduction and Threshold to achieve the desired results.
Luckily, Premiere Pro offers a variety of tools to help you remove these unwanted sounds.
Using the Essential Sound Panel : Select your audio clip in the timeline, go to the Essential Sound Panel and select "Dialogue". Then, select "Reduce Noise" to remove background noise. This will help you create a cleaner, more listenable recording.
Using DeNoiser (Effects Panel) : If you want more control, you can drag the DeNoiser effect from the Effects Panel onto the audio clip. This allows you to customize the level of noise reduction to your needs.
Additionally, using high-quality headphones during editing also helps you detect and handle noise more accurately. This technique not only improves the listening experience of the audience but also creates a professional look for your video product.
2.2 Sound Balance
To make your video sound professional and easy to listen to, it is important to balance the sound between the elements in the video. You need to make sure that the sound is not too loud or too soft compared to other elements, especially between speech, music and sound effects. This technique helps to ensure that the volume level between audio segments in the video is even, avoiding the sound being too loud or too soft, causing discomfort to the viewer.
.jpg)
Using Audio Track Mixer : In Audio Track Mixer, you can adjust the volume of different tracks to create a balance between them. Make sure that speech is always clear and easy to hear while music and sound effects do not overpower it too much.
Auto Level Volume : If you don't want to adjust it manually, you can use the "Auto Level" feature in the Essential Sound Panel to have Premiere Pro automatically adjust the volume levels for you.
Additionally, using keyframes to adjust the volume on a segment-by-segment basis is also an effective way to create smooth transitions between different audio sections. Attention to detail in audio balancing will enhance the audio-visual experience and give your video a professional impression.
2.3 Creating Sound Effects
Common audio editing techniques include balancing the volume to ensure even audio levels, using EQ (Equalizer) effects to fine-tune frequencies, and applying noise reduction filters to remove unwanted noise. To make your videos more engaging and dynamic, you can add audio effects such as Reverb, Delay, or Echo. These effects help create an interesting soundscape, especially in action scenes or background music.
Reverb: This effect creates a sense of space and depth to the sound, giving your video a more "lively" sound.
Delay and Echo: If you want to create a special sound effect, you can use Delay or Echo to create a feedback sound, like the sound reverberating in a large space.
Managing audio channels and applying presets also saves time and helps achieve optimal results. For a professional look, always check and adjust audio levels to match broadcast standards or the platform on which the video will be published.
2.4 Voice Editing
An important element of audio editing is voice clarity. You can use tools like Compressor and Equalizer to improve the quality of voice in your video.
Compressor : Helps reduce the difference between loud and soft sounds, making the voice easier to hear and smoother.
Equalizer : Adjusts the sound frequency of the voice to create more clarity and ease of listening, avoiding blurriness or harshness.
Additionally, you can apply a “Compressor” to balance the volume and control the dynamics, making your voice sound more even. Don’t forget to use the “Audio Track Mixer” tool to fine-tune the overall sound, and check the volume levels with the “Loudness Radar” to ensure they meet broadcast or publishing standards. Combining these techniques will help you create a high-quality, professional-sounding audio product that is pleasing to the listener.
3. Optimizing Audio In Premiere Pro CC
Audio processing plays an important role in creating a high-quality video product. Audio not only supports visual content but also helps convey emotions and messages effectively. Here is a guide on how to optimize audio in Premiere Pro CC to achieve the best results:
.jpg)
3.1. Understanding Audio in Premiere Pro CC
Before you start optimizing, you need to understand the basic components of audio in Premiere Pro. Some important elements include:
- Waveform: A graph that displays the sound intensity, helping you easily identify loud or soft audio segments.
- Decibel (dB): Unit of measurement of sound intensity. Adjust so that the sound is not too loud (causing distortion) or too soft (hard to hear).
- Audio Channels: The audio channels (mono, stereo, or surround) determine how the sound is played.
3.2. Using the Essential Sound Panel Tool
Premiere Pro CC offers the Essential Sound Panel, a powerful tool that helps you edit audio quickly and easily. Here's how:
1. Label the audio type: Select the audio clip and assign a label like "Dialogue," "Music," "Sound Effects," or "Ambience." This helps Premiere Pro automatically apply the appropriate settings.
2. Optimize dialogue: If you edit dialogue, use options like "Reduce Noise" or "DeReverb" to clarify speech.
3. Volume Balance: Use the "Auto-Match" feature to automatically adjust the volume level to the standard level.
3.3. Noise and Noise Removal
One of the common problems when processing audio is noise and interference. To remove them:
- Audio Effects: Use effects like "DeNoise" or "DeReverb" in the Effects section to reduce noise.
- Spectral Editing: If more detailed processing is needed, you can export the file to Adobe Audition, using the Spectral Frequency Display tool to precisely remove noise.
3.4. EQ Adjustment
EQ lets you control the frequency ranges of your audio, making your voice stand out or reducing unwanted sounds. In Premiere Pro, you can:
- Add Parametric Equalizer effect.
- Boost or cut specific frequency ranges (e.g. boost mid-frequency to clarify speech).
3.5. Using Compressor And Limiter
Compressor and Limiter are two important tools to ensure the sound is not distorted too much:
- Compressor: Helps balance the difference between loud and soft sounds, creating uniformity in volume levels.
- Limiter: Set the maximum limit for sound intensity, avoiding distortion when the volume is too high.
3.6. Synchronize Audio With Image
Audio and video need to be in perfect sync to deliver the best viewing experience. Make sure dialogue matches lip movements and sound effects match the action in the video.
3.7 Sound Check Before Publishing
Before publishing your video, you should double-check your audio to make sure there are no errors. You can use the "Audio Meters" feature in Premiere Pro to check your audio levels and make sure none of the audio is out of range, causing clipping or distortion.
- Test it on a variety of devices to ensure consistent audio quality.
- Use the Loudness Meter feature in Premiere Pro to measure overall volume levels before exporting your file.
When exporting files, choose the appropriate format (e.g. AAC or WAV) to ensure the best audio quality.
3.8 Use Appropriate Audio Formats
Premiere Pro supports a wide range of audio formats, from WAV to MP3 to AAC. When exporting your video, make sure you use the appropriate audio format to ensure the best sound quality. Each has its own pros and cons:
- WAV: Is an uncompressed format, providing the best sound quality but large file size.
- MP3: Is a compressed format, suitable for projects that require smaller capacity but quality may be reduced.
- AAC: Commonly used on platforms like YouTube and iTunes, provides higher quality than MP3 at the same bitrate.
- FLAC: Is a lossless compression format, ideal for projects that require high audio quality.
Choosing the appropriate format will depend on the intended use and specific project requirements.
Some Notes When Working With Audio:
- Always test audio on different devices (headphones, speakers, phone) to ensure consistency.
- Don't overuse sound effects as this can take away from the naturalness of the recording.
- Use high quality headphones during editing to hear every detail clearly.
4. Conclusion
Audio editing is an essential part of video editing. Premiere Pro CC gives you powerful tools to create smooth, professional, and expressive audio tracks. Whether you're a beginner or an experienced professional, mastering audio editing techniques will help you enhance your final product and make a lasting impression on your audience.


VIP Products


Best Selling Products
Upgrade Duolingo Super
29 USD
Genuine Cheap Canva Pro
39 USD
Autodesk All App Account Copyright
120 USD
Upgrade Genuine Office 365
49 USD
Copyright Adobe Lightroom Account
59 USD
Freepik Premium Account
59 USD
Capcut Pro 1 Year
39 USD
Plugin Retouch4me
69 USD
Genuine Adobe Illustrator account
99 USD
Adobe Photoshop Copyright - Full App
120 USD
ChatGPT Plus Account (GPT-4)
16 USD
Adobe Premiere Pro Account
99 USD
MidJourney Account
29 USD
Windows 10 & 11 Pro Key
36 USD
Upgrade genuine Capture One account
120 USD