Best Selling Products
Instructions for installing and using Photoshop actions
Nội dung
- 1. Action features in Photoshop
- Actions is a feature that helps users record a series of operations and commands to automatically rerun the Action on one or more images. Actions in Photoshop can be saved as files with the .atn extension.
- 2. The meaning of Action in Photoshop
- 3.1. Create actions in Photoshop by adding them directly
- 3.2. Set actions in Photoshop using the Action panel
- 3.3. Add actions to Photoshop by copying the action file
- 4. Instructions on how to use Photoshop actions
- 5. Important notes when using Action Photoshop
- 5.2. Compatible actions
- 5.3. Action Board
- 5.4. Controls
- 5.5. Color palette menu
Instructions for installing and using Photoshop actions

Instructions for installing and using Photoshop actions
Action Photoshop This is a particularly useful feature for today's users during the photo editing process. Actions can be performed automatically on one or more different images. Our use of Action helps bring high editing efficiency while saving time and effort. The following article Sadesign will guide you on how to install and use the most detailed and simple Action in Photoshop.
1. Action features in Photoshop
Actions is a feature that helps users record a series of operations and commands to automatically rerun the Action on one or more images. Actions in Photoshop can be saved as files with the .atn extension.
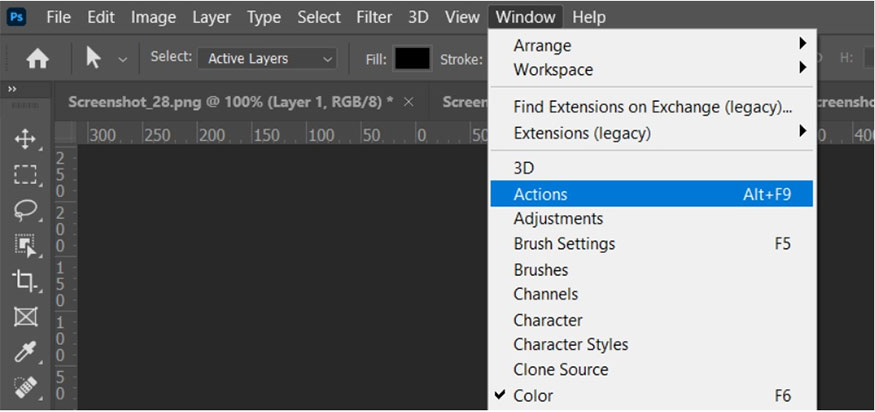
If users want to manage or edit Actions in the Actions table, they can do so by going to Window => Actions.

2. The meaning of Action in Photoshop
For Photoshop users Action is very important, especially for those who make large quantities of images. That photo will need to apply many of the same effects and edits to multiple images at the same time.
For example, if you want to manually change the resolution, size, or filter on hundreds of photos, you will need to perform meticulous operations on each image. This is very time-consuming and prone to errors due to differences in levels and parameters of the operations.
But when we use Action, everything becomes much simpler, you will only need to record the actions you want to apply to edit with only 1 image. You can then apply them to many other images by automatically running the Action again.

You can apply the Batch function to run Action by doing the following: Go to File => Automate => Batch. With this method, we will be able to save a lot of time and effort while still ensuring consistency, making the edited photo much more professional.
Using Action also has the effect of creating many extremely interesting and beautiful effects for your images. You can create your own personal Actions or you can also use pre-created Actions. You can refer to free or paid Actions online to use.
With this tool, you can unleash your creativity such as: Creating black and white photo conversion effects, making artistic photos, cartoon photos or creating classic photos,...
3. Instructions create actions in Photoshop
To be able to create action in Photoshop, we can apply 1 of the following 3 ways that Sadesign offers:
3.1. Create actions in Photoshop by adding them directly
To create an action using the direct add method, follow these steps:
-
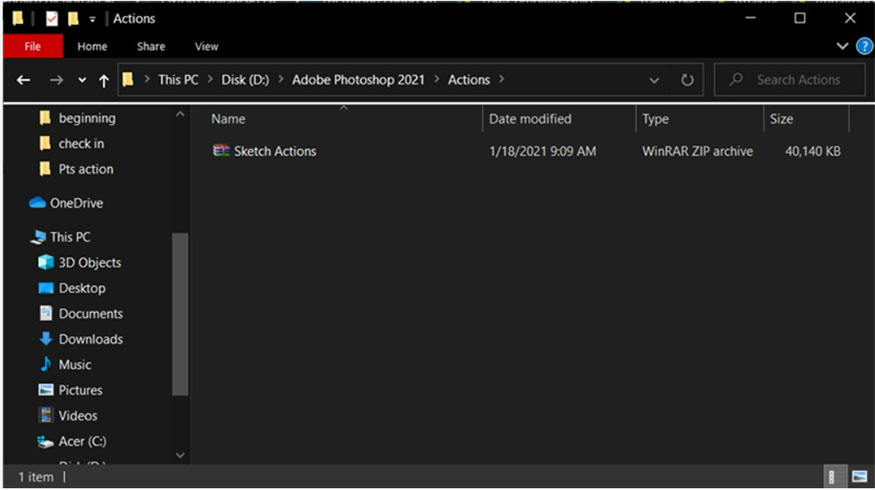
Step 1: You need to download the Action file to your device.
-
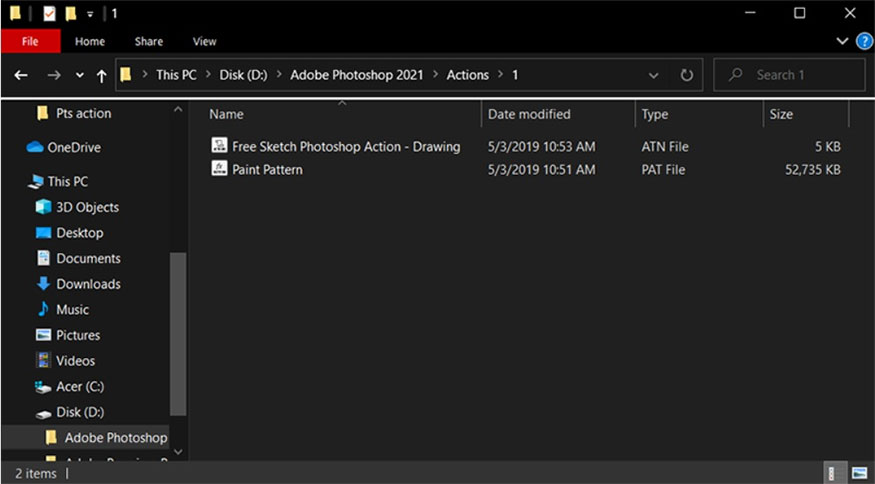
Step 2: Unzip the downloaded action and an .atn file will appear.
-
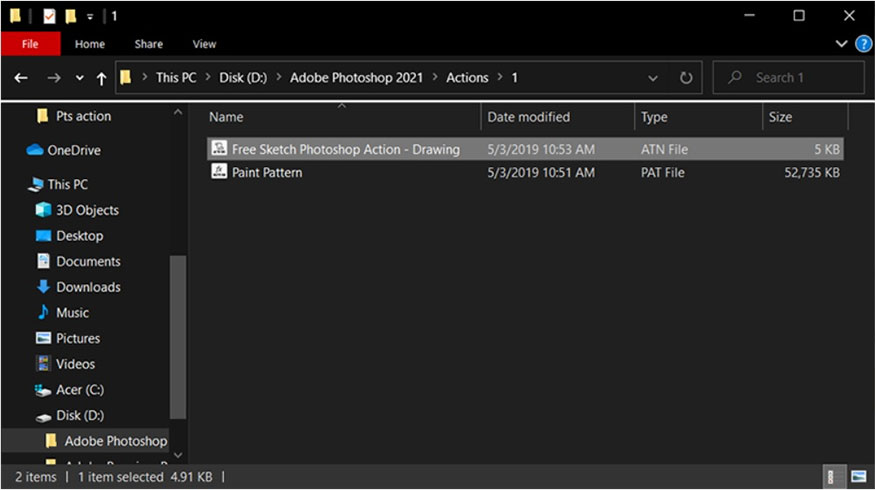
Step 3: Open the Action file (.ant) you just extracted.
-
Step 4: Go to Photoshop and open the Action panel, you will immediately see the effects of the newly downloaded action.
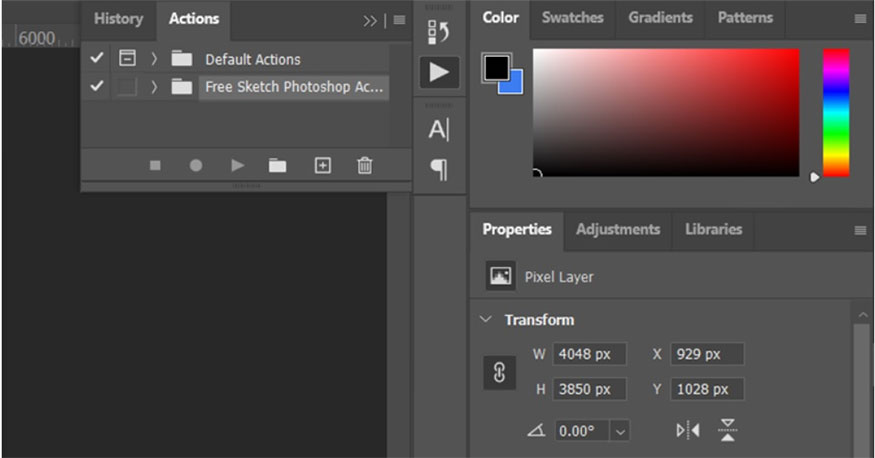
In case the action panel is hidden, go to Windows => Actions or press the shortcut Alt + F9 to display the action panel for use.
3.2. Set actions in Photoshop using the Action panel
Setting actions using the action table is quite simple with the process as follows:
-
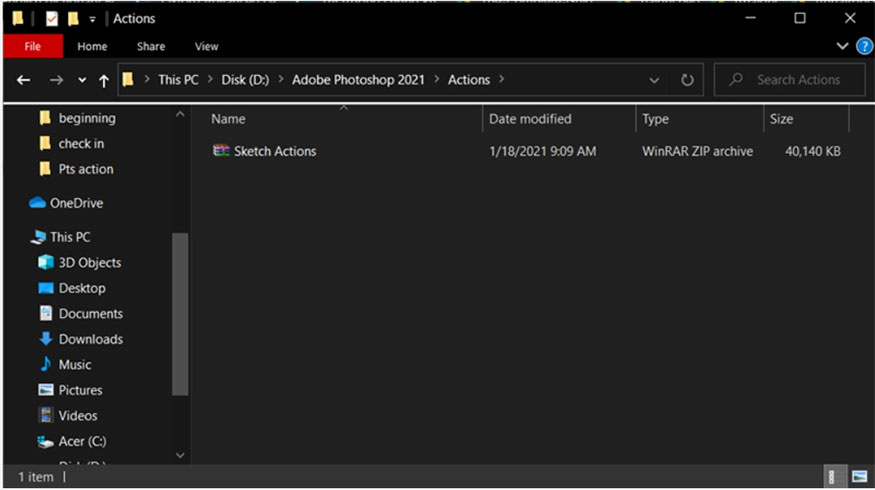
Step 1: Download the Action file to your computer, usually Action files will have the extension .atn or .zip. In case the file extension is .zip, you need to decompress it to convert it to an .atn file.
-
Step 2: Unzip the file to get the .atn file.
-
Step 3: Open Photoshop => Window => Actions will help you open the Actions panel.
-
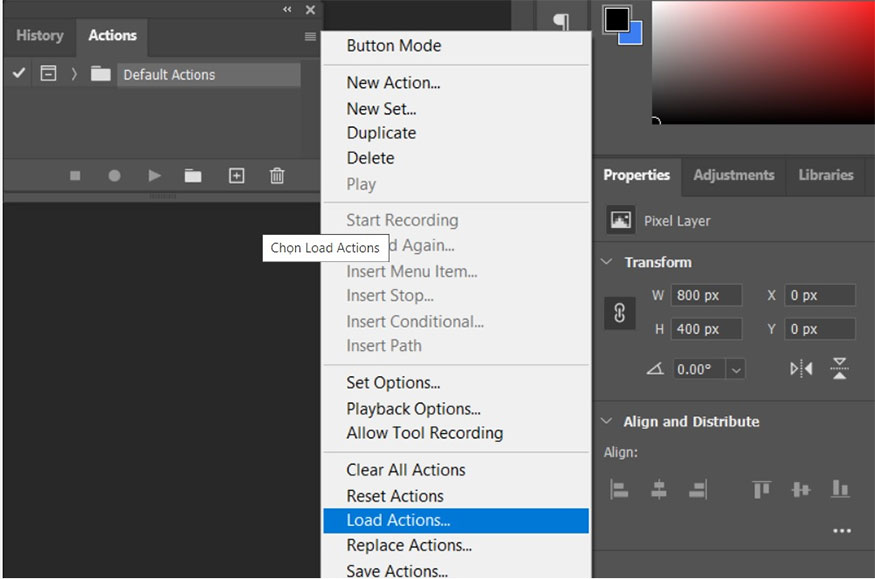
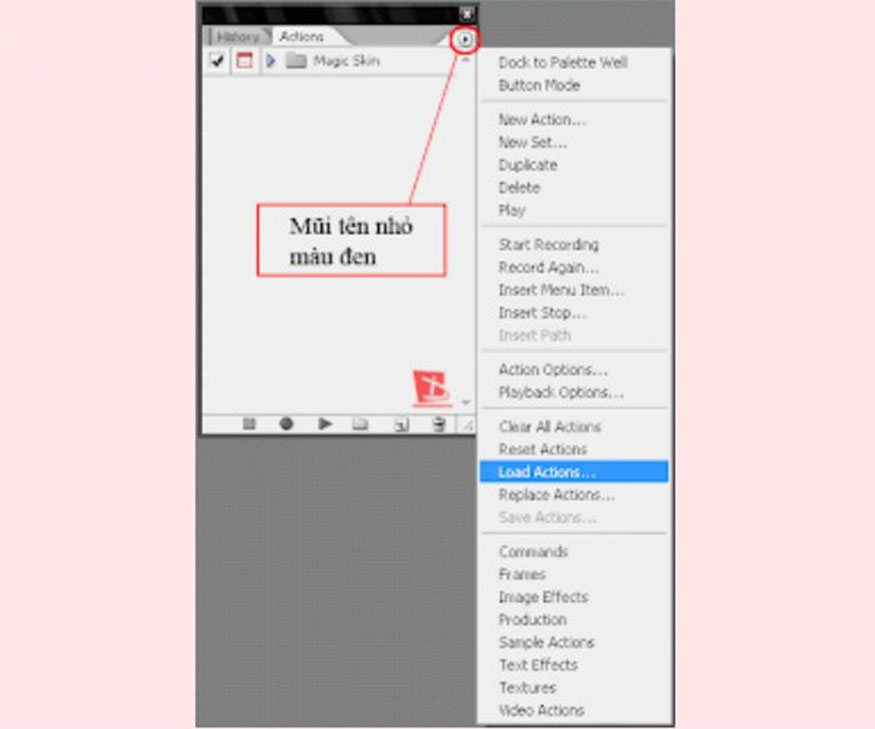
Step 4: At the action table, click the down arrow => select Load action.
-
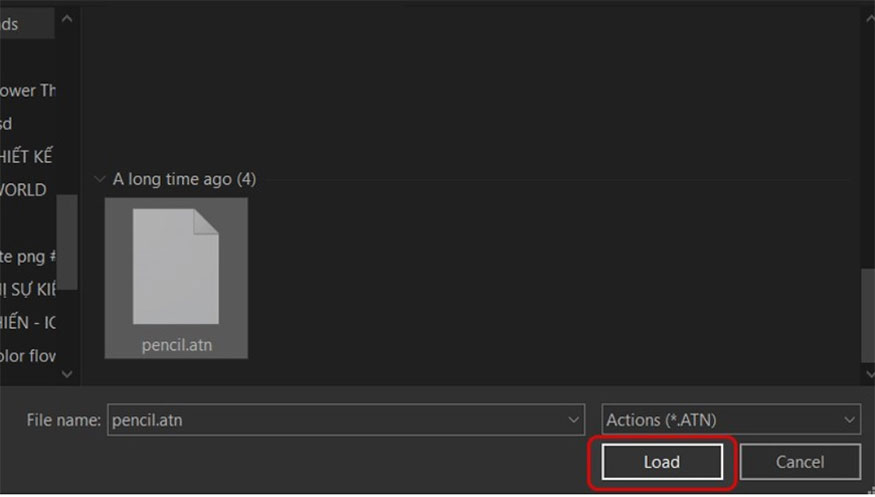
Step 5: Open the newly downloaded action folder in step 1 to select the .atn file => click load to install.
3.3. Add actions to Photoshop by copying the action file
In addition to the above two methods, you can also use the method of copying the Action file as follows:
-
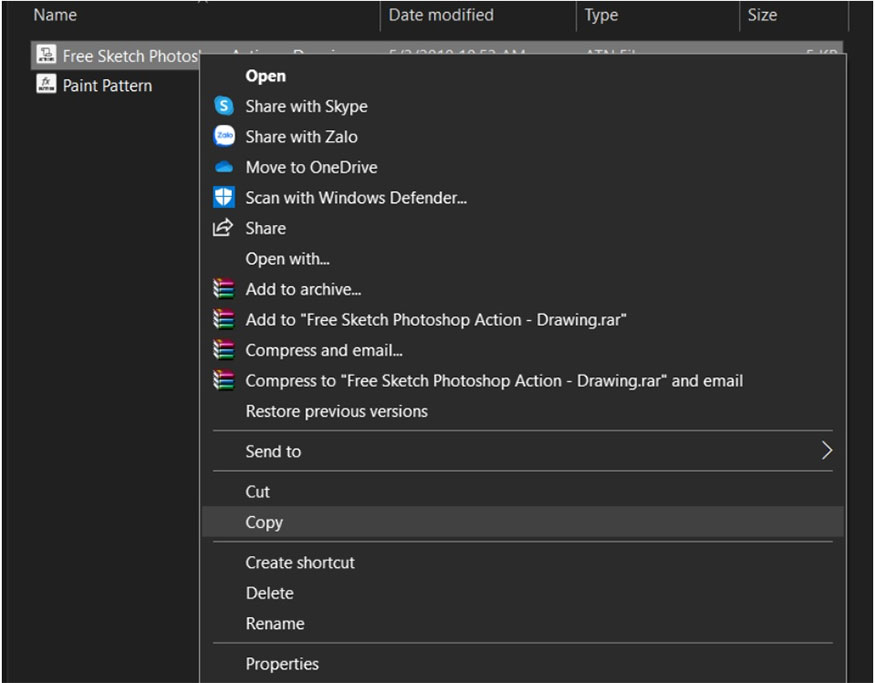
Step 1: Download the Action file to your computer. If it is a .zip file, unzip it to get the .atn file.
-
Step 2: Copy the downloaded Action file into the folder containing Actions in Photoshop software.
-
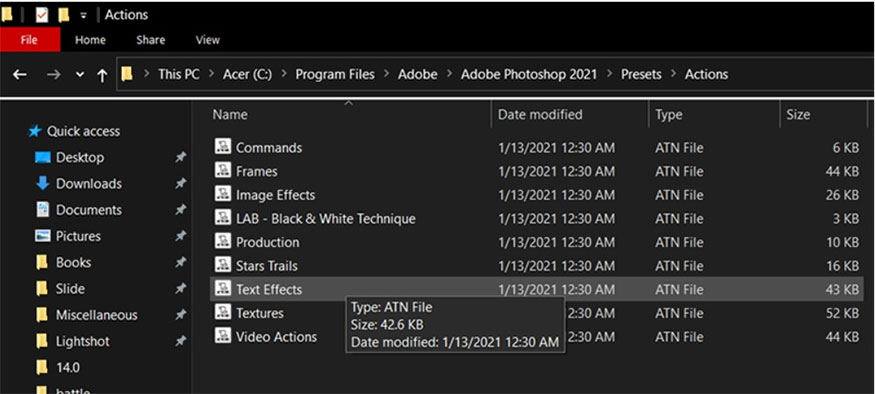
Step 3: Copy the actions file (.atn) to the Photoshop folder using the following path:
C:\Program Files\Adobe Photoshop CS6\ Preset\ Actions
In particular, [version] is the version that Photoshop is running, like CS6, CC,...
-
Step 4: Open Photoshop => click Window => select Actions to successfully open the Actions panel.
-
Step 5: In the Actions panel, select the menu with the three dashes icon to the right of the Actions panel => click Reset Actions.
-
Step 6: When the confirmation window appears, click OK to agree.
-
Step 7: The default Action and the newly copied Action will be displayed in the Actions panel. So you can freely choose and use these new Actions for editing.
4. Instructions on how to use Photoshop actions
If you don't know how to use Photoshop Action, please refer to the detailed steps below:
-
Step 1: Open the edited image to apply the action in Photoshop.
-
Step 2: Click Window => Actions to open the Actions panel.
-
Step 3: In the Actions table, choose the action you want to use. To preview the results, click on the eye icon to the left of the Photoshop action.
-
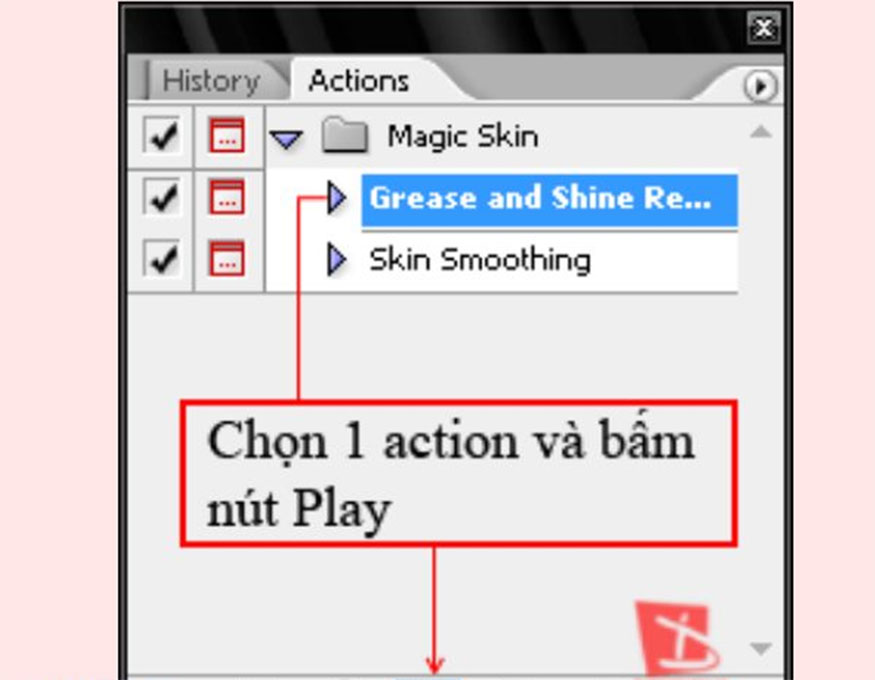
Step 4: After selecting the action => click Play (triangle) located on the right side of the Actions panel to help the action run on the image. Images are changed according to the operations and commands of the Photoshop action.
-
Step 5: Satisfied with the results, save them by selecting File => Save. In case you are not satisfied with the results, you can undo the changes by selecting Edit => Undo or pressing the keyboard shortcut Ctrl + Z to edit again from the beginning.
5. Important notes when using Action Photoshop
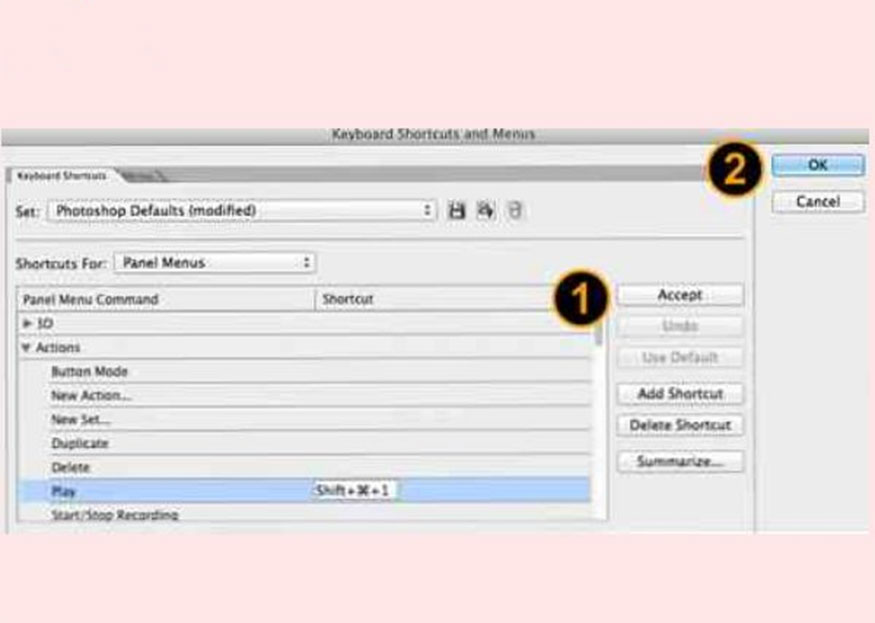
This feature allows users to launch Action on images quickly and conveniently. Users just need to assign a keyboard shortcut or mouse button to the Photoshop action, and then press the keyboard shortcut/mouse button to run the action.
If you don't know how to set up shortcuts for actions, follow the instructions below:
-
Step 1: In the Actions table => Photoshop action you want to assign a shortcut.
-
Step 2: Select the menu icon with three dashes on the right side of the Actions panel => select Action Options.
-
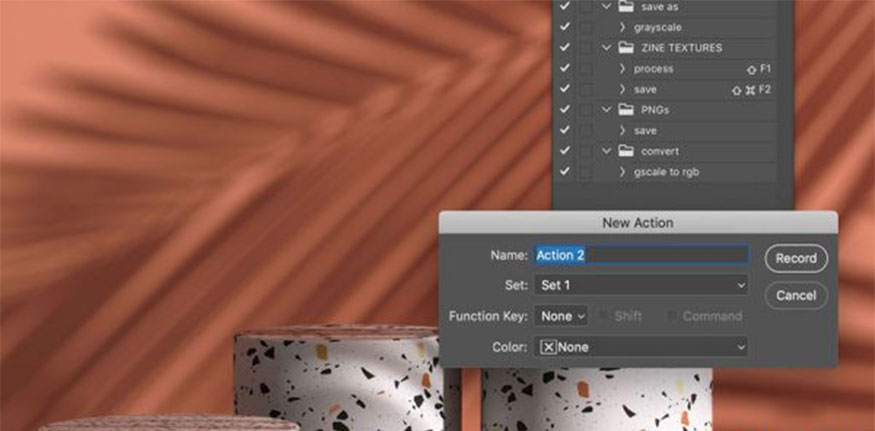
Step 3: Enter a name and select a color group for the Action Options window. The Function Key box allows users to choose a shortcut from F1 to F12 for the action. Combining shortcuts with Shift, Ctrl or Alt keys helps create many different shortcuts. Click OK to save after making your selection.
How to assign mouse buttons to Photoshop actions is done as follows:
-
Step 1: In the Action panel, select the Photoshop action you want to assign the mouse button.
-
Step 2: Select the menu icon with three dashes on the right side of the Actions panel => press Button Mode.
-
Step 3: Actions will be displayed in the table as colored buttons. Click on them to run the action and it's done.
5.2. Compatible actions
Not every action is compatible with all versions and images of Photoshop. There will be some actions that only work in certain versions of Photoshop or can only be applied to certain image types such as: RGB, CMYK, Grayscale,...
So before using Photoshop actions, check to see if they are suitable for your version or image format. You can find information online or try out the action with sample images to see the answer.
In case the action is not compatible with the Photoshop version or the image, the following errors will often appear:
-
The action does not run or stop midway.
-
Although the action runs, the results are not satisfactory.
-
Having performance problems.
If you want to fix the above errors, you can apply the following method:
-
Step 1: Upgrade to the latest version of Photoshop.
-
Step 2: Save your image to an image suitable for Photoshop action.
-
Step 3: Download another action compatible with your Photoshop version and image.
5.3. Action Board
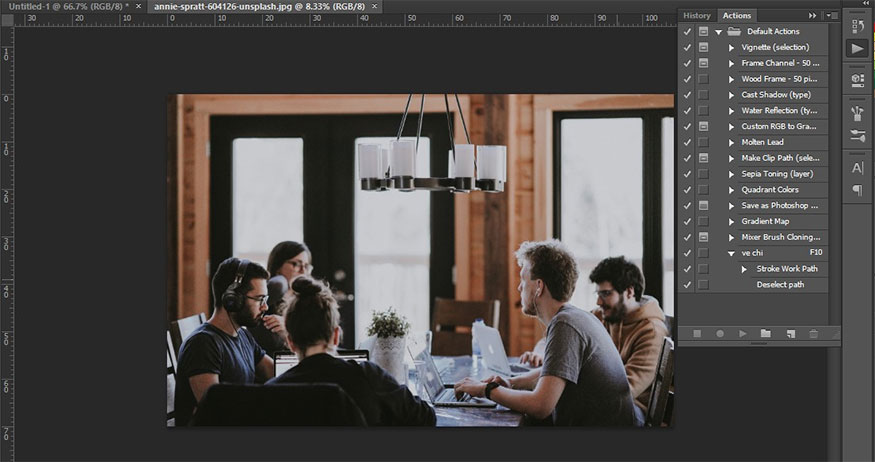
This is the place for you to use and manage action, to open the action, click Window => Actions. You will see the following components:
-
Action groups: A folder containing actions with the same topic. You can expand and collapse the action arbitrarily by pressing the arrow icon located to the left of the action group.
-
Child Actions: These are individual Photoshop actions, displayed as lines. Each child action will have an eye icon for users to preview the results before applying. There will be a few child actions that will also have a settings icon for users to adjust child action parameters before launching.
-
Steps: Are operations and commands recorded in child actions? Click the arrow icon to preview. The settings icon (gear shape) helps adjust parameters before launching.
-
Controls: Helps perform different functions on the action panel such as: menu, Delete, Play, Record, folder, Create new action and Stop.
5.4. Controls
Control buttons are responsible for many different functions Action table like:
-
Menu with three dashes icon: To access the menu and select action panels such as: Load Actions, Save Actions, Button Mode,...
-
Folder: To create a new action group.
-
Create a new action: To create a new child action.
-
Delete: To delete a step, child action or group of actions
-
Play: Launch the child's action on the image.
-
Record (red image): Record operations and commands to create a new child action.
-
Stop (square): End the process of recording a new child action.
5.5. Color palette menu
With the palette menu, you will be able to access the various options of the action panel. To open the palette menu, click on the menu icon just to the right of the action palette. In the Color Palette menu, there will be options:
-
Load Actions: Load the Action file saved as .atn from the computer.
-
Save Actions: Save existing Actions into an .atn file for use or sharing.
-
Reset Actions: Delete existing Actions and restore default Actions.
-
Replace Actions: Replace existing Actions with Actions from another .atn file.
-
Button Mode: Switch the action panel interface to the button to run Action with 1 click.

-
Playback Options: Adjust Action run settings such as speed, view mode,...
-
New Set: Like a folder to create a new Action group.
-
New Action: To create a new child Action.
-
Duplicate: Copy an Action group, a child Action or a step.
-
Delete: Delete an Action group, a child Action or a step.
-
Insert Menu Item: Insert commands from the Photoshop menu into the child Action being recorded
-
Insert Stop: Insert a stop into the recording child Action to perform manual operations before running the Action.
-
Insert Path: Insert a path from the Paths table into the child Action being recorded.
-
Insert Conditional: Insert a condition into the child Action being recorded to run steps depending on the results of the condition.
-
Allow Tool Recording: Record Photoshop tool operations into the child Action being recorded.
Above are details on how to install and use Action Photoshop. Hopefully, you will have more information to use the action effectively in Photoshop.


