Best Selling Products

ChatGPT Plus Account (GPT-4)
16 USD

Freepik Premium Account
59 USD

Upgrade genuine Capture One account
120 USD

Autodesk All App Account Copyright
120 USD

MidJourney Account
29 USD

Adobe Photoshop Copyright - Full App
120 USD

Plugin Retouch4me
69 USD

Capcut Pro 1 Year
39 USD

Genuine Cheap Canva Pro
39 USD

Adobe Premiere Pro Account
99 USD

Upgrade Duolingo Super
29 USD

Copyright Adobe Lightroom Account
59 USD

Upgrade Genuine Office 365
49 USD

Windows 10 & 11 Pro Key
36 USD

Genuine Adobe Illustrator account
99 USD
Mastering Diffuse Light: Secrets to Creating Soft and Refined Images
Nội dung
- 1. What is diffused light?
- 2. When should diffused lighting be used?
- 3. The difference between strong light and soft light
- 4. Diffuser devices and their operating principles
- 4.1 Softbox
- 4.2 Reflector and diffuser
- 4.3 Light source size
- 5. Camera settings for shooting during golden hour
- 6. Common mistakes when shooting during the golden hour.
Discover how to transform harsh light into soft light, creating smooth skin tones and highlighting your subject. You'll learn how to use diffusers, windows, curtains, and natural light sources. Suitable for portrait, product, and lifestyle photography in any setting.
Mastering Diffuse Light: Secrets to Creating Soft and Refined Images
Discover how to transform harsh light into soft light, creating smooth skin tones and highlighting your subject. You'll learn how to use diffusers, windows, curtains, and natural light sources. Suitable for portrait, product, and lifestyle photography in any setting.
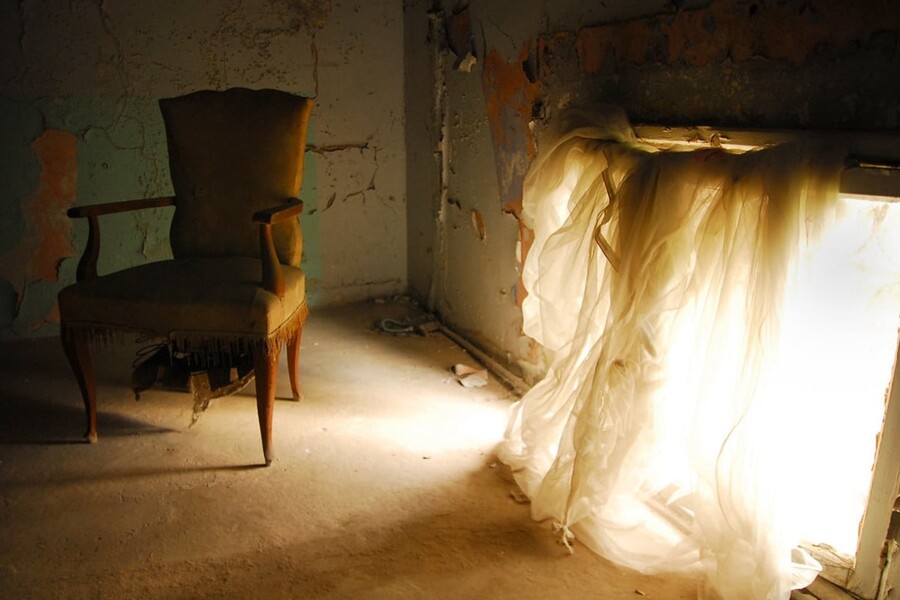
One of the most popular types of lighting among photographers is diffused light . This type of light reduces contrast, softens shadows, and brings a natural, harmonious look to the subject. From portraits and product photography to food photography, art photography, and landscapes, diffused light always plays a crucial role in creating beautiful and emotionally rich images. This article will help you understand what diffused light is, when to use it, how to create soft lighting indoors and outdoors, and provide basic knowledge so you can create soft lighting yourself even without professional equipment.
1. What is diffused light?
Diffused light is a form of light that has been scattered before reaching an object, causing the light rays to be distributed in multiple directions instead of being focused in a single direction. This diffusion occurs when light passes through a semi-transparent material or medium capable of altering the direction of light propagation, thereby reducing the intensity and contrast of the light.
Physically, diffused light reduces the contrast between bright and dark areas, creating a smooth transition between brightness levels. This helps limit overexposure, reduce harsh shadows, and retain detail in the intermediate areas. Diffuse light also reduces the sharpness of shadows, making their edges appear more blurred.
One important factor affecting diffusion is the relative size of the light source to the subject. When the light source has a larger surface area compared to the object, the light tends to be softer because the light rays arrive at more angles. Conversely, a small light source produces harsh light because the light rays are nearly parallel.
.jpg)
Diffused lighting affects not only contrast but also visual perception and image psychology. Soft lighting creates a natural, stable, and pleasant feeling, while hard lighting often creates a strong, sharp, and dramatic effect. Therefore, diffused lighting is often used in contexts requiring high aesthetics and good detail control.
Furthermore, diffused light helps reduce mirror-like reflections on glossy surfaces, while also increasing the uniformity of surface texture. This is why soft light is often considered the standard in many areas of photography, especially when accuracy and control over lighting are required.
2. When should diffused lighting be used?
Diffuse lighting is used when the goal is to reduce contrast, soften shadows, and enhance the naturalness of the image. This type of lighting is suitable for situations requiring detail control, brightness balance, and maintaining smooth transitions between light and dark areas.
In portrait photography, diffused light helps distribute light evenly across the skin's surface, reducing the emphasis on surface textures and minimizing deep shadows. This helps the image maintain a natural look and avoids excessive contrast on the face. Soft light also reduces the brightness difference between highlights and shadows, thus preserving detail in the intermediate areas.
In product and still life photography, diffused light helps control surface reflections, especially on highly reflective materials. Soft light creates even light transitions, avoiding harsh spots and helping to display the object's surface clearly and consistently. This is particularly important when the goal is to highlight the details of shape, color, and texture.
.jpg)
In food photography, diffused light helps maintain the softness of the light, minimizes strong reflections, and keeps colors stable. Hard light tends to accentuate reflections and create an imbalance in brightness, while soft light creates overall harmony.
Additionally, diffused lighting is used when the natural light environment is too strong or too contrasting. Diffusion helps bring the contrast level to a controllable range, reducing the risk of losing detail in both bright and dark areas.
3. The difference between strong light and soft light
Hard light and soft light differ primarily in the dispersion of light rays, the level of contrast, and the characteristics of shadows.
Strong light sources are small or far away, causing the light rays to run almost parallel. The result is clear shadows, sharp shadow edges, and high contrast. Strong light highlights shapes, structures, and microscopic details, but at the same time increases the risk of losing detail due to large differences in brightness.
Soft lighting has a large or diffused light source, causing light rays to come from multiple directions. This makes shadows softer, reduces contrast, and creates smoother transitions between light and dark areas. Soft lighting helps to preserve detail better in both bright and dark areas, while reducing the harshness of the light.
.jpg)
An important factor affecting the softness of light is the apparent size of the light source . The larger the light source relative to the subject, the softer the light. The distance from the light source to the subject also directly affects the softness, as the closer the distance, the larger the apparent size.
Additionally, reflective surfaces and the surrounding environment also contribute to softening the light. Light reflected from large surfaces tends to scatter and create a softer secondary light compared to the direct source.
Understanding the difference between the two types of light helps in better image control, allowing you to choose the right light for your aesthetic and technical goals.
4. Diffuser devices and their operating principles
The basic principle of light diffusion is to increase the effective light-emitting surface area and scatter light rays . This can be achieved using specialized equipment or simple materials.
4.1 Softbox
Softboxes work by reflecting light within a sealed space with a reflective surface, then allowing the light to pass through a diffusing material in front. This process makes the light more even and softer. Softboxes allow control over the direction, spread, and softness of the light through size and spacing.
The larger the softbox, the softer the light, because the apparent area of the light source increases. The distance of the softbox from the subject also affects the softness and intensity of the light.
.jpg)
4.2 Reflector and diffuser
A reflector can function as a secondary light source, reflecting light from the primary source to fill in dark areas. When using a diffuser, light passes through the translucent material and is scattered, helping to soften the direct light source.
The more diffusion layers there are, the softer the light becomes, but the intensity decreases. Therefore, a balance between softness and brightness is necessary to ensure proper exposure.
4.3 Light source size
In any lighting system, creating a "large light source" is crucial for achieving soft lighting. This can be achieved by:
Increase the size of the light-emitting surface.
Reduce the distance to the subject.
• Utilize large reflective surfaces
5. Camera settings for shooting during golden hour
The golden hour is characterized by soft light, gradually decreasing intensity, and warm color temperature. Because the light changes rapidly, camera settings should prioritize stability and control over exposure.
.jpg)
ISO: Low ISO helps reduce noise and retain detail. However, as light decreases, you may need to increase the ISO to maintain a safe shutter speed. Choosing the right ISO balances image quality and brightness.
Aperture: Aperture affects the amount of light, depth of field, and sharpness. A large aperture lets in more light, suitable for low-light conditions. A small aperture increases depth of field and retains detail throughout the frame.
Shutter speed: The shutter speed needs to be fast enough to avoid camera shake and blur. As the light fades, the speed can decrease, so consider using a tripod or increasing the ISO to maintain sharpness.
White Balance: The golden hour has a lower color temperature than daylight, creating a warmer tone. Choosing the right white balance helps maintain color stability and avoid color distortion. Using a fixed setting helps maintain color consistency across images.
Metering: The golden hour light has low contrast but changes rapidly. Choosing the right metering mode helps preserve detail in key areas. Exposure compensation may be needed to control highlights or shadows depending on the image objective.
Image format: RAW format allows for a wider dynamic range and greater flexibility in post-processing, especially when lighting changes rapidly.
6. Common mistakes when shooting during the golden hour.
Even with favorable lighting, a lack of technical control can still degrade image quality.
.jpg)
Uncontrolled exposure: Gradually decreasing light can easily lead to underexposed or detail-delayed images if not adjusted promptly. Monitoring the histogram and adjusting parameters is essential.
Poor adaptation to changing light conditions: Light intensity during golden hour changes rapidly. Without adjusting ISO, aperture, or shutter speed, exposure will be inconsistent.
Incorrect white balance: Automatic white balance can cause the loss of characteristic warm tones. Failure to control white balance leads to color inaccuracies.
Lack of contrast control: Even with soft lighting, a difference between bright and dark areas still exists. Without adjusting exposure or light direction, the image may lose detail.
Lack of preparation: The golden hour is short-lived. A lack of preparation in terms of equipment, location, and settings can lead to missing out on optimal lighting conditions.
Failing to take advantage of light characteristics: Golden hour light has a low beam direction, high softness, and warm color. Without understanding these characteristics, it's difficult to maximize the quality of the light.
Diffused light is a crucial element in photography, helping to create soft, natural, and emotionally rich images. Whether you're shooting in a studio or outdoors, with professional equipment or simply using natural light, understanding and controlling diffused light will significantly improve image quality.


VIP Products


Best Selling Products
ChatGPT Plus Account (GPT-4)
16 USD
Freepik Premium Account
59 USD
Upgrade genuine Capture One account
120 USD
Autodesk All App Account Copyright
120 USD
MidJourney Account
29 USD
Adobe Photoshop Copyright - Full App
120 USD
Plugin Retouch4me
69 USD
Capcut Pro 1 Year
39 USD
Genuine Cheap Canva Pro
39 USD
Adobe Premiere Pro Account
99 USD
Upgrade Duolingo Super
29 USD
Copyright Adobe Lightroom Account
59 USD
Upgrade Genuine Office 365
49 USD
Windows 10 & 11 Pro Key
36 USD
Genuine Adobe Illustrator account
99 USD