Best Selling Products

Upgrade Genuine Office 365
49 USD

ChatGPT Plus Account (GPT-4)
16 USD

Plugin Retouch4me
69 USD

Genuine Cheap Canva Pro
39 USD

Autodesk All App Account Copyright
120 USD

Copyright Adobe Lightroom Account
59 USD

Genuine Adobe Illustrator account
99 USD

Windows 10 & 11 Pro Key
36 USD

Adobe Photoshop Copyright - Full App
120 USD

Upgrade Duolingo Super
29 USD

Capcut Pro 1 Year
39 USD

Adobe Premiere Pro Account
99 USD

MidJourney Account
29 USD

Upgrade genuine Capture One account
120 USD

Freepik Premium Account
59 USD
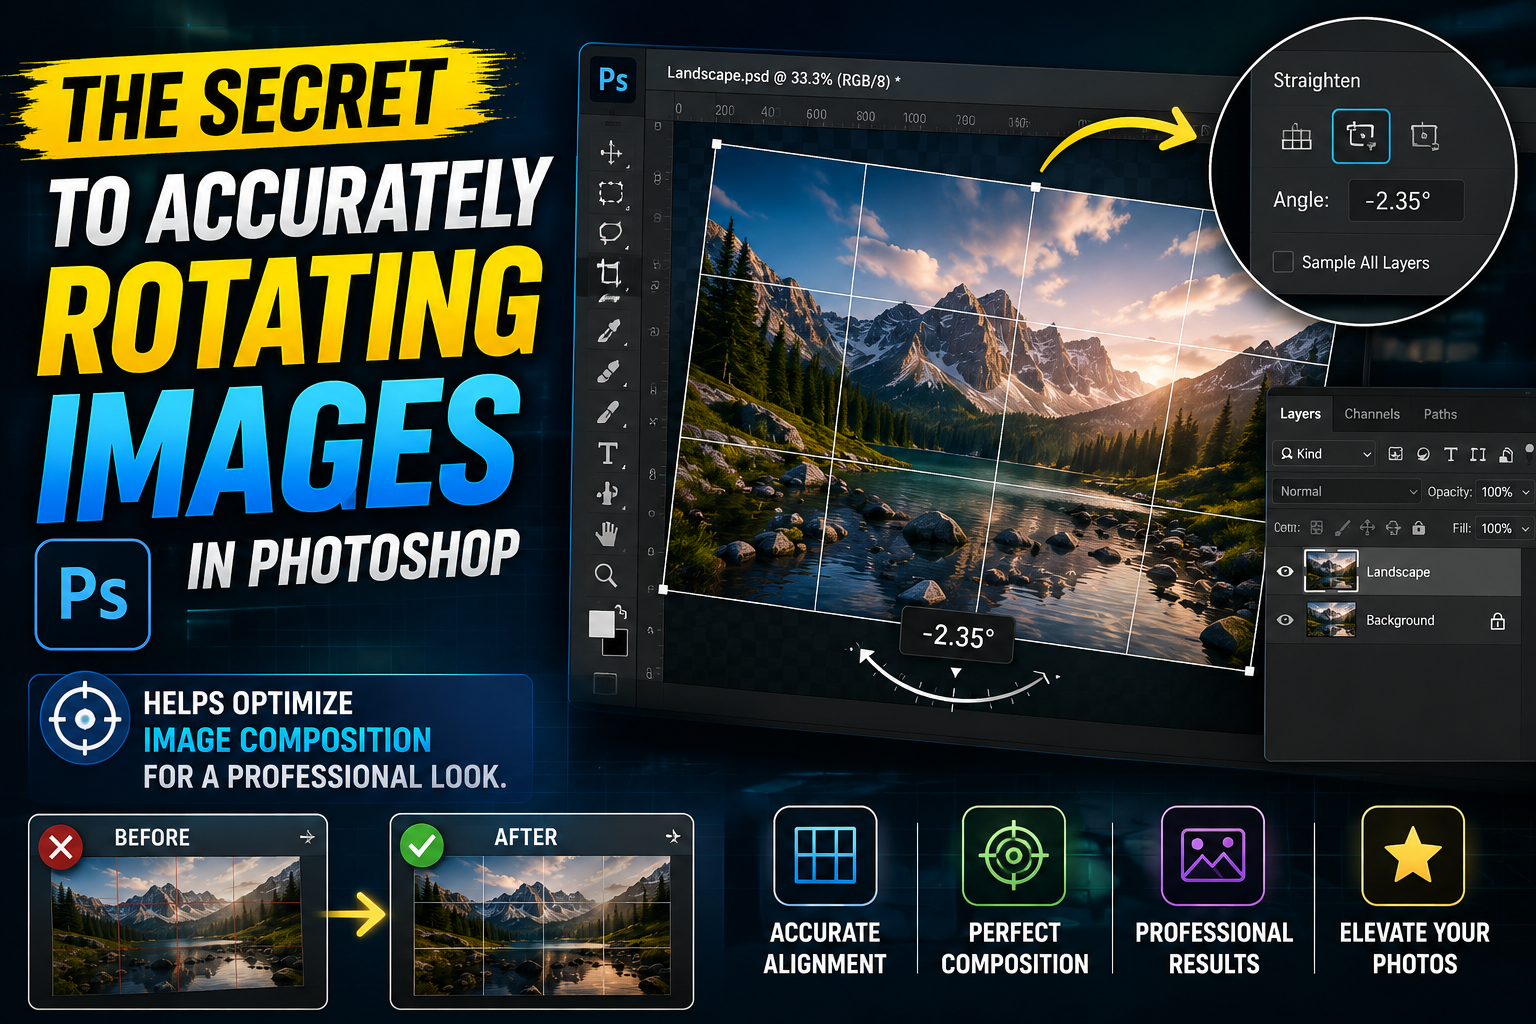
The secret to accurately rotating images in Photoshop helps optimize image composition for a professional look.
Nội dung
- 1. The importance of adjusting image angles in graphic design.
- 1.1 Balancing the horizon and the architectural axis
- 1.2 Creating an artistic perspective and dynamism
- 2. Basic object rotation methods using the Transform tool
- 2.1 Using the Free Transform command (Ctrl + T)
- 2.2 Rotate at fixed angles of 90 degrees and 180 degrees
- 3. Techniques for rotating the entire drawing using Image Rotation and Rotate View
- 3.1 Rotate the entire canvas for publishing purposes
- 3.2 Rotate View Tool (Keyboard shortcut R) for digital drawing workflow
- 4. AppVip.ai - A solution to optimize design processes and AI tools.
- 5. How to perfectly align an image using the Ruler Tool
- 5.1 Measure the angle of inclination using a specialized ruler.
- 5.2 Using the Straighten Layer feature
- 6. Rotate images in conjunction with Content-Aware to avoid losing detail.
- 6.1 Challenges when trimming empty corners
- 6.2 Smart image rotation solution with Content-Aware Fill
- 7. Mastering the Pivot Point in Advanced Design
- 7.1 How to change the rotation center position in Free Transform
- 7.2 Applying the center of rotation to create symmetrical patterns
- 8. Notes on image quality when performing rotation operations.
- 8.1 Convert to Smart Object before rotating
- 8.2 Selecting the appropriate interpolation method
- 9. Rotate images in three-dimensional space using Perspective and Skew.
- 9.1 Adjusting perspective with the Perspective tool
- 9.2 Using Skew to create a flexible tilt
- 10. Conclusion
Discover all the ways to rotate images in Photoshop: free rotation, fixed-angle rotation, horizon rotation, and canvas rotation. Learn the secrets to professional image rotation without losing detail.
1. The importance of adjusting image angles in graphic design.
Each photograph possesses its own unique visual language, and the angle is the element that creates the rhythm of that language.
1.1 Balancing the horizon and the architectural axis
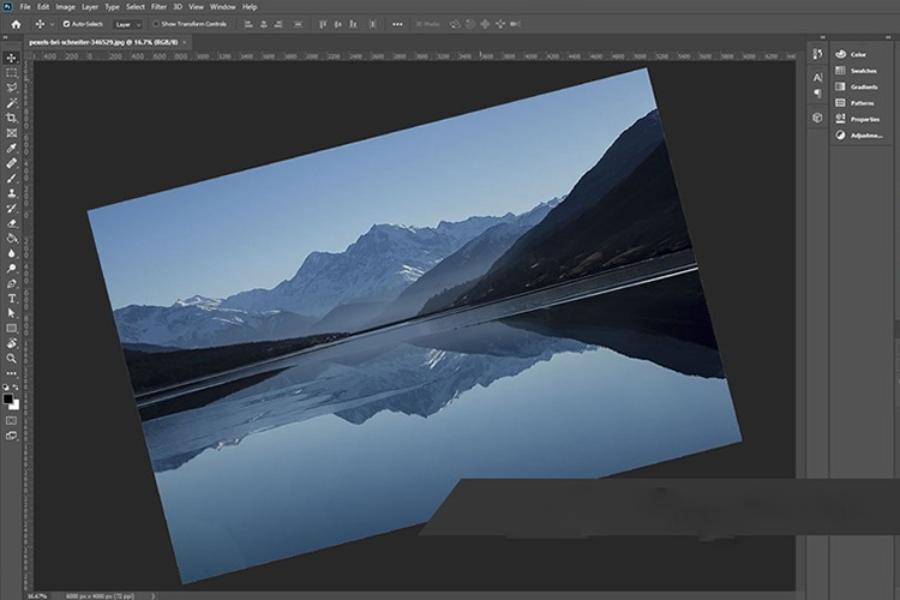
Landscape or architectural photographs often suffer from a distorted horizon line, which can be unpleasant for the viewer. Properly rotating the image helps restore physical balance, making the photograph look more stable and realistic.
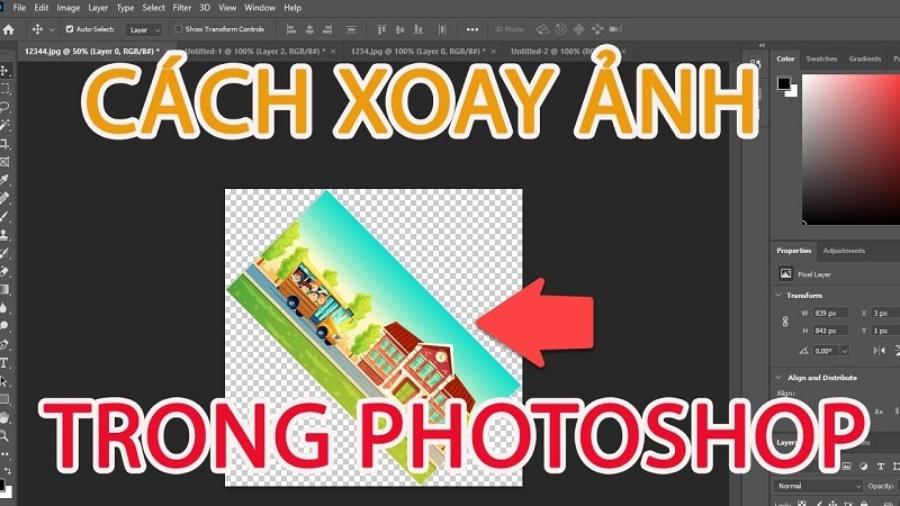
1.2 Creating an artistic perspective and dynamism
Sometimes, rotating an image at a specific angle (Dutch angle) can create a sense of anxiety, drama, or dynamism. This is a common technique in fashion and film photography to highlight the subject's personality.
2. Basic object rotation methods using the Transform tool
Transform is the most versatile toolset that anyone using Photoshop must familiarize themselves with right from the start.
2.1 Using the Free Transform command (Ctrl + T)
This is the quickest way to rotate a layer or selection. When the object's boundary is activated, simply move your mouse cursor outwards to the corners to reveal the curved arrow icon and begin rotating as desired.
2.2 Rotate at fixed angles of 90 degrees and 180 degrees
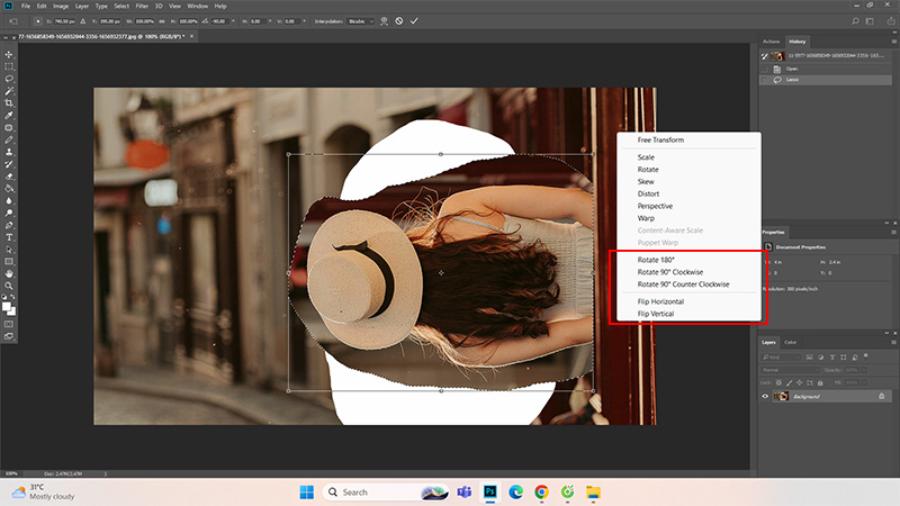
In the Edit > Transform menu, Photoshop provides quick rotation options such as Rotate 180°, Rotate 90° Clockwise, and 90° Counterclockwise. These options ensure absolute precision without the need for manual alignment.
2.3 Rotating Objects by Custom Angle in Options Panel
Besides manually rotating with the mouse, you can directly enter the precise rotation angle value in the Options bar while using Free Transform. Simply enter the desired number of degrees (e.g., 15°, -30°…), and Photoshop will rotate the object according to the set parameter. This method is especially useful when you need to ensure consistency between multiple objects or work in designs requiring high precision such as banners, posters, or UI interfaces.
3. Techniques for rotating the entire drawing using Image Rotation and Rotate View
There is a clear difference between rotating an object on a Layer and rotating the entire workspace.
3.1 Rotate the entire canvas for publishing purposes
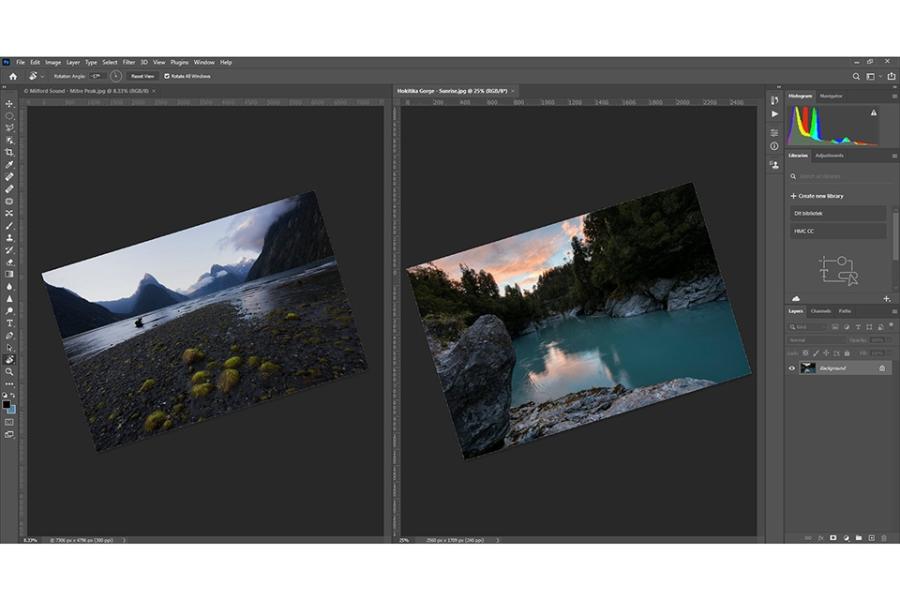
When you go to the Image > Image Rotation menu, everything displayed on the screen, including all layers, will be rotated. This is a necessary operation when you want to convert an image format from portrait to landscape or vice versa.
3.2 Rotate View Tool (Keyboard shortcut R) for digital drawing workflow
For digital illustrators, rotating the frame to suit their drawing position is a frequent need. The Rotate View Tool allows you to rotate the display screen without altering the actual pixel structure of the image file, making the creative process feel as natural as drawing on real paper.
4. AppVip.ai - A solution to optimize design processes and AI tools.
The development of artificial intelligence has opened up new approaches to image processing, saving designers hours of manual work. AppVip.ai is one of the leading reputable websites providing information and tools to support the most modern image editing today. Here, users can find in-depth tutorials on how to apply AI to layout adjustment, intelligent image rotation, and automatic compensation for missing areas when rotating. Combining basic Photoshop operations with the technological solutions on this website will help you improve the quality of your final product and optimize your work efficiency in the era of design 4.0.
5. How to perfectly align an image using the Ruler Tool
This is the most professional technique for handling tilted photos, eliminating the need for users to "guess" the angle with the naked eye.
5.1 Measure the angle of inclination using a specialized ruler.
Find the Ruler Tool (which is in the same group as the Eyedropper). Then, simply draw a straight line along the horizon or a slanted wall edge in the image. Photoshop will automatically calculate the exact deviation of that line.
5.2 Using the Straighten Layer feature
After drawing the lines using the Ruler Tool, simply click the "Straighten Layer" button on the options bar. Photoshop will automatically rotate the image to the perfect balanced position. This is the optimal solution for architectural or product photos that require high precision.
6. Rotate images in conjunction with Content-Aware to avoid losing detail.
A major problem when tilting an image is that the corners of the image will be missing compared to the original rectangular frame.
6.1 Challenges when trimming empty corners
Typically, after rotating an image, designers have to use the Crop tool to remove the white edges, which reduces the image area and can ruin the desired composition.
6.2 Smart image rotation solution with Content-Aware Fill
When using the Crop tool to rotate an image, check the "Content-Aware" box on the toolbar. Photoshop will automatically calculate and "draw" in the empty corners based on the surrounding data. The result is a straightened image that retains its original size and content.
7. Mastering the Pivot Point in Advanced Design
The center of rotation is the fixed point around which an object will rotate. By default, the center of rotation is located in the middle of the object, but you can change it.
7.1 How to change the rotation center position in Free Transform
When you press Ctrl + T, you'll see a small circular icon in the center of the frame. You can drag this icon to any location, for example, the corner of the object or a point outside the Layer. The object will then rotate around this new point.
7.2 Applying the center of rotation to create symmetrical patterns
The rotation shift technique is extremely useful when you want to create patterned circles, wheel spokes, or looping motion effects. Combining rotation shift with the repeat action command (Ctrl + Shift + Alt + T) will create complex symmetrical graphic designs in just seconds.
8. Notes on image quality when performing rotation operations.
Each time an image is rotated beyond a 90-degree angle, the pixels must be recalculated, which can affect image sharpness.
8.1 Convert to Smart Object before rotating
To preserve image quality, you should right-click on the Layer and select "Convert to Smart Object". As a smart object, you can rotate it repeatedly without blurring the image, because Photoshop will always retain the original data for calculations.
8.2 Selecting the appropriate interpolation method
In the Preferences panel, you can select methods such as Bicubic Sharper or Bicubic Smoother. For image rotation, choosing the correct interpolation method will help prevent the edges of the object from becoming jagged or blurry after the transformation.
9. Rotate images in three-dimensional space using Perspective and Skew.
Sometimes simply rotating the image flat isn't enough; you need to rotate it along spatial axes to match the perspective of the environment.
9.1 Adjusting perspective with the Perspective tool
This feature allows you to rotate the edges of the object in a converging direction, creating the illusion that the image is lying on an inclined plane and moving further away. This is an essential technique when creating product mockups or superimposing billboard images onto buildings.
9.2 Using Skew to create a flexible tilt
Skew allows you to independently pull the corners of the image to create horizontal or vertical tilt. This helps you fine-tune minor distortions caused by the camera lens, bringing subjects back to the correct perspective.
10. Conclusion
Rotating images might seem like a simple skill, but it actually involves a great deal of in-depth technical and artistic knowledge. Mastering basic tools like Free Transform to advanced features like Content-Aware Crop and the Ruler Tool will give you complete control over the appearance of your work. Support from technology platforms like appvip.ai, along with the habit of using Smart Objects, will ensure your workflow is always highly efficient without compromising image quality. Remember, each rotation angle serves a unique storytelling purpose, so always consider carefully before deciding to change the perspective of an image. We wish you success in applying this knowledge to create balanced, creative, and captivating graphic designs in your design career.





















VIP Products








Best Selling Products
Upgrade Genuine Office 365
49 USD
ChatGPT Plus Account (GPT-4)
16 USD
Plugin Retouch4me
69 USD
Genuine Cheap Canva Pro
39 USD
Autodesk All App Account Copyright
120 USD
Copyright Adobe Lightroom Account
59 USD
Genuine Adobe Illustrator account
99 USD
Windows 10 & 11 Pro Key
36 USD
Adobe Photoshop Copyright - Full App
120 USD
Upgrade Duolingo Super
29 USD
Capcut Pro 1 Year
39 USD
Adobe Premiere Pro Account
99 USD
MidJourney Account
29 USD
Upgrade genuine Capture One account
120 USD
Freepik Premium Account
59 USD