Best Selling Products

ChatGPT Plus Account (GPT-4)
16 USD

Genuine Cheap Canva Pro
39 USD

Plugin Retouch4me
69 USD

Capcut Pro 1 Year
39 USD

Adobe Premiere Pro Account
99 USD

Adobe Photoshop Copyright - Full App
120 USD

MidJourney Account
29 USD

Windows 10 & 11 Pro Key
36 USD

Autodesk All App Account Copyright
120 USD

Genuine Adobe Illustrator account
99 USD

Copyright Adobe Lightroom Account
59 USD

Upgrade genuine Capture One account
120 USD

Upgrade Duolingo Super
29 USD

Upgrade Genuine Office 365
49 USD

Freepik Premium Account
59 USD
Useful Tricks In After Effects You Should Know
Nội dung
- 1. Speed up your workflow with Pre-compose
- 1.1 Benefits of Pre-compose:
- 1.2 How to use Pre-compose:
- 2. Use Adjustment Layers to apply general effects
- 2.1 Advantages of Adjustment Layers:
- 2.2 How to use Adjustment Layers :
- 3. Easing to smooth the motion
- 4. Use Motion Blur to Add Realism
- 4.1 Benefits of Motion Blur
- 4.2 How to use Motion Blur
- 5. Track Matte for Creative Text Effects
- 6. Time Remapping to adjust the effect time
- 6.1 Benefits of Time Remapping
- 6.2 How to use Time Remapping
- 7. Layer Styles help you quickly create effects
- 8. Conclusion
Discover useful After Effects tricks to save time, increase productivity, and improve your motion graphics skills. Learn these tips in this detailed article.
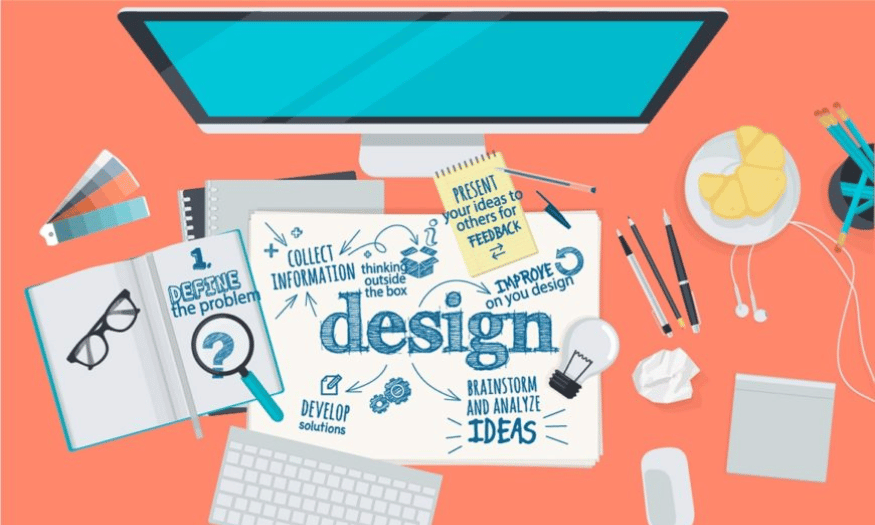
After Effects is a powerful and popular software for creating visual effects and motion graphics. However, with countless features and tools, fully exploiting this software can make many people feel overwhelmed. In this article, sadesign will share useful tricks in After Effects to help you improve work efficiency, save time and optimize workflow.
1. Speed up your workflow with Pre-compose
One of the most important tricks that professionals use to save time and organize their projects more efficiently in After Effects is to use Pre-compose . When working with complex layers or long video clips, you can combine layers into a new Composition for easier adjustment.
.jpg)
1.1 Benefits of Pre-compose:
Pre-compose is a powerful tool when working with design and editing software, especially in After Effects. It helps manage complex layers. This not only helps reduce clutter in the timeline, but also makes it easier to manage and edit complex elements.
Pre-compose also helps increase productivity, allowing effects or adjustments to be applied easily across a group of layers instead of having to manipulate each layer individually. It keeps your project neat, making it easy to handle multiple effects without getting confused.
This is an effective way to save time and maintain consistency in your project, especially for large and highly organized projects. Save time when you need to edit multiple layers at once.
In addition, using Pre-compose also allows users to apply effects or edits to a group of layers without having to perform each step individually, thereby saving time and improving productivity. In addition, Pre-compose also supports the reuse of designed components, helping to maintain consistency in the project and minimize errors. This is a powerful tool that contributes to optimizing the creative process and bringing more professional results.
1.2 How to use Pre-compose:
Select the layers to merge.
Press Ctrl+Shift+C (Windows) or Cmd+Shift+C (Mac).
Name the new Composition and press OK.
You can easily apply effects or adjust layers more flexibly. Using Pre-compose not only saves time but also significantly improves work efficiency, especially in large projects that require high flexibility.
2. Use Adjustment Layers to apply general effects
Instead of applying effects directly to each layer in your Composition, you can save time and gain more control by using Adjustment Layers . This allows you to apply a general effect to all the layers below it without having to work with each layer individually.
.jpg)
2.1 Advantages of Adjustment Layers:
Adjustment Layers are a powerful tool in image editing software, allowing users to apply editing effects such as brightness, contrast, color or special filters without directly changing the original image.
The main advantage of Adjustment Layers is that they are flexible and non-destructive, allowing users to easily adjust or remove changes without losing the original data. In addition, using Adjustment Layers also allows applying uniform effects to multiple layers or areas in a project, saving time and ensuring consistency in design. This is an indispensable tool for professional graphic designers and photographers.
2.2 How to use Adjustment Layers :
Adjustment Layers are a powerful tool in image editing software that allows you to apply effects and adjust color, brightness, contrast, or other elements to an entire image or a specific part without directly changing the original content. Specifically, the following steps:
Create a new layer (Layer > New > Adjustment Layer).
Drag the Adjustment layer above the layers you want to apply the effect to.
Apply the effect to the Adjustment Layer as usual.
Adjustment Layers make it easy to make non-destructive edits, allowing you to maintain flexibility in your workflow. This is especially useful when you need to experiment with different effects or revert to an image's original state. To use them effectively, simply add a new Adjustment Layer, select the type of effect you want, such as Levels, Curves, or Hue/Saturation, and then customize it as you like. You can also combine them with masks to control the range of the effect, giving you more precise and professional results.
3. Easing to smooth the motion
One of the keys to creating smooth and natural motion in After Effects is using Easing . When you adjust keyframes, applying easing will make the object's motion smoother, avoiding jerkiness.
How to apply Easing:
Select the keyframe you want to apply easing to.
Press F9 to apply default easing.
To make specific adjustments, right-click on the keyframe, select Keyframe Assistant , and choose Easy Ease In or Easy Ease Out as needed.
Easing is an important technique in design and programming, used to smooth out motion and create a more natural feel in transitions. By adjusting the rate of change over time, easing makes motions smoother, less rigid, and provides a better user experience. Common easing functions such as ease-in, ease-out, ease-in-out, or cubic-bezier allow designers and programmers to have fine-grained control over how motions occur, optimizing the aesthetics and efficiency of interfaces.
Choosing the right type of easing should be based on your design goals and the user experience you want to achieve. Also, make sure that the movements using easing are smooth and natural, avoiding any abrupt or inconsistent feeling. Regular testing and tweaking will help you optimize the effectiveness of easing in your project.
4. Use Motion Blur to Add Realism
To create a more realistic sense of motion for objects in After Effects, applying Motion Blur is an indispensable step. Motion Blur helps objects blur when moving quickly, creating a more realistic sense of motion, similar to what we see in real life.
.jpg)
Motion Blur effect is an important tool in adding realism to images or videos, especially in the field of graphics and film production. When used properly, Motion Blur helps recreate the feeling of natural movement, making objects in the scene come alive and closer to the human eye.
This not only improves the visual experience but also creates a seamless, less “artificial” feel that is often seen in digital footage. However, to achieve optimal results, careful consideration must be given to the intensity and direction of the effect, ensuring that it matches the speed and context of the subject’s movement. The subtlety of the application of Motion Blur will bring high aesthetic value, contributing to the quality of the final product.
4.1 Benefits of Motion Blur
Motion Blur is an important technique in graphics and image processing that enhances realism and smoothness in moving scenes. When used properly, Motion Blur not only accurately reproduces the way the human eye sees fast-moving objects, but also minimizes the jerkiness or unnaturalness in frames.
Especially in the fields of cinema, video games and animation, the application of Motion Blur brings a more vivid visual experience, while creating depth and continuity for the scenes. However, to achieve optimal results, it is necessary to consider the appropriate level of application, avoiding overuse leading to loss of detail or reducing the overall image quality.
4.2 How to use Motion Blur
Motion Blur is an important technique in the field of graphics and image editing, helping to enhance the realism and liveliness of moving scenes. When Motion Blur is applied, moving objects in the frame will have a natural blur effect, simulating the way the human eye or camera records motion in reality.
To use it effectively, you need to adjust parameters such as motion speed, blur direction, and blur level to suit the context. Proper application of this technique not only highlights the dynamic element but also adds depth and continuity to the image or video, bringing a more impressive and professional visual experience.
5. Track Matte for Creative Text Effects
Track Matte is an incredibly powerful tool in After Effects that allows you to create effects such as text peeking out from a background image or video. You can use Track Matte to create creative effects, such as making text appear as an object moves past it.
How to use Track Matte:
Place the video or image you want to use as a background below the text layer.
Select the text layer and under TrkMat (if you don't see it, you can turn it on in the Timeline bar), choose Alpha Matte or Luma Matte depending on the effect you want to create.
The text will now only display within the image or video area of the underlying object.
By using Track Matte, you can combine video or image layers with text to create effects such as text fading through the image, text moving along the background, or special lighting effects. This technique not only enhances the aesthetics but also highlights the message you want to convey, especially in advertising projects, product introductions or art videos. Mastering how to use Track Matte will give you a great advantage in improving the quality and professionalism of your creative products.
6. Time Remapping to adjust the effect time
If you want to create slow motion, rewind or adjust time in your own way, Time Remapping is one of the extremely useful tools. With this feature, you can flexibly slow down or speed up, even reverse time, thereby bringing creativity and professionalism to the final product. This is an important technique, often used to emphasize details, create a sense of drama or highlight special moments in the video.
.jpg)
6.1 Benefits of Time Remapping
Time Remapping offers significant benefits in video editing and creative content production. This tool allows users to flexibly change the playback speed of videos, from slowing down to emphasize important details to speeding up to save time or create unique effects.
This not only enhances the aesthetics but also enhances the ability to convey emotions and ideas effectively. In particular, Time Remapping helps optimize the viewer experience by adjusting the rhythm and creating smoothness in movements, thereby highlighting the message that the producer wants to convey.
6.2 How to use Time Remapping
Time Remapping is a powerful tool in video editing that allows you to change the playback speed of clips to create slow motion or fast motion effects. To use Time Remapping, you first need to open a video editing software that supports this feature, such as Adobe Premiere Pro. Then, select the clip you want to edit on the timeline, right-click and select "Time Remapping" or use a similar option in the menu.
Next, you can add keyframe points to define the points in time where the speed will change. Drag the slider up to speed up or down to slow down. Pay attention to maintaining smoothness of the motion by using assistive tools like “Ease In” and “Ease Out”. Finally, review and tweak to make sure the effect looks professional and matches your creative goals.
7. Layer Styles help you quickly create effects
Layer Styles is a powerful tool in graphic design, allowing users to quickly apply effects such as shadows, lighting, borders, and many other options to enhance the aesthetics and professionalism of the work. This tool not only saves time but also provides flexibility in customizing graphic elements, meeting the diverse creative needs of users.
(1).jpg)
One of the quickest and easiest ways to animate layers in After Effects is to use Layer Styles . Layer Styles like Outer Glow, Inner Glow, Drop Shadow, or Bevel and Emboss will help you add special effects without having to use complicated tools.
How to use Layer Styles:
Layer Styles are a powerful tool in graphic design, allowing you to apply effects such as Drop Shadow, Outer Glow, Inner Glow, Stroke, and more to the layers in your project. To use Layer Styles, simply double-click on the layer you want to edit in the Layers panel or select "Blending Options" from the right-click menu.
Here, you can customize each effect to your liking by adjusting parameters such as Opacity, Size, Angle, and Color. Layer Styles not only enhance aesthetics but also optimize workflow, as these effects can be applied non-destructively and can be easily edited or copied to other layers. Mastering the use of Layer Styles will help you improve the quality and efficiency of your design projects.
Layer Styles are useful when you want to create a quick effect without having to create multiple layers or use complicated tools.
8. Conclusion
After Effects is a powerful tool, with countless features and tips to help you create impressive motion graphics effects. Applying useful tricks during your workflow will not only save you time but also increase your efficiency and creativity in every project. By understanding features such as Pre-compose, Adjustment Layers, Easing, Motion Blur, Track Matte, Time Remapping and Layer Styles, you will be able to create more complete and professional products. Try applying these tips and level up your After Effects skills today!


VIP Products


Best Selling Products
ChatGPT Plus Account (GPT-4)
16 USD
Genuine Cheap Canva Pro
39 USD
Plugin Retouch4me
69 USD
Capcut Pro 1 Year
39 USD
Adobe Premiere Pro Account
99 USD
Adobe Photoshop Copyright - Full App
120 USD
MidJourney Account
29 USD
Windows 10 & 11 Pro Key
36 USD
Autodesk All App Account Copyright
120 USD
Genuine Adobe Illustrator account
99 USD
Copyright Adobe Lightroom Account
59 USD
Upgrade genuine Capture One account
120 USD
Upgrade Duolingo Super
29 USD
Upgrade Genuine Office 365
49 USD
Freepik Premium Account
59 USD