Best Selling Products

Windows 10 & 11 Pro Key
36 USD

Genuine Adobe Illustrator account
99 USD

Plugin Retouch4me
69 USD

Adobe Premiere Pro Account
99 USD

Upgrade Genuine Office 365
49 USD

Genuine Cheap Canva Pro
39 USD

Adobe Photoshop Copyright - Full App
120 USD

Freepik Premium Account
59 USD

Autodesk All App Account Copyright
120 USD

Capcut Pro 1 Year
39 USD

Upgrade genuine Capture One account
120 USD

Copyright Adobe Lightroom Account
59 USD

MidJourney Account
29 USD

Upgrade Duolingo Super
29 USD

ChatGPT Plus Account (GPT-4)
16 USD
Why you should calibrate your monitor's colors
Nội dung
What is monitor calibration?
To calibrate your monitor, you need a ball-like device that sits on top of your monitor and measures the colors displayed. This is called a spectrometer. It is just a name for what it does: photo = light, spectrum = the word spectrum means a range of colors, and meter = to measure. So it measures the color of light. Don't worry, you don't have to buy one of these specifically and bundle software with it, they come as kits, with the required software included.What do you need to do?
Some examples of monitor calibration toolkits include the X-Rite i1 Display Pro (which is what I got), Spyder Pro, and Color Munki. The process for each is similar and fairly straightforward. You first install the software and run it. Next you plug in the device. You must initially decide on the settings, but exact settings are often suggested. Usually this is 120cd/m2 or less, D65 or Native for Illuminant and 2.2 for Gamma. When getting started, you may need to set the screen's brightness and contrast through the monitor's own menu. Finally, you just let the software run and it will automatically create a profile when finished. It is important that you turn on the monitor for a while before starting the calibration. It takes up to 30 minutes for the screen to resolve.How do you calibrate the monitor?
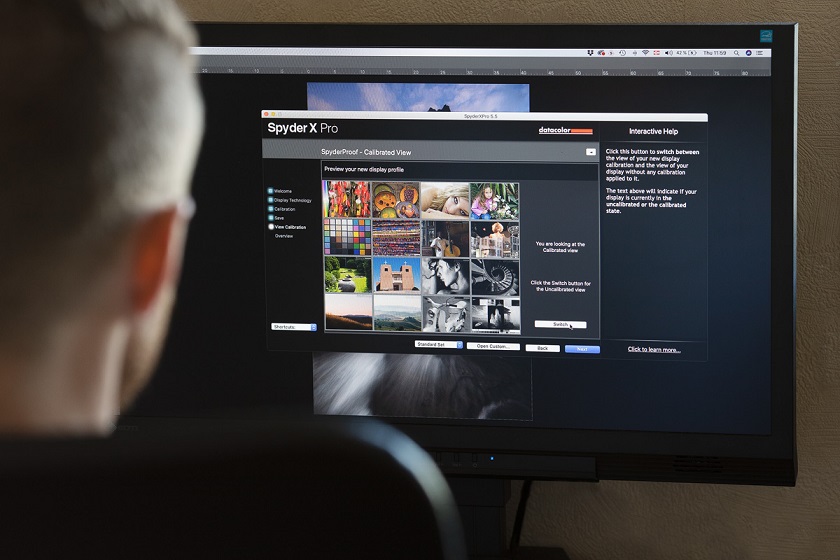
Take a look at this using the software that comes with i1DisplayPro, i1 Profiler. This is the screen you see at the start (after product registration).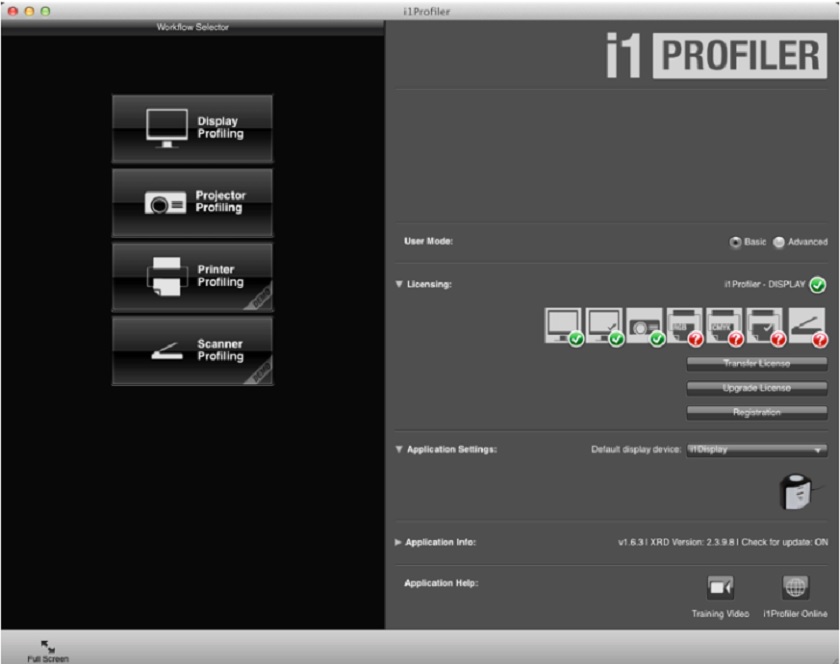 Click Display Profiling to get started. The software automatically detects your monitor type and applies the recommended defaults to the display. Click Next (below).
 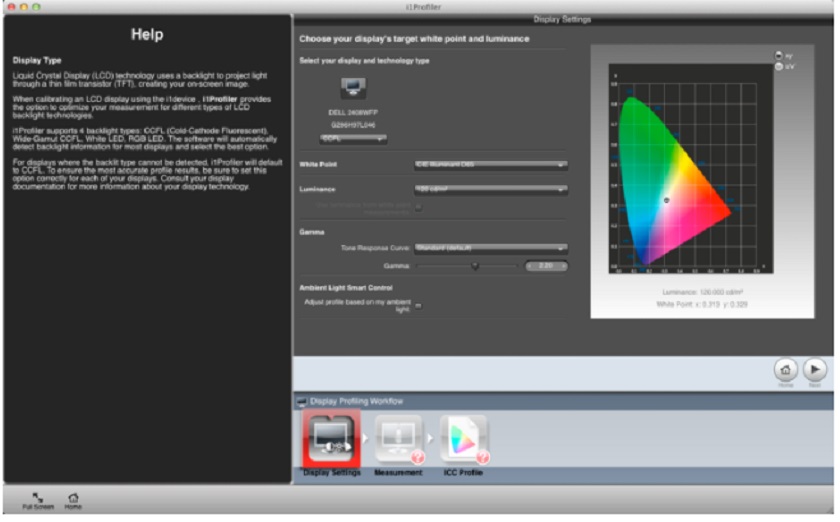 You are now on the Measurements screen (below). Select manual options for screen brightness and contrast. The colored boxes you see on the right are the colors that will flash on the screen as the calibration runs. Click the Next button to get started.
 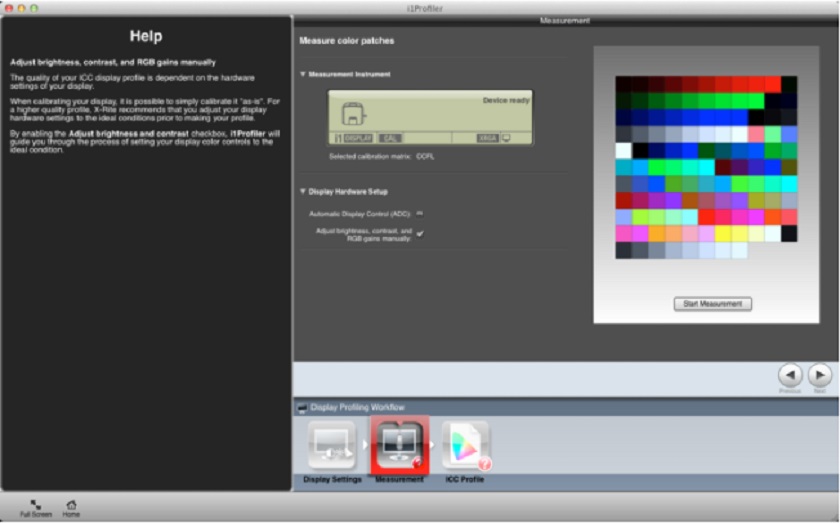 The next image, below, is a cropped version of the screen you'll see. Place the device on the screen according to the instructions. Press 'Ok' to continue.
 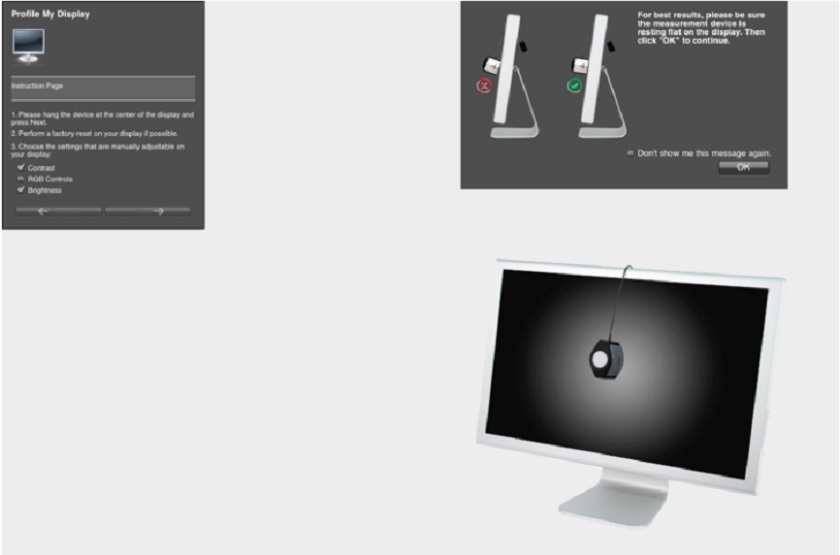 Use the controls on your monitor to get the correct brightness settings (see below) for the profile. Click Next when it is correct. The screen will cycle through a series of colors seen as further back tiles. As each tile becomes visible, the entire screen changes to that color. This process takes about two minutes.
 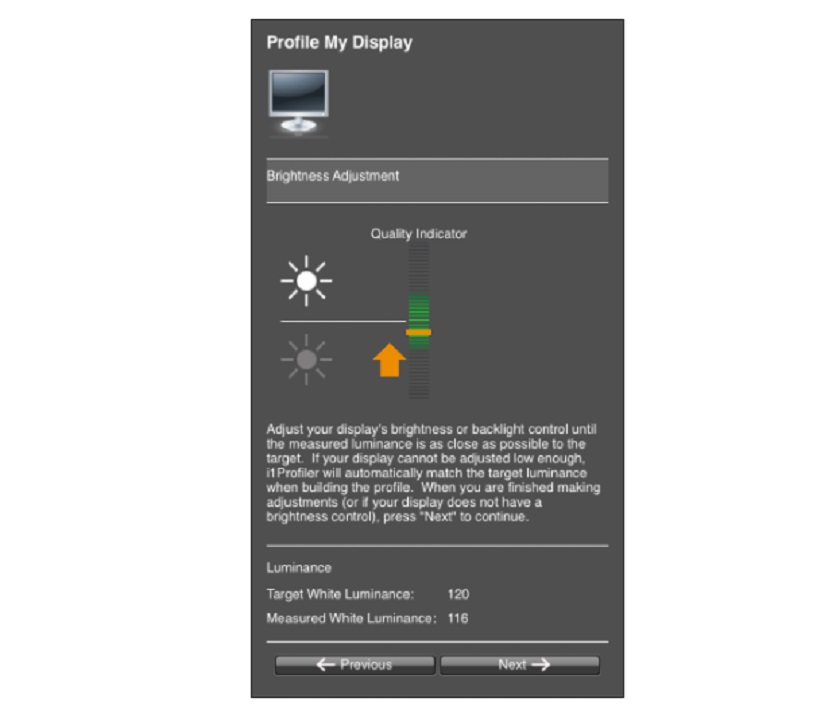 Turn the device off and set it to the ambient light, even if you are not using this function.
 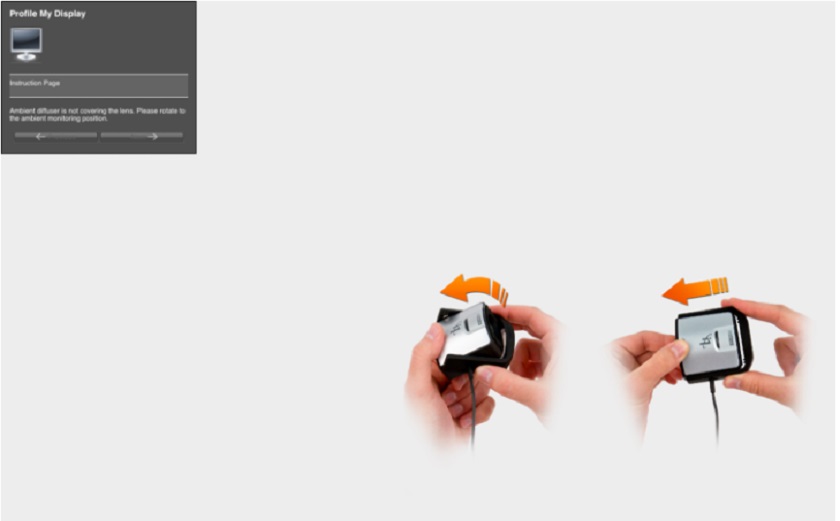 The tiles now show a before and after color change from the config. Click Next.
 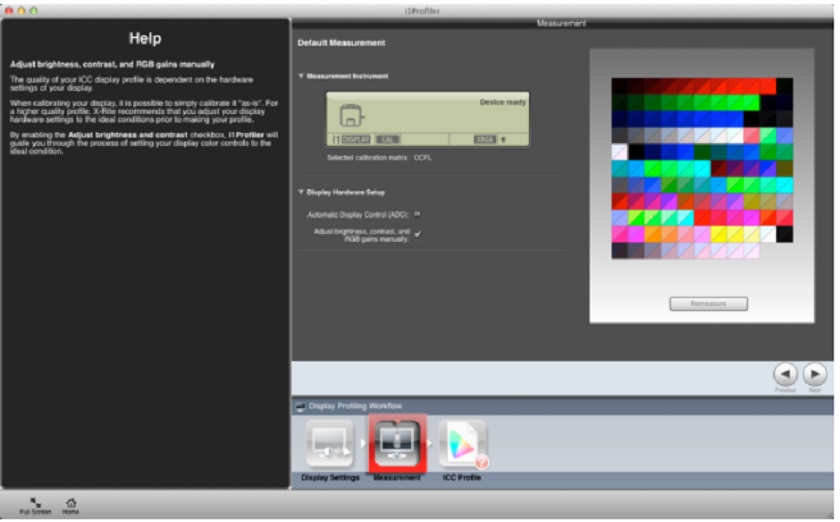 Click Create and Save configuration to create a new monitor profile.
 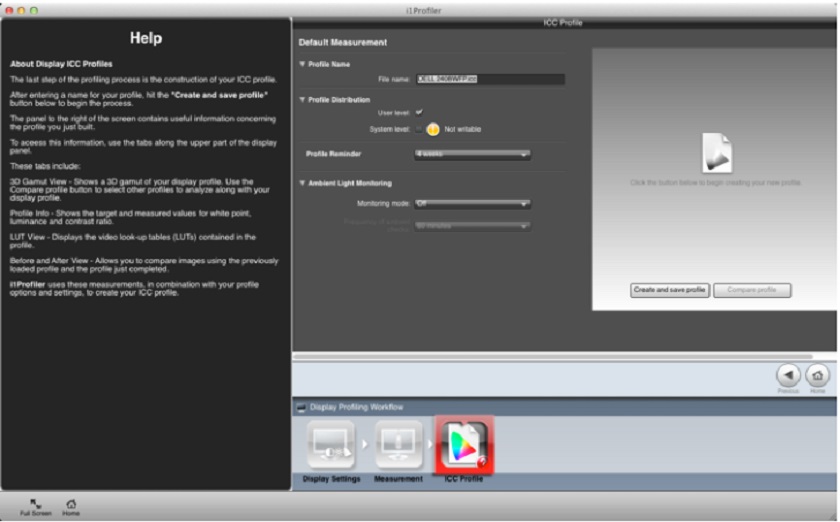 Once the profile is created, you can compare using the test charts on the screen.
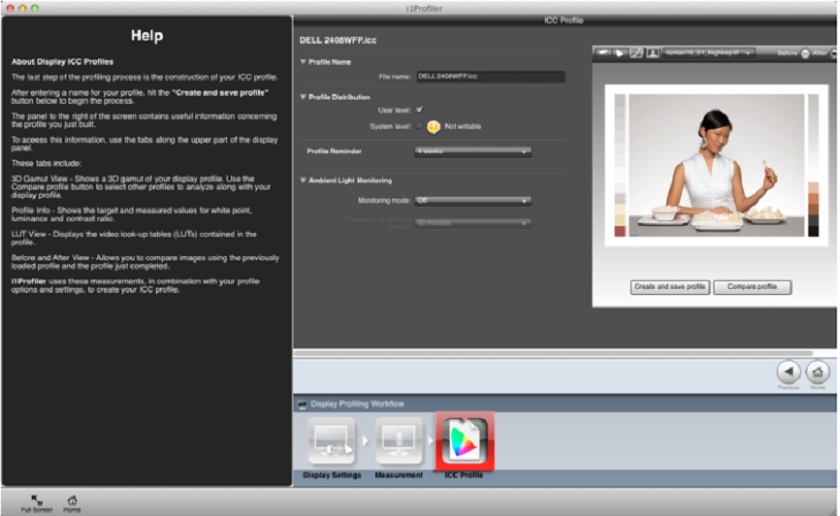
The importance of understanding color spaces
Regularly calibrating your monitor is essential to producing prints that accurately represent what you see on your screen. However, there is still a chance that the colors are wrong. The most likely reason is that your image is saved and/or printed in the wrong color space. Color space, in simple terms, is the range of colors that can be produced in an image. The most popular ones are sRGB, Adobe RGB and ProPhoto RGB. You may not know that there is a huge difference between them, which is why printing or editing in the wrong color space can cause colors to look off when viewed on a different medium, even when calibrate the screen!Conclusion
Monitor calibration is an important part of the digital photography process but, unfortunately, it is often overlooked. It goes without saying that this can cause a lot of frustration as failure to do so will greatly affect image quality. Non-photographers viewing your work may not have a calibrated monitor. In a perfect world, all monitors would be perfectly calibrated so the picture would look the same on every monitor. The sad thing is that this is not the case (yet). However, calibrating your monitor is even more important to print results. You don't want your blue photo to look pink when printed, do you? In short, working on an uncalibrated monitor means you're working blindly and have minimal control over the finished product.


VIP Products


Best Selling Products
Windows 10 & 11 Pro Key
36 USD
Genuine Adobe Illustrator account
99 USD
Plugin Retouch4me
69 USD
Adobe Premiere Pro Account
99 USD
Upgrade Genuine Office 365
49 USD
Genuine Cheap Canva Pro
39 USD
Adobe Photoshop Copyright - Full App
120 USD
Freepik Premium Account
59 USD
Autodesk All App Account Copyright
120 USD
Capcut Pro 1 Year
39 USD
Upgrade genuine Capture One account
120 USD
Copyright Adobe Lightroom Account
59 USD
MidJourney Account
29 USD
Upgrade Duolingo Super
29 USD
ChatGPT Plus Account (GPT-4)
16 USD