Best Selling Products

Upgrade Genuine Office 365
49 USD

Freepik Premium Account
59 USD

Genuine Adobe Illustrator account
99 USD

Upgrade Duolingo Super
29 USD

Upgrade genuine Capture One account
120 USD

Capcut Pro 1 Year
39 USD

Adobe Photoshop Copyright - Full App
120 USD

Plugin Retouch4me
69 USD

Windows 10 & 11 Pro Key
36 USD

Genuine Cheap Canva Pro
39 USD

Copyright Adobe Lightroom Account
59 USD

MidJourney Account
29 USD

Adobe Premiere Pro Account
99 USD

ChatGPT Plus Account (GPT-4)
16 USD

Autodesk All App Account Copyright
120 USD
5 steps to clean your PC like a technician, right at your home
Nội dung
- 1. Why should you clean your PC regularly?
- 2. Tools to prepare before cleaning
- 3. Instructions for cleaning your PC at home
- 3.1. Disconnect the power source to ensure safety.
- 3.2. Remove the case cover
- 3.3. Clean dust on internal components
- 3.4. Cleaning the external parts
- 3.5. Reattach components and restart the machine
Regularly cleaning your PC at home not only helps keep your system cool and running smoothly in all tasks, but also prevents unfortunate breakdowns.

Personal computers (PCs) have long been an important part of our work, study and entertainment. With the intensity of daily use, it is very familiar that the PC has to "shoulder" many heavy tasks from word processing, graphic design to gaming or video editing. However, while users often pay attention to upgrading hardware, updating software or installing security, many people forget a very important factor: regular cleaning of the PC .
You may not realize it, but the dust accumulated inside the computer is a "silent enemy" that directly affects the performance and lifespan of components. After only a few months of operation, dust can accumulate on the cooling fan, RAM slots, PCIe slots, or even the computer's power supply. When this layer of dust increases, the air circulation is limited, the temperature increases, and the computer runs slowly, hangs easily, or shuts down by itself.
For new users, opening the case and cleaning components may sound “dangerous” and troublesome. But in fact, if you have basic knowledge and prepare properly, you can completely clean your computer at home without having to take it to the shop. In this article, we will learn in detail about the reasons for cleaning the PC periodically, the tools to prepare and step-by-step instructions in a simple, safe and effective way .
1. Why should you clean your PC regularly?
When you use your PC for a long time, dust will not only accumulate on the keyboard or screen, but also penetrate deep inside the case. Dust often sticks to the surface of the motherboard, gets stuck in the cooling fan blades and blocks the ventilation slots. If this condition persists, the PC will have to operate in hotter conditions than usual, thereby affecting performance and lifespan.

One of the most obvious consequences is reduced cooling capacity . When air cannot circulate, the fan will have to spin faster to dissipate heat, causing loud noise and consuming more power. When the CPU and GPU get too hot, they can reduce the clock speed to protect themselves, leading to lag when playing games or processing heavy work.
In addition, long-term dirt is also the cause of overheating and component damage . Sudden power failure, blue screen error or "sudden death" of the graphics card can originate from poor heat dissipation. Even dust combined with humidity in the air can cause oxidation or short circuit , causing serious damage to the mainboard or power source, the repair cost is many times more expensive than regular cleaning.
The benefits of regular PC cleaning go beyond just protecting the hardware. A clean computer feels more comfortable and professional . A neat keyboard, a bright screen, and a dust-free case help you feel more excited about working or playing. For gamers, a cool system also means a smoother, more stable experience during intense matches.
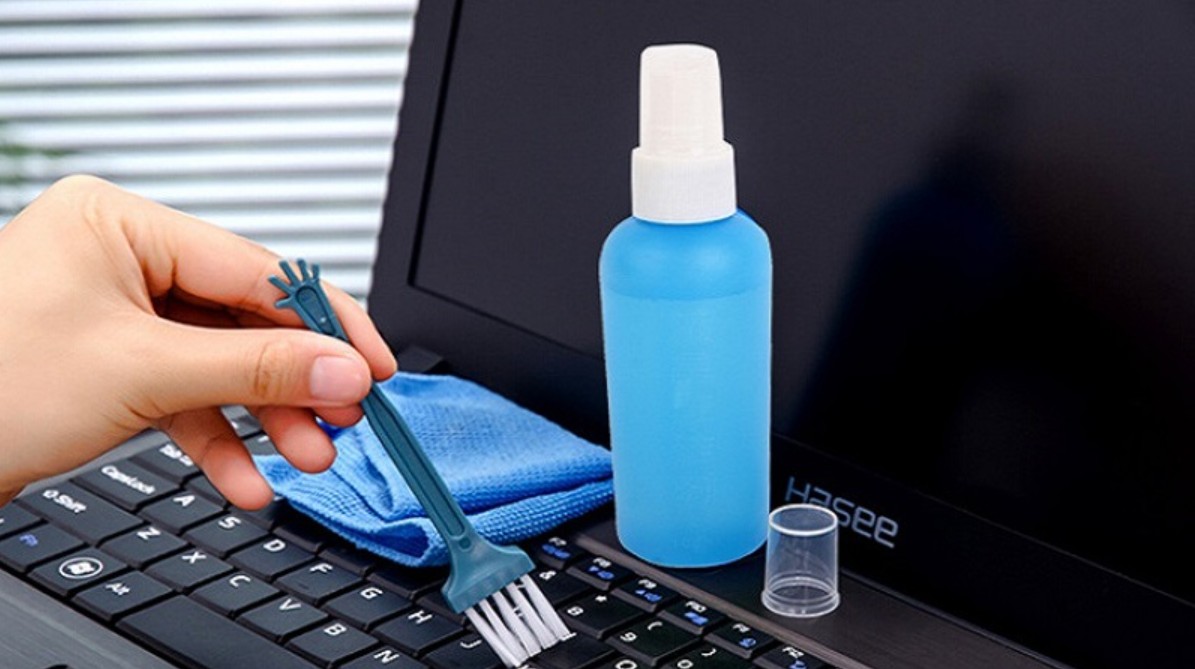
2. Tools to prepare before cleaning
To clean your PC effectively, having the right tools is key. Many people tend to use paper towels, regular dust brushes, or even household vacuum cleaners to clean, but these are all potentially harmful to components . Choosing the right tools will make the cleaning process easier, while ensuring the safety of the motherboard and sensitive electronic components.
Basic tools needed include:
Screwdriver : used to open the case and remove components if needed. Most cases are secured with Phillips screws, so a crosshead screwdriver will suffice.
Soft brush or specialized brush : to sweep away fine dust that has accumulated over time on the surface of components. The brush bristles need to be soft to avoid scratching.
Microfiber cloth : a type of microfiber cloth that does not leave lint, suitable for cleaning screens and case surfaces.
Isopropyl alcohol (IPA) 90% or higher : a solution for cleaning circuit boards, fans, or old thermal paste without leaving residue, evaporating quickly and safe for components.
Compressed air can : the ultimate tool for blowing dust from narrow crevices, fan blades, RAM slots or PCIe slots that brushes can't reach.
Anti-static strap : although many people often ignore it, for beginners, this is a very necessary accessory to avoid static electricity causing damage to chips or circuit boards.
Having all the above items ready will help you feel more confident when starting the cleaning process. Instead of worrying about damaging the components, you will be in control of every step.
3. Instructions for cleaning your PC at home

3.1. Disconnect the power source to ensure safety.
Before you start any work, the number one rule is safety. A PC is an electronic device, with many sensitive components inside, and some components like the power supply unit (PSU) can even store voltage even when the computer is turned off. So, turn off the computer completely, unplug the power cord from the outlet, and remove all connecting cables such as HDMI, USB, network cable, headphone jack, or monitor power cord.
For systems with complex wiring, you should take a photo of the back of the case before removing it to avoid confusion when reassembling it. This is a small tip that saves a lot of time for beginners, especially when the power cord, HDMI cable, speaker cable, etc. can be quite similar.
Another important factor is choosing the right space. If possible, clean your PC outdoors or in a well-ventilated area , such as near a window or terrace. Because when the dust is blown out, if done in a closed room, it will float and stick back to the furniture or the computer itself after cleaning. In addition, spread a towel or pad to place the case, avoiding scratching the table or floor.
3.2. Remove the case cover
When you remove the case cover, you will start to contact the “heart” of the PC. Usually, the computer case is fixed with screws on the back . A common crosshead screwdriver can be removed.
Remove each screw carefully, placing them in a small tray or container to avoid losing them. Some modern cases are more cleverly designed with latches or quick-release mechanisms , but you still need to be gentle, not using too much force to avoid warping the side panels.

After opening the lid, you will see the entire system inside: motherboard, CPU, GPU, RAM, hard drive, power supply and wiring system . Don't rush to clean it right away, but take a moment to observe. You can recognize the areas with the most dust, such as the radiator fan, heatsink, or the bottom of the case. These will be the places that need more careful attention.
3.3. Clean dust on internal components
This is the most important step and also requires the most meticulousness. The advice is to start from top to bottom , because when dust is blown out from the fan or heatsink, it will fall to the parts below, making it easier for you to clean.
CPU heatsink and fan : This is a component that operates continuously and often accumulates dust. Use a can of compressed air to blow away dust stuck in the heatsink slot and fan blades. If the fan is stubbornly dusty, you can use a cotton swab lightly dipped in isopropyl alcohol to wipe each blade. In case the fan is too dirty, remove it to clean thoroughly before reassembling.
Graphics card (GPU) and RAM : If you are experienced and confident, remove the graphics card and RAM for a more thorough cleaning. Use compressed air to blow away dust on the GPU fan blades, heatsink, and PCIe slot. When cleaning RAM, be careful not to touch the copper contact pins to avoid oxidation.
Computer power supply (PSU) : This is a part that many people ignore, but in fact, it is one of the places that collects dust the most easily. The PSU has its own cooling fan and air vents, if clogged, it will cause the power source to heat up quickly. Absolutely do not open the PSU because inside there are capacitors that store high voltage. The safest way is to use compressed air to blow dust through the air vents.
Hard drive bay and motherboard : This is an area that contains many small parts. Use a soft brush to lightly sweep away a thin layer of dust, then combine compressed air to clean small slots and hidden corners.

Once you have finished cleaning the inside, you can use a microfiber cloth with a little isopropyl alcohol to wipe the inside surface of the case. This will not only make the case shine brighter but also limit the accumulation of dust quickly.
3.4. Cleaning the external parts
Besides the components in the case, peripherals also need to be cleaned regularly to ensure the best user experience.
Screen : This is the most visible part and is also prone to dust and fingerprints. Never use paper towels or strong cleaning solutions because they can scratch or damage the anti-glare coating. Use a clean microfiber cloth and wipe gently in a circular motion. If there are stubborn stains, you can use a specialized screen cleaning solution or a diluted vinegar mixture.
Connection ports : USB ports, HDMI, headphone jacks are often covered with dust, causing poor contact over time. Use a small cotton swab or compressed air to clean. If you find light rust, you can use a little alcohol to treat it.
Keyboard : This is where most dust, food particles, and bacteria accumulate. Turn the keyboard upside down, tap lightly to loosen the dust, then use a brush to clean it. With mechanical keyboards, you can remove the keycaps for a deeper cleaning. Wipe each key with an alcohol swab to remove grease and bacteria.
Computer mouse : Wipe the surface of the mouse with a damp cloth, paying attention to the grip as it is often dirty with sweat. Don't forget to clean the sensor eye on the underside to ensure the mouse moves accurately.
3.5. Reattach components and restart the machine
Once all components and peripherals have been cleaned, the final step is to reassemble the system.

Insert each component into its original position, making sure that the pins, slots, and screws are all firmly secured. For GPUs and RAM, press firmly but firmly to ensure the components fit completely into the slots. When replacing the side panels, make sure to tighten the screws just enough, but not too much to avoid damaging the screw threads.
Reconnect all the cables as they were. If you took a photo of them, make sure you don't plug them in the wrong way. Finally, power on your computer to test it out. You should notice a noticeable difference: quieter fans, cooler system, and more stable performance.
Cleaning your PC is not as complicated as many people think. With just a few basic steps and a little care, you can completely do it yourself at home without the need for outside services. This is a small habit but brings many long-term benefits: from keeping the system running smoothly, extending the life of components, to providing a more comfortable and professional user experience.
If you are new, start with simple tasks like wiping the case, blowing dust off the fan, then gradually increase to cleaning the internal components. Once you get used to it, you will find that this not only saves money but also helps you understand your computer better.
Consider cleaning your PC as part of your regular maintenance schedule. A clean, cool PC is a reliable companion, helping you work, study and entertain with peace of mind every day.


VIP Products


Best Selling Products
Upgrade Genuine Office 365
49 USD
Freepik Premium Account
59 USD
Genuine Adobe Illustrator account
99 USD
Upgrade Duolingo Super
29 USD
Upgrade genuine Capture One account
120 USD
Capcut Pro 1 Year
39 USD
Adobe Photoshop Copyright - Full App
120 USD
Plugin Retouch4me
69 USD
Windows 10 & 11 Pro Key
36 USD
Genuine Cheap Canva Pro
39 USD
Copyright Adobe Lightroom Account
59 USD
MidJourney Account
29 USD
Adobe Premiere Pro Account
99 USD
ChatGPT Plus Account (GPT-4)
16 USD
Autodesk All App Account Copyright
120 USD