Best Selling Products

MidJourney Account
29 USD

Adobe Photoshop Copyright - Full App
120 USD

Plugin Retouch4me
69 USD

Autodesk All App Account Copyright
120 USD

Adobe Premiere Pro Account
99 USD

Genuine Cheap Canva Pro
39 USD

Freepik Premium Account
59 USD

Copyright Adobe Lightroom Account
59 USD

Windows 10 & 11 Pro Key
36 USD

Upgrade Duolingo Super
29 USD

Capcut Pro 1 Year
39 USD

Genuine Adobe Illustrator account
99 USD

Upgrade genuine Capture One account
120 USD

ChatGPT Plus Account (GPT-4)
16 USD

Upgrade Genuine Office 365
49 USD
A detailed step-by-step guide to creating a cool CapCut transition effect.
Nội dung
- 1. Understanding transition effects
- 2. Detailed instructions on how to create transition effects in CapCut
- 3. Some common CapCut transition effects you can add to your video.
- 3.1. Adjust the video to Slow Motion or Fast Motion.
- 3.2. A huge library of background music
- 3.3. Diverse collection of animated stickers
- 4. Important things to remember when using the CapCut transition effect.
Want to create captivating videos on TikTok or Reels? Beautiful transitions are a weapon you can't ignore.
One of the key elements that makes a video more professional is the use of transition effects, which connect different segments of footage, creating a seamless rhythm and emotional impact. CapCut, a free video editing app from ByteDance, has become a popular tool for those who want to edit videos quickly while maintaining aesthetic appeal. CapCut offers a rich library of easy-to-use transition effects, supporting users of all levels, including beginners. Understanding and applying transition effects correctly will make videos smoother, more dynamic, and noticeably more professional.
In this article, we'll explore what transition effects are , how to create transitions in CapCut step-by-step , and discover some of the most popular effects in the application. When combined correctly, CapCut is a powerful tool that helps you create impressive works in just minutes.
1. Understanding transition effects
To create a compelling video, you can't simply piece together a bunch of images or videos. The key lies in how those segments are connected. Transition effects are the tool that helps achieve this.
Transition effects are techniques used to switch between two video clips or images using a visual effect, aiming to create continuity or highlight the content. Instead of abruptly transitioning from one scene to another, transitions make the splicing process smoother.
![]()
In CapCut, transition effects are designed in a variety of styles, from simple and subtle to unique and unconventional. You can find common transition types such as fade, rotate, slide, twist, glitch, flash… Each type has its own meaning and suits different video styles.
Furthermore, using appropriate transitions not only enhances aesthetics but also helps convey emotions more effectively. For example, smooth transitions are suitable for travel videos or introspective videos, while strong or glitchy transitions are appropriate for music videos, sports, or dynamic content.
2. Detailed instructions on how to create transition effects in CapCut
CapCut is designed to be user-friendly, making it easy to add transition effects. Even if you're a beginner, just a few simple steps are all it takes to create beautiful and natural transitions.
If you want to follow the details via video, you can search for visual tutorials to understand each step. Below is the most detailed step-by-step guide.
Step 1: Open CapCut and create a new project.
Open the CapCut app on your phone or tablet. From the main interface, select New Project to begin editing. This is the starting point for setting up a completely new project, where you can freely express your creativity.
![]()
CapCut will allow you to access your entire library of photos and videos available on your device, making it easy to select the resources you need for your video.
Step 2: Add images or videos to the project.
To create a transition effect, you need at least two segments, which could be two still images, two videos, or a combination of both. The more segments you have, the more points in the video you can add transitions to.
Click the Add button to select your content. Once you've made your selection, CapCut will take you to the main editing interface, where the entire creative process takes place.
![]()
Choosing content that aligns with the video's theme will directly impact the transition style. If the video is lighthearted, you should select photos or video clips with consistent colors to create a more seamless emotional flow.
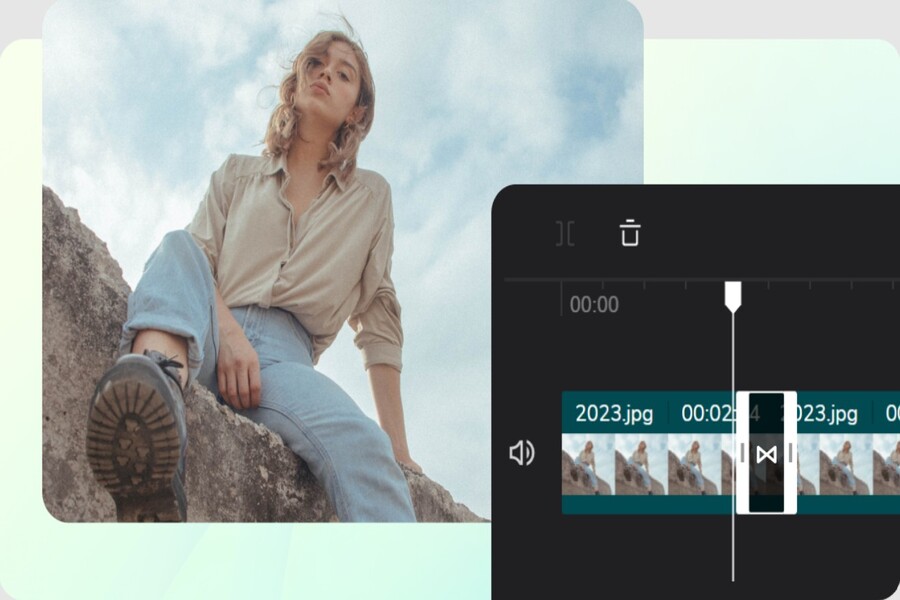
Step 3: Add transition effects between segments.
In the editing interface, you'll see the dividing point between the two clips. CapCut uses a "-" symbol to indicate where you can add a transition effect.
![]()
Click this icon to open the transition effects panel. This area contains a variety of different effects, divided into several groups such as Basic, Camera, MG, Slide, Glitch, etc.
Choosing the right effects will help make your video more professional and engaging.
Step 4: Choose a suitable transition effect.
Now you can freely explore the effects CapCut offers. Each effect has a preview, allowing you to assess whether it suits your video.
Consider the style of the video. If you're editing a travel video, you might try Slide or Wipe. If you're creating a trending music video, Glitch or Flash effects will create a more impactful feel.
![]()
Don't be afraid to try different styles to find the effect that best suits the content.
Step 5: Adjust the transition duration.
A transition is only beautiful when its duration is appropriate. If it's too long, the video can easily become slow; if it's too short, the effect won't stand out. CapCut allows you to customize the duration using the Duration slider right below the effect.
![]()
Adjust the duration until you feel the effect harmonizes with the video's rhythm. For fast-paced music, choose a short duration; for emotional videos, a longer duration will create a softer effect.
Step 6: Confirm and apply the effect
After you've finished adjusting, tap the checkmark icon to apply the effect. CapCut will automatically update to your timeline, allowing you to review the entire added transition.
![]()
You can review the video again to assess whether any adjustments or changes to the effects are needed.
Step 7: Export the video and save it to your computer.
Once you're satisfied with the entire editing process, export the video by selecting the arrow icon at the top. CapCut will then allow you to choose the appropriate resolution and frame rate.
After a few seconds of processing, your video will be saved to your device, ready to share on TikTok, Facebook, Instagram, or YouTube.
3. Some common CapCut transition effects you can add to your video.
CapCut boasts a rich and diverse library of transition effects, suitable for a wide range of creative styles. Below are some of the most frequently used effect groups that can make your videos stand out.
3.1. Adjust the video to Slow Motion or Fast Motion.
In addition to direct transitions, CapCut also allows users to adjust video speed to create natural transition effects without needing additional effects. Slow Motion creates a soft, profound feel, very suitable for emotional videos or slow-motion videos. Meanwhile, Fast Motion provides dynamism and power, and is especially suitable for entertainment, sports, or trending videos.
Varying the speed is sometimes seen as a form of "enhanced transition," as it helps create a contrast in speed between the preceding and following segments, generating a captivating sense of movement without the need for complex effects.
![]()
3.2. A huge library of background music
Background music is also considered an important element that helps make scene transitions smoother. CapCut offers a diverse music library, allowing you to synchronize the rhythm between the music and effects.
The climactic moments in a song are often ideal for adding dramatic transition effects like Flash or Zoom. Conversely, with softer music, fading or sliding effects are more appropriate.
![]()
3.3. Diverse collection of animated stickers
CapCut not only offers built-in transition effects but also allows you to incorporate animated stickers to add emphasis. Many creators use stickers like bubbles, light trails, bokeh effects, or anime animations to highlight the transitions.
![]()
4. Important things to remember when using the CapCut transition effect.
Although CapCut offers many interesting effects, you shouldn't overuse them. An effective video always requires balance and subtlety.
First, choose effects that suit the video's theme and style. If you're creating a serious video, overly flashy effects will detract from its professionalism. Conversely, for entertaining or trending videos, you can use fast-paced, impactful effects to increase appeal.
Secondly, the duration of transition effects is extremely important. An effect that is too short will not be impactful enough, but if it is too long, the video will become slow and cumbersome. Adjusting the duration to match the rhythm of the video and music will help create a seamless viewing experience.
Third, combine transitions with other elements such as sound, color filters, animated stickers, or lighting effects. Knowing how to combine them can create a video with much more depth than using only transitions. However, harmony is key. Using too many elements at once can make the video cluttered and distracting.
Transition effects are a crucial part of creating a professional and engaging video. Thanks to the convenience and versatility of CapCut, anyone can create beautiful transitions with just a few simple steps. However, to achieve the best results, you need to understand how to select effects, adjust their duration, and combine them with other elements such as sound, stickers, and video speed.


VIP Products


Best Selling Products
MidJourney Account
29 USD
Adobe Photoshop Copyright - Full App
120 USD
Plugin Retouch4me
69 USD
Autodesk All App Account Copyright
120 USD
Adobe Premiere Pro Account
99 USD
Genuine Cheap Canva Pro
39 USD
Freepik Premium Account
59 USD
Copyright Adobe Lightroom Account
59 USD
Windows 10 & 11 Pro Key
36 USD
Upgrade Duolingo Super
29 USD
Capcut Pro 1 Year
39 USD
Genuine Adobe Illustrator account
99 USD
Upgrade genuine Capture One account
120 USD
ChatGPT Plus Account (GPT-4)
16 USD
Upgrade Genuine Office 365
49 USD