Best Selling Products

Upgrade Duolingo Super
29 USD

Upgrade Genuine Office 365
49 USD

Capcut Pro 1 Year
39 USD

MidJourney Account
29 USD

Plugin Retouch4me
69 USD

Windows 10 & 11 Pro Key
36 USD

ChatGPT Plus Account (GPT-4)
16 USD

Genuine Cheap Canva Pro
39 USD

Copyright Adobe Lightroom Account
59 USD

Upgrade genuine Capture One account
120 USD

Genuine Adobe Illustrator account
99 USD

Freepik Premium Account
59 USD

Adobe Premiere Pro Account
99 USD

Adobe Photoshop Copyright - Full App
120 USD

Autodesk All App Account Copyright
120 USD
An Alternative To Outer Glow Effect In Photoshop
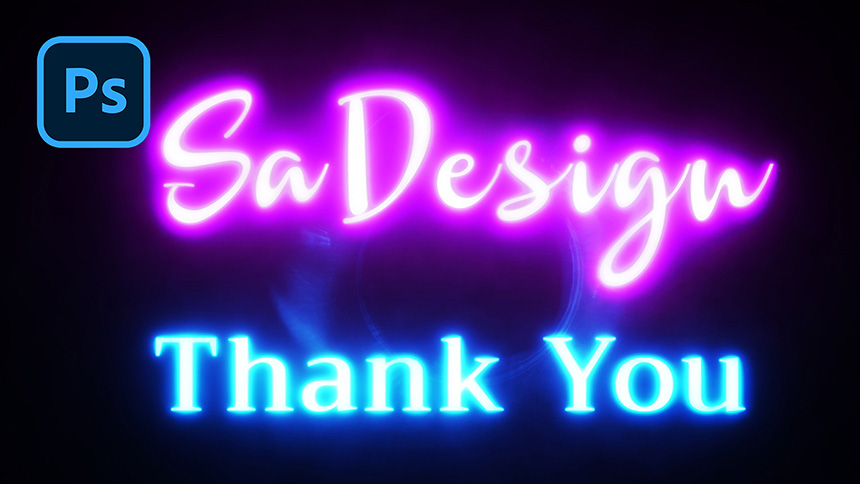
Hi guys, this is SaDesign and today I'll share with you the way to create glow text effect in Photoshop. Stay tuned!
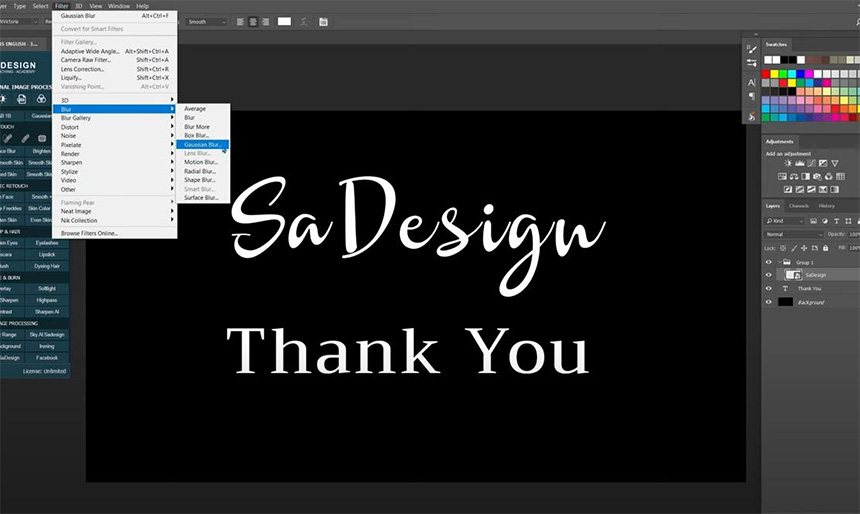
There, I have 2 text layers and black background. Now, we will decorate these texts with glowing effect. First, Image > Mode > Change from 8 bits/channel to 16 bits/channel. Convert SaDesign layer to smart object and put it into group by clicking and dragging this layer to the group icon. Add a bit of blur to the SaDesign layer, go to Filter > Blur > Gaussian Blur > blur it with radius 0.5 pixels. Next, copy this layer 6 times by pressing CTRL or CMD + J repeatedly.
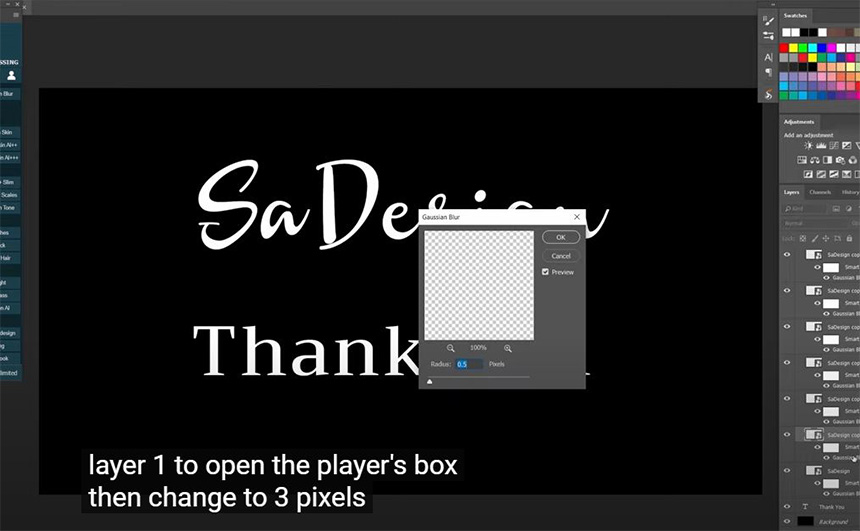
These next steps are important, we will change blur radius pixels with the amount I show right here. We already set the first layer to 0.5 pixels, now, double click to Gaussian blur of layer 1 to open the blur box, then change to 3 pixels, OK.
Double click to Gaussian blur of layer 2 and set the radius pixels to 10.
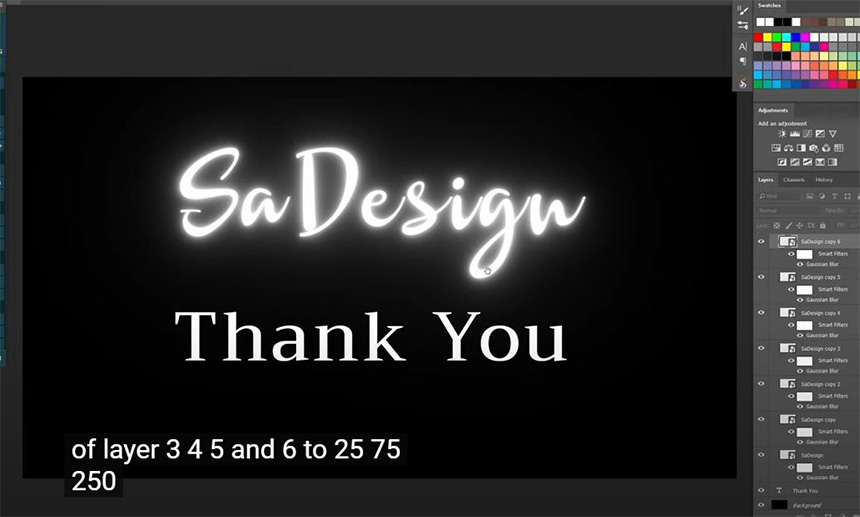
similarly, we will set the radius pixels of layer 3,4,5 and 6 to 25, 75, 250 and 500. Now, we see the beautiful glowing text.
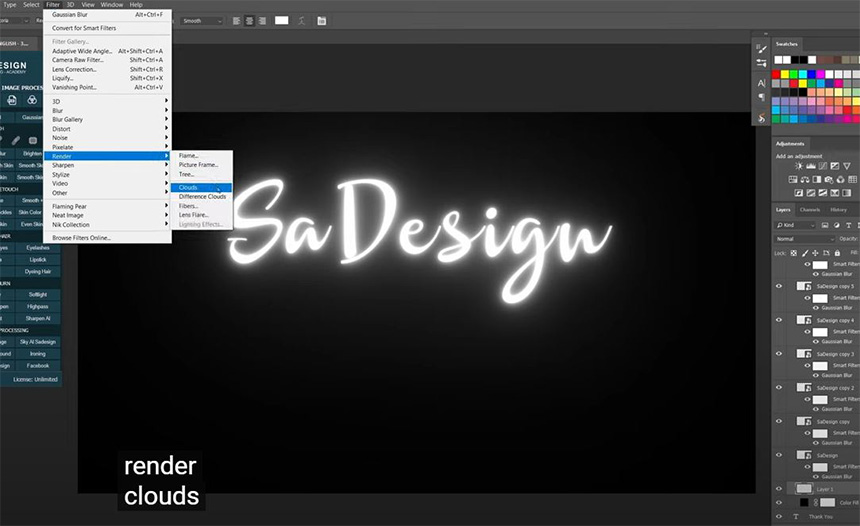
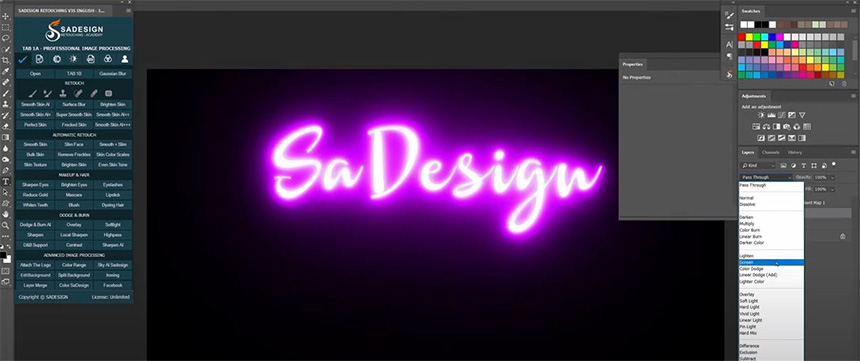
Then, create a black solid adjustment layer. Put it under all SaDesign layers. Create a new layer, go to Filter > Render > Clouds, change blending mode from normal to multiply and adjust the opacity to 50%, move this layer under SaDesign copy 2 layers. Now, click to the adjustment icon and select gradient map, open the gradient editor by clicking to the preset. In here, there are lots of presets for you to select the color that you like. You can also create your own unique preset, to do that, there is a bar from black to white, click to the one third of the bar and change the color you want to use. Let's try with blue color, as you can see, the text now is covered with blue glowing color. You can easily change the position of the blue spot to left or right to see the changes. Click to the second third of the bar to create another spot, we will change to something nearly close to blue color, take this. The text now perfectly glow, let's me try with some available preset in Photoshop... green … purple... orange …. I'll go with purple
Create clipping mask to the gradient layer by pressing CTRL + ALT + G for Win or CMD + OPTION + G for MAC. Change blending mode of group 1 from pass through to “Screen”. It's done for the first text.
Moving on to the second one which is “Thank you” text layer, first, put it into group so we can manage easier later on. Right click to the layer and convert it to Smart Object, go to Filter > Blur > Gaussian Blur, set radius 0.5 pixels. We will do exactly the same steps as SaDesign text.
Copy this layer 6 times and change the gaussian blur pixel to 3, 10, 25, 75, 250 and 500 from layer 2 to 6.
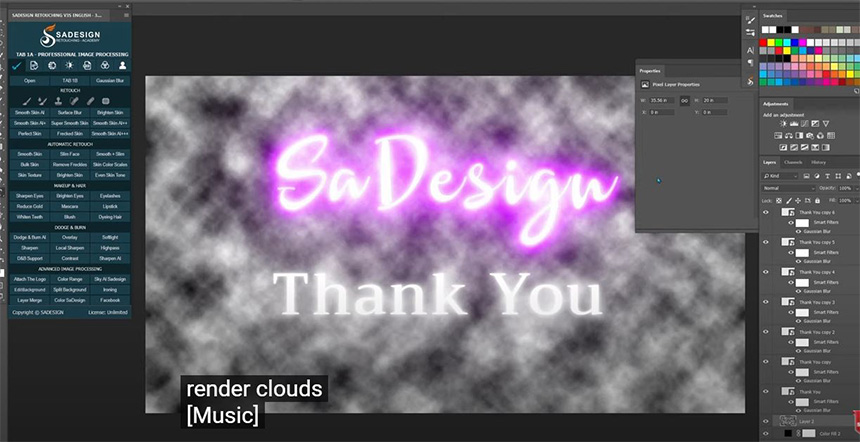
Create a solid adjustment layer in black color, place it right just above the background layer.
Create a new layer, Filter > Render > Clouds > change to Multiply in blending mode with opacity is 50% and put it under Thank you copy 2 layers
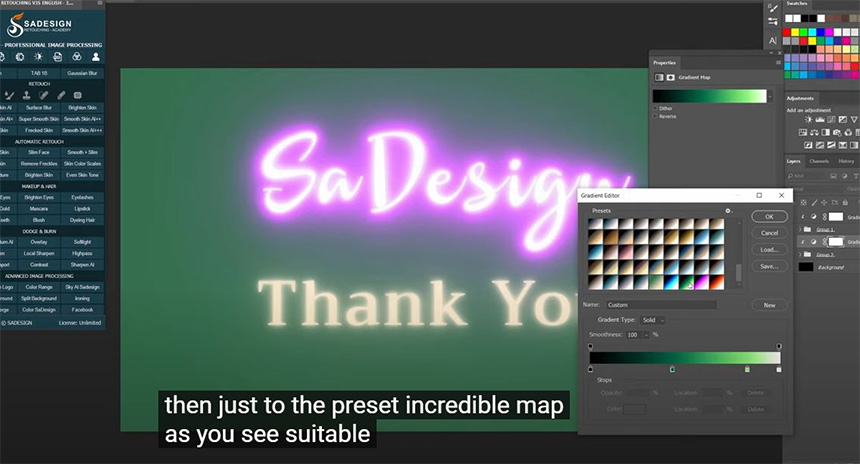
We will do the same thing to the other texture photo. Instead of change blending mode to screen, we will change to overlay this time and decrease the opacity. Alright, that's all for this tutorial.
Hope that you will like this tutorial, hit like and subscribe to our channel to update the latest tutorials on a daily basis. Feel free to leave comments in case you have any questions. Thank you and bye bye! (end)
Watch the video here:
REGISTER FOR FREE PHOTOSHOP LEARNING
============================
The most powerful Retouch tool processor
DOWNLOAD:
✅ SADESIGN PANEL ENGLISH: https://sadesign.ai/retouching/
✅ SADESIGN PANEL VIETNAM: https://www.retouching.vn/


VIP Products


Best Selling Products
Upgrade Duolingo Super
29 USD
Upgrade Genuine Office 365
49 USD
Capcut Pro 1 Year
39 USD
MidJourney Account
29 USD
Plugin Retouch4me
69 USD
Windows 10 & 11 Pro Key
36 USD
ChatGPT Plus Account (GPT-4)
16 USD
Genuine Cheap Canva Pro
39 USD
Copyright Adobe Lightroom Account
59 USD
Upgrade genuine Capture One account
120 USD
Genuine Adobe Illustrator account
99 USD
Freepik Premium Account
59 USD
Adobe Premiere Pro Account
99 USD
Adobe Photoshop Copyright - Full App
120 USD
Autodesk All App Account Copyright
120 USD