Best Selling Products

Copyright Adobe Lightroom Account
59 USD

Autodesk All App Account Copyright
120 USD

Upgrade Duolingo Super
29 USD

Genuine Adobe Illustrator account
99 USD

Adobe Premiere Pro Account
99 USD

Plugin Retouch4me
69 USD

Freepik Premium Account
59 USD

Capcut Pro 1 Year
39 USD

Genuine Cheap Canva Pro
39 USD

ChatGPT Plus Account (GPT-4)
16 USD

Adobe Photoshop Copyright - Full App
120 USD

Windows 10 & 11 Pro Key
36 USD

MidJourney Account
29 USD

Upgrade genuine Capture One account
120 USD

Upgrade Genuine Office 365
49 USD
Camera settings for better pictures
Nội dung

Beginner photographers will often move on to studying photo editing before they refine their photography and lighting skills. However, it is smarter to start with a solid photographic background before refining the post-production techniques. Starting with a good and technically correct photo will always lead to better results than trying to fix a bad photo.
Camera settings for better picturesIt helps if you know what to focus on and learn at the start of your journey, instead of wasting time on lots of advanced information that you may not even understand yet. So here are some basics that will directly affect your technique and it is very important that you can control them in the best way without affecting your image.
In this article, we'll focus on some of the key elements and settings that you as a photographer need to know and understand to be able to create technically correct photos.
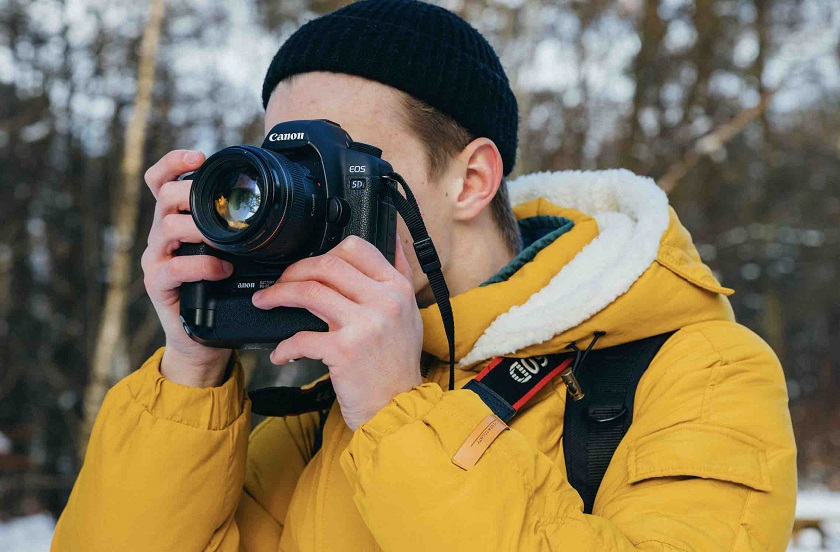
The camera is your main tool in the photographic process. First of all, you need to dig through and read the manual to know how it works inside and out. Take out your camera and learn it according to the instructions, then immediately see how the picture you took.
Before shooting, always check the following settings:
ISO speed
Always start with checking the ISO speed and I will set it to 100 - 200 and will only increase it when I really have to (e.g. I can't use artificial light, lighting). there isn't enough with my basic camera settings to get the exposure correct).
The faster the ISO speed (the higher the number), the better the image quality that may be subject to noise. Some cameras have sensor technology that can handle higher ISOs without seriously affecting image quality. With most cameras, you can still degrade the quality of your images, so always try adding more light or finding the correct exposure through other settings before increasing the ISO speed.
White balance
When you shoot in RAW, white balance errors are easier to correct. However, it will save you more time in post-production if it's done properly in-camera.
To avoid inaccurate color shades, such as blues, greens, or yellows, in our photos we had to adjust the camera's White Balance for the color temperature of a particular light source. There are several ways to achieve the correct White Balance, such as using a gray or white card or setting a Custom White Balance in Kelvins.
Most digital SLRs contain multiple White Balance presets so it works great. This is another thing that you need to try while practicing to find what works best for you. Using Auto White Balance will often add a lot of work in post-production due to its inconsistency.
Camera screen brightness, if you are not shooting with a tablet or computer
Never set your LCD monitor's brightness to AUTO, as it may cause your photos to be overexposed or underexposed if you are assessing exposure by looking at the camera monitor. Check the chart or better yet, try shooting with a tether from a distance to get an accurate assessment of the captured images and also the lighting.
One particular reason it's difficult to check this setting before shooting is that, if your previous shoot was outside and you've set your monitor's brightness to maximum to review photos in bright environments, Now your photos taken indoors or in darker settings will look brighter on the camera screen than they actually are. Fixing exposure in post-production equates to more unnecessary work and can lose detail in shadows or highlights.
File Format
There is a lot of discussion online regarding “RAW vs JPEG” and you can figure out what works best for you by comparing how much flexibility each format gives you.
Here I chose RAW - a form of digital negative - because it allows me to retain most of the light and color information, and offers greater control and flexibility in post-production. production, while JPEG is a compressed file, so the information is immediately discarded (which explains why the file size is much smaller). Because of the lost information, you have little flexibility to make significant adjustments or correct errors in lighting or White Balance in post-production. In addition, the JPEG file loses additional information (loss of quality) each time it is opened and saved. Unlike JPEG, you can specify color space (sRGB, Adobe RGB)
So it can be a good practice to convert image files to DNG (Digital Audio) format when you download them from the camera. The DNG format will not become superfluous like the last proprietary camera formats.
Lens

You don't need the latest and greatest camera lenses or a huge collection of different 'key' lenses for portraiture, lifestyle, wedding, etc. Most photographers. often take the same kind of photos, so hone your lens collection to meet your needs and desires for the performance of your glasses. A collection of lenses can easily amass, from very wide-angle to very long telephoto. However, after a few years of shooting, you may find that you only use a handful.
Here is my collection of lenses:
- 100mm 2.8 Macro (beautiful studio photography, macro photography)
- 50mm f/1.4 & 24-70mm f/2.8 (outdoor beautification and portraiture, boudoir)
- 70-200 f/2.8 (full body fashion, specific shots that I had to shoot from a distance)
A little hint:
- For Studio Beauty Photography - a longer focal length lens (100mm or more) helps to avoid distortion.
- For Fashion and Editorial Photography - a wide angle lens will also work, especially during shoots in locations where surroundings are important.
- For Portrait, Boudoir, Senior, Engagement, Wedding photos - a fixed focal length lens with a smaller aperture number is ideal ( 50mm f/1.2 or 50mm f/1.4 , etc.). This is great when a shallow depth of field (additional softness of the background/foreground), is desired.
Of course, these suggestions are all to my taste and you should adjust to suit your personal photography style.
In short, how to fully understand all the operations of the camera and its parameters so that you can take the best, technically correct and quality photos.
See more Camera sensors, megapixels and how they affect post-production results!
Subscribe to the channel here ============================ The most powerful Retouch tool processor DOWNLOAD: ✅ SADESIGN PANEL ENGLISH: https://sadesign.ai/retouching/ ✅ SADESIGN PANEL VIET NAM: https://www.retouching.vn/


VIP Products


Best Selling Products
Copyright Adobe Lightroom Account
59 USD
Autodesk All App Account Copyright
120 USD
Upgrade Duolingo Super
29 USD
Genuine Adobe Illustrator account
99 USD
Adobe Premiere Pro Account
99 USD
Plugin Retouch4me
69 USD
Freepik Premium Account
59 USD
Capcut Pro 1 Year
39 USD
Genuine Cheap Canva Pro
39 USD
ChatGPT Plus Account (GPT-4)
16 USD
Adobe Photoshop Copyright - Full App
120 USD
Windows 10 & 11 Pro Key
36 USD
MidJourney Account
29 USD
Upgrade genuine Capture One account
120 USD
Upgrade Genuine Office 365
49 USD