Best Selling Products

Autodesk All App Account Copyright
120 USD

Capcut Pro 1 Year
39 USD

Freepik Premium Account
59 USD

Upgrade Duolingo Super
29 USD

Windows 10 & 11 Pro Key
36 USD

ChatGPT Plus Account (GPT-4)
16 USD

Upgrade Genuine Office 365
49 USD

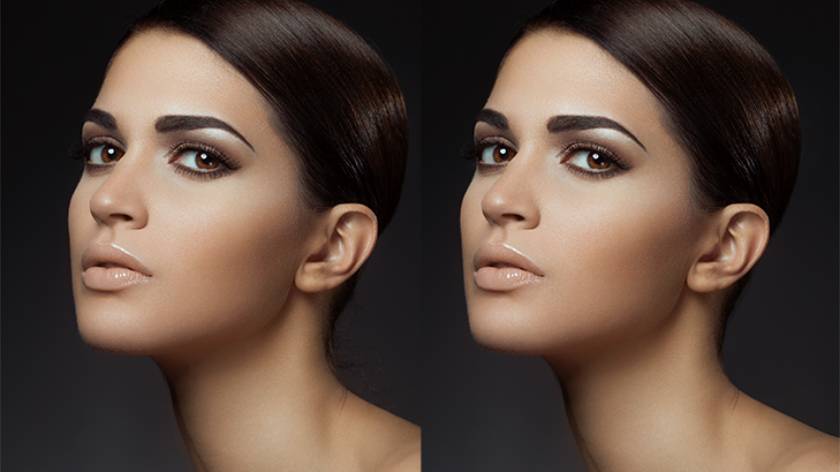
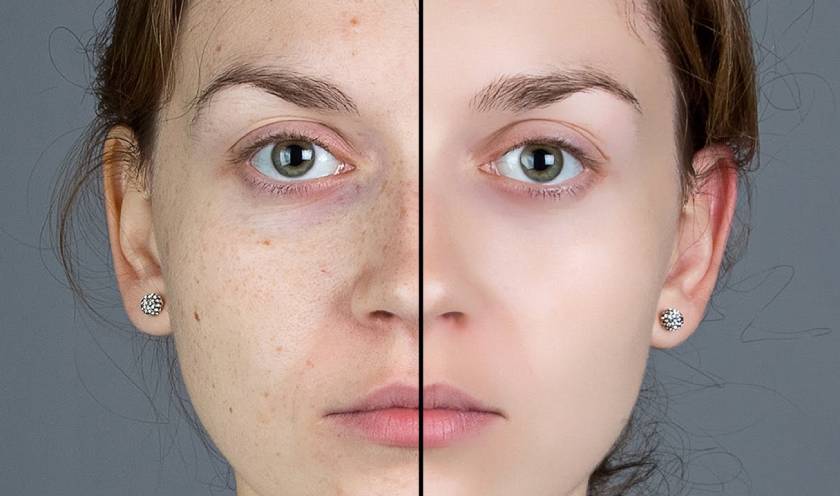
Plugin Retouch4me
69 USD

Copyright Adobe Lightroom Account
59 USD

Genuine Cheap Canva Pro
39 USD

Genuine Adobe Illustrator account
99 USD

Adobe Photoshop Copyright - Full App
120 USD

Adobe Premiere Pro Account
99 USD

MidJourney Account
29 USD

Upgrade genuine Capture One account
120 USD
Color grading with the Color Balance tool in Photoshop
Nội dung
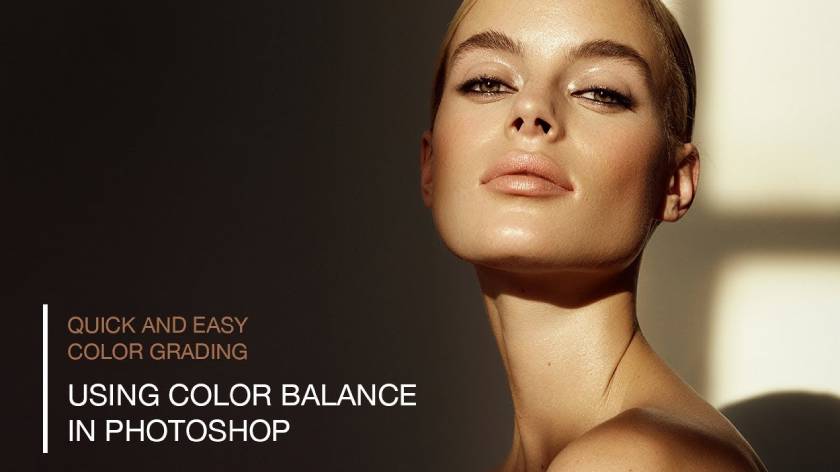
One of the most powerful means of influencing your audience is through the effective use of color. Setting the mood, creating an atmosphere, or even just using an aesthetically pleasing color palette is important to attracting the customers you want. As photo editors, we can look to the film industry for ongoing examples of the power of color grading and its importance in our work.
In this detailed tutorial by Michael Woloszynowicz of Vibrant Shot, the author of the course on color grading, explains everything a photo editor wants to know about using the Color Balance tool in Photoshop. From understanding the tool's impact on different tonal ranges, to the specific settings that should be used to produce the best results. This tutorial uses several examples, from a warm portrait to a more precise shot with very different lighting situations. Michael also shares a free action that can further speed up your workflow when it comes to color grading or color correcting your photos.
Watch the video tutorial at:
[embed]https://www.youtube.com/watch?v=8v1BjJxVeyk[/embed]How do you enable the color balance adjustment layer?
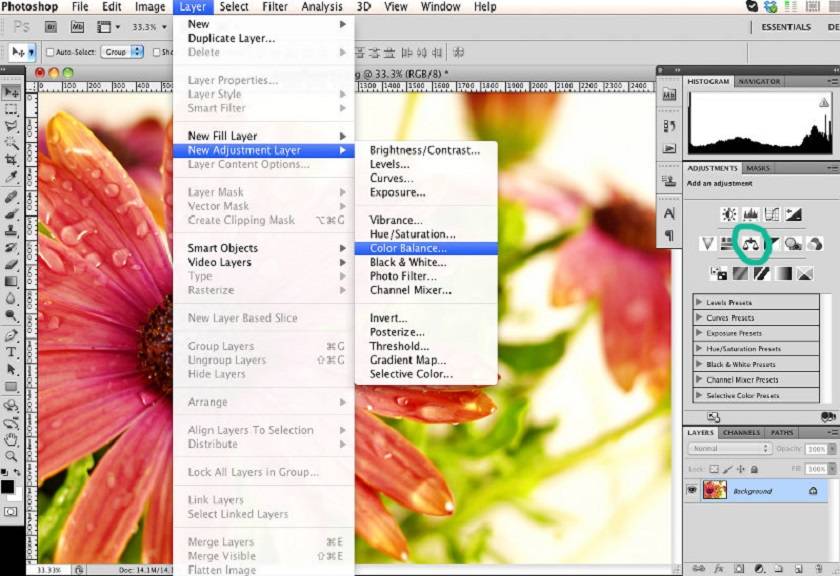
If the adjustment panel is already open, you can simply click the Color Balance button, represented by the weight icon, located third from left in the middle row. Alternatively, you can go to Layer > New Adjustment Layer > Color Balance and you can name the layer in the next dialog if you want, though I left the default.
How to control the Color Balance Adjustment layer
As mentioned, this tool allows you to control the three RGB color channels of the image. It should be noted that if you are working in CMYK while preparing the print job, the Color Balance tool will still only work on red, green, and blue values and their complementary colors, despite the table channel will display four CMYK channels.
The three channels are represented by slider controls that default to the center point in each case. Above the three sliders are three Tone radio buttons. These allow you to limit your changes to different areas of the image based on tone values.
To make adjustments, simply move the slider in either direction to increase or decrease the amount of red, green, or blue in one or more tonal ranges. The changes you make can be very subtle, be it to combat a bit of light color, or be more extreme and designed to apply a more creative result.
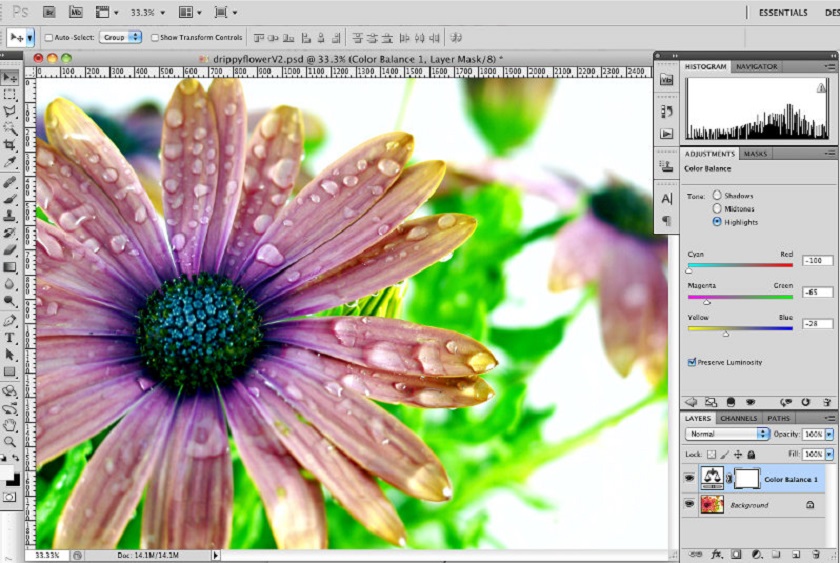
In Figure 1, the color of the image seems a bit cooler than the original. Achieve this by setting the Cyan/Red (Cyan/Red) slider to Cyan (-100%) for both Shadows and Midtones. I also set Highlights, but the image is too bright, you can limit this by reducing the Highlight values of the Green and Blue sliders.

In the 2nd image, I made just one change to the Highlights, pushing the Blue/Yellow slider towards the bottom of Blue to limit the warmth as it appears in the lighter areas of the image. Photo.
Keep the same light color when changing color
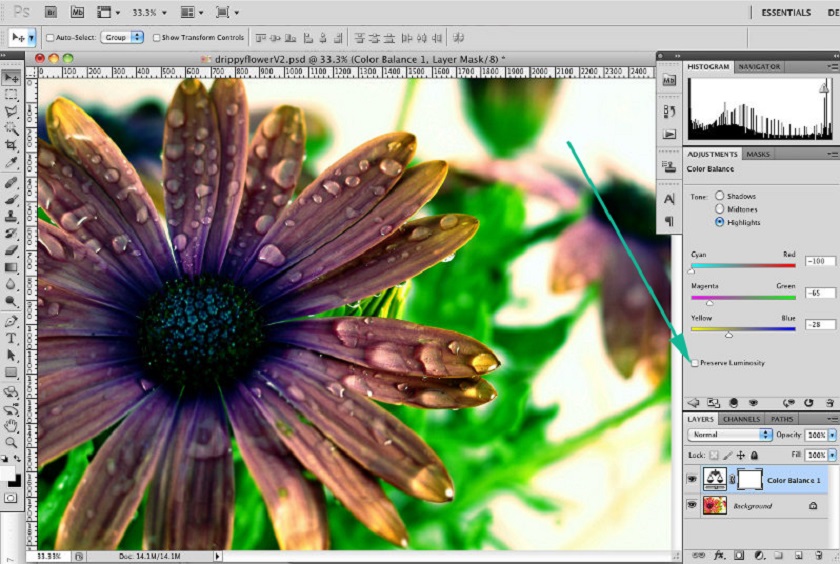
The default is to check the Preserve Luminosity box to maintain the same negative values throughout the image. As shown above you can see that the image is darker when you uncheck Preserve Luminosity.
How to create tonal separation using Color Balance
You can also use Color Balance adjustment layers to create a simple split-tone effect. In the image above, I added a Black and White adjustment layer below the Color Balance layer to desaturate the image. Next, I selected the Shadows radio button.
Then I slide the Blue/Yellow slider to the right applying blue color to the shadow areas. Then I clicked the Featured radio button to move the same slider to the left. This applies a yellow tint to the lighter areas.
Bottom line: The Color Balance tool offers a number of useful features for users, and although you may not use it often, it offers a lot of benefits when you want to correct the colors of your images. me.


VIP Products


Best Selling Products
Autodesk All App Account Copyright
120 USD
Capcut Pro 1 Year
39 USD
Freepik Premium Account
59 USD
Upgrade Duolingo Super
29 USD
Windows 10 & 11 Pro Key
36 USD
ChatGPT Plus Account (GPT-4)
16 USD
Upgrade Genuine Office 365
49 USD
Plugin Retouch4me
69 USD
Copyright Adobe Lightroom Account
59 USD
Genuine Cheap Canva Pro
39 USD
Genuine Adobe Illustrator account
99 USD
Adobe Photoshop Copyright - Full App
120 USD
Adobe Premiere Pro Account
99 USD
MidJourney Account
29 USD
Upgrade genuine Capture One account
120 USD