Best Selling Products

Autodesk All App Account Copyright
120 USD

Upgrade Genuine Office 365
49 USD

MidJourney Account
29 USD

Freepik Premium Account
59 USD

Capcut Pro 1 Year
39 USD

Adobe Photoshop Copyright - Full App
120 USD

Adobe Premiere Pro Account
99 USD

ChatGPT Plus Account (GPT-4)
16 USD

Upgrade genuine Capture One account
120 USD

Genuine Adobe Illustrator account
99 USD

Upgrade Duolingo Super
29 USD

Windows 10 & 11 Pro Key
36 USD

Plugin Retouch4me
69 USD

Copyright Adobe Lightroom Account
59 USD

Genuine Cheap Canva Pro
39 USD
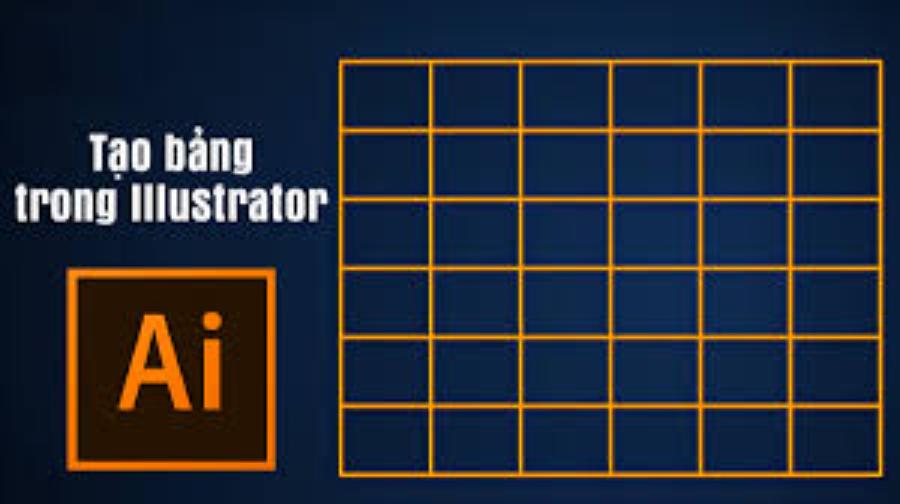
Create Quick Tables in Illustrator: Tips You Need to Know
Nội dung
- 1. The "5 Second" Lightning Fast Method: The Secret Called Rectangular Grid Tool
- 2. The Professional Method: Mastering Text and Tabs
- 3. Combination Technique: The Power of the Grid Tool and Tabs
- 4. Optimization Solution: Copy & Paste From Excel, Word, Google Sheets
- 5. Frequently Asked Questions (FAQ) When Creating Tables in Illustrator
- 6. Some notes when creating tables in Illustrator
- 7. Conclusion
Discover 4 methods of creating tables in Illustrator from super fast in 5 seconds to professional. Detailed instructions on how to draw tables, edit, format and tips to optimize workflow in AI

For many designers, from beginners to experts, Adobe Illustrator (AI) is an endless playground of creativity. However, there is a seemingly simple task that often causes many difficulties: creating tables . Unlike InDesign or Microsoft Word, Illustrator does not have a dedicated "Table Tool" with just one click. This shortcoming has caused many people to struggle, wasting time manually aligning each line and each square tirelessly. This will be the most comprehensive guide, turning you from someone who is "afraid" of creating tables in AI into an expert at handling them quickly, accurately and beautifully.
1. The "5 Second" Lightning Fast Method: The Secret Called Rectangular Grid Tool
This is the answer to the “5 seconds” promise. This tool has been available in Illustrator for a long time but is often overlooked. It is the absolute fastest way to create a perfect grid structure, the foundation for any type of table you need.
How to do:
-
Find the Tool: On the left toolbar, look for the Line Segment Tool ( \ ). Click and hold on this icon, a submenu will appear. Select the Rectangular Grid Tool .
[Image: Illustrator toolbar interface with the Rectangular Grid Tool highlighted] -
"5 Seconds" Action:
-
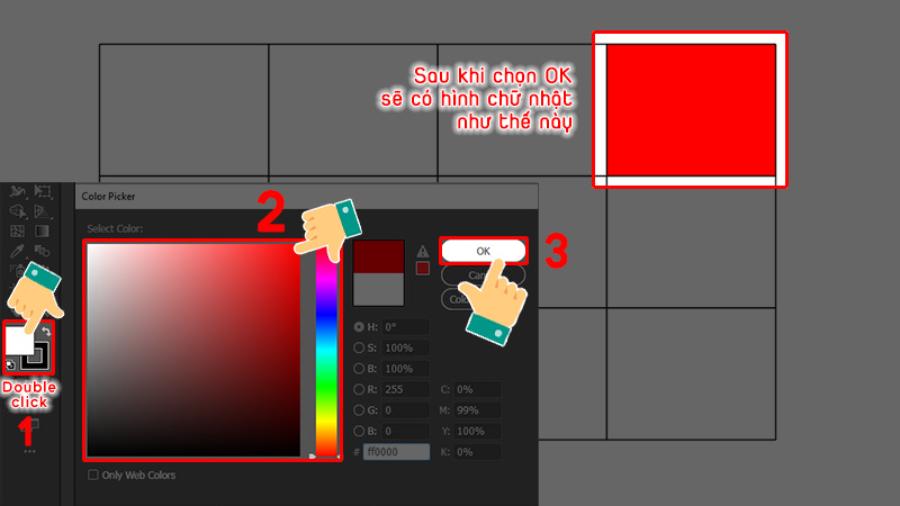
Method 1 (Quick Drag-and-Drop): Select the tool and simply drag a rectangle on your Artboard. A basic grid will be created instantly.
-
Method 2 (Absolute Precision): Select the tool, then click once anywhere on the Artboard. A custom dialog box will appear. This is the "control center" of the power of this tool.
-
-
Rectangular Grid Tool Options Dialog Box Decoded:
[Image: Rectangular Grid Tool Options dialog box with annotated options]-
Default Size:
-
Width: Width of the entire table.
-
Height: Height of the entire table.
-
-
Horizontal Dividers:
-
Number: The number of horizontal lines inside the grid. Important note: Number of Rows = Number of Lines + 1. For example, to create a table with 5 rows, you would enter 4 in this box.
-
Skew: Adjust the skew, which helps to push lines up or down. Leave 0% for evenly spaced lines.
-
-
Vertical Dividers:
-
Number: The number of vertical lines inside the grid. Important note: Number of Columns = Number of Lines + 1. For example, to create a table with 4 columns, you would enter 3 in this box.
-
Skew: Adjust the skew, stacking columns to the left or right. Leave 0% to keep columns even.
-
-
Use Outside Rectangle as a Frame: Check this box to create a border around the entire table.
-
Fill Grid: Checking this box will fill the background color of the entire table (not individual cells).
-
-
Click "OK" and Admire: After entering the desired parameters, click OK. Voilà! A perfect, even table frame appears before your eyes. The whole process from selecting the tool to clicking OK takes only a few seconds.
Advanced Tips With Rectangular Grid Tool:
While dragging and dropping to create a table (Method 1), you can:
-
Press the Up/Down arrow keys to increase/decrease the number of lines.
-
Press the Left/Right arrow keys to increase/decrease the number of columns.
-
Hold down the Shift key to create a perfect square board.
This method has solved the "skeleton" part of the table. But how to put content in it and turn it into a real table? Let's move on to the next methods.
2. The Professional Method: Mastering Text and Tabs
If your table contains a lot of text and data, this is the most powerful and flexible method. It gives you complete control over text alignment within columns, just like in InDesign.

2.1 When should this method be used?
-
When creating price lists, restaurant menus, tables of contents.
-
When data needs to be perfectly aligned (left, right, center, or decimal point aligned).
-
Easily update content when needed without disrupting the structure.
Steps to follow:
-
Create a Text Box: Using the Type Tool (T), drag a text box that is the same size as the table you want to create.
-
Import Raw Data:
-
Type the content for the first row. Between columns, press the Tab key only once .
-
Press Enter to go to new line.
-
Repeat the process for the next rows.
-
-
For example:
Product [Tab] Quantity [Tab] Unit price [Tab] Total
Cotton T-Shirt [Tab] 10 [Tab] 150,000 VND [Tab] 1,500,000
VND Jeans [Tab] 5 [Tab] 450,000 VND [Tab] 2,250,000 VND -
Open Control Panel Tabs:
-
Select the entire text box.
-
Go to Window menu > Type > Tabs or press Ctrl + Shift + T (on Windows) / Cmd + Shift + T (on Mac).
-
A ruler will appear just above your text box.
-
-
[Image: Tabs panel interface in Illustrator]
-
Setting Tab Stops:
-
On the ruler bar of the Tabs panel, you will see 4 types of stops:
-
Left-Justified Tab: Left-justifies text at the tab stop.
-
Center-Justified Tab: Centers the text at the tab stop.
-
Right-Justified Tab: Right-aligns text at the tab stop.
-
Decimal-Justified Tab: Justifies the decimal point (perfect for financial number columns).
-
-
Select the type of Tab you want (e.g. Left-Justified for the product name column).
-
Click the position on the ruler where you want the first column to start. A small Tab icon will appear.
-
Continue selecting the Tab type and setting the stops for the next columns. You can drag these Tab icons back and forth to visually align their positions.
-
-
Add Dotted Leader:
-
Do you want dots............ connecting the section name to the page number like in a table of contents?
-
In the Tabs panel, select a stop.
-
In the Leader box , type a period . (or any character).
-
Press Enter. The space before that stop will be filled with the character you selected.
-
This method creates a text table with an extremely flexible structure. You can easily change the content, font, size without fear of "breaking" the layout.
3. Combination Technique: The Power of the Grid Tool and Tabs
This is where we combine the two most powerful methods above to create a complete table in both form and content. This is the workflow that professional designers often apply.
-
Step 1: Create the "Skeleton" (5 seconds):
-
Use the Rectangular Grid Tool to create a table grid with the exact number of rows, columns, and dimensions you want.
-
Important Tip: Once you've created your grid, put it on a separate layer and lock it (by clicking the empty box next to the eye icon in the Layers panel). This prevents you from accidentally moving the lines while working with your text.
-
-
[Image: Layers panel in AI with "Grid" layer locked]
-
Step 2: Create Content Layer:
-
Create a new Layer above the "Grid" Layer. Name it "Content" or "Text".
-
-
Step 3: Insert and Align Text:
-
On the "Content" Layer, use the Type Tool (T) to drag a text box that covers the entire table frame you created.
-
Use Method #2 (using Tabs) to enter and align your data. You can now use the grid lines as "guides" to set tab stops visually and precisely.
-
-
Step 4: Formatting and Styling:
-
Now you can get creative. Back on the "Grid" Layer (unlocked), you can:
-
Change the thickness, color, line style (dashed) for lines.
-
Use the Live Paint Bucket (K) to quickly color header cells or Zebra Stripes.
-
-
On the "Content" Layer, you can change the font, color, style (bold, italic) for each part of the table.
-
By combining this, you get the speed of the Rectangular Grid Tool and the flexibility and professionalism of the Tabs panel, creating a final product that is both beautiful and easy to edit.
4. Optimization Solution: Copy & Paste From Excel, Word, Google Sheets
In a real-world work environment, the data for a table often already exists in an Excel, Word, or Google Sheets file. Typing it all back in is a huge waste of time. Luckily, Illustrator handles this copy-pasting pretty well.
Implementation process:
-
Prepare at Source: Open your Excel, Word or Sheets file. Select and copy (Ctrl+C / Cmd+C) the entire table area you want to include in AI.
-
Paste into Illustrator: Open your Illustrator file and hit paste (Ctrl+V / Cmd+V).
-
Handling "Battlefield":
-
What you get after pasting can look a bit messy. Text and lines are often grouped together in a "Compound Path" or multiple nested groups.
-
What to do now: Select the pasted object, right-click and select Ungroup multiple times until it can no longer be ungrouped. Then, if there are still stuck objects, right-click and select Release Compound Path .
-
-
Restructuring and formatting:
-
You now have separate text and line objects.
-
You can erase unnecessary lines, redraw the frame with the Rectangular Grid Tool, or simply realign text blocks.
-
This is the time to apply the formatting skills you've learned: change colors, strokes, fonts...
-
Advantages: Saves maximum data entry time.
Disadvantages: It takes time to "clean up" and reformat objects after pasting. The table is no longer linked to the original file, any updates must be done manually.
5. Frequently Asked Questions (FAQ) When Creating Tables in Illustrator
This section will answer the most common questions, helping you understand every aspect.
Question 1: How to make the rows and columns in the table have the same size?
Answer: The fastest and most accurate way is to use the Rectangular Grid Tool. In its dialog box, make sure the Skew value for both Horizontal and Vertical Dividers is set to 0%.
Question 2: Does Illustrator have a dedicated table creation tool like InDesign?
Answer: No. Illustrator's philosophy is that it is a vector drawing and illustration software, focusing on the freedom of object creation. Meanwhile, InDesign is a page layout software, optimized for handling long blocks of text and structured data such as tables. Therefore, InDesign has a dedicated Table Tool, while AI does not.
Question 3: How to create a table with rounded corners?
Answer: Very simple.
-
Create a table using the Rectangular Grid Tool .
-
Select the entire table, go to menu Object > Group (Ctrl+G / Cmd+G).
-
Once the table is a single group, go to the menu Effect > Stylize > Round Corners... .
-
Enter the Radius value you want and press OK.
Question 4: How to merge cells in a table?
Answer: Since AI has no concept of "cells", you will do this manually but very quickly.
-
After creating the grid with the Rectangular Grid Tool, Ungroup it.
-
Using the Direct Selection Tool (A) (white arrow), select the line segments separating the cells you want to merge.
-
Press the Delete key . The cells are now visually merged.
Question 5: When should I use Illustrator and when should I use InDesign to make tables?
Answer: This is a very important question.
-
Use Illustrator when: Your table is highly decorative, part of a larger graphic design (e.g. infographic, poster, flyer). The table has little data, doesn't need to be updated frequently.
-
Use InDesign when: You're working with multi-page documents (catalogs, annual reports, magazines). Your tables contain a lot of data, need to link to an Excel file and update automatically, have complex formatting, and repeat across multiple pages.
Creating tables in Illustrator is no longer a daunting task. We discovered that, with the Rectangular Grid Tool , building a perfect table layout can be done in as little as 5 seconds. However, speed isn’t everything. Professionalism lies in combining that speed with the flexibility and precision of word processing with Tabs , the ability to optimize time by copying and pasting from other sources, and the ability to combine methods to create a final product that is both aesthetically pleasing and manageable.
6. Some notes when creating tables in Illustrator
To create a standard, professional table in Illustrator, users need to note the following important points to avoid errors and save working time.
First, cell alignment is key to making a table look neat, regular, and easy to read. Illustrator provides an Align tool that is very effective in arranging objects. Designers should use features like “Align to Selection” or “Distribute Spacing” to center cells or space them evenly. This is especially important if you are drawing your own cells instead of using a grid, as even the slightest misalignment can make a table look unbalanced and unprofessional.
Second, when drawing or dragging rectangles to make table cells, you should hold the Shift key . This will help you maintain the correct horizontal and vertical ratio, avoiding distortion or uneven cells. In table design, consistency in size and proportion is a prerequisite to ensure the overall aesthetics of the layout.
A small but extremely useful tip is to group the cells using the Ctrl + G key combination after completing the shape creation. Grouping objects will help you easily move, edit or position the table in different locations in the design without fear of being misaligned or disturbed. If you want to edit individual cells, you just need to go into Isolation Mode or temporarily ungroup.
Another often overlooked detail that greatly affects the uniformity of the table is the stroke thickness . You should set a consistent stroke value for all cells, avoiding having some borders thick and some thin, which makes the overall table inconsistent and confusing for the viewer. In Illustrator, selecting all cells and adjusting the stroke in the top control bar will make this operation quick.
Finally, once you've completed your table, lock the object by going to Object > Lock > Selection . This ensures that you don't accidentally edit or misalign the table when working on other parts of your design. Locking the table also helps protect carefully aligned elements from unwanted changes during the final product.
7. Conclusion
Don't think of Illustrator's lack of a "Table Tool" as a weakness. Instead, think of it as an opportunity to gain a deeper understanding of how vector objects work and master the program's core tools. By practicing the techniques in this article, you'll not only create tables faster, but you'll also improve your design thinking and problem-solving skills in Adobe Illustrator. Fire up Illustrator and try the 5-second method. You'll be amazed at how much better it can be!


VIP Products


Best Selling Products
Autodesk All App Account Copyright
120 USD
Upgrade Genuine Office 365
49 USD
MidJourney Account
29 USD
Freepik Premium Account
59 USD
Capcut Pro 1 Year
39 USD
Adobe Photoshop Copyright - Full App
120 USD
Adobe Premiere Pro Account
99 USD
ChatGPT Plus Account (GPT-4)
16 USD
Upgrade genuine Capture One account
120 USD
Genuine Adobe Illustrator account
99 USD
Upgrade Duolingo Super
29 USD
Windows 10 & 11 Pro Key
36 USD
Plugin Retouch4me
69 USD
Copyright Adobe Lightroom Account
59 USD
Genuine Cheap Canva Pro
39 USD