Best Selling Products

Copyright Adobe Lightroom Account
59 USD

Upgrade Duolingo Super
29 USD

Genuine Adobe Illustrator account
99 USD

Plugin Retouch4me
69 USD

Adobe Premiere Pro Account
99 USD

Windows 10 & 11 Pro Key
36 USD

ChatGPT Plus Account (GPT-4)
16 USD

MidJourney Account
29 USD

Adobe Photoshop Copyright - Full App
120 USD

Capcut Pro 1 Year
39 USD

Genuine Cheap Canva Pro
39 USD

Upgrade Genuine Office 365
49 USD

Upgrade genuine Capture One account
120 USD

Freepik Premium Account
59 USD

Autodesk All App Account Copyright
120 USD
Discover the Magic of the Lens Flare Effect
Nội dung
This article will take you on a journey to discover the phenomenon of lens flare – a magical light effect in photography. You will learn how to turn optical “errors” into artistic highlights, along with secrets to create unique and attractive photos.
In the modern world of photography, creating unique photos does not stop at the ability to take sharp photos, but also depends on the ability to turn "flaws" into artistic "highlights". One of the factors that many photographers are favoring is the lens flare effect - the phenomenon of scattered light creating magical light lines on the photo. So what is flare? Why is there a lens flare effect and how to control and utilize it professionally? Let's explore with SaDesign through the article below!
1. Definition of Lens Flare
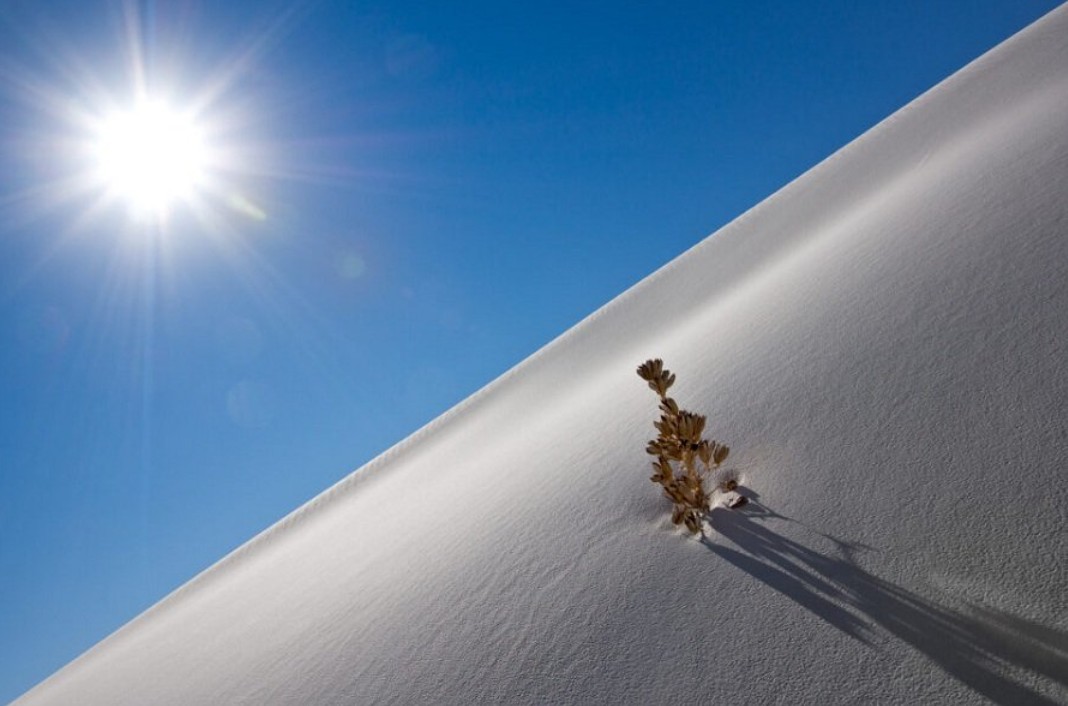
Lens flare (or simply flare) is an optical phenomenon that occurs when strong light, usually sunlight or other extremely strong light sources, directly impacts the camera lens. When this light encounters surfaces in the lens, it will be scattered and reflected in many different directions, creating small bright images, light streaks, or blurry light rays in the photo.
Flare can be said to come in two main forms:
Natural flare: Occurs when the camera shoots in bright light conditions and there is no way to remove it.
Artificial flare: Created intentionally through adjusting the shooting angle, using accessories or post-production techniques to highlight this effect.
.png)
2. Common types of Flare
Circular Flare: This is the most common type of flare, appearing as bright rings or spheres around the main light source. It occurs when light shines directly into the lens and reflects between optical elements inside the lens.
(1).png)
Streak Flare: This flare appears as bright streaks extending from the main light source. Streaks can be created by reflections or scattering of light on surfaces within the lens.
.png)
Ghost Flare: Ghost flare is a faint or faint image of the main light source that appears at different locations in the image. It occurs when light reflects and scatters between optical elements in the lens.
Veiling Flare: This flare occurs when light reflects and scatters in the lens and blurs the entire image. It can cause a loss of contrast and detail in the image.
.png)
Colored Flare: This flare appears as lines or rings of light of different colors. The color of the flare depends on the type of lens, optical elements and filters used.
.png)
Flares can have different shapes and properties depending on the lens, lighting conditions, shooting angle, and other factors. Some photographers and filmmakers use different types of flares to create artistic effects or add uniqueness to their work.
3. Factors affecting the Flare phenomenon
Light Source: The most important factor affecting flare is the primary light source. Strong light sources, such as the sun or a flash, are more likely to produce a strong flare. The position of the light source in the frame also affects the shape and location of the flare.
Lighting angle: Lighting angle is the angle at which light hits the lens. When light hits the lens at a direct angle, the likelihood of flare occurring is higher. Lighting angle also affects the shape and size of flare.
Lens construction: The structure and optical elements within a lens can influence flare. Some lenses are more likely to produce flare due to their design and specific optical elements. For example, a lens with multiple anti-reflective coatings can reduce flare.
Filters and Coatings: Using filters or coatings on your lens can affect flare. Some filters or coatings can minimize flare while others can create unique flare effects.
(1).jpg)
Lighting conditions: The overall lighting conditions in the shooting environment can also affect flare. For example, when shooting in dim lighting conditions, flare may appear more intense.
Camera angle and terrain: The camera angle and surrounding environment can also affect flare. Terrain such as trees, mountains, or other objects can create shadows or block light, increasing the likelihood of flare.
4. Common uses of Lens Flare
Lens flare has a number of common uses in photography and filmmaking.
Create a rustic and natural feel: Lens flare can create a rustic, natural and intimate feel in photos or videos. It can increase the authenticity and presence of the image.
Create space and depth: Lens flares can create a larger space and add depth to a photo. The streaks or highlights from the flare can create a three-dimensional feel and highlight elements in the frame.
Create artistic effects: Lens flare can be used as a creative element to create unique and special artistic effects in photos or videos. It can change colors, create bokeh lights or create unique light shapes and patterns.
.png)
Creating Mood and Emotion: Lens flares can be used to create mood and emotion in artwork. The streaks or highlights from the flare can create a dreamy, romantic or magical feel in the photograph.
Creating a Signature Style: Some photographers and filmmakers use flares as part of their personal style and signature. Lens flares can create a unique and identifiable character for their work.
However, it is important to note that lens flare is not always considered a good element in photography and filmmaking. Sometimes, flare can reduce contrast and detail in an image or cause noise in the image. The use of flare should be considered and adjusted to suit the artistic intention and content of the work.
5. How to limit Flare phenomenon
To limit flare in photography and filmmaking, you can apply the following measures:
Use an anti-flare filter: Anti-flare filters, such as anti-reflective filters or UV filters, can reduce flare by absorbing unwanted light and reducing reflections in the lens. Be sure to use quality filters to avoid affecting image quality.
.png)
Block the sun: When shooting in bright light, try to block the sun by using a shade or placing a shade in the frame. This helps reduce direct light entering the lens and reduces the chance of flare.
Change your camera angle: Changing your camera angle can help avoid direct light hitting the lens and reduce the chance of flare. Try adjusting your camera angle and position to find the best angle to avoid flare.
Use high-quality lenses: High-quality, well-designed lenses can help minimize flare. Optical elements and anti-reflective coatings in lenses can help minimize reflections and light dispersion.
Adjust camera settings: Changing camera settings like aperture, shutter speed, and ISO can affect flare. Try adjusting these settings to find the best configuration to minimize flare.
Shooting in good lighting conditions: Shooting in good lighting conditions, such as early morning or late afternoon, can reduce the likelihood of flare occurring. The soft, gentle light in these conditions is less likely to produce flare than bright light.
.png)
6. Notes and tips for the Lens Flare effect
Although the lens flare effect brings many unique highlights to the photo, to achieve optimal results, you need to remember the following notes and tips:
6.1. Balance Between Light and Dark
Retain the main subject’s details: When using flare, always be careful not to blur out important details of the photo. Make sure the light effect is just “spice” and not taking over the entire photo.
Adjusting the lighting: Balancing the brightness of the flare with the rest of the image is key. Sometimes, reducing the brightness of the flare in post-production will help the main subject stand out more.
6.2. Be Creative But Don't Abuse
Create effects naturally: Creativity in photography is invaluable, but overdoing flare can make a photo look cluttered. Use flare to create emphasis rather than overpowering the entire image.
.png)
Get inspiration: Look at the work of famous photographers to learn how they use flare. This will give you ideas and inspiration for your own photos.
6.3. Practice and Testing
Don’t be afraid to experiment: Every time you go out on location is an opportunity to experiment. Take multiple versions of your photos with different angles and lighting to find the “formula” that works for your style.
Analyze and learn: After each shoot, take time to review your photos, analyzing what worked and what needs improvement. Patience and constant practice will help you gradually perfect your lens flare technique.
The lens flare effect is not only a “flaw” that needs to be eliminated, but can also become a “background music” that enhances the artistry of the photo. It is the ingenuity in controlling and creating sparkling rays of light that will help you affirm your personal style and create a unique impression in the eyes of the viewer. In conclusion, mastering the knowledge of flare and applying the presented techniques will open up countless creative opportunities for you. Always dare to experiment, dare to break the mold and do not be afraid of mistakes. Because each attempt is a step closer to success.


VIP Products


Best Selling Products
Copyright Adobe Lightroom Account
59 USD
Upgrade Duolingo Super
29 USD
Genuine Adobe Illustrator account
99 USD
Plugin Retouch4me
69 USD
Adobe Premiere Pro Account
99 USD
Windows 10 & 11 Pro Key
36 USD
ChatGPT Plus Account (GPT-4)
16 USD
MidJourney Account
29 USD
Adobe Photoshop Copyright - Full App
120 USD
Capcut Pro 1 Year
39 USD
Genuine Cheap Canva Pro
39 USD
Upgrade Genuine Office 365
49 USD
Upgrade genuine Capture One account
120 USD
Freepik Premium Account
59 USD
Autodesk All App Account Copyright
120 USD