Best Selling Products

Copyright Adobe Lightroom Account
59 USD

Upgrade genuine Capture One account
120 USD

Freepik Premium Account
59 USD

Genuine Adobe Illustrator account
99 USD

Capcut Pro 1 Year
39 USD

Genuine Cheap Canva Pro
39 USD

Windows 10 & 11 Pro Key
36 USD

Upgrade Duolingo Super
29 USD

MidJourney Account
29 USD

Adobe Photoshop Copyright - Full App
120 USD

Adobe Premiere Pro Account
99 USD

Plugin Retouch4me
69 USD

ChatGPT Plus Account (GPT-4)
16 USD

Upgrade Genuine Office 365
49 USD

Autodesk All App Account Copyright
120 USD
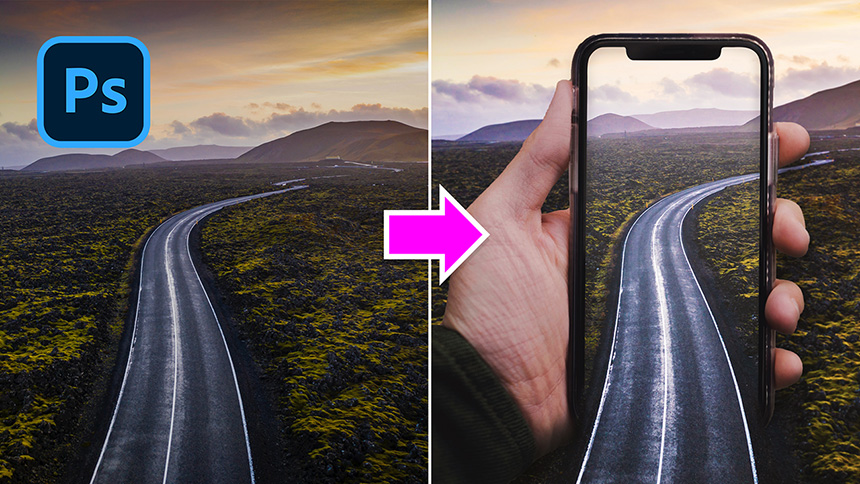
How to Create a Light Text effect in Photoshop
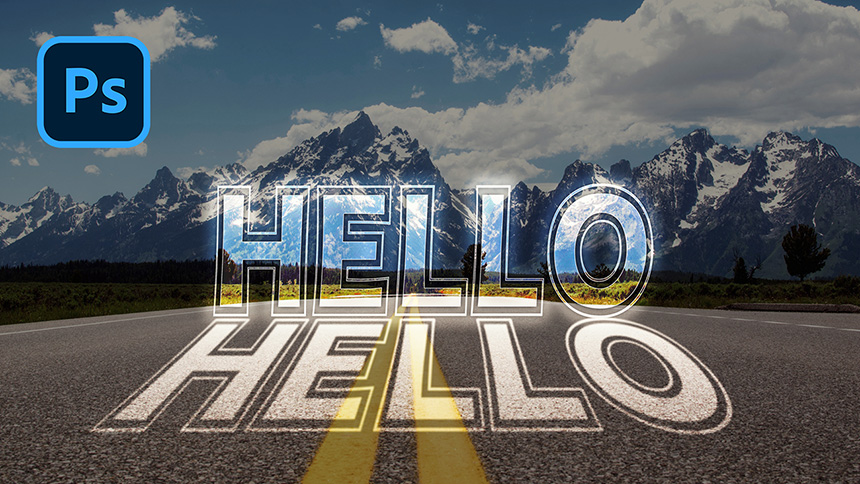
Hi there, in this tutorial, I’ll share with you how to create a light text effect in Adobe Photoshop.
You can download stock in the link on the description for following along with me throughout the process.
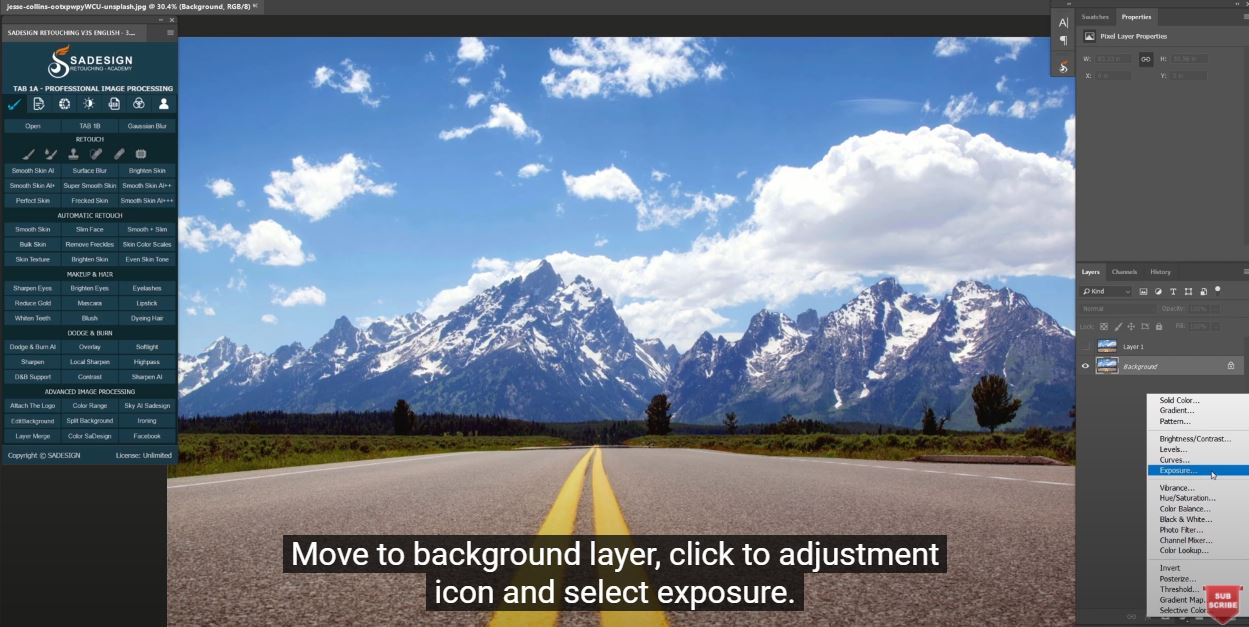
After opening your photo, press CTRL or CMD + J to duplicate it, then turn this copy layer off. Move to background layer, click to adjustment icon and select exposure.
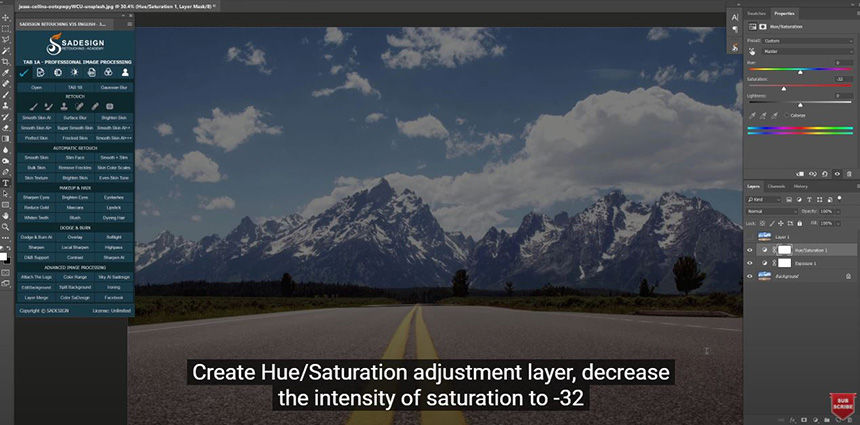
In properties tab, darken image by decrease exposure to -2.28 Create Hue/Saturation adjustment layer, decrease the intensity of saturation to -32 Pick up Text tool, choose your Font, size and type it out.
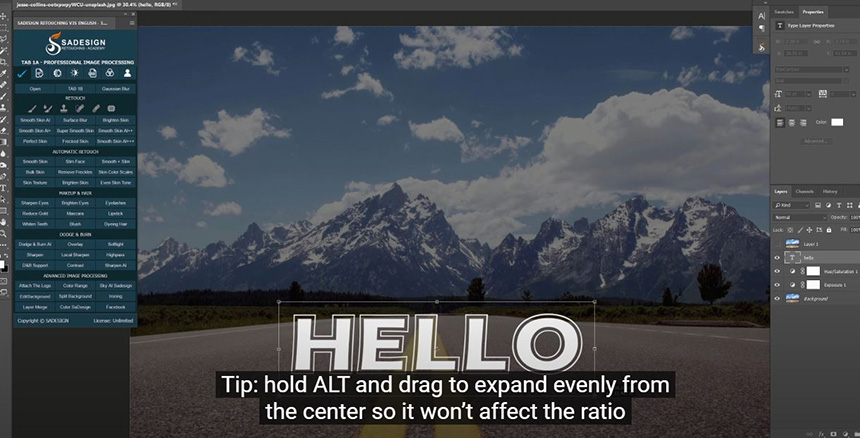
CTRL+T to expand the size. Tip: hold ALT and drag to expand evenly from the center so it won’t affect the ratio of the text.
Convert this text layer into smart object, so we can modify it non-destructively.
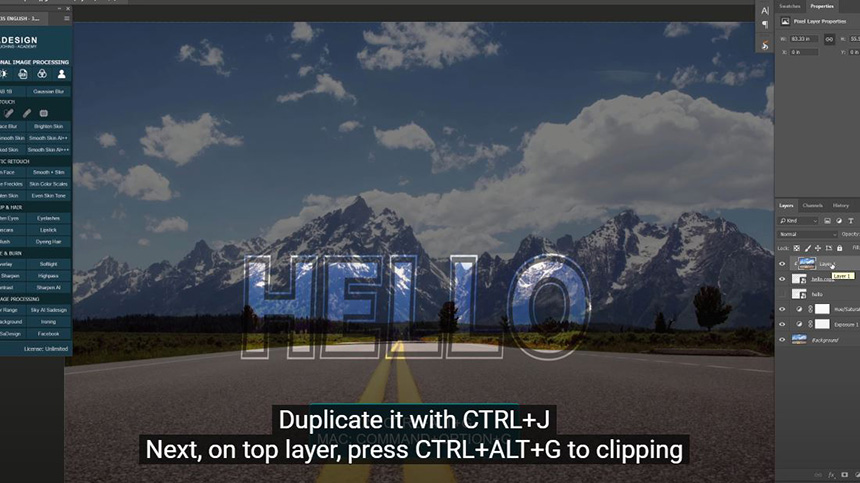
I’ll expand it a bit to fill the road. Duplicate it with CTRL+J Next, on top layer, press CTRL+ALT+G to clipping mask it to the text layer below.
Open Blending Options in the copy text layer, we will add lots of effects to it.
Check to Stroke at first Check to Inner Glow as well, this effect will make the text really stand out from the background.

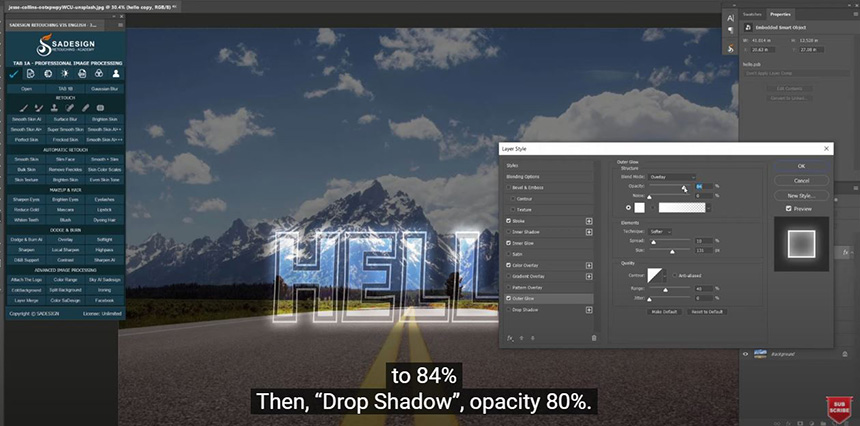
Change blend mode to overlay, adjust opacity to around 70% In “color overlay”, choose White color Check to “Outer Glow”, reduce opacity to 84% Then, “Drop Shadow”, opacity 80%.
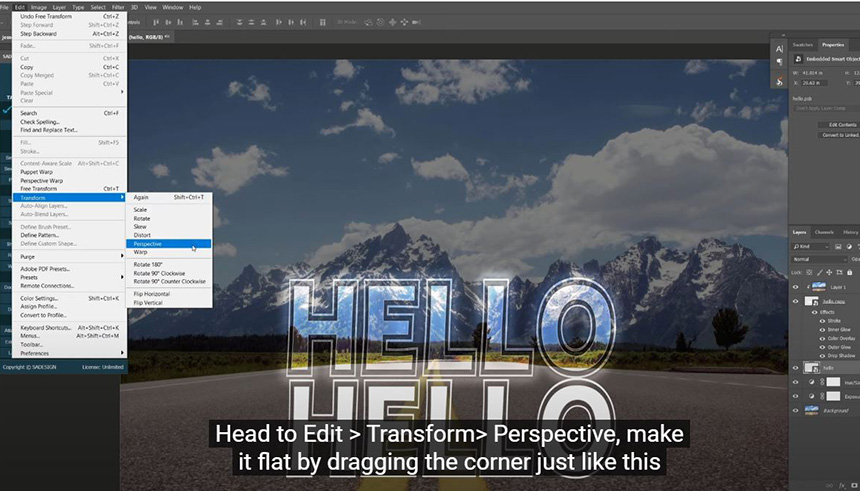
Confirm For the other text layer, we will take it as the reflection of the text.
CTRL+T, move it below the text. Head to Edit > Transform> Perspective, make it flat by dragging the corner just like this Then, Edit > Transform > Distort > adjust a bit in the middle Change to overlay in blend mode, and add blur to it by going to Filter > Blur > Gaussian Blur > 5 pixels. OK
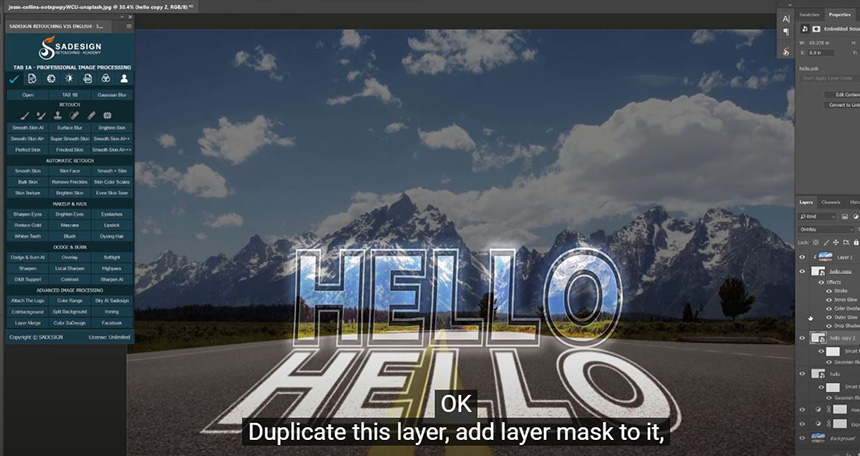
Duplicate this layer, add layer mask to it, use gradient map with black,white preset And create a line to make gradient effect to the reflection.
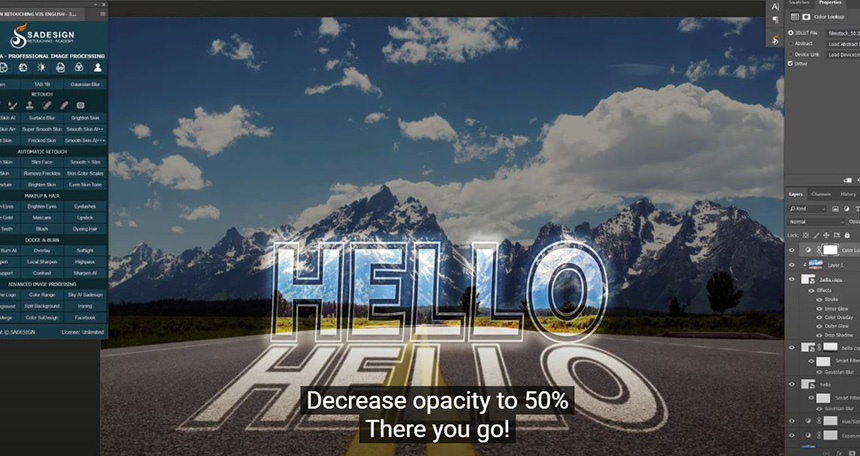
Final step, we will add preset color to the whole image, create a color lookup adjustment layer, drop down 3DLut file and select preset that you prefer. I’ll pick “Filmstock”. Decrease opacity to 50%
Watch the video here:
REGISTER FOR FREE PHOTOSHOP LEARNING
============================
The most powerful Retouch tool processor
DOWNLOAD:
✅ SADESIGN PANEL ENGLISH: https://sadesign.ai/retouching/
✅ SADESIGN PANEL VIETNAM: https://www.retouching.vn/


VIP Products


Best Selling Products
Copyright Adobe Lightroom Account
59 USD
Upgrade genuine Capture One account
120 USD
Freepik Premium Account
59 USD
Genuine Adobe Illustrator account
99 USD
Capcut Pro 1 Year
39 USD
Genuine Cheap Canva Pro
39 USD
Windows 10 & 11 Pro Key
36 USD
Upgrade Duolingo Super
29 USD
MidJourney Account
29 USD
Adobe Photoshop Copyright - Full App
120 USD
Adobe Premiere Pro Account
99 USD
Plugin Retouch4me
69 USD
ChatGPT Plus Account (GPT-4)
16 USD
Upgrade Genuine Office 365
49 USD
Autodesk All App Account Copyright
120 USD