Best Selling Products

Upgrade Duolingo Super
29 USD

Copyright Adobe Lightroom Account
59 USD

Windows 10 & 11 Pro Key
36 USD

Freepik Premium Account
59 USD

Autodesk All App Account Copyright
120 USD

Genuine Adobe Illustrator account
99 USD

Upgrade genuine Capture One account
120 USD

Plugin Retouch4me
69 USD

MidJourney Account
29 USD

ChatGPT Plus Account (GPT-4)
16 USD

Capcut Pro 1 Year
39 USD

Adobe Premiere Pro Account
99 USD

Upgrade Genuine Office 365
49 USD

Genuine Cheap Canva Pro
39 USD

Adobe Photoshop Copyright - Full App
120 USD
How to Create An App Splatter in Photoshop
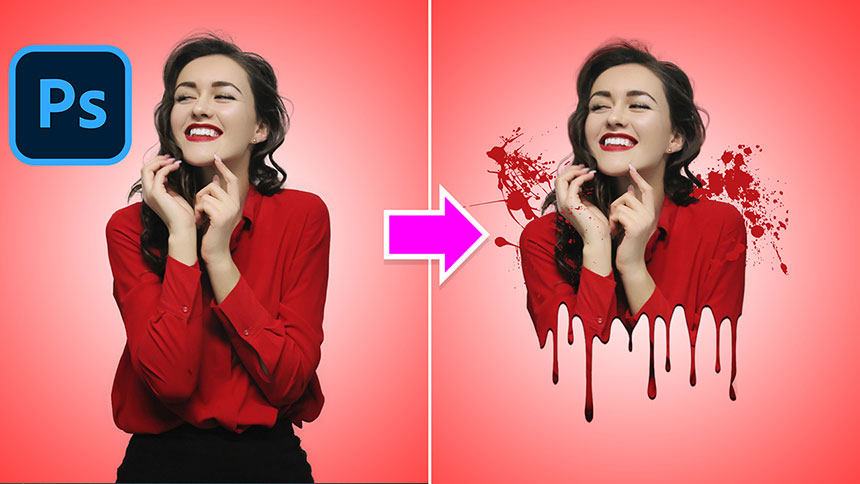
Hi guys, today I'll show you how to create a splatter effect in Photoshop.
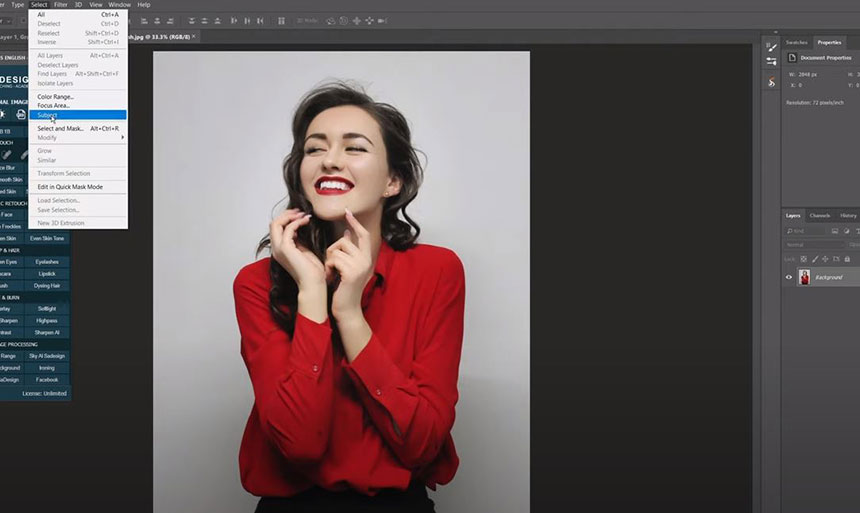
At first, we will separate the subject from the background. Go to Select > Subject, Photoshop AI will choose the subject for us. Head to Select > Select and Mask > use Refine Edges Brush tool to make its selection accurate. Paint over her hair and her body to remove the background left.
Check to “Decontaminate colors” , amount 64% Output “New layer with layer mask”. OK
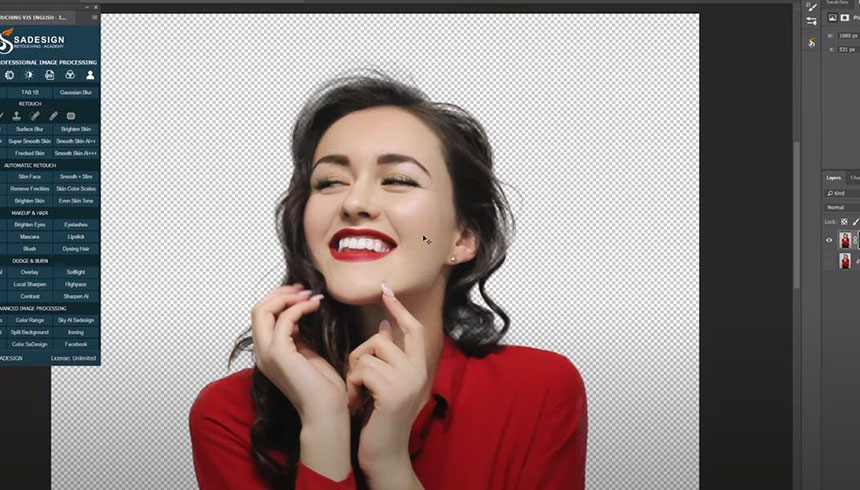
Press CTRL or CMD + C to copy this layer. Go to File > New > choose Custom and set the values as below Width 5000 Height 5000 Resolution 72 Color mode: RGB color
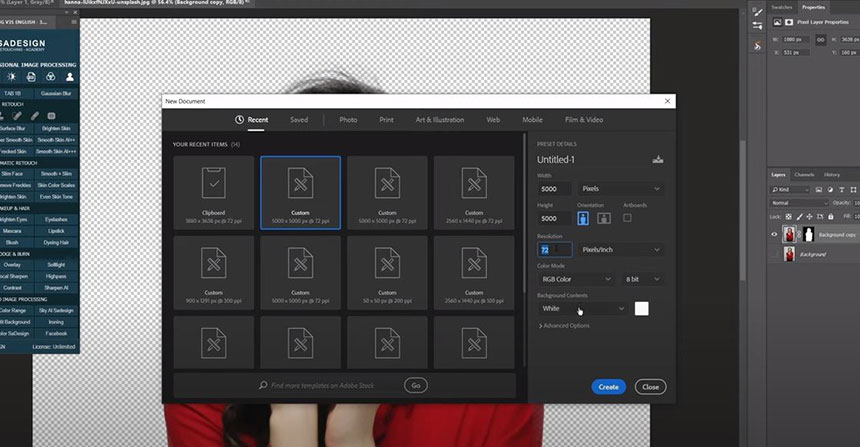
White in background contents Hit “Create” Double click to the lock icon to unlock the background layer. Click to fx icon, choose “Blending Options”, choose “Gradient Overlay” Blend mode: Normal Opacity 80% Style: Radial Click to color box, select “Black, White” Change black color to the color that you prefer.
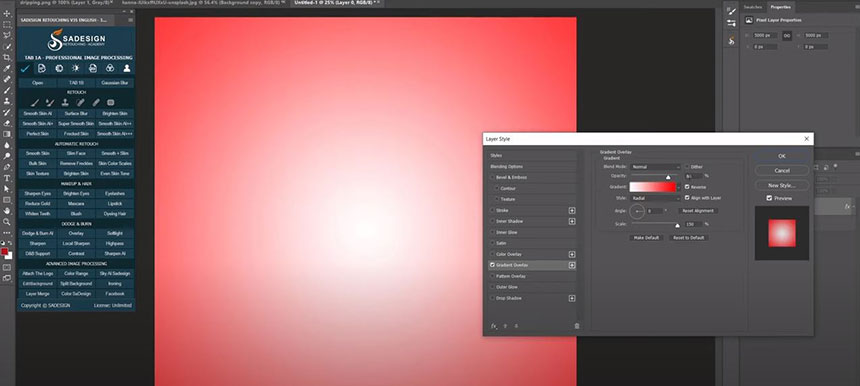
I’ll go with Red OK to close all windows Now, CTRL or CMD + V to paste the girl that we copied before. Use Tranforms tool (CTRL + T) to expand the subject to fit with the canvas.
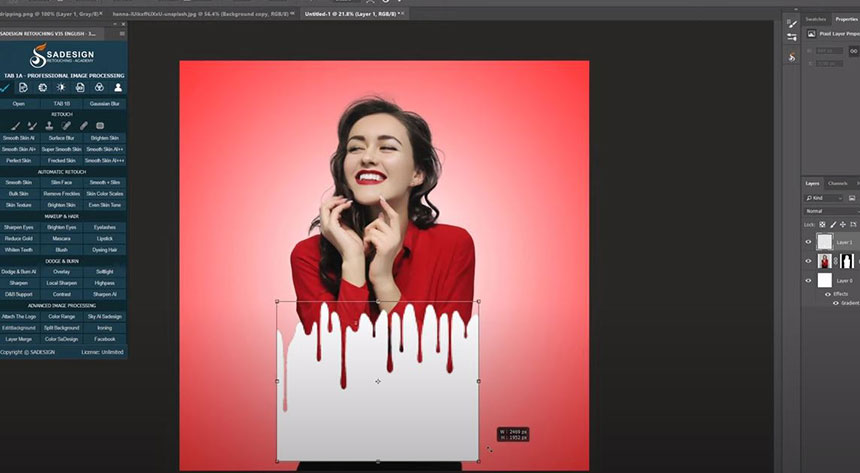
CTRL+T to expand and move it down. Hold CTRL key and click to layer 1 to take its selection. Turn off layer 1, select the mask of subject layer, then press Delete In Layer 0, create a new layer with this icon, pick up brush tool, click to arrow icon, drop down menu in wheel icon and select “Import Brushes”. Load this set of splatter brushes.
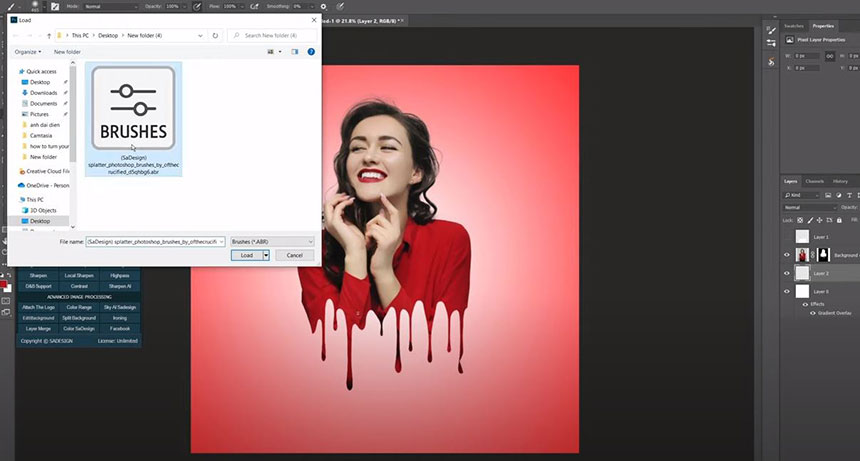
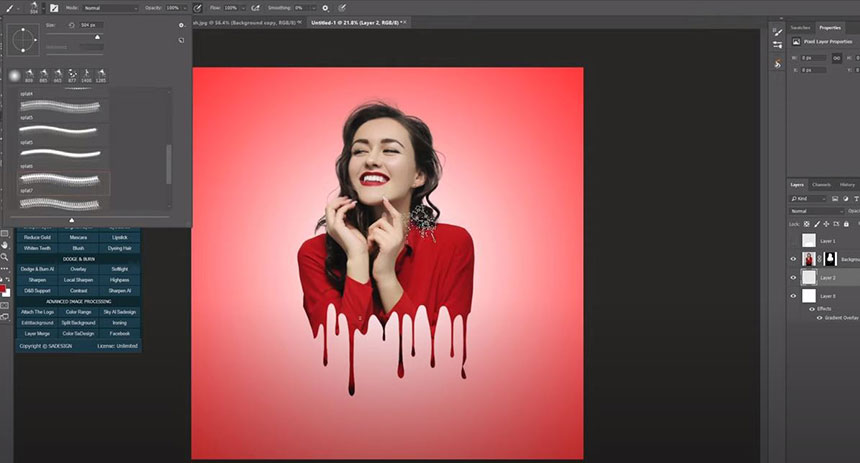
Open splatter folder, choose the brush that you like, increase brush size with this bracket ]. Set foreground color to dark red to match with the background and subject color. Dab to apply the brush to the image. Change to different brushes to create a unique dripping effect. Create a new layer for using other brushes.
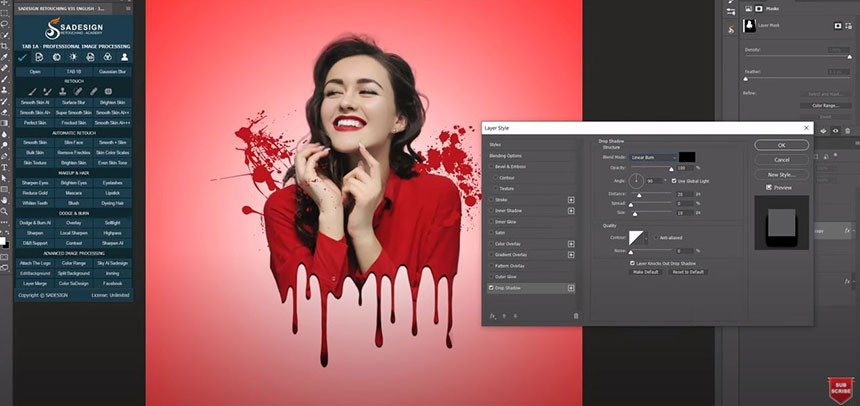
Use eraser tool to remove the color. In background layer, create “Blending Options”, add Drop Shadow. Blend mode: Linear Burn Black in color box Angle 90 degrees Distance 20 pixels Size 10 pixels OK
Put splatter brushes and subject layers into a group. Hope that you guys enjoy this session. hit like and subscribe or you can leave comments right down below. Thanks for watching!
REGISTER FOR FREE PHOTOSHOP LEARNING
============================
The most powerful Retouch tool processor
DOWNLOAD:
✅ SADESIGN PANEL ENGLISH: https://sadesign.ai/retouching/
✅ SADESIGN PANEL VIETNAM: https://www.retouching.vn/


VIP Products


Best Selling Products
Upgrade Duolingo Super
29 USD
Copyright Adobe Lightroom Account
59 USD
Windows 10 & 11 Pro Key
36 USD
Freepik Premium Account
59 USD
Autodesk All App Account Copyright
120 USD
Genuine Adobe Illustrator account
99 USD
Upgrade genuine Capture One account
120 USD
Plugin Retouch4me
69 USD
MidJourney Account
29 USD
ChatGPT Plus Account (GPT-4)
16 USD
Capcut Pro 1 Year
39 USD
Adobe Premiere Pro Account
99 USD
Upgrade Genuine Office 365
49 USD
Genuine Cheap Canva Pro
39 USD
Adobe Photoshop Copyright - Full App
120 USD