Best Selling Products

Windows 10 & 11 Pro Key
36 USD

Upgrade genuine Capture One account
120 USD

Upgrade Genuine Office 365
49 USD

Upgrade Duolingo Super
29 USD

ChatGPT Plus Account (GPT-4)
16 USD

Capcut Pro 1 Year
39 USD

Genuine Adobe Illustrator account
99 USD

MidJourney Account
29 USD

Genuine Cheap Canva Pro
39 USD

Autodesk All App Account Copyright
120 USD

Adobe Photoshop Copyright - Full App
120 USD

Adobe Premiere Pro Account
99 USD

Freepik Premium Account
59 USD

Plugin Retouch4me
69 USD

Copyright Adobe Lightroom Account
59 USD
How to Create Effect Alert in Crystal Ball Result
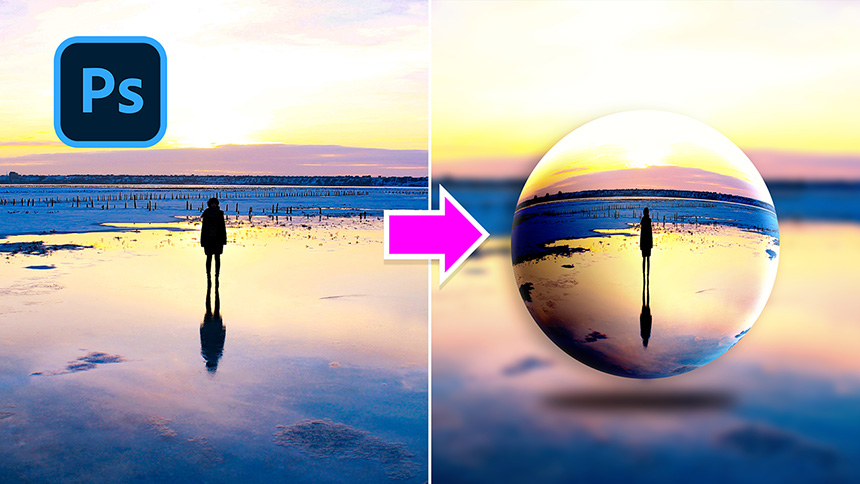
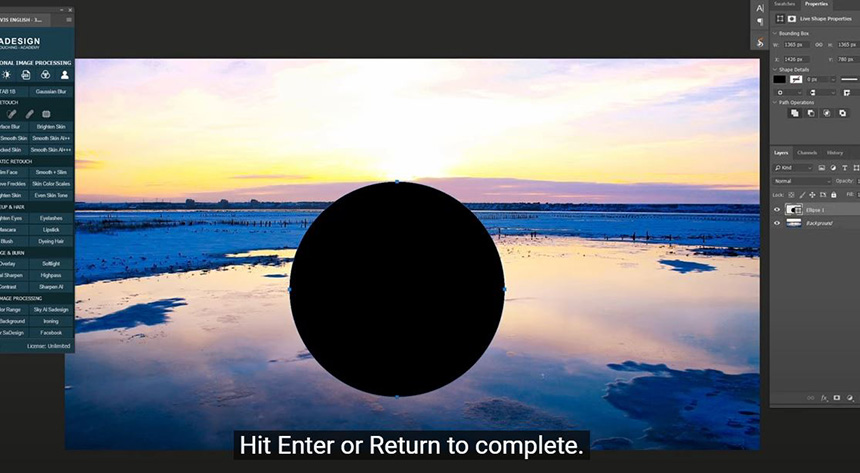
Hi there, I’ll share with you how to easily create crystal ball effect in Photoshop. Stay tuned! At first, pick up Ellipse tool to draw a circle shape, ensure “Shape” will be selected.
Black color in Fill In stroke, choose this first icon which means “No stroke” Then, hold SHIFT while drawing to have a perfect circle. Hit Enter or Return to complete.
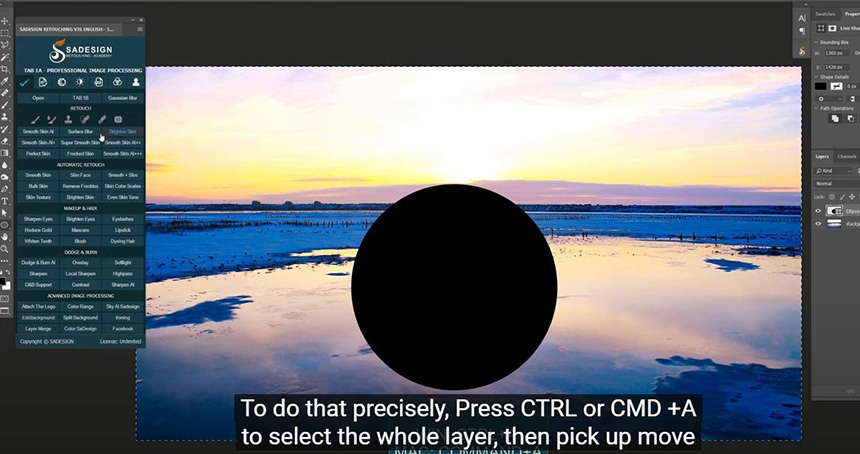
We will take this circle to the center. To do that precisely, Press CTRL or CMD +A to select the whole layer, then pick up move tool (V shortcut) and choose this icon, it’s for center alignment. CTRL+D to deselect
Next, duplicate background layer, bring it to the top. Go to Filter > Distort > Spherize > Set the amount at 100% Mode: Normal Confirm. 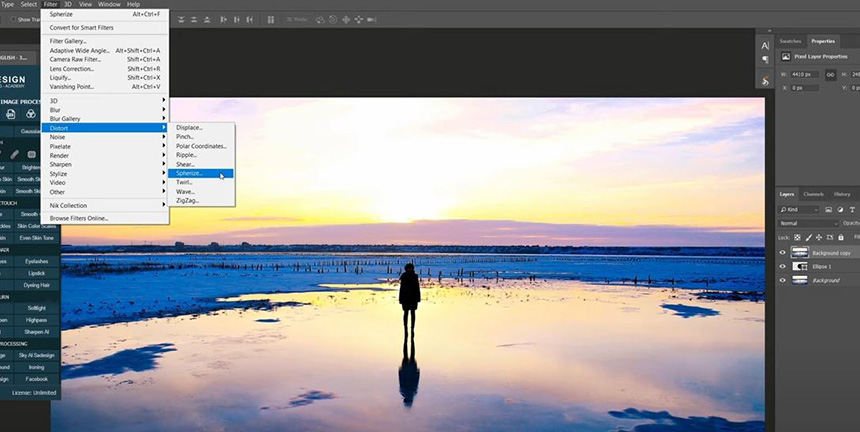
Press key combination CTRL+ALT+G or CMD+OPTION+G for Win or Mac to clipping mask it to the Circle shape below. CTRL+T to scale down the layer to a square shape just to fit with the circle. There you go! Now you can see it just like a crystal ball. Then hit Enter. 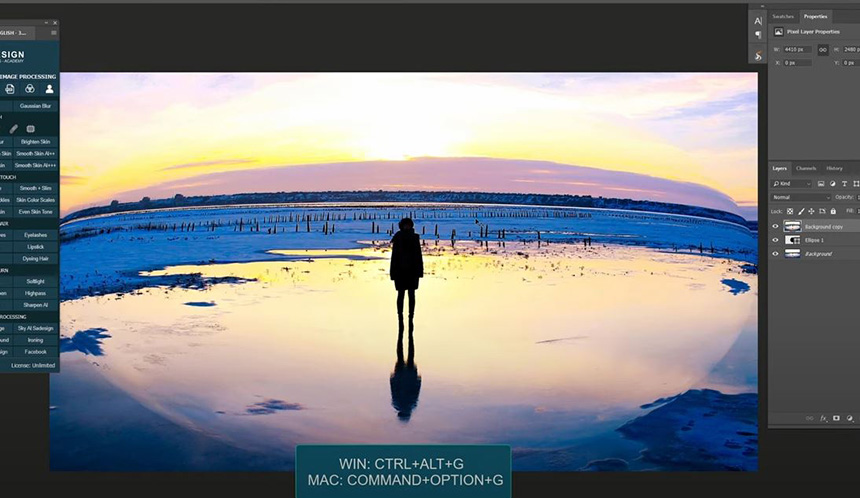
In Ellipse layer, we will create shadow to the crystal ball, to make it look realistic. Click to fx icon and select “Blending Options”, check to “inner shadow” Set values as the following: Blend mode: Linear Dodge Opacity: 60% Angle 60 degree Distance 40 pixels Size 200 pixels Check to “Gradient Overlay”, Blend mode: Linear Burn Opacity 60% Click to color bar to open Gradient Editor window, select “Foreground to transparent” in preset Drag the white point to the left, just to limit the dark space. Then OK
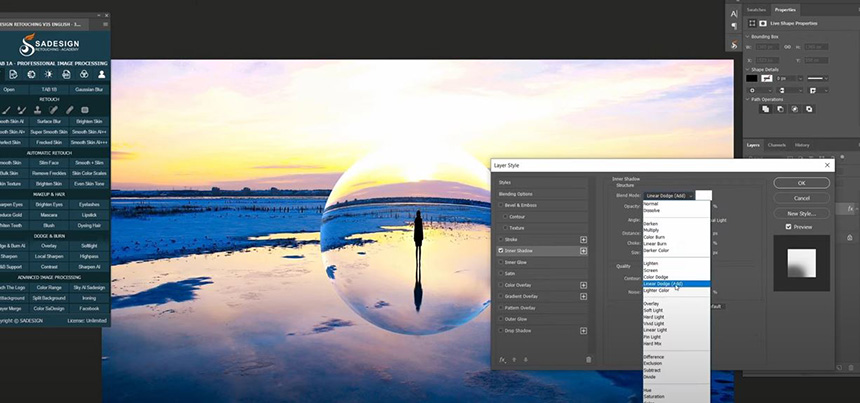
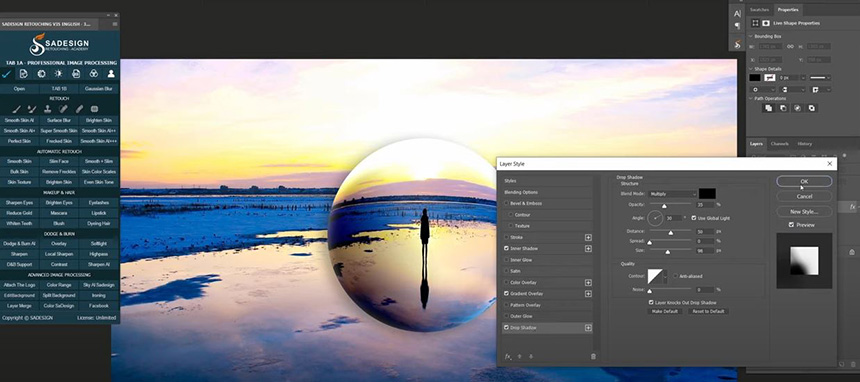
Angle 30 degrees Scale 90% Check to “Drop Shadow”, following the values just like this. Hit OK to confirm Duplicate this layer with CTRL+J
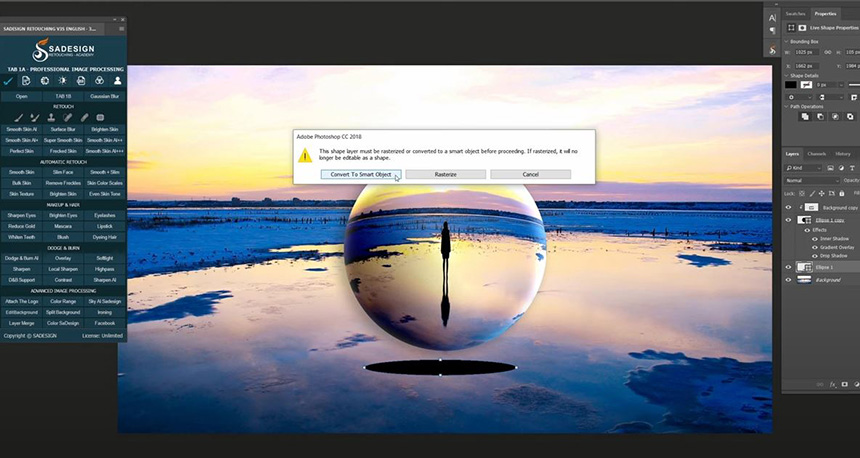
In Ellipse 1, right click to it and choose “Clear Layer Style” CTRL+T and drag from the top to the bottom to create the shadow of the crystal ball. Just place it under Head to Filter > Blur > Gaussian Blur > “convert to smart object” > 40 radius pixels > OK
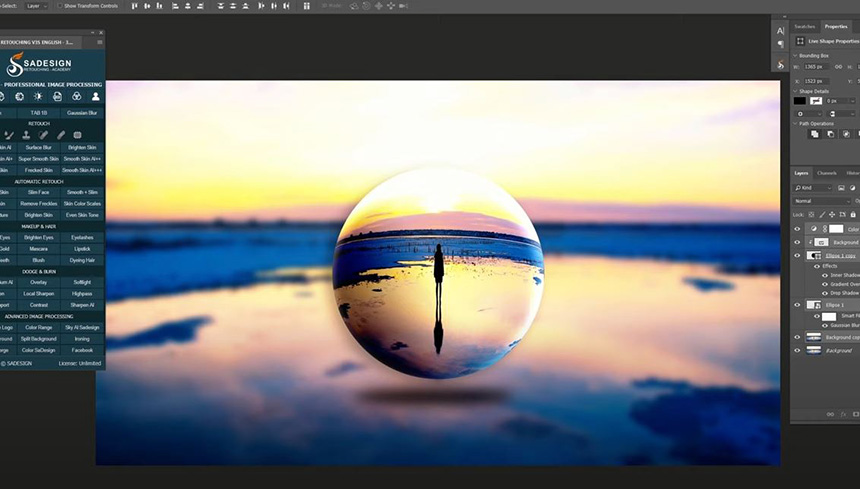
 Adjust opacity to around 80% Next, we will add color to the canvas. Click to adjustment icon and select “Color Lookup”, drop down menu in 3DLUT file and select “Crisp_warm”. Decrease the opacity to 70% To make the crystal ball stand out even more, the background should be blurred. Duplicate background layer, go to Filter > Blur > Gaussian Blur > 20%
Watch the video here:
REGISTER FOR FREE PHOTOSHOP LEARNING
============================
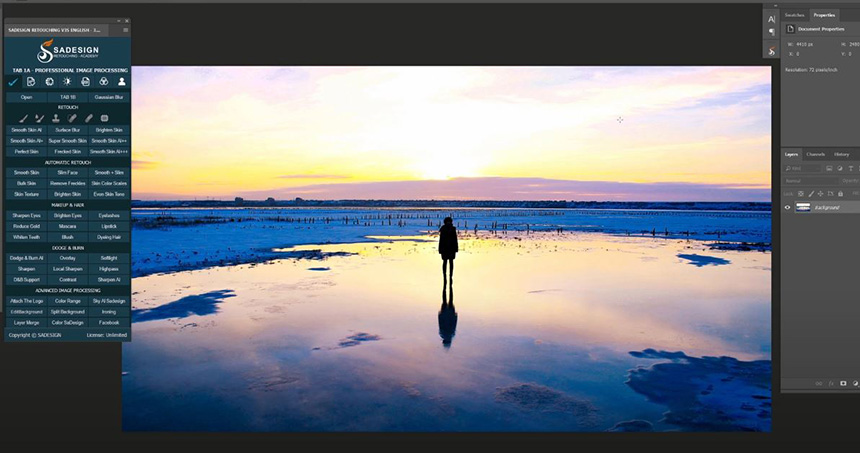
The most powerful Retouch tool processor
DOWNLOAD:
✅ SADESIGN PANEL ENGLISH: https://sadesign.ai/retouching/
✅ SADESIGN PANEL VIETNAM: https://www.retouching.vn/


VIP Products


Best Selling Products
Windows 10 & 11 Pro Key
36 USD
Upgrade genuine Capture One account
120 USD
Upgrade Genuine Office 365
49 USD
Upgrade Duolingo Super
29 USD
ChatGPT Plus Account (GPT-4)
16 USD
Capcut Pro 1 Year
39 USD
Genuine Adobe Illustrator account
99 USD
MidJourney Account
29 USD
Genuine Cheap Canva Pro
39 USD
Autodesk All App Account Copyright
120 USD
Adobe Photoshop Copyright - Full App
120 USD
Adobe Premiere Pro Account
99 USD
Freepik Premium Account
59 USD
Plugin Retouch4me
69 USD
Copyright Adobe Lightroom Account
59 USD