Best Selling Products

Upgrade genuine Capture One account
120 USD

Windows 10 & 11 Pro Key
36 USD

Adobe Premiere Pro Account
99 USD

Copyright Adobe Lightroom Account
59 USD

ChatGPT Plus Account (GPT-4)
16 USD

Genuine Cheap Canva Pro
39 USD

Autodesk All App Account Copyright
120 USD

Genuine Adobe Illustrator account
99 USD

MidJourney Account
29 USD

Upgrade Genuine Office 365
49 USD

Upgrade Duolingo Super
29 USD

Capcut Pro 1 Year
39 USD

Adobe Photoshop Copyright - Full App
120 USD

Freepik Premium Account
59 USD

Plugin Retouch4me
69 USD
How to create impressive textures to enhance professional design
Nội dung
- 1. Why Are Textures Important In Design?
- 2. Methods to Create Beautiful Textures for Design
- 3. Detailed Instructions for Creating Some Popular Textures
- 4. Tips for Using Textures Effectively in Design
- 5. Popular texture types
- 6. Basic texture creation process
- 7. Common Mistakes When Using Texture
- 7. Conclusion
Discover the secrets to creating unique and impressive textures for any design project. Texture creation methods, plus free download links to thousands of high-quality templates, to help you take your work to the next level.
Textures play a vital role in adding depth, realism, and visual appeal to designs. Whether you are a graphic designer, a digital artist, or a 3D modeler, having the ability to create beautiful textures can be a huge competitive advantage. This article by sadesign will provide a comprehensive guide to various texture creation methods.
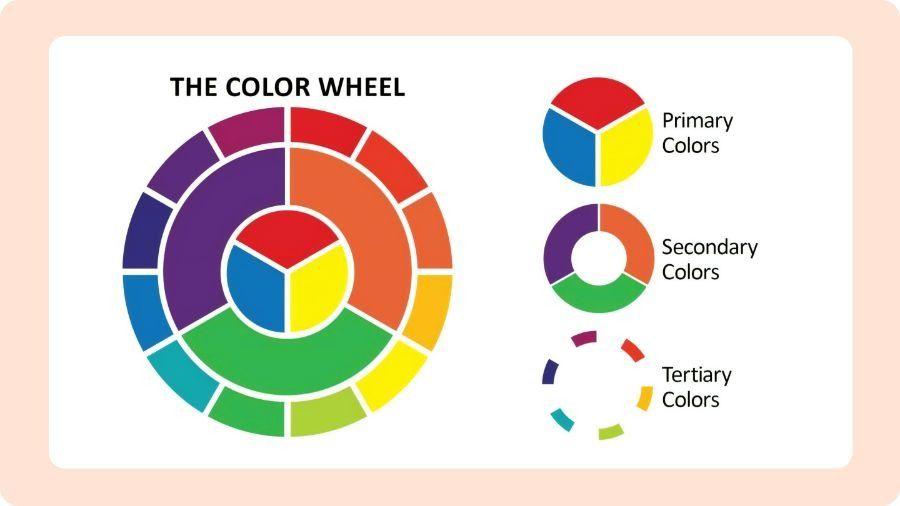
1. Why Are Textures Important In Design?
Textures are more than just surface patterns; they are a key element in conveying emotion, creating emphasis, and bringing life to designs. The clever integration of textures can transform a flat, boring design into something more engaging and appealing.
Enhance realism and depth: In 3D design and illustration, textures help recreate the look of material surfaces, from the roughness of stone, the softness of fabric to the shine of metal. They create the illusion of depth and volume, making objects come to life.
Conveying Emotion and Atmosphere: Textures have the ability to evoke different emotions and feelings. A rough texture can give a strong, classic feel, while a smooth texture can create a sophisticated, modern feel. Choosing the right texture will help to effectively convey the message and atmosphere of the design.
Create Distinctiveness and Uniqueness: Using unique textures can help your design stand out from the crowd. A custom-made or creatively chosen texture will add a personal touch and distinction to your project.
Improved visual engagement: Rich and varied textures stimulate the eye, encouraging viewers to explore the details in the design. They create complexity and interest, keeping the eye on the design longer.
Diverse applications in many fields: Textures are not only limited to graphic design but are also widely applied in web design (backgrounds, patterns), game design (character surfaces, environments), architecture (virtual building materials), and many other creative fields.
2. Methods to Create Beautiful Textures for Design
There are many ways to create impressive textures for your designs, depending on your purpose, personal style, and the tools you have. Here are some popular methods:
Using graphic design software: Specialized software such as Adobe Photoshop, Illustrator, Substance Designer... provide a variety of powerful tools and filters to create diverse digital textures.
Create textures from built-in filters: Photoshop and similar software have many built-in filters (Noise, Clouds, Fibers...) that can be customized to create unique surface effects. Combining and adjusting these filters creatively will bring surprising results.
Draw and paint by hand: Use brush tools to create freehand textures and surfaces. This method gives you complete control over the shape, color, and detail of the texture.
Using patterns: Software often provides a library of pre-made patterns or allows you to create and import custom patterns. Patterns are useful for creating seamless repeating textures.
Combine photos and edit: Use photos of real surfaces (wood, stone, fabric...) and edit them in software to create complex and realistic textures. Tools like Clone Stamp, Healing Brush help remove unwanted details and create seamlessness.
Use dedicated texture creation tools: Substance Designer is a great example of dedicated software for creating procedural textures. It allows you to control every aspect of the texture through nodes and create variations easily.
Create textures by hand and digitize: Sometimes the best way to get a unique texture is to create it by hand and then digitize it.
Draw or print on different surfaces: Draw with ink, paint, or use printing techniques (woodcut, screen printing, etc.) on paper, fabric, or other materials. You can then scan or photograph the created surface to digitize the texture.
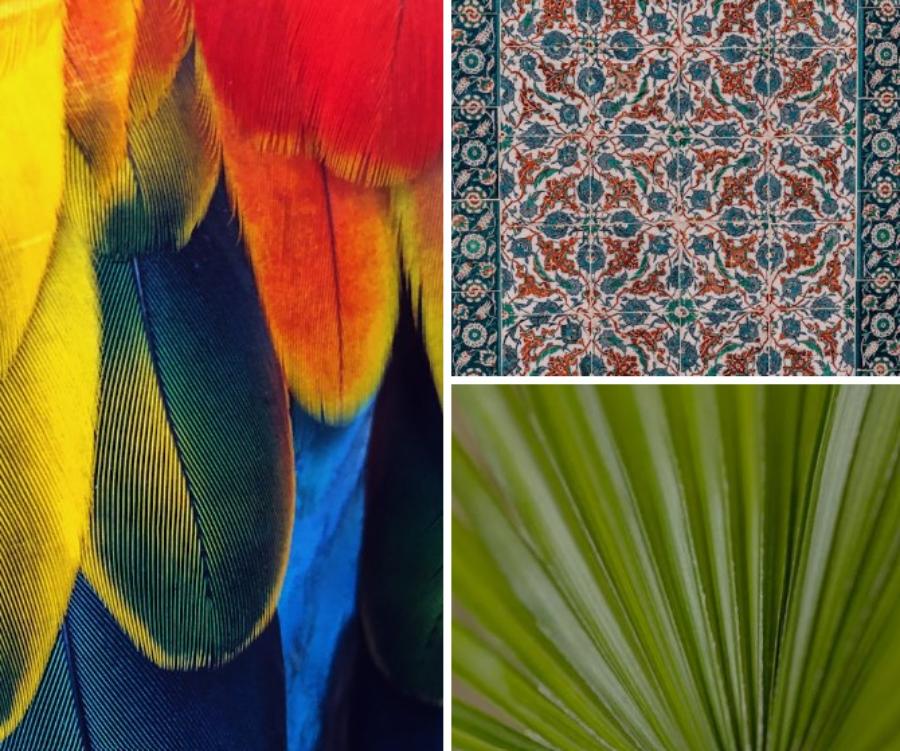
Use natural materials: Create textures using natural materials like leaves, sand, bark... Arrange them on a flat surface and photograph them, or create prints from them.
Scrape and Print: Create textured surfaces by scraping, carving, or scratching soft materials (e.g. clay, plaster). You can then print or photograph this surface.
Using 3D scanning technology: With the development of technology, 3D scanners are becoming more popular and accessible. They allow you to scan real material surfaces and create 3D models with high texture detail.
3. Detailed Instructions for Creating Some Popular Textures
To give you a better idea of the process of creating textures, here are detailed instructions for some popular types of textures:
Create natural wood texture (using Photoshop):
Create a new layer with the desired size.
Go to Filter > Render > Fibers. Adjust the Variance and Strength parameters to create basic wood grain patterns.
Apply Filter > Blur > Gaussian Blur with a small radius to soften the grain.
Use adjustment layers like Curves or Levels to increase contrast and create depth in the wood grain.
Add a Noise layer (Filter > Noise > Add Noise) with a small amount to create a natural graininess.
Use textured brushes (e.g. crack brushes) to add details like wood knots and scratches.
Adjust the color using Hue/Saturation or Color Balance to achieve the desired wood tone.
Create a woven fabric texture (using Illustrator):
Use the Rectangle Tool to create a small rectangle representing a strand of fabric.
Duplicate this rectangle and arrange them in a horizontal row.
Select all the rectangles and duplicate them, then move down to form a mesh of fabric threads.
Use effects (Effect > Warp > Arc) to create a slight curve in the fabric fibers, giving them a more natural feel.
Apply different colors to the fabric threads to create a woven effect.
Save this pattern (Object > Pattern > Make).
Apply the created pattern to any shape to create a woven fabric effect.
Create a rough stone texture (combining manual and Photoshop):
Collect some rocks that have interesting, rough surfaces.
Take pictures of rock surfaces in good lighting.
Open the image in Photoshop.
Use the Selection Tools to isolate the areas of the stone surface you want to use.
Combine different stone surface areas on separate layers.
Use editing tools (Clone Stamp, Healing Brush) to remove unwanted details and create seamlessness.
Apply filters (Sharpen, Noise) and adjustment layers (Levels, Curves) to enhance the detail and contrast of the rock texture.
4. Tips for Using Textures Effectively in Design
Creating beautiful textures is only half the story. What's more important is how you use them effectively in your designs:
Use textures subtly: Sometimes a subtle texture can have a greater impact than a distracting, over-the-top texture. Consider the purpose and role of the texture in the overall design.
Mix and match textures: Don’t be afraid to experiment with mixing and matching different textures to create variety and interest. However, make sure they work together in style and color.
Adjust the texture's opacity: Reducing the texture layer's opacity can help it blend better with other elements in your design, creating a softer, more natural effect.
Using a texture as a mask: You can use a texture as a mask for another layer to create unique transitions or shapes.
Consider size and resolution: Choose a texture size and resolution that fits your intended use. Textures for print typically need higher resolution than textures for the web.
Create consistency: In a large project, try to maintain consistency in the style and quality of the textures you use.
Optimize for performance: Especially in web design and games, using too many high-resolution textures can impact page load or game performance. Optimize the file size and complexity of your textures.
Experiment with blending modes: Layer blending modes in design software can create unique color interactions between textures and underlying layers.
Use textures to create emphasis: A unique texture can be used to highlight a specific element in your design, drawing the viewer's attention.
Apply textures selectively: Not every element in your design needs texture. Carefully consider where and how much you apply texture to avoid confusing the viewer.
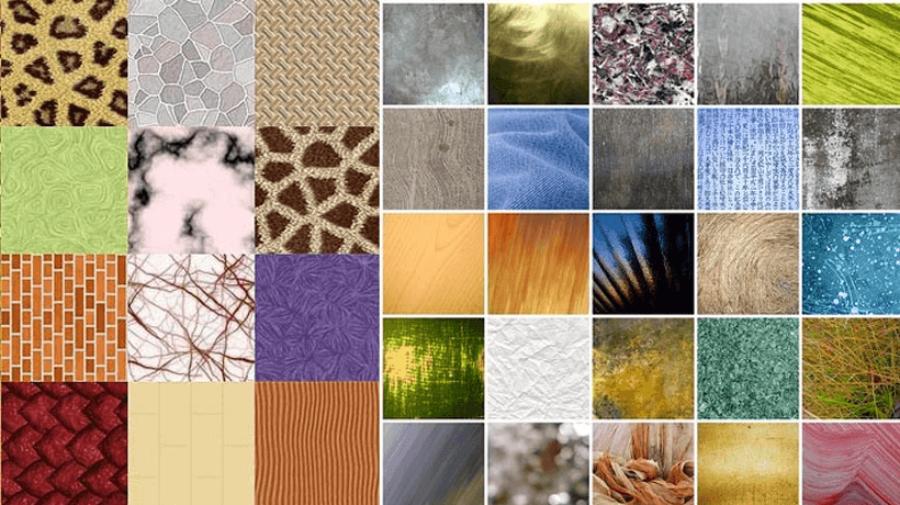
5. Popular texture types
Textures can be divided according to material and purpose of use. Below are the commonly used texture types:
a. Fabric Texture
Used for fashion designs, packaging, high-end invitations. This type of texture brings a soft, friendly feeling.
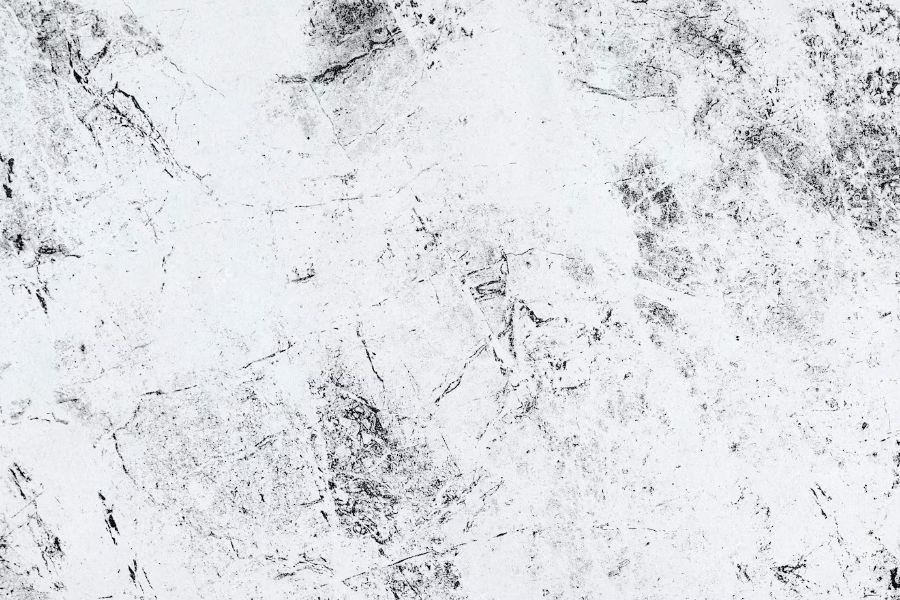
b. Paper Texture
Creates a handmade, vintage or minimalist effect. Very popular in book, calendar and album cover designs.
c. Stone/Concrete Texture
Suitable for industrial, masculine or minimalist designs. Adds a “raw” and strong feel to the image.
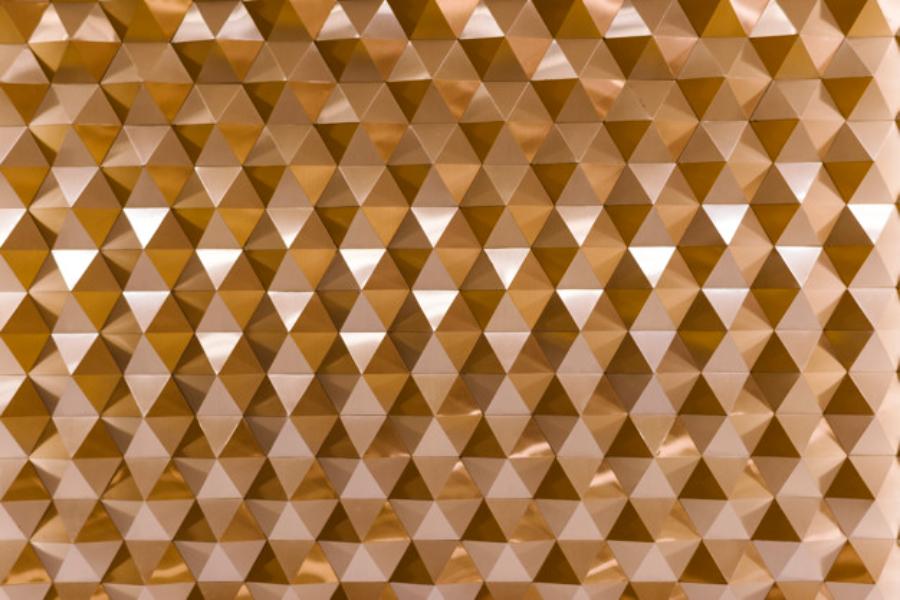
d. Metal Texture
Makes a strong impression with a cold, sharp and modern effect. Widely used in technology design, automobiles, or futuristic interfaces.
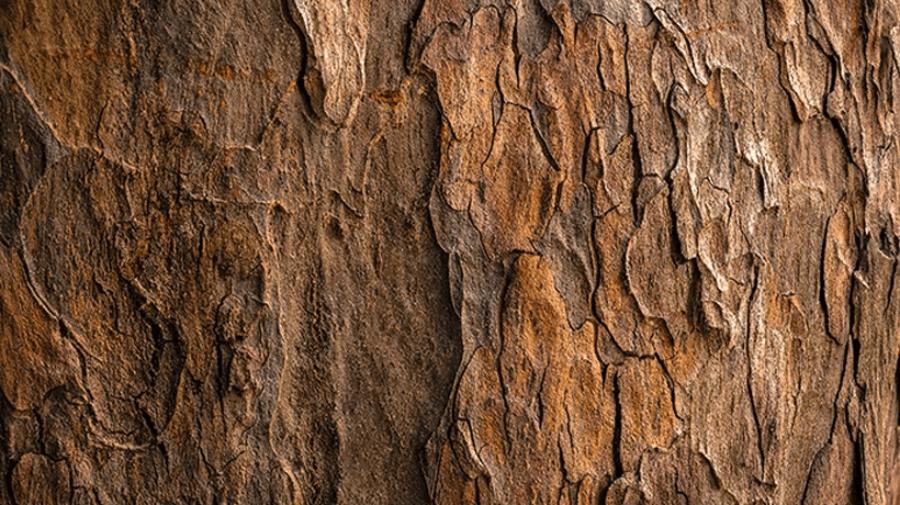
e. Wood Texture
Brings a warm, natural feeling. Suitable for interior design, handmade products or eco-friendly brands.
f. Light/Bokeh Texture
Easily creates depth, dreamy space or visual impression. Widely used in creative photography and graphic design.
6. Basic texture creation process
Here is a step-by-step process to create a beautiful and versatile texture:
Step 1: Determine the purpose of use
First, you need to know where the texture will be used: as a background, as an overlay, or as a main part of the design? This will help you choose the right material and scale.
Step 2: Collect the original material
You can:
Take photos of real materials (wood, fabric, stone, etc.)
Use brushes to create effects on Photoshop
Use scanned images from documents, handmade paper
Notes when taking photos or creating textures:
Maintain even lighting
Sharp image, no noise
No extra details (objects, shadows)
Step 3: Process the original image
Use software like Photoshop to:
Balance light, increase contrast
Clean up clutter
Create seamless texture using Offset function (Filter > Other > Offset)
Step 4: Create a pattern or overlay
After having the original material image:
Turn it into a pattern (Edit > Define Pattern)
Export to transparent PNG file if overlay
Divide into packs for convenient use later.
Step 5: Test on design
Test the texture on multiple backgrounds (light, dark, multi-colored) to check compatibility and flexibility.
7. Common Mistakes When Using Texture
Incorporating textures into your design can be aesthetically pleasing, but if not done carefully, it can also have a negative impact on the overall quality of your project. Here are some common mistakes to avoid when using textures:
Using low-quality textures causes pixelation: When a texture with fewer pixels is stretched to cover a larger area, it becomes blurry, jagged, and lacks detail. This not only reduces the aesthetic appeal of the design, but also makes it look unprofessional. This is especially true in printed products or on large screens. To avoid this, always prioritize using high-resolution textures that are appropriate for the size and purpose of the design.
Textures that are too prominent and overshadow the main content: A common mistake is to choose textures that are too complex, making them a dominant element and overshadowing the main content (e.g. text, product images, central characters). To avoid this, consider the role of textures as supporting elements. Typically, textures that are neutral in color, low in contrast, or applied with a moderate opacity are safer choices. If you do want to use a texture that stands out, make sure it is well-placed and not competing directly with other important elements in the design.
Not testing for seamlessness when using as a pattern: Before using a texture as a pattern, carefully check that it repeats smoothly. Many graphic design software programs provide tools for creating and testing seamless patterns. If the original texture is not seamless, you can use editing techniques (e.g. in Photoshop using the Offset tool and the drawing/copying tools) to create a seamless version.
Applying textures inconsistently across pages or products: Applying different textures randomly can create a disjointed, unprofessional feel and undermine the overall unity of the design. Establish a set of rules for using textures, including texture type, color, opacity, and application for each type of content or product. This helps ensure that all elements in the project flow and reinforce each other.
Forgetting to credit or violating copyright if using conditional textures: Before using any external texture, always read and understand its terms of use. If the texture requires attribution, make sure you do so clearly and prominently in your design. For serious commercial projects, it may be safer and more professional to consider purchasing textures with proper licenses.
7. Conclusion
By mastering the various methods of creating textures, from digital to manual, and knowing how to use them effectively, you will have a powerful tool to enhance your design projects. Don’t hesitate to explore the free template resources. Good luck on your journey to conquer the art of texture creation!


VIP Products


Best Selling Products
Upgrade genuine Capture One account
120 USD
Windows 10 & 11 Pro Key
36 USD
Adobe Premiere Pro Account
99 USD
Copyright Adobe Lightroom Account
59 USD
ChatGPT Plus Account (GPT-4)
16 USD
Genuine Cheap Canva Pro
39 USD
Autodesk All App Account Copyright
120 USD
Genuine Adobe Illustrator account
99 USD
MidJourney Account
29 USD
Upgrade Genuine Office 365
49 USD
Upgrade Duolingo Super
29 USD
Capcut Pro 1 Year
39 USD
Adobe Photoshop Copyright - Full App
120 USD
Freepik Premium Account
59 USD
Plugin Retouch4me
69 USD