Best Selling Products

ChatGPT Plus Account (GPT-4)
16 USD

Copyright Adobe Lightroom Account
59 USD

Adobe Premiere Pro Account
99 USD

Freepik Premium Account
59 USD

Windows 10 & 11 Pro Key
36 USD

Upgrade Duolingo Super
29 USD

Upgrade Genuine Office 365
49 USD

Upgrade genuine Capture One account
120 USD

Genuine Adobe Illustrator account
99 USD

Autodesk All App Account Copyright
120 USD

Plugin Retouch4me
69 USD

Capcut Pro 1 Year
39 USD

MidJourney Account
29 USD

Genuine Cheap Canva Pro
39 USD

Adobe Photoshop Copyright - Full App
120 USD
How to Create Photoshop Actions Quickly in Just 4 Simple Steps
Nội dung
- 1. What is Action in Photoshop?
- 2. Benefits of using Action
- 2.1. Increase Work Efficiency
- 2.2 Save Time and Cost
- 2.3. Ensuring High Accuracy
- 2.4. Strong Integration Capabilities
- 2.5. Increased Flexibility
- 2.6. Improve Customer Experience
- 2.7. Data-Driven Decision Support
- 2.8 Quality consistency
- 3. Instructions for creating Actions in Photoshop with 4 simple steps
- 4. Some notes when creating Actions in Photoshop
- 4.1. Clearly define the goal of the Action
- 4.2. Organize and name Actions scientifically
- 4.3. Check each step when recording Action
- 4.4. Use general commands instead of specific commands
- 4.5. Use shortcuts to optimize processes
- 4.6. Recheck on multiple files
- 4.7. Backup and Share Action
- 4.8. Always updated and optimized
- 5. Download and use available Actions
- 6. Conclusion
Instructions for creating Actions in Photoshop in just 4 simple steps to save time, automate processes and improve photo editing performance.
Creating Actions in Photoshop helps automate repetitive tasks, save time and improve work efficiency. With just 4 simple steps, you can record actions and apply them to multiple images quickly. Here are detailed instructions for setting up effective Actions.
1. What is Action in Photoshop?
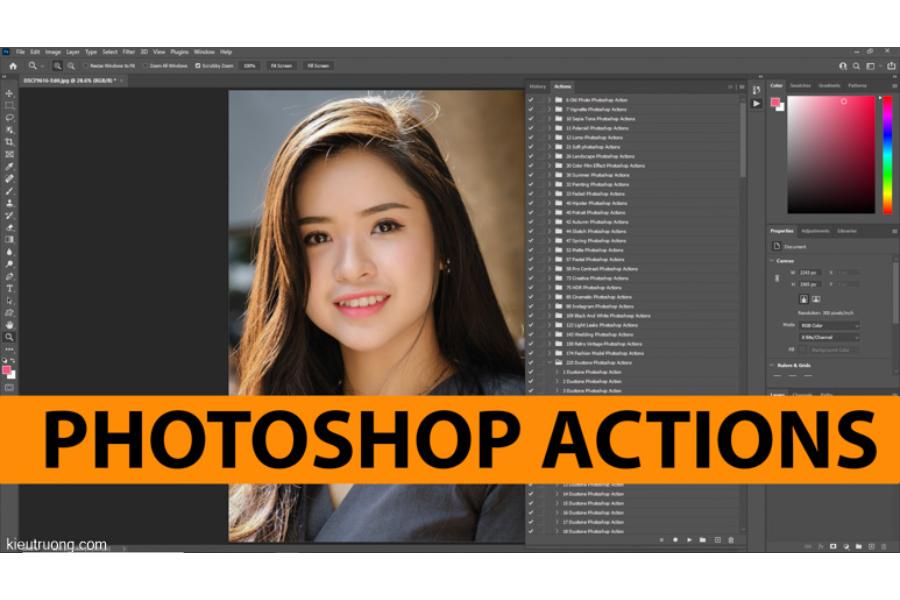
Actions in Photoshop are a powerful tool that allow users to automate repetitive tasks by recording a series of editing steps or actions and applying them to multiple images. This saves time and effort, especially when working with large numbers of images or performing complex editing processes. Actions can include steps such as resizing, adjusting colors, applying effects, or even combining multiple actions. Users can create their own Actions or use ready-made Actions provided by the Photoshop community.
.jpg)
Actions are a set of recorded actions in Photoshop that can be automatically applied to one or more images with a single click. They are especially useful for batch editing, saving time when performing repetitive processes such as color correction, resizing, or adding effects.
2. Benefits of using Action
One of the effective support tools in this is Action. So, what benefits does Action bring and why is it highly appreciated in optimizing operations? Let's analyze it in detail. Some benefits of using Action:
2.1. Increase Work Efficiency
Actions help automate repetitive tasks, reducing manual workload. This allows employees to focus on more strategic and creative tasks. This not only increases productivity but also improves the quality of work.
2.2 Save Time and Cost
With its automation capabilities, Action helps reduce the time it takes to process complex tasks, thereby saving on human resources and resources. Businesses can achieve higher operational efficiency without investing too much in additional resources.
2.3. Ensuring High Accuracy
Humans are prone to errors in the workplace, especially when dealing with large amounts of data or complex tasks. Actions help reduce human error, ensuring accuracy and consistency in processes.
Accuracy not only reduces errors, but also increases efficiency, while building trust and professionalism in related activities. This is an important factor, especially in areas that require high reliability, such as finance, healthcare, and information technology. Action's combination of advanced technology and optimized processes ensures that every result is of the highest standard, meeting the expectations of users and organizations.
2.4. Strong Integration Capabilities
Actions are often designed to easily integrate with a variety of systems and platforms. This allows organizations to deploy quickly without changing existing infrastructure, while taking full advantage of available support tools.
It not only helps optimize workflows but also increases operational efficiency, reduces errors and saves time. Flexible integration capabilities allow businesses to easily connect and synchronize data, thereby building a modern technology ecosystem that meets complex requirements in operations and management.
2.5. Increased Flexibility
With Action, businesses can customize workflows to their specific needs. This creates operational flexibility and the ability to quickly adapt to market changes.
This flexibility allows users to easily adjust and adapt to changes or new requirements quickly and effectively. At the same time, it also helps optimize processes, minimize wasted time and improve overall performance. This is an important factor that helps individuals and organizations stay competitive and develop sustainably in the modern, ever-changing working environment.
2.6. Improve Customer Experience
When internal processes are optimized, businesses can provide faster and more efficient services to customers. This not only improves customer experience but also creates a competitive advantage in the market.
It includes increasing satisfaction through quickly and effectively responding to needs, optimizing communication processes, and building sustainable relationships with customers. In addition, Action also helps businesses capture feedback accurately, thereby providing appropriate solutions to improve service quality and build long-term trust. This is a key factor for businesses to develop sustainably in today's competitive environment.
2.7. Data-Driven Decision Support
Using Action to support data-driven decision making offers significant benefits, especially as organizations and businesses increasingly rely on data to optimize operational efficiency. This tool not only helps analyze and synthesize information quickly, but also provides strategic recommendations based on trends and patterns discovered from the data.
As a result, managers can make accurate decisions, minimize risks and maximize potential opportunities. Furthermore, applying this method also helps improve predictability, increase transparency in the decision-making process and create sustainable competitive advantages in today's volatile market.
2.8 Quality consistency
Using Action brings many significant benefits, the most prominent of which is the ability to standardize quality. This helps ensure that processes and products are performed to the highest standards, minimizing errors and improving reliability. Quality consistency not only improves operational efficiency but also enhances brand reputation, creating solid trust with customers and partners. This is an important factor in helping businesses maintain a competitive advantage in the market.
3. Instructions for creating Actions in Photoshop with 4 simple steps
To create an Action in Photoshop easily, you just need to follow 4 simple steps. First, open the Actions panel by going to Window > Actions menu. Next, click the folder icon to create a new group if needed, then click the "Create new action" icon to start recording the actions. Third, perform the editing or design steps you want to automate, and Photoshop will record the whole process. Finally, click the Stop button to end the recording, and your Action is ready to use. This way, you can save time and increase your work efficiency significantly.
.jpg)
Step 1: Open the Actions panel and create a new Action
Open the Actions panel :
Go to Window > Actions or press the shortcut Alt + F9 to display the Actions panel.
Create New Action : Click on the Create New Action
icon (plus sign at the bottom of the Actions panel).
Name the Action (for example, “Vintage Color Correction”).
Select Set (the folder containing the Action) or create a new Set if needed.
Assign a shortcut key if you want to use it faster (eg: F2 ).
Click Record to start recording the action.
Step 2: Perform photo editing operations
When recording mode is on, every action you take in Photoshop will be saved in an Action. Some common actions that are recorded in Actions include:
Color correction :
Go to Image > Adjustments > Curves to adjust the brightness.
Use Hue/Saturation to change the color tone.
Apply Color Balance to adjust the color balance.
Add effects :
Go to Filter > Blur > Gaussian Blur to create a slight blur effect.
Use Sharpen to sharpen the image.
Crop and resize images :
Go to Image > Image Size to resize the image.
Use the Crop tool (C) to crop the image to the desired proportions.
Any unnecessary operations can be skipped so that the Action is not too long and heavy.
Step 3: Stop recording Action and save
Once you're done, click the Stop Recording button (square icon under the Actions panel).
The action is saved and available for immediate use.
If you need to edit an Action, you can expand the list of steps in the Actions panel and adjust each action individually.
Step 4: Apply Action to multiple images
Once created, the Action can be applied to any image or batch of images in Photoshop.
How to run an Action on an image
Open the photo to edit.
Select Action in the Actions panel.
Press Play (triangle) to have Photoshop automatically apply the recorded steps.
How to run Action on multiple images at once (Batch Processing)
Go to File > Automate > Batch .
Select the Set containing the Action just created.
Select Source (folder containing the image to be edited).
Select Destination (folder to save the image after applying Action).
Click OK to let Photoshop automatically process the entire image.
This way you can edit hundreds of photos in just a few minutes without any manual work.
4. Some notes when creating Actions in Photoshop
Actions in Photoshop are a powerful tool that can automate repetitive tasks, save time, and improve productivity. However, to create and use Actions effectively, you need to keep in mind a few important points:
.jpg)
4.1. Clearly define the goal of the Action
Before you start creating an Action, be clear about what you want to automate. This will help you avoid creating Actions that are unnecessary or overly complex. Focus on repetitive tasks, such as resizing an image, adding a watermark, or applying a specific set of effects.
4.2. Organize and name Actions scientifically
When creating a new Action, give it a clear, easy-to-understand name so that it is easy to recognize and use later. You should also arrange Actions into appropriate groups (Sets) for better management, especially when you work with many different Actions.
4.3. Check each step when recording Action
While recording your Action, make sure that everything is correct and error-free. If you make a mistake, you may have to erase and re-record the entire Action. To avoid this, double-check each step before saving.
4.4. Use general commands instead of specific commands
When creating Actions, avoid using commands or operations that apply only to a specific file or object. Instead, use generic commands to ensure that the Action can be applied to many different files without errors.
4.5. Use shortcuts to optimize processes
Photoshop allows you to assign keyboard shortcuts to each Action. This allows you to quickly activate the Action without opening the Actions panel. Choose shortcuts that are easy to remember but do not overlap with Photoshop's default commands.
4.6. Recheck on multiple files
Once you've created your Action, test it on multiple files of different formats and sizes to make sure it works as expected. This will help you spot problems early and make timely adjustments.
4.7. Backup and Share Action
If you've created useful Actions, back them up by exporting them as a (.atn) file. This not only protects your work, but also allows you to share them with colleagues or use them on other devices.
4.8. Always updated and optimized
As your Photoshop skills improve, go back and optimize your old Actions. You can incorporate new actions or simplify the process to fit your current needs.
Limit recording of wrong operations : Each time you press undo or an error operation will be recorded in Action. If you make a mistake, you should stop recording, delete the wrong operation and continue recording.
Use keyboard shortcuts to speed things up : Assign keyboard shortcuts to Actions to get things done faster without opening the Actions panel.
Save Action for later use :
Go to File > Save Actions to save the Action as an .ATN file.
When you need to reuse it, just Load Actions from the saved file.
Test before running on multiple images : Always test the Action on one image before running in bulk to avoid errors.
5. Download and use available Actions
.jpg)
To download Action, you need to follow these steps:
Step 1: Find a reputable supplier
- Visit websites that specialize in providing Actions such as Adobe Exchange, Envato Elements, or Creative Market.
- Ensure a reliable download source to avoid malicious or incompatible files.
Step 2: Select the appropriate Action
- Preview description and illustrations to make sure the Action meets your needs.
- Check if Action is compatible with the software version you are using.
Step 3: Download
- Click the "Download" button and save the Action file (.atn) to your computer.
3. How to use loaded Action
Once downloaded, you need to follow these steps to use it:
Step 1: Install Action
1. Open Action support software (e.g. Adobe Photoshop).
2. Access the "Actions" panel (if you don't see it, go to Window > Actions menu to open it).
3. Click the menu icon in the top right corner of the Actions panel and select "Load Actions".
4. Browse to the location where the .atn file is saved and click "Open".
Step 2: Apply Action
1. Open the file you want to apply the Action to.
2. Select Action from the list in the Actions panel.
3. Press the "Play" button (triangle icon) to run the Action. The software will automatically perform the recorded steps.
Step 3: Adjust (if necessary)
- Once applied, you can fine-tune the results as needed, ensuring they match your project's specific requirements.
4. Some important notes
- Test before mass application: Test on a sample file before applying the Action to the entire project.
- Backup data: Always backup the original file to avoid data loss if the results are not as expected.
- Software Updates: Make sure your software is always up to date to avoid compatibility errors when using Action.
6. Conclusion
Creating Actions in Photoshop is an effective way to automate work, save time and ensure consistency in the photo editing process. In just 4 simple steps, you can record actions, apply them to multiple images and optimize your workflow. When combining Actions with Batch Processing, processing batches of photos will be faster than ever.


VIP Products


Best Selling Products
ChatGPT Plus Account (GPT-4)
16 USD
Copyright Adobe Lightroom Account
59 USD
Adobe Premiere Pro Account
99 USD
Freepik Premium Account
59 USD
Windows 10 & 11 Pro Key
36 USD
Upgrade Duolingo Super
29 USD
Upgrade Genuine Office 365
49 USD
Upgrade genuine Capture One account
120 USD
Genuine Adobe Illustrator account
99 USD
Autodesk All App Account Copyright
120 USD
Plugin Retouch4me
69 USD
Capcut Pro 1 Year
39 USD
MidJourney Account
29 USD
Genuine Cheap Canva Pro
39 USD
Adobe Photoshop Copyright - Full App
120 USD