Best Selling Products

Upgrade Duolingo Super
29 USD

Genuine Adobe Illustrator account
99 USD

Upgrade genuine Capture One account
120 USD

Capcut Pro 1 Year
39 USD

Adobe Premiere Pro Account
99 USD

Genuine Cheap Canva Pro
39 USD

Autodesk All App Account Copyright
120 USD

Copyright Adobe Lightroom Account
59 USD

Windows 10 & 11 Pro Key
36 USD

Adobe Photoshop Copyright - Full App
120 USD

Upgrade Genuine Office 365
49 USD

Freepik Premium Account
59 USD

ChatGPT Plus Account (GPT-4)
16 USD

Plugin Retouch4me
69 USD

MidJourney Account
29 USD
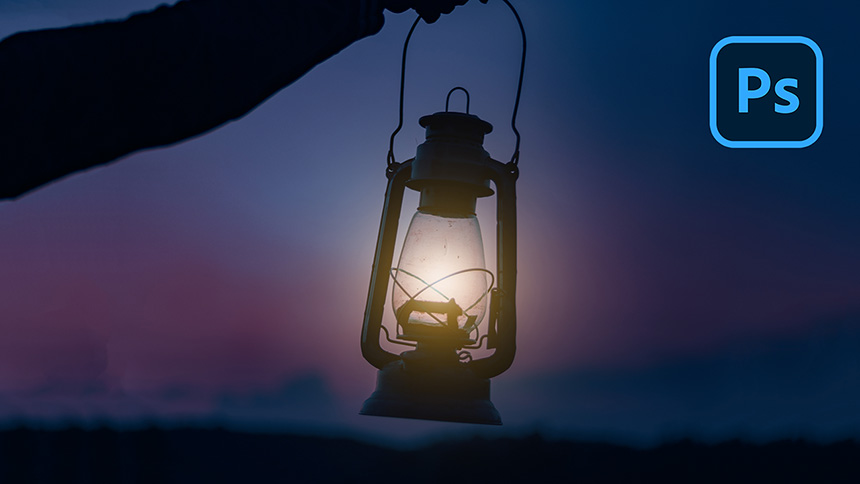
How To Glow Anything in Photoshop | Glow Effect
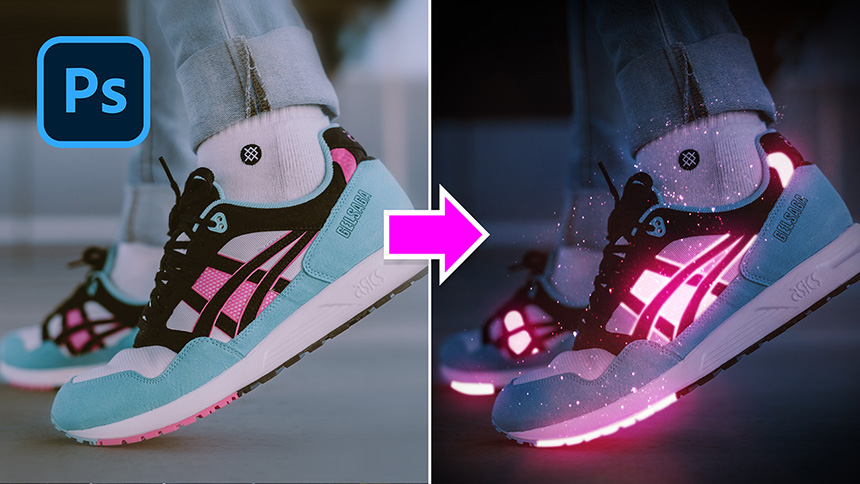
Hi there, today I’ll share with you how to create glow effect to any objects in Photoshop.
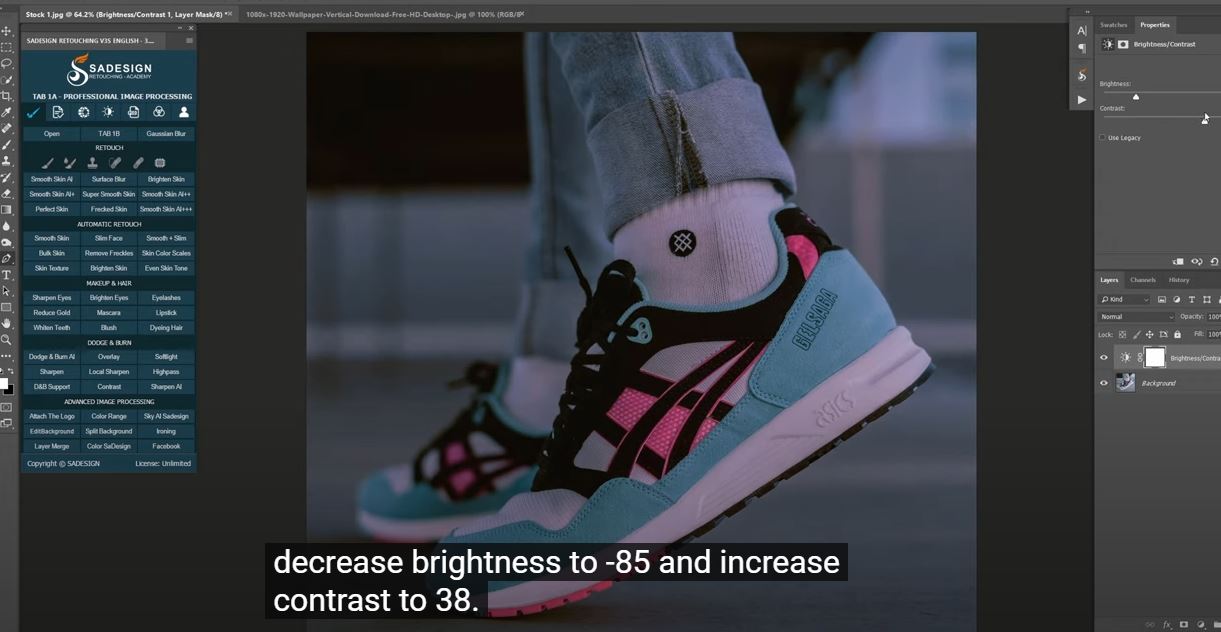
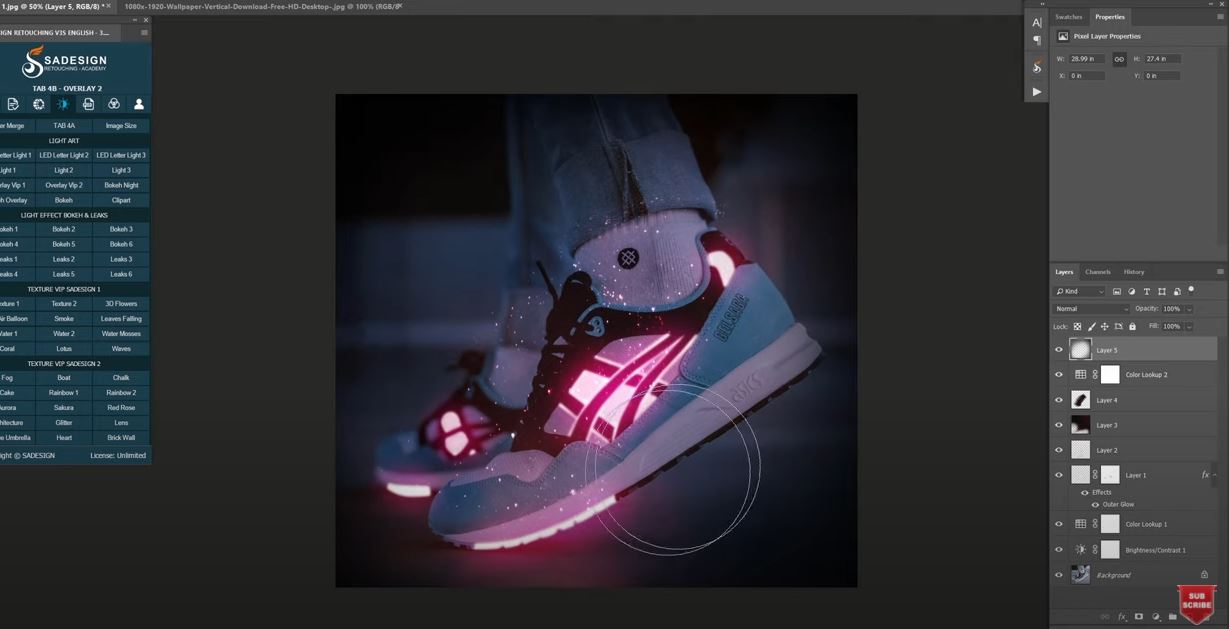
Let’s take this image as an example, I’m going to glow these sneakers. First, I’ll darken the image, click to adjustment icon and choose “Brightness/Contrast”. Decrease brightness to -85 and increase contrast to 38
Add color to it with Color lookup adjustment layer, drop down menu in 3DLUT file and select “moonlight” Adjust the opacity to 50%
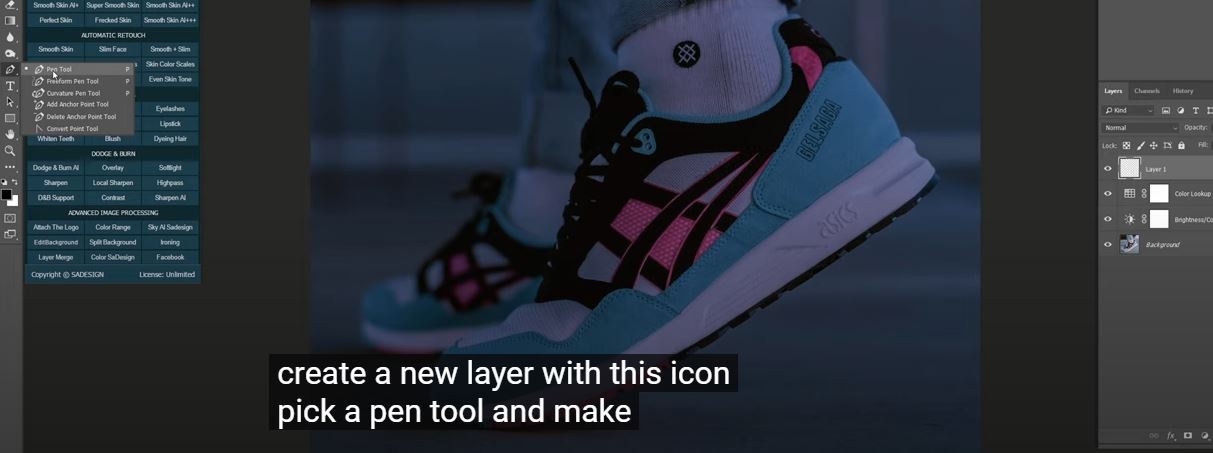
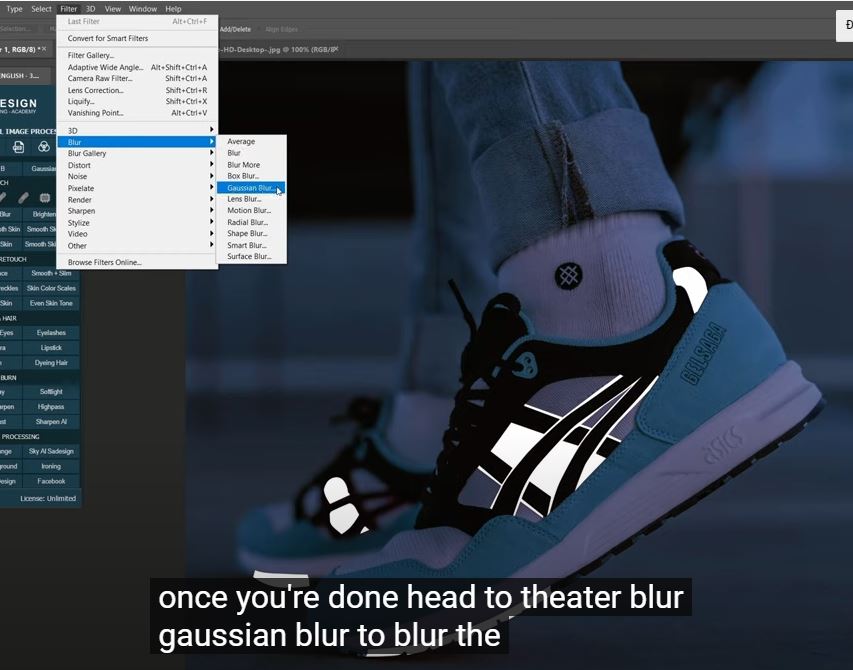
Create a new layer with this icon, pick up pen tool and make the selection of the areas that you want to make it shine. I’ll glow the pink color on the sneakers. After finishing each selection, press CTRL or CMD + Delete to fill it with White color in the background.
Once, you’re done. Head to Filter > Blur > Gaussian Blur to blur these white areas with 5 radius pixels, then confirm Next, click to fx icon and choose “Blending Options”, choose “Outer Glow”. You can see the changes immediately.
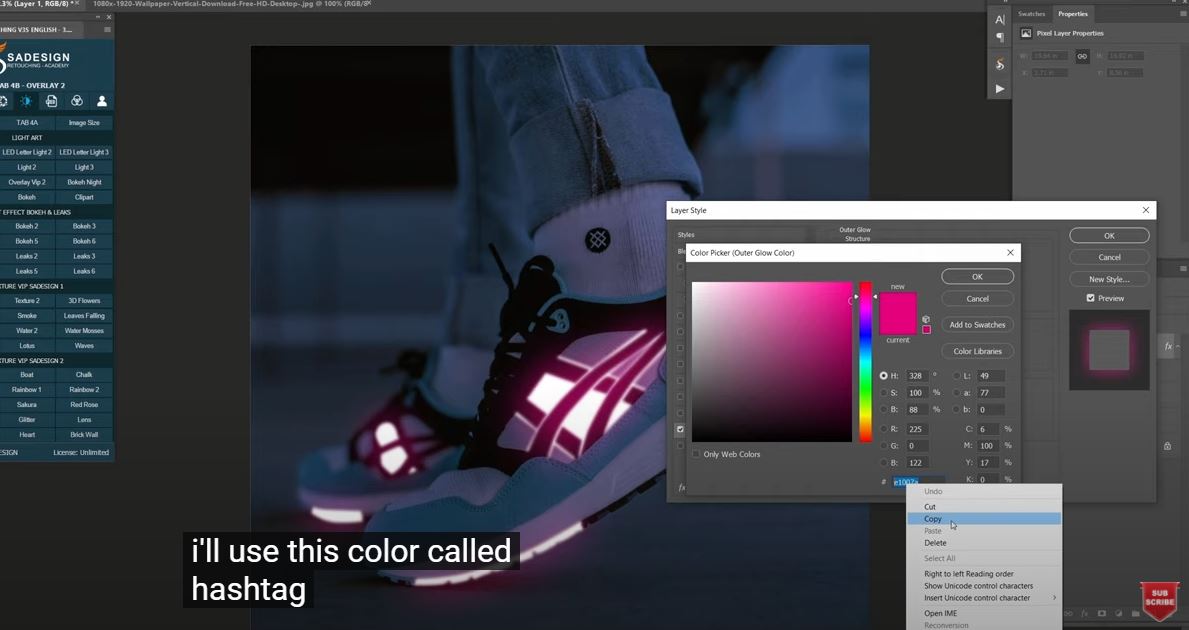
On the right side, you can customize the Glow effect with these options (Opacity, Noise, Size, Color, Range..) Feel free to try it out one by one to understand each function Since the color that I chose is pink, I’ll use this color code #e1007a and copy it Next, we will bring back the texture in the glow areas that we fill white at the first step.
Create layer mask, use brush tool, low opacity, black in foreground color. Paint slightly to the places you want to bring the texture back. Create another layer, change blend mode from normal to color dodge. In foreground color, paste the color code that we choose. Adjust opacity of brush tool to 10%, increase brush size with bracket ] and dab or paint to add a bit of pink color to these areas. In case you accidentally paint too much color, use eraser tool to remove it I’ll decorate with bokeh light. We have tons of stocks in SaDesign retouching panel, feel free to download and give it a try in the link on the description.

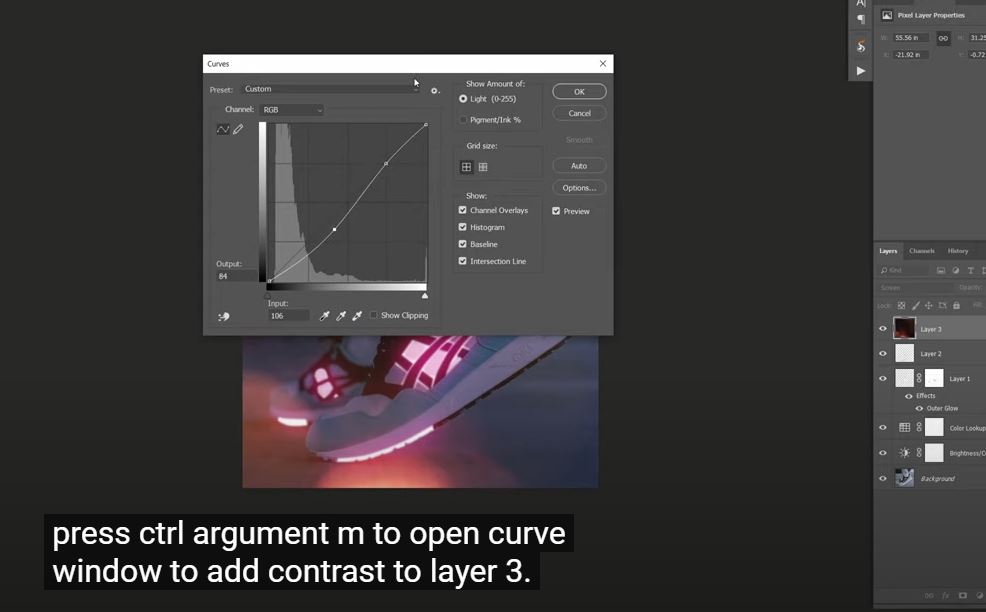
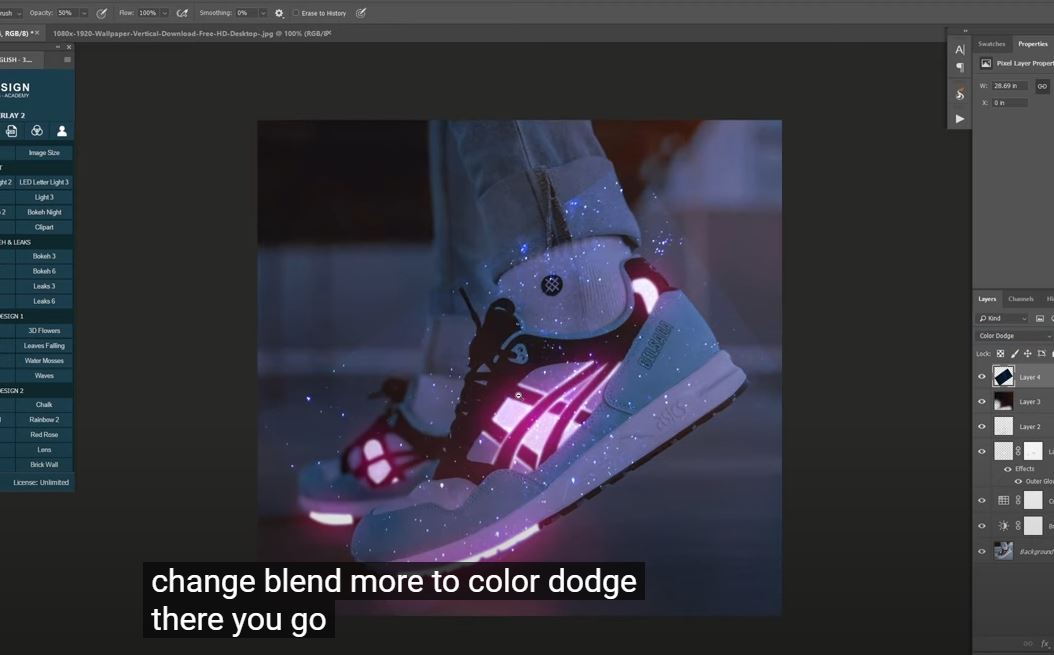
Take this bokeh to our project, zoom out, CTRL+T to adjust the position and flip it vertically Change blend mode to screen. Press CTRL or CMD + M to open Curves window to add contrast to layer 3. Open Hue/Saturation with shortcut CTRL + U, adjust Hue to -12. Pick up eraser tool to remove unnecessary bokeh in the image. Next, use this photo of starry night to create a dreamy look. CTRL+T to rotate it to align with the sneakers Change blend mode to color dodge. There you go! Open Hue/Saturation again with CTRL + U, check to “Colorize” to match color of starry to the glow shoes. Increase saturation to 37.
CTRL+T, click to this icon to warp it to fit the sneakers Use eraser tool to remove some areas that you like.
Create color lookup adjustment layer, Choose Filmstock in 3DLUT file and adjust opacity to 50% Then, create new layer, use Brush tool with black color in foreground. Opacity 100% Paint along the border of the canvas, use Gaussian Blur to blur it with around 300 pixels This helps to make the sneakers really stand-out in the image. Brighten the shoes with eraser tool, opacity 50% and paint on it. Finally, use curves to add a bit of contrast to the image.
That’s all for this tutorial. Hope you will like it, hit like, subscribe and hit the notification to get more tips everyday. Thanks for watching!
REGISTER FOR FREE PHOTOSHOP LEARNING
============================
The most powerful Retouch tool processor
DOWNLOAD:
✅ SADESIGN PANEL ENGLISH: https://sadesign.ai/retouching/
✅ SADESIGN PANEL VIETNAM: https://www.retouching.vn/


VIP Products


Best Selling Products
Upgrade Duolingo Super
29 USD
Genuine Adobe Illustrator account
99 USD
Upgrade genuine Capture One account
120 USD
Capcut Pro 1 Year
39 USD
Adobe Premiere Pro Account
99 USD
Genuine Cheap Canva Pro
39 USD
Autodesk All App Account Copyright
120 USD
Copyright Adobe Lightroom Account
59 USD
Windows 10 & 11 Pro Key
36 USD
Adobe Photoshop Copyright - Full App
120 USD
Upgrade Genuine Office 365
49 USD
Freepik Premium Account
59 USD
ChatGPT Plus Account (GPT-4)
16 USD
Plugin Retouch4me
69 USD
MidJourney Account
29 USD