Best Selling Products
How to use Lightroom on your phone in detail A-Z
Nội dung
- 1. Install Lightroom on your phone
- 1.1. Install Lightroom on Android
- 1.2. Install Lightroom on IOS
- 2. Instructions for using Lightroom on mobile phones
- 3. Instructions for rotating and removing blemishes in Lightroom
- 3.1. Instructions for cropping and rotating photos in Lightroom
- 3.2. Use Healing Brush to remove acne
- 3.3. Adjust the brightness of the photo
- 4. How to adjust Lightroom color on phone
- 5. Instructions for creating Lightroom selections using Masking
- 6. How to sharpen photos using Lightroom on your phone
- 7. Instructions for taking photos with Lightroom on your phone
- 8. How to download Lightroom Presets for phones
- 9. How to save photos from Lightroom to your phone
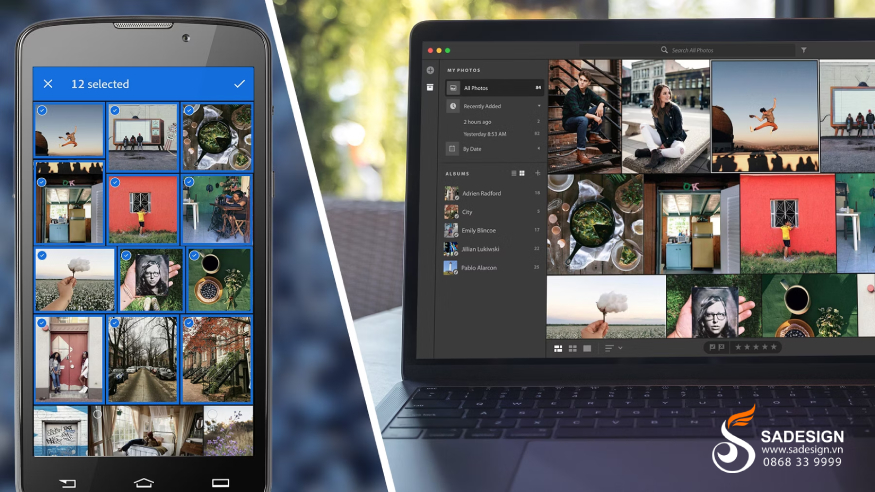
Lightroom is a powerful and convenient photo editing tool that helps users easily create perfect photos even without professional graphics skills. Using Lightroom on your phone with a friendly interface and many advanced editing features, Lightroom allows you to adjust the light, color, sharpness and many other elements of the photo in just a few steps. If you want to use this photo editing tool, want to improve your editing skills, follow the instructions on how to use Lightroom on your phone below from SaDesign and let's do it together!
1. Install Lightroom on your phone
Lightroom is a professional photo editing app from Adobe, available on both Android and iOS. Here are the detailed steps to install Lightroom on both operating systems:
1.1. Install Lightroom on Android
Step 1: Open Google Play Store or CH Play on your phone.
Step 2: Search for the Adobe Lightroom application by entering keywords in the search bar above.
Step 3: Select the Adobe Lightroom - Photo Editor application from the search results.
Step 4: Click the Install button. Wait for the download and installation to complete. This may take a few minutes depending on your network speed.
Step 5: After installation is complete, click the Open button to start using.
You will need to sign in with your Adobe, Google, or Facebook account to access Lightroom features.
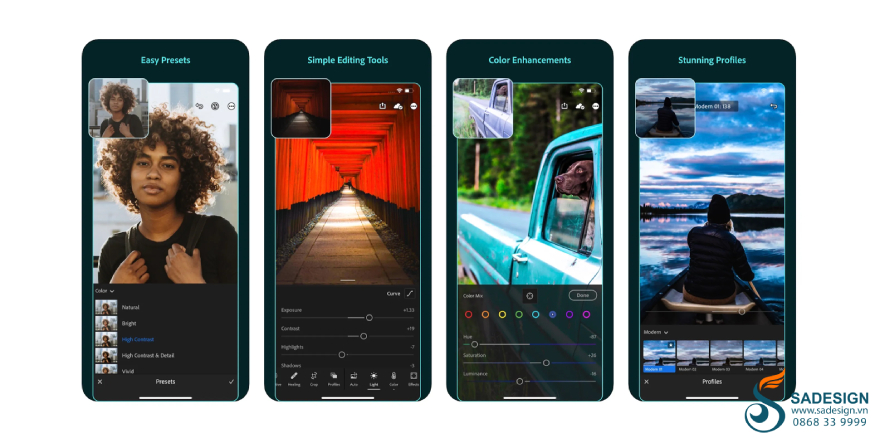
1.2. Install Lightroom on IOS
Step 1: Open App Store on iPhone/iPad from the home screen or app store.
Step 2: In the search bar at the top, type the keyword "Adobe Lightroom" or just "Lightroom".
Step 3: Select the application named Adobe Lightroom - Photo Editor from the search results. Click on the application icon to enter the detail page.
Step 4: Tap the Get button and then tap Install. If you use Touch ID or Face ID, you may need to confirm your identity to start the download.
Step 5: After installation is complete, click Open. Log in to the application with your Adobe, Apple ID, Google or Facebook account to use it.
So you have completed the process of installing Lightroom on iOS operating system to create more perfect photos with this advanced tool.
2. Instructions for using Lightroom on mobile phones
To use Lightroom on your phone, you can open the main functions of the application in the following simple way:
Open Lightroom from the app store.
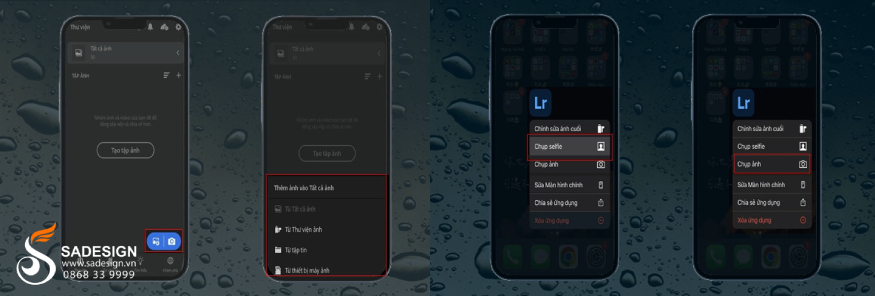
On the main interface, you have three options:
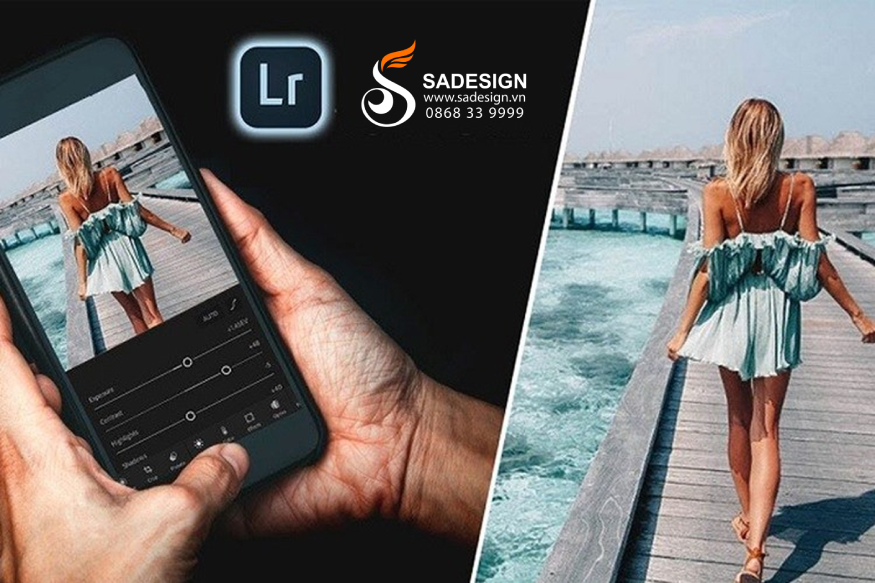
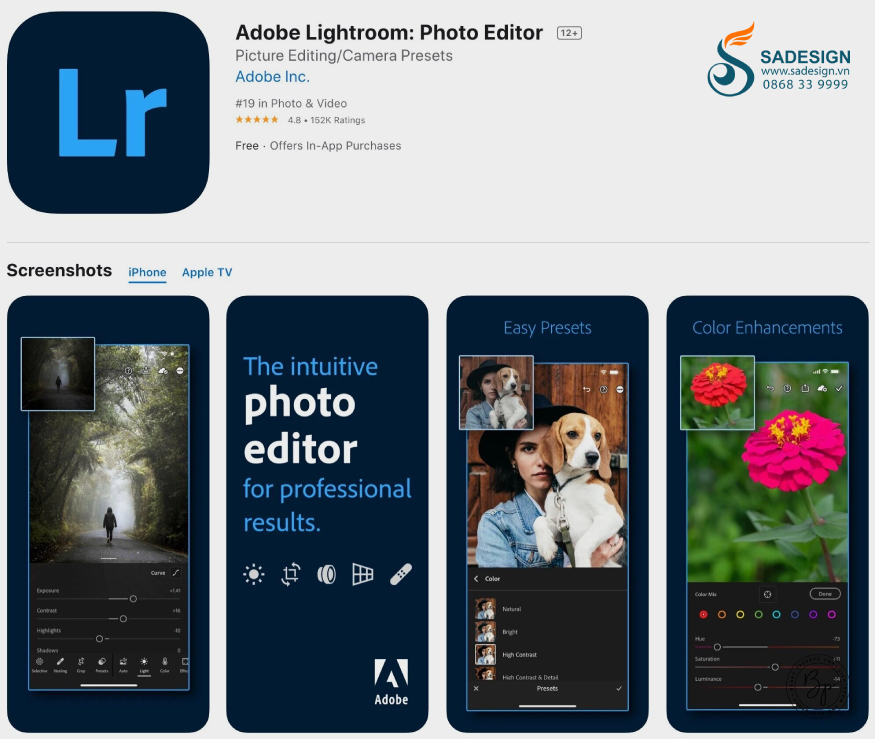
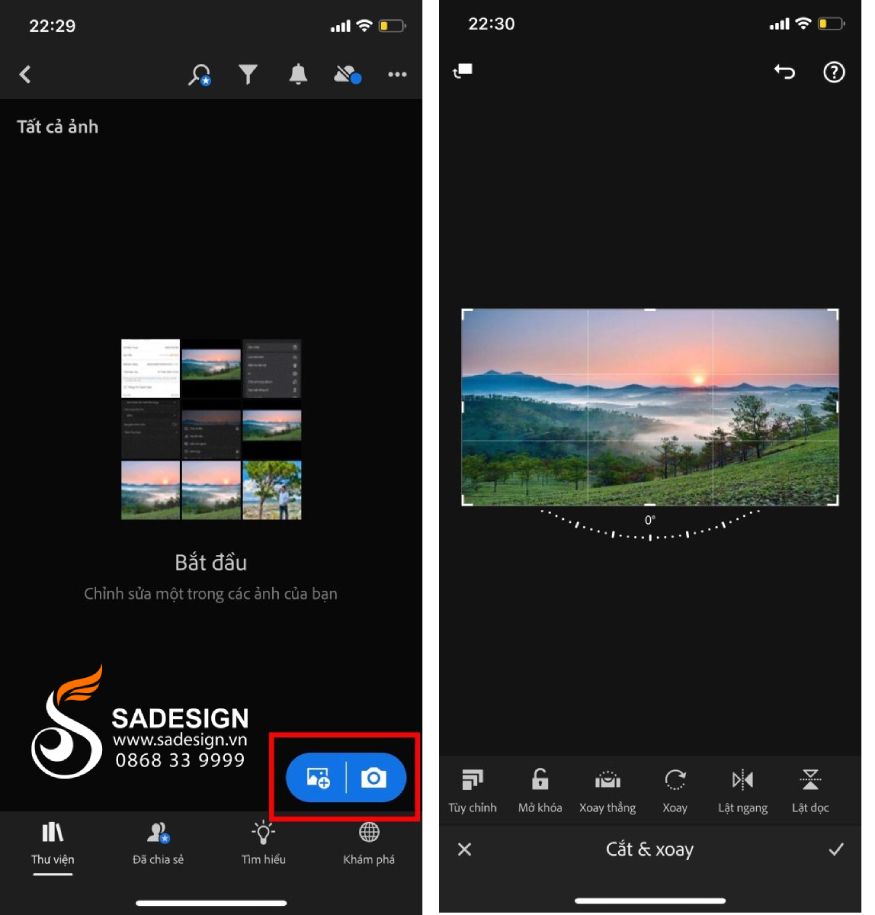
Add Photos: If you want to edit photos available in your phone's photo library, select this function to upload photos from your library to Lightroom.
Tap the (+) icon in the app and select a photo from your album or memory card to start editing. You can also connect your camera directly to your phone using an OTG cable to import photos to your phone for editing when you don’t have access to a computer. This method makes it easy to import both JPG and RAW photos from your camera into Lightroom.
Lr Camera: If you want to take photos directly from the application, select this function. Lightroom will provide editing tools right during the photo taking process.
Selfie: Take selfies directly from the app.
After that, you can proceed with the necessary editing or manipulation steps with the photo. Lightroom is a powerful photo editing tool, supporting many photo formats, including professional RAW photos, helping you get the best quality photos to post on social networks, online platforms,...
3. Instructions for rotating and removing blemishes in Lightroom
To perform these tasks, do the following:
3.1. Instructions for cropping and rotating photos in Lightroom
Crop image
To crop a photo as desired, open the Lightroom app and select the photo you want to edit, then find and select the Crop feature on the toolbar. You can adjust the crop frame as desired by dragging the edges or corners of the frame. If necessary, zoom in or out to suit your needs.
Rotate or flip the image
Lightroom allows you to easily flip photos with the Flip H (flip horizontally) and Flip V (flip vertically) features. Find and select the feature to apply to the image you want, remember to click on the green check mark icon in the right corner of the screen to save the changes.
3.2. Use Healing Brush to remove acne
Lightroom on mobile provides the Healing Brush feature to remove damaged areas, acne, blemishes, etc. to make the photo more perfect. You just need to find and select the Healing tool in the toolbar, adjust the Feather and Opacity levels to suit your needs.
Then select the area of the photo you want to erase and paint over the area of the photo you want to remove to erase blemishes such as: acne, freckles, wrinkles, unwanted makeup errors. If you need other options, you can refer to Clone Stamp to see the difference and apply according to your needs.
3.3. Adjust the brightness of the photo
If you want to increase the brightness of the photo, after loading or opening the photo, find and select the Light function in the toolbar. Then, adjust the Exposure by dragging the Exposure bar to the right to increase the brightness of the entire photo. Every time you increase by 1.0 EV, the photo will be twice as bright and vice versa.
4. How to adjust Lightroom color on phone
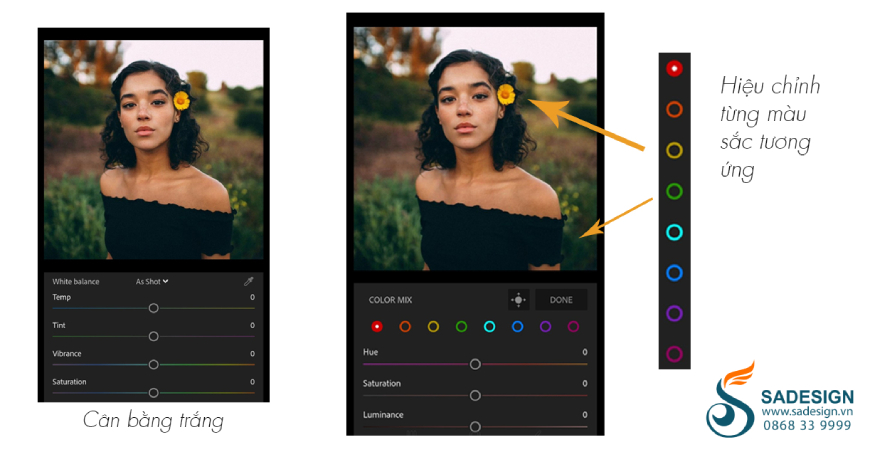
Lightroom on mobile supports white balance and color adjustment with Vibrance and Saturation tasks. White balance is to make the photo more yellow, you can increase the color temperature. Conversely, if you want the photo to have a pinker tone, increase the tint.
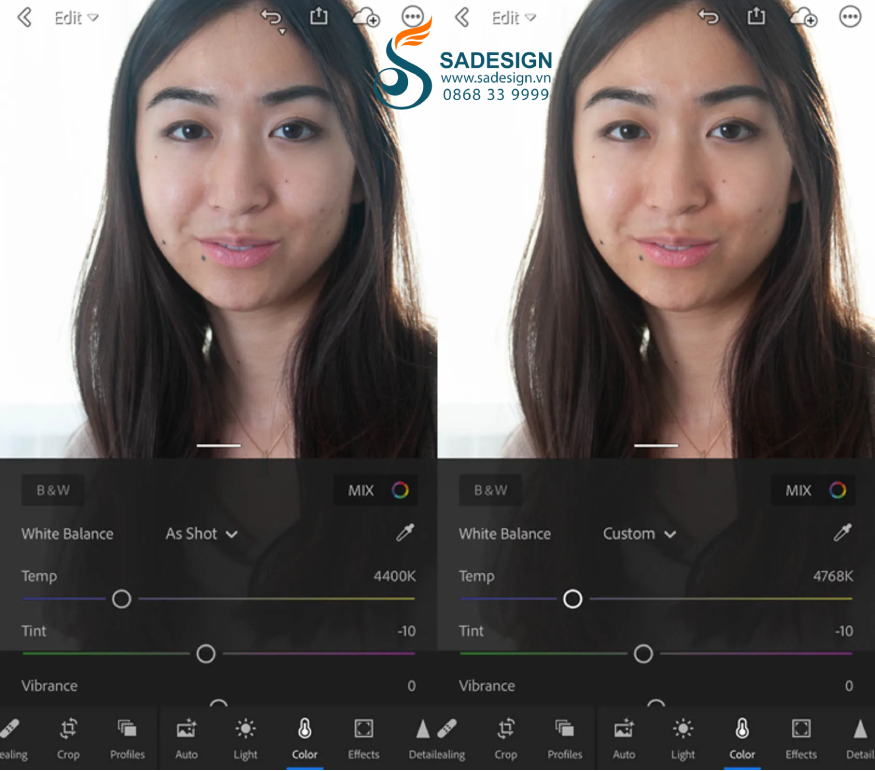
The Vibrance feature is to adjust the saturation of the photo, giving pale colors without affecting the saturated colors, making the colors more vivid. The Saturation feature is to increase the saturation of all colors in the photo.
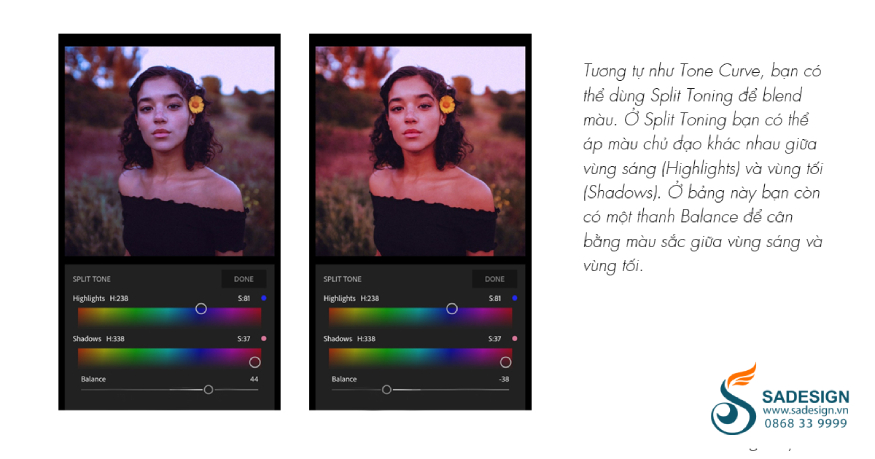
To adjust the color of your photo, find and adjust the Color Grading section. This feature is divided into four circles: Shadows, Midtone, Highlight, and Global. After adjusting the color for the Shadows, Midtone, and Highlight areas, you can control the effect with the Blend slider. Lightroom will automatically adjust the effect for these areas. Observe the screen and adjust until you are satisfied with the result.
5. Instructions for creating Lightroom selections using Masking
Lightroom provides a Masking feature that allows you to create selections when editing photos, increasing precision when working. You just need to find and click on the Masking icon in the Lightroom editing interface. Then choose the selection type as one of the five functions to create a selection that suits your editing needs.
In which, Linear Gradient is a feature that creates a selection area along a straight line, suitable for adjusting the light for clouds and sky, helping to adjust the brightness independently of the foreground. Linear Gradient helps create a transition area between two image areas, very effective when editing landscape photos. It is especially suitable for aligning high brightness deviation without using GND Filter.
This is a freehand selection, which acts like a brush. You can draw a selection in any shape you want. Once you have made a selection, you can adjust parameters such as brightness, color, and sharpness for the selected area. This is a huge improvement over older mobile versions of Lightroom, allowing you to perform complex operations quickly in just a few seconds.
6. How to sharpen photos using Lightroom on your phone
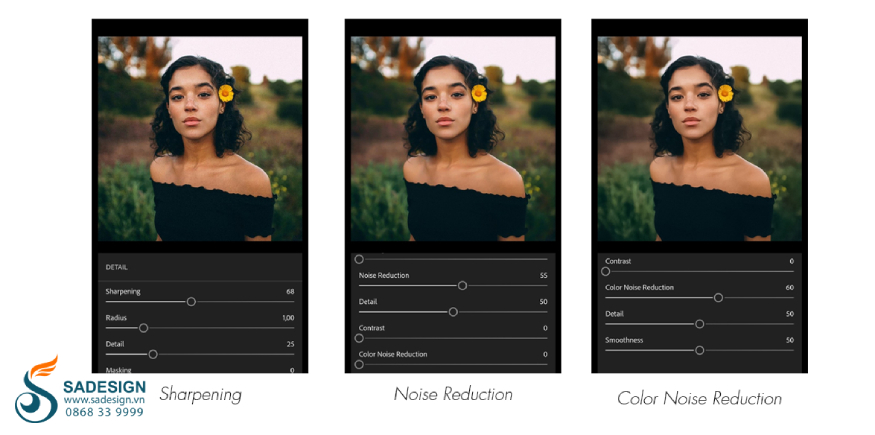
Lightroom Mobile provides the feature to adjust sharpness and remove defects in photos called Details. You just need to find and open the Details feature in Lightroom on your phone and adjust as follows:
To sharpen the photo, drag the Sharpening bar to the right. Conversely, drag it to the left to reduce the sharpness.
Radius determines how much of the image area you want to sharpen, while Details adjusts the detail of the lines in the image. For best results, combine the Radius and Details adjustments.
To control the effectiveness of sharpening, you can use the Masking feature.
Although there aren't as many customizations as on the desktop version, these features still work well, making it easy to edit RAW photos right on your phone.
7. Instructions for taking photos with Lightroom on your phone
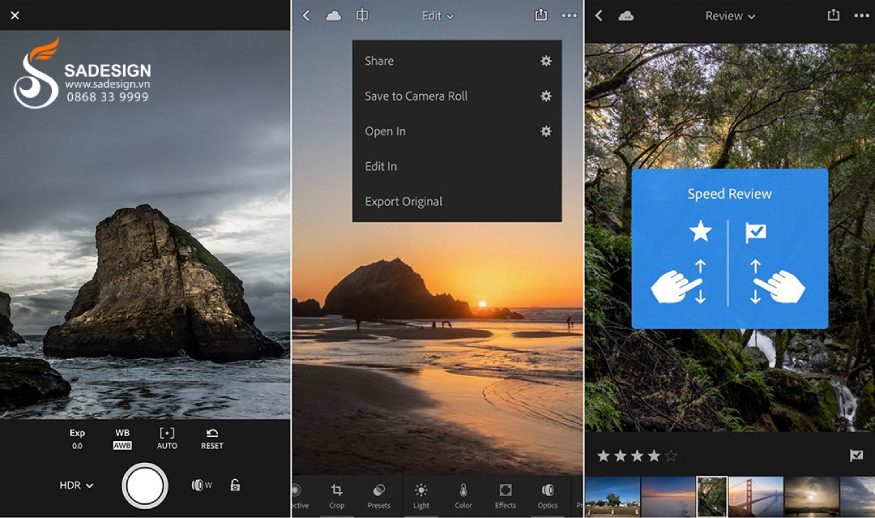
To shoot RAW (DNG) photos with Lightroom, from the main Lightroom interface, click on the Camera icon in the right corner of the screen. Next, select the shooting mode:
Auto Mode: Shoot automatically with default settings.
M (Manual) mode: Allows you to adjust parameters such as: Shutter Speed, ISO sensor light sensitivity, white balance, focus,...
Before taking a photo, adjust the parameters to suit the lighting conditions and the subject. Then use additional features such as: Exposure Compensation, Timer, RAW shooting mode,... to ensure you get the desired photo with the best quality.
Once you're done adjusting, press the shutter button to take the photo and tweak it further and save it, then choose to post it on social media, share it or use it as you wish.
8. How to download Lightroom Presets for phones
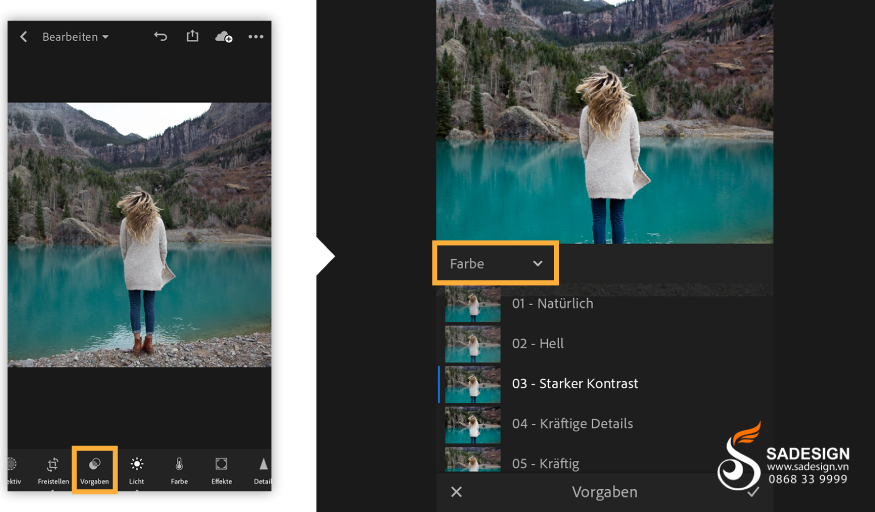
One of the strengths of Lightroom is the ability to save editing parameters as Presets, allowing you to store, share or sell them. Presets can be understood as color formulas, which are parameters that you can adjust for the photo as desired. How to create, save or download Lightroom Presets for your phone is as follows:
To download the Preset to your phone, simply import the DNG image you previously exported into Lightroom on your phone.
To create a Preset, tap the three dots icon (...) in the right corner of the screen > Select Create Preset > Select the parameters to save > Name and save > Select the storage folder and tap the check mark ✅ to complete.
To export a photo and save a Preset, you need to select the photo and click Export > select DNG format. Then, the Preset will be attached to that photo.
9. How to save photos from Lightroom to your phone
Finally, to save photos from Lightroom to your phone, do the following:
Step 1: Open the Lightroom app, find and open the photo you want to save to your phone.
Step 2: Tap the share icon (usually a rectangle with an up arrow), find and select “Export” or “Save to Camera Roll”.
Step 3: You will be asked about the export format (JPG or DNG) and image quality (high quality, medium quality or low quality), choose the format you want.
Step 4: Select a save location in your photo library or another folder and tap “Save” or “Export” to finish. Open your phone’s photo library to confirm that the photo has been saved successfully.
Conclusion
Using Lightroom on your phone gives you flexibility and ease in editing photos anytime, anywhere, providing a professional experience that is no less than the desktop version. Above are instructions for you from basic tasks to advanced editing operations to enhance your photos without much effort, even if you do not know much about professional graphics. Hopefully the above instructions will help you maximize the potential of the application to practice, have beautiful photos to share on social platforms or for work.


