Best Selling Products

Capcut Pro 1 Year
39 USD

Plugin Retouch4me
69 USD

MidJourney Account
29 USD

Freepik Premium Account
59 USD

Adobe Premiere Pro Account
99 USD

Genuine Adobe Illustrator account
99 USD

Upgrade Duolingo Super
29 USD

Windows 10 & 11 Pro Key
36 USD

Upgrade Genuine Office 365
49 USD

ChatGPT Plus Account (GPT-4)
16 USD

Copyright Adobe Lightroom Account
59 USD

Upgrade genuine Capture One account
120 USD

Adobe Photoshop Copyright - Full App
120 USD

Autodesk All App Account Copyright
120 USD

Genuine Cheap Canva Pro
39 USD
Learning Photoshop? How to resize layers in Photoshop
Nội dung
- 1. Learn about Photoshop?
- 2. Tools Used To Change Layer Size
- 2.1. Crop: Cut Off Excess Part of Layer
- 2.2. Transform: Transform and Change Layer Ratio
- 2.3. Resize: Change the Overall Size of the Layer
- 3. Benefits of resizing layers in Photoshop
- 3.1. Optimize design layout
- 3.2. Maintain image quality
- 3.3. Save time and effort
- 3.4. Create precise effects and details
- 4. Things to Note When Changing Layer Size
- 4.1. Maintain Aspect Ratio
- 4.2. Pixel Size Matters for Quality
- 4.3. Pay Attention to the Quality of Vector Graphics
- 4.4. Perform Non-Destructive Editing
- 4.5. Using Grids and Guides for Precise Alignment
- 5. Common Errors When Resizing Layers
- 5.1. Do not keep aspect ratio when resizing
- 5.2. Resizing without regard to image quality
- 5.3. Forgetting to enable "Content-Aware Scale"
- 6. Conclusion
This article provides detailed instructions on how to resize layers in Photoshop. Learn about Photoshop and the features that help you work more effectively with this software.

Photoshop is the leading graphic design software, widely used in the creative industry, from photo editing to professional graphic design. Familiarity with the tools and features in Photoshop is essential to take full advantage of the power of this software. One of the important skills that Photoshop users need to master is how to resize layers. In this article, Sadesign will provide you with detailed information about Photoshop and how to resize layers in Photoshop effectively.
1. Learn about Photoshop?
Photoshop is Adobe's popular graphics and photo editing software, used by graphic designers, photographers, and creative people all over the world. Photoshop was first developed in 1988 and is now one of the indispensable tools in the creative industry.
.jpg)
Photoshop is more than just a photo editing software, it offers a wide range of powerful tools for every design need, from digital painting, web design, special effects, to video editing. With over 30 years of development, Photoshop has become the standard software in the design and creative industry.
One of the factors that makes Photoshop popular is its flexibility and high customizability. This software supports working with layers, an important tool that helps users manipulate and edit each part of a photo or design easily. With Photoshop, changing the size of layers is a regular and necessary operation in the design process.
2. Tools Used To Change Layer Size
Resizing layers is an important part of the graphic design process, especially when you’re working with software like Photoshop, Illustrator, or similar tools. Whether you’re cropping, transforming, or resizing layers, each tool has its own unique role to play in improving your workflow. In this article, we’ll explore three of the most popular layer resizing tools, including Crop , Transform , and Resize , to help you work more easily and quickly with your designs.
2.1. Crop: Cut Off Excess Part of Layer
One of the first tools you can use when you want to resize a layer is Crop . This is a tool that helps you cut out excess parts of an image or layer that you no longer need, allowing you to focus on the more important parts.
.jpg)
The main use of Crop is to change the size of the layer.
When using the Crop tool, you can adjust the edges of a layer, removing unwanted elements. For example, when designing a banner or poster, you may want to crop out areas outside the main design to make the image more harmonious and neat. Cutting out excess elements not only helps to clean up the layout, but also improves productivity when working with large files.
The Crop tool in Photoshop or Illustrator is quite simple. You just need to select the area you want to keep, then cut off the outside part. This makes it easy to resize the layer without losing important details.
Advantages of the Crop tool
Reduce layer size without changing image aspect ratio.
Helps save space and increase work efficiency.
Easy to use and quick to operate.
Notes when using the Crop tool
Be careful when cropping images, as cropping too much can lose important details of the design.
The Crop tool only reduces the size of the layer in length and width, without affecting the resolution of the image.
2.2. Transform: Transform and Change Layer Ratio
The Transform tool in design software allows you to resize, rotate, scale, or change the proportions of a layer without losing the elements inside. This is a powerful tool that gives you more flexibility when designing and working with complex images.
.jpg)
Common operations with the Transform tool
Scale: You can change the size of the layer to the ratio you want. Using this tool is especially useful when you want to scale the layer evenly or at a certain ratio.
Rotate: When you want to rotate a layer at a certain angle without affecting other design elements, Transform is the ideal tool.
Skew: This tool allows you to skew your layer in a certain direction, making your design more flexible.
Distort: This is the most powerful operation of the Transform tool, allowing you to completely change the shape of the layer, be it stretching, distorting the corners or distorting the entire image.
Advantages of the Transform tool
Helps to change the size and shape of layers flexibly and precisely.
You can keep the default proportions or freely change the proportions to suit your design.
An indispensable tool in every image editing process.
Notes when using the Transform tool
While the Transform tool is powerful, you need to be careful when scaling layers to avoid over-deforming design elements.
Keep proportions reasonable to avoid losing balance in the design.
2.3. Resize: Change the Overall Size of the Layer
Resize is a tool that changes the overall size of a layer, allowing you to adjust the length and width of a layer as desired. This is a useful tool in many situations when you need to adjust the size of layers to match the size of your workspace or overall document.
.jpg)
Main uses of Resize
The Resize tool helps you change the overall size of a layer, especially when you need to standardize the size of design elements in a project. For example, when working with images on a poster, you can use the Resize tool to make layers uniform in size or change them to fit the overall space.
Resize works by adjusting the size of a layer without changing the content inside the layer, helping to preserve elements such as the ratio of images, text, or graphics.
Advantages of Resize tool
Provides a simple and efficient way to change the overall size of a layer without affecting design elements.
Easily change size parameters to units of measurement such as pixels, inches or centimeters.
Helps maintain the correct proportions of elements within a layer when resized.
Notes when using the Resize tool
When using Resize, make sure you don't over-resize the layer to avoid losing quality or blurring the image.
Be careful when resizing too small or too large, as it may affect the sharpness of details in the image.
3. Benefits of resizing layers in Photoshop
Resizing layers in Photoshop not only helps you adjust your design to fit, but it also has many other benefits. Here are some reasons why resizing layers is important in Photoshop.
3.1. Optimize design layout
One of the biggest benefits of resizing layers in Photoshop is the ability to optimize your design layout. Resizing layers makes it easy to adjust elements in your photo or graphic so they fit within the overall space. This is especially important when designing advertisements, websites, or banners, where elements need to be balanced and harmonious.
Using the layer resizing tool, you can easily change the size of individual objects without affecting other objects in the project. This gives you great flexibility in creating designs that suit your specific requirements.
3.2. Maintain image quality
Resizing layers in Photoshop helps you maintain the quality of the objects in your image. This is important, especially when you need to change the proportions or size of an element without losing sharpness or causing distortion.
One of the most useful tools in Photoshop is the Smart Objects feature. When you convert a layer to a Smart Object, you can resize it at any time without affecting the original image quality. With Smart Objects, you can resize a layer an unlimited number of times without worrying about losing resolution or blurring the image.
3.3. Save time and effort
Another benefit of resizing layers in Photoshop is that it saves time and effort. Instead of having to recreate a new element or copy and re-edit every detail, you can simply resize the layer while maintaining the original effects, details, and shapes.
This saves you time during the design process, especially when you’re working on large projects or have a lot of elements to change. Quickly resizing layers helps you get things done more efficiently, minimizing disruption to your creative process.
3.4. Create precise effects and details
Resizing layers allows you to create effects, details, and design elements without losing image quality. This is useful when you need to create small details or special effects in your designs.
4. Things to Note When Changing Layer Size
4.1. Maintain Aspect Ratio
One of the most important factors when resizing layers in Photoshop is maintaining the width-to-height ratio of the object. If you drag a layer without paying attention, the object can become distorted or no longer look like the original design.
To avoid this, you should always hold down the Shift key while resizing. This will help you maintain the aspect ratio of the layer, ensuring it doesn't stretch or shrink in an unwanted way.
4.2. Pixel Size Matters for Quality
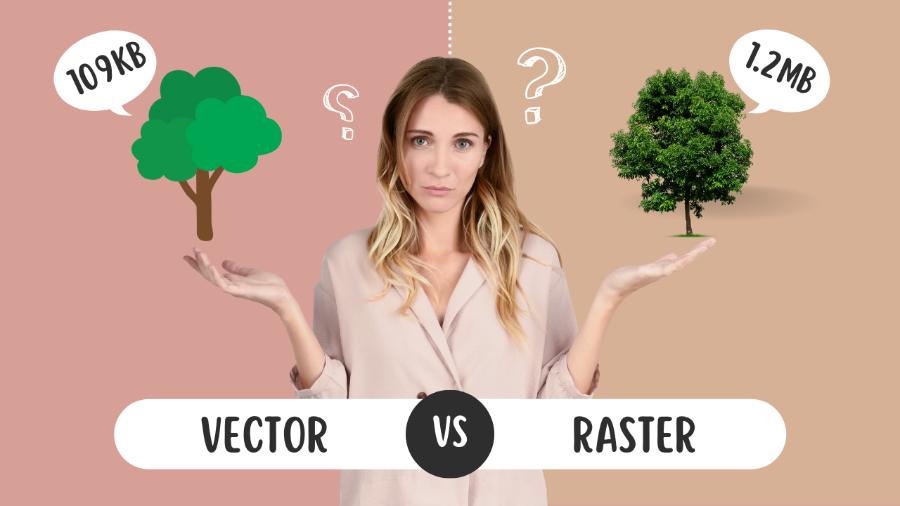
When resizing layers in Photoshop, you also need to be mindful of the pixel size of the objects in the layer. If you enlarge a layer too much, it can become pixelated and lose sharpness. This is especially important when working with raster images rather than vector images.
If you need to enlarge an image without losing quality, you can use tools like Preserve Details 2.0 in Photoshop's Image Size section , which helps maintain the sharpness of the image when resized.
4.3. Pay Attention to the Quality of Vector Graphics
If you’re working with vector layers (like Pen Tool drawings or Illustrator objects imported into Photoshop), resizing layers is easier because vector images don’t lose quality when resized. However, you still need to keep an eye on the overall size of your document to make sure that objects aren’t too small or too large for your design.
4.4. Perform Non-Destructive Editing
In Photoshop, an important principle is non-destructive editing . When resizing a layer, you should use techniques like Smart Objects to avoid losing quality. Smart Objects allow you to resize an object without affecting its original data.
.jpg)
If you resize a layer without using a Smart Object, Photoshop will resize the pixels directly, and you may experience loss of image quality.
4.5. Using Grids and Guides for Precise Alignment
To ensure that your layers are resized accurately and evenly, you can use tools like Grids and Guides in Photoshop. Grids and guides help you align your layers as you resize them, avoiding misalignment or asymmetry.
5. Common Errors When Resizing Layers
Although resizing layers is a basic operation in Photoshop, users still sometimes encounter some common errors. Here are some common errors and how to fix them:
5.1. Do not keep aspect ratio when resizing
When resizing a layer in Photoshop, not maintaining the proportions of the object can cause the image to become distorted. This is a very common mistake, especially for those new to the software. If you do not hold down the Shift key while dragging the corners of the layer, you will easily change the proportions of the object, causing the image to become distorted and not the original.
How to fix:
To ensure that the image doesn't distort when resizing, simply hold down the Shift key while dragging the corners of the layer. This will keep the original proportions of the object without distorting it.
5.2. Resizing without regard to image quality
One of the common problems when resizing layers in Photoshop is image quality loss, especially when you zoom in too much or zoom out too small. Images can become blurry, fuzzy, or lose detail, affecting the quality of your work.
How to fix:
When resizing layers, especially when enlarging images, you should be mindful of the resolution of the image. Photoshop will try to automatically maintain image quality, but if you need to resize too much, consider adjusting settings like Resample and choosing an appropriate resampling mode like Preserve Details to preserve image quality.
5.3. Forgetting to enable "Content-Aware Scale"
When resizing objects with complex backgrounds or details, it is important to use Content -Aware Scale . Without this feature, important details in the image can be stretched or lost, causing the image to look unbalanced.
How to fix:
To avoid this, you can enable Content-Aware Scale mode in Photoshop. This mode helps the software automatically recognize important elements in the image and preserve them when resizing, thereby helping to maintain the balance and quality of the image.
6. Conclusion
Resizing layers in Photoshop is a basic but extremely important skill for everyone working with this software. By mastering the tools and methods of resizing, you can optimize your design and photo editing process, creating high-quality products.
If you are looking for a reputable address that provides Photoshop software to help support your design process faster and more effectively, Sadesign will meet all your needs. Contact us today to receive the best price for Photoshop software!


VIP Products


Best Selling Products
Capcut Pro 1 Year
39 USD
Plugin Retouch4me
69 USD
MidJourney Account
29 USD
Freepik Premium Account
59 USD
Adobe Premiere Pro Account
99 USD
Genuine Adobe Illustrator account
99 USD
Upgrade Duolingo Super
29 USD
Windows 10 & 11 Pro Key
36 USD
Upgrade Genuine Office 365
49 USD
ChatGPT Plus Account (GPT-4)
16 USD
Copyright Adobe Lightroom Account
59 USD
Upgrade genuine Capture One account
120 USD
Adobe Photoshop Copyright - Full App
120 USD
Autodesk All App Account Copyright
120 USD
Genuine Cheap Canva Pro
39 USD