Best Selling Products
Low Light Photography Techniques: The Secret to Getting Great Photos
Nội dung
- 1. Introduction to taking photos in bad light conditions
- 2. Understanding the types of light in photography
- 3. Increase ISO appropriately
- 4. Use a wide aperture (low f-stop)
- 5. Increase Shutter Speed
- 6. Use a flash or additional light source
- 7. Look for natural light sources around you
- 8. Edit photos after taking them
- 9. Conclusion
Discover how to shoot in low light with helpful techniques and tips. You'll learn how to optimize your lighting, use the right equipment, and adjust your camera to get sharp, professional-looking shots.

Taking photos in low light conditions is always a challenge for any photographer. However, with useful techniques and tips, you can still create sharp and impressive photos even in low light environments. In this article, Sadesign will help you discover how to make the most of light and overcome all the difficulties when taking photos in bad light conditions.
1. Introduction to taking photos in bad light conditions
Shooting in low light is a challenge for both professionals and beginners, but it also presents an opportunity for experimentation and creativity. To achieve good results in low light, you need to understand how to use your camera, lenses, and especially the settings related to ISO, aperture, and shutter speed.
.jpg)
In addition, taking advantage of the remaining natural light or using supplementary light sources such as flash, LED lights also play an important role. In addition to technical factors, patience and the ability to observe to find the right shooting angle are also the keys to creating impressive photos in less than ideal lighting conditions.
Lighting is a key element in photography. A good photo depends not only on the photographer’s technique but also on the quality of the surrounding light. However, you cannot always shoot in ideal lighting conditions. Sometimes you are faced with low light, bright light or even mixed light situations, making taking photos much more difficult.
2. Understanding the types of light in photography
To be able to take good photos in bad lighting conditions, the first thing is to understand the types of light in photography. There are many different types of light that photographers need to understand to make effective use of, including natural light and artificial light.
Low natural light : like sunlight, gives a realistic look and is often used to create vivid photos. This is the situation when you shoot outdoors on cloudy days or in the early morning/late evening when the sun is not shining strongly.
Artificial Light : Light from artificial sources such as electric lights, flash, LED lights, or studio lights can give you more control over the light, but can also cause unnatural shadows or artifacts in your photos.
Reflected Light : Sometimes light from reflective surfaces (e.g. water, mirrors) can make a photo appear brighter or darker, depending on how you adjust it.
Understanding the characteristics of each type of light and how it interacts with the subject will help photographers optimize their shooting techniques, thereby improving the quality of their work and conveying messages effectively.
3. Increase ISO appropriately
Increasing ISO in photography needs to be done appropriately to ensure that image quality is not affected too much by noise. ISO is one of the three important factors in the exposure triangle, along with aperture and shutter speed, which help adjust the brightness of the photo.
.jpg)
Increasing the ISO makes the camera more sensitive to light, allowing you to shoot in low light without increasing the exposure time or opening up the aperture. However, this also means that the image may have more noise, especially on cameras with small sensors or at very high ISOs. Therefore, photographers need to carefully consider the balance between creativity and image quality, and take advantage of post-processing tools to reduce noise if necessary.
One of the easiest ways to improve your photos in low light is to increase your ISO. ISO is a measure of how sensitive your camera's sensor is to light. Increasing your ISO helps your camera sense light better, which helps reduce underexposure.
However, it is important to note that increasing the ISO too high can lead to noise in the image. Therefore, you need to consider increasing the ISO enough to get reasonable brightness without reducing the image quality too much.
Tip : If you are using a DSLR or mirrorless camera, you can try ISO 800 to 1600 for low light environments. If you are using a compact camera, try ISO 400 to 800 to avoid noise.
4. Use a wide aperture (low f-stop)
Aperture is an important factor in controlling the amount of light that reaches the camera sensor. When you're shooting in low light conditions, a wide aperture (with a low f-stop value like f/2.8 or f/4) will let in more light, resulting in brighter, clearer photos.
.jpg)
A wide aperture not only improves brightness but also creates a beautiful background blur (bokeh) effect, making the subject stand out more in the photo.
Note : Although a wide aperture increases light, you also need to pay attention to the depth of field. When the aperture is wide open, the depth of field will be shallower, meaning that some parts of the image will be sharp while the rest may be blurred. You need to consider when choosing the aperture to get the photo you want.
5. Increase Shutter Speed
Using a wide aperture (low f-stop) can create a beautiful bokeh effect, highlighting the subject by blurring the background. This is a popular technique in portrait and fine art photography, helping to focus attention on the main subject. At the same time, a wide aperture also allows more light to reach the sensor, supporting low-light photography without having to increase the ISO too much, thereby minimizing noise. However, it is important to note that the depth of field will be reduced, so accurate focusing is important to ensure the image achieves optimal quality.
Tip : When shooting in low light, a shutter speed of 1/60 second or slower may be necessary. If you're shooting a moving subject, consider increasing the shutter speed or using continuous shooting mode to capture clear movement.
6. Use a flash or additional light source
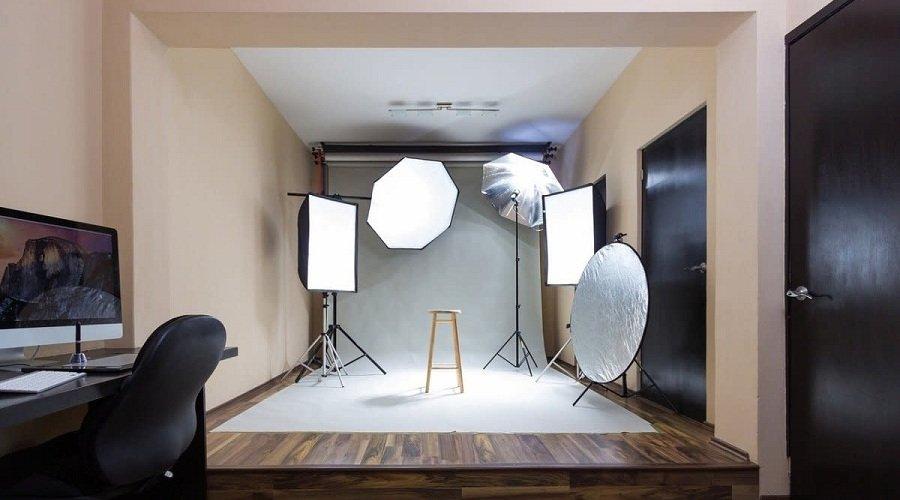
Another solution for low light photography is to use a flash or additional artificial light source. A flash can help illuminate your subject, but it can also create unwanted effects such as hard shadows and unnatural lighting. This is especially important in low light conditions or when you want to highlight the main subject. However, it is important to adjust the intensity and angle of the light appropriately to avoid unwanted shadows or loss of naturalness in the image. Choosing the right equipment and using it correctly will contribute to improving efficiency and professionalism in your work.
.jpg)
To get softer, more natural lighting, you can use accessories like softboxes, diffusers, or reflectors. These devices help spread the light from your flash evenly, creating a soft lighting effect and reducing shadows.
7. Look for natural light sources around you
Finding natural light sources around you not only saves energy but also benefits your health and increases your productivity. Natural light, with its gentle and intimate characteristics, can improve your mood, reduce stress and help regulate your body's circadian rhythm. To make the most of this light source, consider arranging your work or living space near a window, using thin curtains to diffuse the light, and limiting obstructions. At the same time, designing open spaces and using reflective colors are also effective solutions to optimize natural light in living and working environments.
In case you don’t have a flash or additional equipment, a simple trick is to look for natural light from your surroundings. Whether it’s light from a window, a street lamp, or even car headlights, they can all create beautiful and unique photos if you know how to exploit them.
Pay attention to soft light sources and try shooting at different angles to make the most of the light.
8. Edit photos after taking them
After taking a photo, editing is an important step to improve the quality and create a finished product. Users can use professional photo editing software such as Adobe Photoshop, Lightroom or online editing applications to adjust the light, color, contrast and remove unwanted details. It helps you adjust the brightness, contrast, color and reduce noise, making the photo clearer and more impressive.
In addition, cropping the photo to create a more harmonious composition is also a factor that needs attention. This process not only makes the photo more impressive but also reflects the professionalism and sophistication in the way the image is processed.
Adjusting parameters like Exposure, Contrast, and Shadows can help you significantly improve the quality of your photos when the initial lighting is less than ideal.
9. Conclusion
Shooting in poor lighting conditions doesn’t have to be an insurmountable challenge. By applying basic techniques and helpful tips like increasing your ISO, using a wide aperture, adjusting your shutter speed, or using additional light sources, you can create beautiful, sharp photos even in low light.


