Best Selling Products

Autodesk All App Account Copyright
120 USD

Plugin Retouch4me
69 USD

MidJourney Account
29 USD

Adobe Premiere Pro Account
99 USD

Upgrade genuine Capture One account
120 USD

Copyright Adobe Lightroom Account
59 USD

Freepik Premium Account
59 USD

ChatGPT Plus Account (GPT-4)
16 USD

Windows 10 & 11 Pro Key
36 USD

Capcut Pro 1 Year
39 USD

Genuine Adobe Illustrator account
99 USD

Adobe Photoshop Copyright - Full App
120 USD

Upgrade Duolingo Super
29 USD

Upgrade Genuine Office 365
49 USD

Genuine Cheap Canva Pro
39 USD
Photoshop Basics: Color Correction Tips for Beginners
Nội dung
- 1. Basic color correction tools in Photoshop
- 2. Basic photo color correction guide for beginners
- 2.1. Adjust photo color with Hue and Saturation
- 2.2. Adjust photo color with Selective Color
- 2.3. Adjust photo color with Curves and Levels
- 3. Tips for better photo color correction for beginners
- 3.1. Avoid over-adjusting colors
- 3.2. Use Presets or LUTs to save time
- 3.3. Observe the light in the photo before adjusting the color
- 3.4. Customize colors according to personal style
Are you new to Photoshop and want to learn how to color correct photos but don't know where to start? Don't worry! This article will guide you step by step on how to color correct in Photoshop in a simple, easy-to-understand way.
In the field of design and photography, color correction is an important step to make the image more professional and vivid. Photoshop is one of the most powerful tools to do this, but for beginners, getting familiar with the color correction tools can be quite difficult.
Have you ever taken a photo but the color is not as expected? Or want to create a unique color style but don't know where to start? Don't worry! This article will guide you through how to color correct photos in Photoshop in specific, easy-to-understand steps. Even if you have no experience, just follow the instructions and you will quickly master color correcting photos professionally.
1. Basic color correction tools in Photoshop
Before going into the specific practical steps, we need to understand the basic color adjustment tools in Photoshop. These are important tools that help you flexibly control the color, brightness and contrast of your photos.
Adjustment Layers – is a non-destructive way of color correction, meaning you can make adjustments without affecting the original image. You can turn the effects on/off or re-edit them without losing the original image data.
Curves – A tool that gives you detailed control over highlights, shadows, and midtones by adjusting curves on the color chart.
.png)
Levels – helps adjust brightness and contrast by adjusting the black, white and midpoints on the histogram.
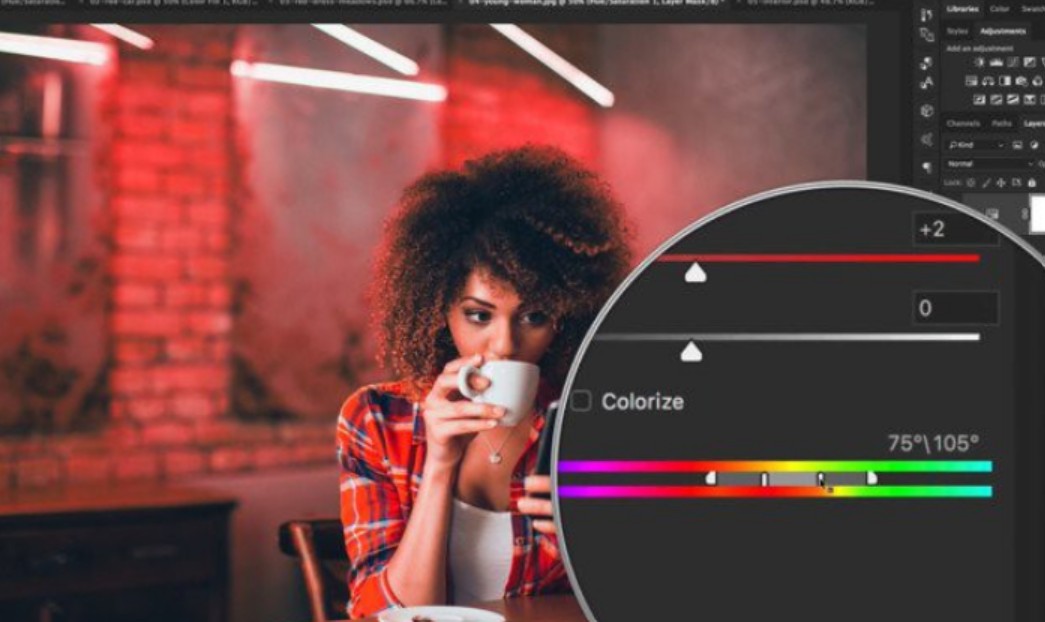
Color Balance – This tool allows you to change the color tone of your photo by adding or subtracting primary colors like red, blue, and green.
Hue/Saturation – Hue changes the color of the photo, while Saturation increases or decreases the intensity of the color.
Selective Color – This tool helps you tweak individual color groups without affecting the entire image.
Vibrance – enhances natural colors without making them too vibrant, especially suitable for correcting human skin tones.
.png)
2. Basic photo color correction guide for beginners
After understanding the basic tools, we will go into the practical steps of color correction in Photoshop.
2.1. Adjust photo color with Hue and Saturation
Hue and Saturation is the simplest feature you can use to easily adjust the color of your photos in Photoshop. Follow the steps below.
Step 1: Click the add edit layer icon at the bottom of the Layers panel.
.png)
Step 2. Select Hue/Saturation…
.png)
Step 3. The Hue/Saturation panel appears. Customize the Hue and Saturation parameters by holding down and dragging the arrows on each bar or entering the index directly into the corresponding box.
.png)
You see, beautiful color correction with Photoshop starts with simple operations like this. Therefore, before learning and exploring complex tricks, practice with the basic features of Photoshop!
2.2. Adjust photo color with Selective Color
Add a basic Photoshop color correction tool: Selective Color. This Photoshop color correction tool will help you replace a certain color in your photo with a new color. When you color correct an image with Selective Color, you will create a new color by mixing cyan, magenta, yellow, and black.
If you do not know how to edit the photo I mentioned above, please follow the steps below.
Step 1: Click the add edit layer icon at the bottom of the Layers panel.
Step 2: Click Selective Color…
.png)
Step 3. The Selective Color dialog box appears. You choose one of the colors you want to replace in the Colors section. Suppose I need to replace the cyan color in the photo with another color, I will choose Cyans.
.png)
Step 4. Now I will adjust the cyan, magenta, yellow and black parameters by holding down and dragging the arrows on each bar or entering the index directly into the corresponding box.
.png)
Step 5. Repeat steps 3 and 4 with other colors that need to be changed in the Colors section of the Selective Color dialog box.
2.3. Adjust photo color with Curves and Levels
Now we will come to the two most magical and valuable tools of Photoshop. When it comes to photo color correction or how to edit beautiful photos in general, there are certainly not many tools that can surpass Curves and Levels. For the task of color correction in Photoshop, I will group these two tools together because they almost do not have much difference other than the interface. Below I will guide you to color correct photos using Curves.
Step 1: Click the add edit layer icon at the bottom of the Layers panel.
Step 2: Click Curves…
.png)
Step 3. The Curve dialog box appears. Here you will see a graph as shown in the image below. Open the RGB section and select a color to adjust.
You will see the options RGB, Red, Green, Blue. These are the 3 basic colors of the RGB color system and are also the 3 colors we will adjust the color displayed on the image. Suppose I need to adjust the blue color, I will choose Blue.
.png)
Step 4. Click on a point at the same colored diagonal line on the chart and drag the point to the appropriate position.
In this image color correction step, we will adjust the blue diagonal line on the histogram:
· Moving a point above the origin will increase the hue of the color being adjusted.
· Moving the point below the origin will increase the hue of the opposite color.
For example, if I'm adjusting the blue color, going up will increase the blue hue, and going down (where the arrow points in the picture) will increase the yellow hue (the color opposite blue on the color wheel).
.png)
Another thing to keep in mind when editing photos in Photoshop with Curves:
· The right part of the histogram represents the highlight of the image.
· The left part of the histogram represents the shadow of the image.
.png)
Compared to the color correction tools in Photoshop above, you will find Curves much more complicated to use. However, once you understand how it works, you will find Curves extremely flexible and time-saving when color correcting photos. And of course, the color correction effect with Curves is much more satisfying than Hue and Saturation or Selective Color.
3. Tips for better photo color correction for beginners
Color correction is not just about adjusting parameters on Photoshop, but also an art that requires observation, sophistication and good color perception. Here are some useful tips to help you get more beautiful and professional photos without spending too much time.
3.1. Avoid over-adjusting colors
One of the most common mistakes beginners make when learning color grading is to overdo it with effects. By focusing too much on making colors pop, you can end up making your photos look unnatural, oversaturated, or harsh.
.png)
When using the Hue/Saturation tool, don't drag the Saturation bar too high as this will cause the image to "burn out". If you want to subtly increase the color, prioritize using Vibrance.
When adjusting Curves or Levels, avoid making the highlights too bright or the shadows too harsh, which can cause loss of detail in the image.
Test photos on different devices (computer screens, phones) to make sure the colors look harmonious and natural.
Tip: After you've finished color correcting, you can reduce the Opacity of the Adjustment Layer to about 80-90% to make the color effect softer.
3.2. Use Presets or LUTs to save time
If you want to do quick, professional color correction, Presets and LUTs (Lookup Tables) are the perfect solution. These are pre-set color filters that help you create a beautiful color tone with just one click.
.png)
Presets: Use in Camera Raw or Lightroom. Just download and apply to photos.
LUTs: Used in Photoshop via Color Lookup Adjustment Layer.
Benefits of using Presets and LUTs:
· Saves time on color correction, especially useful when you need to correct multiple photos in the same style.
· Helps you get an overview of colors and easily find the right color tone.
· Parameters can be customized to better suit each specific photo.
3.3. Observe the light in the photo before adjusting the color
Lighting is the most important factor in determining the color in a photo. A photo taken in natural light will have a very different color tone than a photo taken under artificial light. Therefore, before you color correct, you need to identify the light source in the photo to apply the appropriate color.
.png)
How to observe light effectively?
If the photo has natural light (outdoors, daylight), you can keep the color tones neutral or add a little warmth to create a soft feel.
If the photo has artificial light (yellow lights, neon lights), it may be necessary to reduce the Saturation of yellow/orange to balance the colors.
Check the highlights and shadows in your photo with the Histogram tool to avoid losing detail when editing.
3.4. Customize colors according to personal style
Everyone has different tastes, and color correction is no exception. There is no one-size-fits-all formula. The important thing is to find your own color style.
.png)
How to create a personal color style?
Experiment with different color tones: From clear, bright tones to warm, vintage tones.
Look to popular color trends: Instagram, Pinterest, or professional photographers for inspiration.
Save your favorite color settings: If you find a color you like, save the settings in Adjustment Layers so you can easily apply it to other photos.
Adjust the color according to the mood of the photo: For example, landscape photos can use clear, cool tones; portraits can use warm or retro tones to create softness.
Color grading in Photoshop isn’t as difficult as you might think, especially if you understand the basic tools and apply the right techniques. Take the time to practice and experiment with different ways to improve your color grading skills. Good luck with your Photoshop color grading!


VIP Products


Best Selling Products
Autodesk All App Account Copyright
120 USD
Plugin Retouch4me
69 USD
MidJourney Account
29 USD
Adobe Premiere Pro Account
99 USD
Upgrade genuine Capture One account
120 USD
Copyright Adobe Lightroom Account
59 USD
Freepik Premium Account
59 USD
ChatGPT Plus Account (GPT-4)
16 USD
Windows 10 & 11 Pro Key
36 USD
Capcut Pro 1 Year
39 USD
Genuine Adobe Illustrator account
99 USD
Adobe Photoshop Copyright - Full App
120 USD
Upgrade Duolingo Super
29 USD
Upgrade Genuine Office 365
49 USD
Genuine Cheap Canva Pro
39 USD