Best Selling Products

Upgrade genuine Capture One account
120 USD

Plugin Retouch4me
69 USD

Upgrade Genuine Office 365
49 USD

Genuine Adobe Illustrator account
99 USD

Genuine Cheap Canva Pro
39 USD

Windows 10 & 11 Pro Key
36 USD

ChatGPT Plus Account (GPT-4)
16 USD

Adobe Premiere Pro Account
99 USD

Upgrade Duolingo Super
29 USD

Freepik Premium Account
59 USD

Capcut Pro 1 Year
39 USD

MidJourney Account
29 USD

Copyright Adobe Lightroom Account
59 USD

Adobe Photoshop Copyright - Full App
120 USD

Autodesk All App Account Copyright
120 USD
Pocket these tips for taking beautiful photos with your phone this summer
Nội dung
- 1.Optimizing natural light – the key to every beautiful photo
- 1.1 Shoot during the "golden hour" and "blue hour"
- 1.2 Avoid shooting in direct midday sunlight
- 1.3 Use reflective objects for support
- 2. Optimize natural light – the key to every great photo
- 2.1 Shoot during the "golden hour" and "blue hour"
- 2.2 Avoid shooting in direct midday sunlight
- 2.3 Use reflective objects for support
- 3. Reasonable layout – the secret to creating depth and emphasis
- 3.1 Apply the 1/3 rule
- 3.2 Use visual paths
- 3.3 Don't be afraid to leave space
- 4. Summer – the perfect time to embrace vibrant colors
- 4.1 Choose outstanding outfits
- 4.2 Take advantage of colorful summer backgrounds
- 4.3 Pay attention to white balance
- 5. Master your phone camera – make the most of your available equipment
- 6. Suggest some summer photography concepts with your phone
- 6.1. Backlit portrait by the sea
- 6.2. Flatlay beach supplies
- 6.3. Funny moving pictures
- 6.4. Reflection through sunglasses or water
- 7. Conclusion
Discover tips for taking beautiful photos with your phone this summer: light, composition, color, post-production and emotion - all to help you improve your photos with just your smartphone.
Summer is the ideal time to capture brilliant, vibrant moments. With a smartphone in hand, you can completely create impressive photos without the need for a professional camera. Just apply a few small tips below, every summer moment will become more artistic than ever. Let's find out more details with sadesign in the content below.
1.Optimizing natural light – the key to every beautiful photo
Light is the most important factor in photography, determining the quality and emotion of each photo. Especially in the summer, when the sunlight is strong, optimizing natural light becomes the key to creating beautiful works, avoiding overexposed or harsh shadows.
1.1 Shoot during the "golden hour" and "blue hour"
To have sparkling photos, you should take advantage of the "golden" and "blue" hours:
-
Golden Hour: The ideal time is from 5:30 am to 7:00 am and 4:30 pm to 6:00 pm . At this time, the sunlight is soft, with a warm yellow color, creating a depth and softness effect for the photo. When the sun is still low, the shadows will be softer, making the subject's skin smooth and radiant, especially suitable for portraits.
-
Blue Hour: The period of time just before dawn or just after dusk when the sky turns a deep blue. Although not mentioned directly in the text, this is a time of special light that creates a magical atmosphere in photographs, often used to capture cityscapes or night scenes.
1.2 Avoid shooting in direct midday sunlight
The time from 11am to 2pm is when the sunlight is at its strongest and harshest. Taking photos at this time can easily lead to problems such as:
-
Blown out: Bright areas of the image lose detail.
-
Harsh shadows: Create unwanted dark areas, detracting from the aesthetic of the photo.
-
Oily skin: Harsh lighting can highlight skin imperfections.
If you have to take photos during this time, look for shady places like trees or porches to reduce the intensity of direct light, making the photo more harmonious.
1.3 Use reflective objects for support
Reflectors are powerful tools that help you adjust light flexibly, especially when shooting against the light or needing to brighten dark areas:
-
White cardboard or light-colored towels: These are simple but effective materials that can help bounce light, soften light, or fill in shadows on faces or subjects.
-
Reflective surfaces: Materials such as stainless steel covers or small mirrors have better light reflection capabilities, suitable when you need to focus light on a specific area or want to create highlights.
Clever use of natural light, especially during the "golden hour", along with avoiding harsh midday sunlight and using supporting reflectors, will help you create beautiful photos with much more depth and emotion.
2. Optimize natural light – the key to every great photo
Natural light plays an important role in creating a perfect photo, an indispensable element to highlight the subject and create a harmonious, natural feeling for the entire frame. Making reasonable use of natural light not only helps to minimize the use of artificial lighting equipment but also brings more realistic and sharp colors.

2.1 Shoot during the "golden hour" and "blue hour"
To have sparkling photos, you should take advantage of the "golden" and "blue" hours:
-
Golden Hour: The ideal time is from 5:30 am to 7:00 am and 4:30 pm to 6:00 pm . At this time, the sunlight is soft, with a warm yellow color, creating a depth and softness effect for the photo. When the sun is still low, the shadows will be softer, making the subject's skin smooth and radiant, especially suitable for portraits.
-
Blue Hour: The period of time just before dawn or just after dusk when the sky turns a deep blue. Although not mentioned directly in the text, this is a time of special light that creates a magical atmosphere in photographs, often used to capture cityscapes or night scenes.
2.2 Avoid shooting in direct midday sunlight
The time from 11am to 2pm is when the sunlight is at its strongest and harshest. Taking photos at this time can easily lead to problems such as:
-
Blown out: Bright areas of the image lose detail.
-
Harsh shadows: Create unwanted dark areas, detracting from the aesthetic of the photo.
-
Oily skin: Harsh lighting can highlight skin imperfections.
If you have to take photos during this time, look for shady places like trees or porches to reduce the intensity of direct light, making the photo more harmonious.
2.3 Use reflective objects for support
Reflectors are powerful tools that help you adjust light flexibly, especially when shooting against the light or needing to brighten dark areas:
-
White cardboard or light-colored towels: These are simple but effective materials that can help bounce light, soften light, or fill in shadows on faces or subjects.
-
Reflective surfaces: Materials such as stainless steel covers or small mirrors have better light reflection capabilities, suitable when you need to focus light on a specific area or want to create highlights.
Clever use of natural light, especially during the "golden hour", along with avoiding harsh midday sunlight and using supporting reflectors, will help you create beautiful photos with much more depth and emotion. In particular, the "golden hour" - the time right after sunrise or before sunset - is when the light is softest and warmest, creating an attractive and professional visual effect. Mastering the technique of using natural light not only enhances the quality of the photo but also shows the sophistication and creativity of the photographer.
3. Reasonable layout – the secret to creating depth and emphasis
Composition is the second most important element after lighting, it helps your photo have depth, neatness and easily conveys your emotions to the viewer. Arranging the elements in the frame with purpose will turn a simple photo into a work of art.
3.1 Apply the 1/3 rule
This is one of the most basic and effective compositional rules in photography. Instead of placing your main subject in the center of the frame, imagine dividing the frame into nine equal parts by two horizontal and two vertical lines. Place your subject at one of the four intersections of these lines.
-
Benefits: This helps create balance and harmony in the photo and naturally directs the viewer's eyes to the main subject. Camera apps on phones today all have a grid feature , helping you easily align the composition according to the 1/3 rule.
3.2 Use visual paths
Leading lines are natural elements in a landscape that can lead the viewer's eye from the foreground to the background or directly to the focal point of the photo.
-
For example, you can take advantage of straight lines like stairs, train tracks, hallways, trees, paths, or even a long fence .
-
Application: This technique is often used effectively in landscape or architectural photography , creating a sense of depth and movement in the frame.
3.3 Don't be afraid to leave space
Negative space, also known as empty space , is the area in a photo that does not contain the main subject.
-
Benefits: Leaving space around your subject helps create a light, airy feel and keeps the photo from feeling cluttered. It also helps highlight the main subject and gives the viewer room to "breathe" within the frame, avoiding a cramped feeling.
-
How to use it: You can leave space above, to the sides, or in front of your subject (if they're facing a certain direction) to create balance and visual interest.
By flexibly combining these compositional rules, you will create photos that are not only beautiful, but also have depth, are engaging, and effectively convey emotion.
4. Summer – the perfect time to embrace vibrant colors
Color is the soul of summer photos. The blue sky, the turquoise sea, the yellow of the sun or the red of the clothes will contribute to the unique personality of each photo.
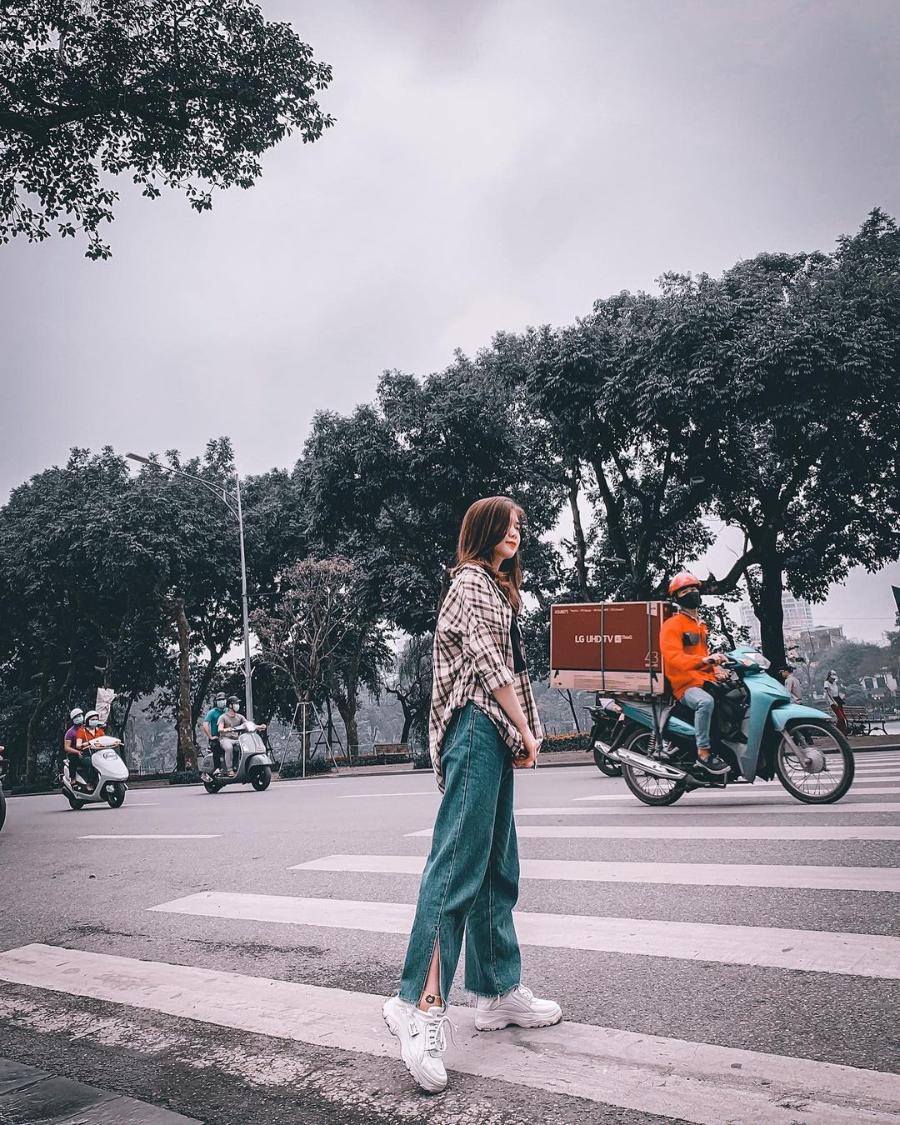
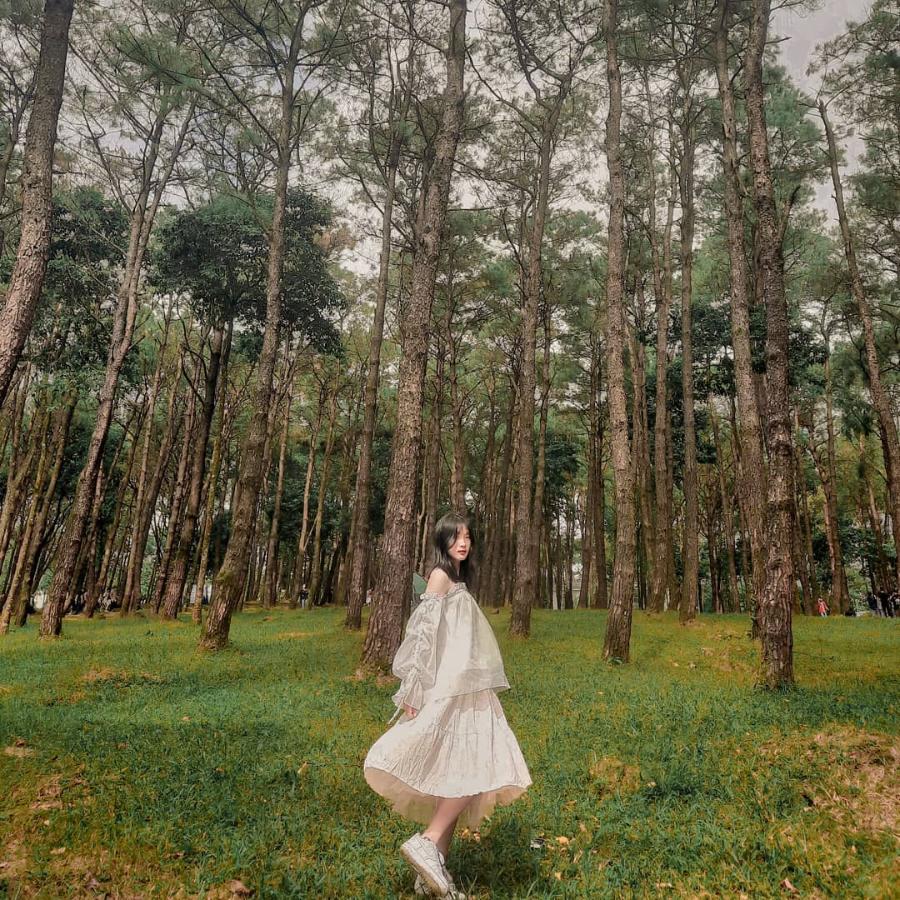
4.1 Choose outstanding outfits
Bright-colored outfits like white, red, yellow, and pastel blue always stand out in the sun. Prioritize these colors when taking outdoor photos to make them more eye-catching. In addition, outfits that match the surrounding background (blue sea - blue shirt, forest - green dress...) also create a very pleasant synchronous effect.
4.2 Take advantage of colorful summer backgrounds
Summer scenery is already brilliant with white sand, yellow sunshine, green trees, clear sea… you just need to choose a clever shooting angle to have a vivid photo. Avoid backgrounds that are too dark or messy, making the subject obscure.
4.3 Pay attention to white balance
Don't let auto mode give your photos a blue or yellow tint. Adjust the color temperature gently or use suitable presets (color filters) to keep the tones true and clear for summer photos.
5. Master your phone camera – make the most of your available equipment
Although not professional cameras, today's phone cameras have many powerful features to support photographers.
Shooting in Pro Mode
Some high-end Android phones allow manual adjustment of parameters such as ISO, shutter speed, manual focus, white balance. When shooting sunsets, fireworks or summer night lights, using this mode will help you have better control over the image.
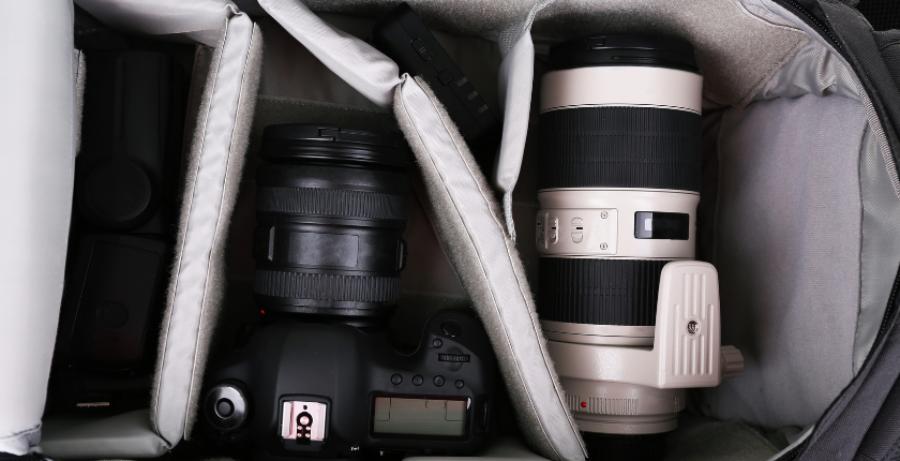
Exploit wide-angle, telephoto and macro cameras
Don't ignore the secondary lenses on your phone. Wide angle helps capture the whole landscape, telephoto allows you to take long shots without losing focus, macro creates depth for small details like flowers, seashells...
Turn off HDR when not needed
HDR helps balance out dark and light areas, but sometimes makes photos look unnatural. In evenly lit scenes, turning off HDR will make photos look more realistic and clear.
Reasonable post-production – turn ordinary photos into impressive ones
Photo editing is an indispensable step if you want your photos to achieve the highest visual effect.
Prioritize simple and effective editing apps
Apps like Snapseed, Lightroom Mobile, VSCO, or even your phone's default editing tools are enough to process your photos. Adjusting brightness, contrast, saturation, and sharpness are the basics.
Do not abuse filters
Each season has its own color scheme. Summer often favors clear, bright colors or soft pastels. However, overusing filters can make your photos look washed out and unnatural.
Keep photos at high resolution
When saving photos after editing, keep the original resolution so that the photos don't get pixelated when shared on social media or printed.
6. Suggest some summer photography concepts with your phone
Summer is a great time to capture memorable moments. With your phone in hand, you can absolutely create beautiful and unique photos. Here are some summer photography concepts that you can try:
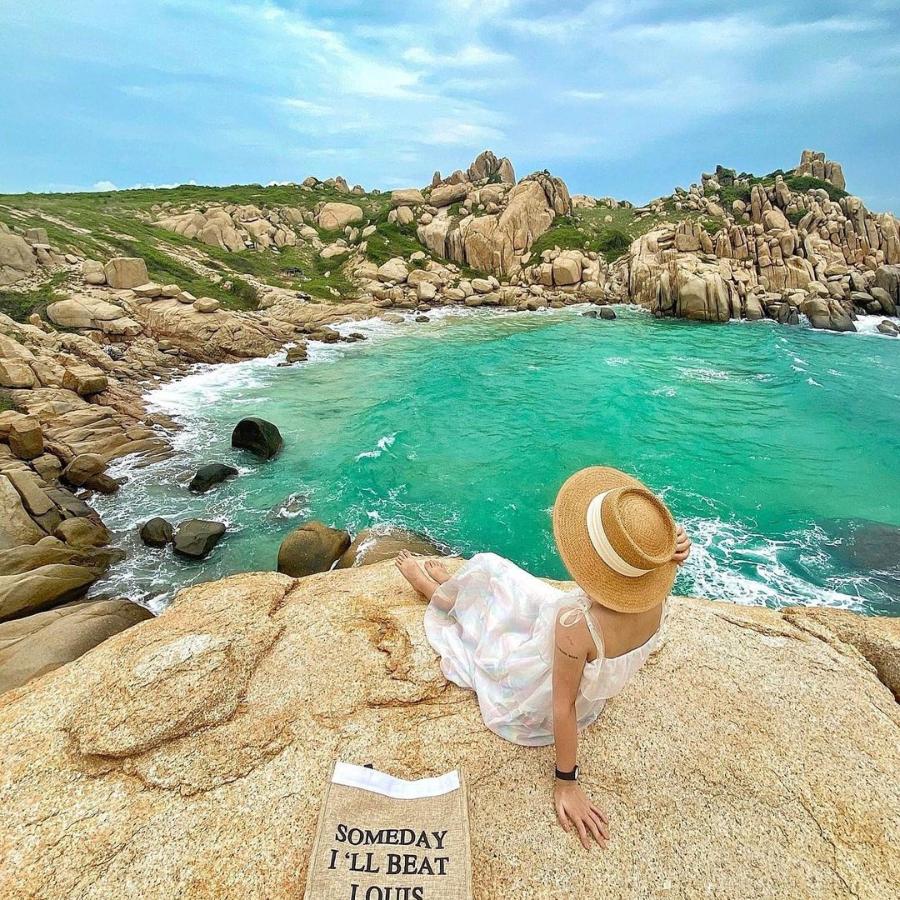
6.1. Backlit portrait by the sea
Sunset or sunrise is an ideal time to shoot backlit portraits. Position your model with their back to the sun, so the light hits the lens directly, creating a dramatic silhouette effect .
-
How to do it: Encourage the model to pose simply, naturally, expressing genuine emotions such as looking towards the sea, spreading their arms to catch the wind or simply letting their body loose. The shadow effect will highlight the body lines and hair, bringing an artistic and mysterious photo.
6.2. Flatlay beach supplies
Flatlay is a type of photography that takes photos from above and arranges objects on a flat surface. This concept is extremely suitable for showing off your typical summer items and your beach trips.
-
How to do it: Arrange items such as sunglasses, flip-flops, sunscreen, magazines, wide-brimmed hats, seashells, starfish ... neatly and aesthetically on a colorful towel, beach sand or a simple flat surface. Make sure the lighting is even and sufficient so that the objects stand out and the photo looks eye-catching and attractive.
6.3. Funny moving pictures
Summer is all about action and fun. Capture the action to create vibrant, energetic photos.
-
How to do it: Don’t be afraid to capture your friends or family jumping, running around on the sand, throwing water, swimming, or playing in the waves . To capture these moments, use the burst mode on your phone. This mode will help you take many photos in a quick sequence, then you can easily choose the best photo with the most precious and clear moment.
6.4. Reflection through sunglasses or water
Take advantage of reflective surfaces to create unique and creative photos.
-
How to do:
-
Through Sunglasses: Ask the model to wear sunglasses and take a close-up shot of the lenses, to show the reflection of the sea, sky or surrounding scenery.
-
Over water: Find a small puddle, a still lake, or even the wet surface of a sandy beach after the waves have receded. Lower your phone close to the water to capture the reflection of the sky, trees, or another prominent object.
-
-
Creative angles are key to creating a photo that makes viewers look closely and feel surprised by its uniqueness.
With these suggestions, hopefully you will have beautiful and memorable summer photos with just your phone. Do you want to try any concept first?
7. Conclusion
Taking photos with your phone in the summer is no longer too difficult if you know how to take advantage of light, composition, color, equipment and especially emotions. Each photo has its own story and you are the storyteller through the lens. Don't be afraid to experiment, don't be afraid of making mistakes, enjoy the joy of photography from the most ordinary things.


VIP Products


Best Selling Products
Upgrade genuine Capture One account
120 USD
Plugin Retouch4me
69 USD
Upgrade Genuine Office 365
49 USD
Genuine Adobe Illustrator account
99 USD
Genuine Cheap Canva Pro
39 USD
Windows 10 & 11 Pro Key
36 USD
ChatGPT Plus Account (GPT-4)
16 USD
Adobe Premiere Pro Account
99 USD
Upgrade Duolingo Super
29 USD
Freepik Premium Account
59 USD
Capcut Pro 1 Year
39 USD
MidJourney Account
29 USD
Copyright Adobe Lightroom Account
59 USD
Adobe Photoshop Copyright - Full App
120 USD
Autodesk All App Account Copyright
120 USD