Best Selling Products

Adobe Photoshop Copyright - Full App
120 USD

Capcut Pro 1 Year
39 USD

Adobe Premiere Pro Account
99 USD

Upgrade Genuine Office 365
49 USD

Upgrade Duolingo Super
29 USD

Genuine Cheap Canva Pro
39 USD

Upgrade genuine Capture One account
120 USD

Autodesk All App Account Copyright
120 USD

Copyright Adobe Lightroom Account
59 USD

Windows 10 & 11 Pro Key
36 USD

Genuine Adobe Illustrator account
99 USD

MidJourney Account
29 USD

Freepik Premium Account
59 USD

ChatGPT Plus Account (GPT-4)
16 USD

Plugin Retouch4me
69 USD
How to remove noise in photoshop
Nội dung

What is noise in photoshop?
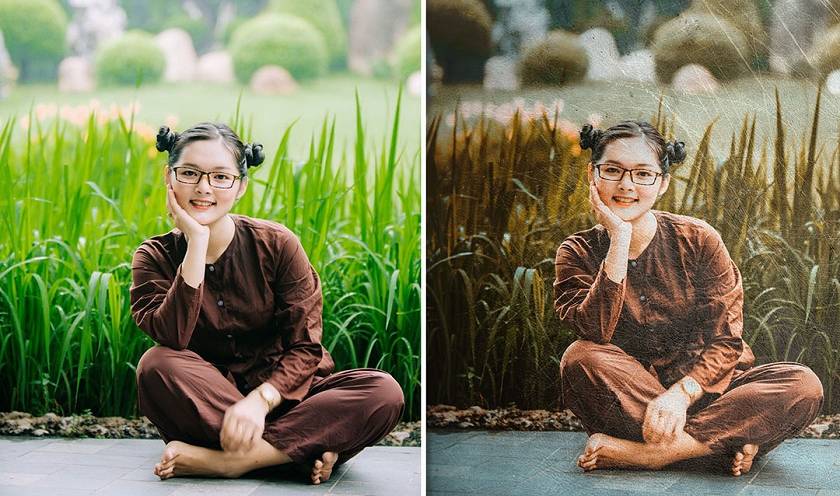
 Noise is a grainy image phenomenon if you take pictures in a low-light environment. The image with noise when looking at it will not be smooth, lose its beauty and not be beautiful. But you do not need to worry because there is still a way to fix this phenomenon with Photoshop in the simplest way. Noise will be divided into the following 3 types:
 - Random Noise: this is the form of noise when you take pictures with fast speed, high ISO (light sensitivity) and Noise will be distributed randomly.
- Fixed Noise: Noise will appear when you take pictures in an environment with high temperature, and the time the photo is taken.
- Banding Noise: Noise will appear when the photographer increases the light in the dark areas, and then the noise will have a striped appearance. In addition, banding noise is also highly dependent on the sensor manufacturing technology of the manufacturers.
2 ways to remove Noise with Photoshop very quickly
Method 1: Eliminate Noise with Lab color system
This way has one advantage that you can do it right on Photoshop without having to install any additional applications. However, it will have to go through many operations. Step 1: Open photoshop software and upload the edited image by: File => Open or you can drag and drop that image into the software. Step 2: You will convert the image to the Lab system so that you can reduce the Noise on the areas of the Lab color system by: Image => Mode => Lab Color.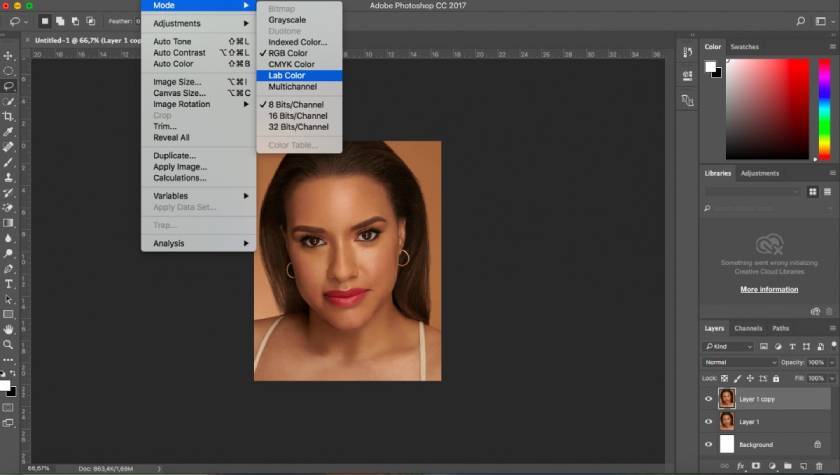 Note: In case you have many layers, Photoshop will optionally ask you if you want to change to Flatten image or not? This is the option that will help you merge all the layers together. For the purpose of noise reduction, choose Don't Flatten!
 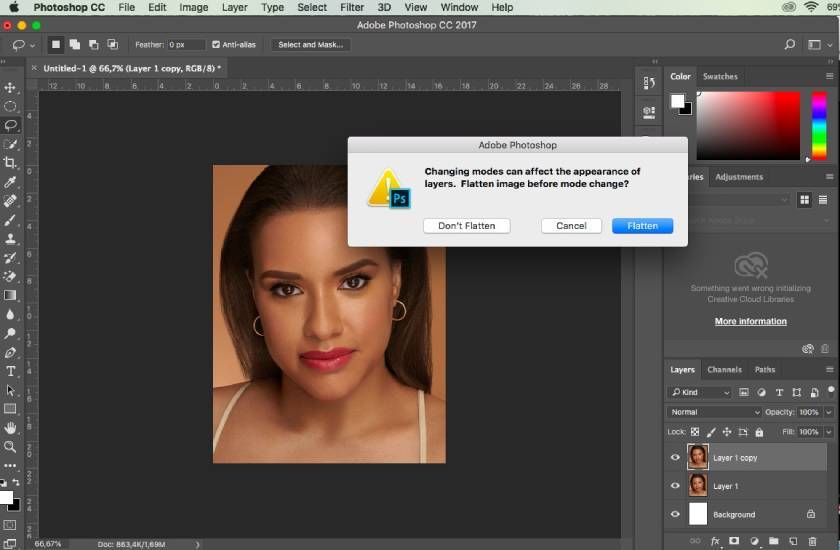 Step 3: Open the Channel tab (next to the Layer Tab) > Select the Lightness channel and do the following: Choose Filter => Noise => Despeckle to make the image smoother.
 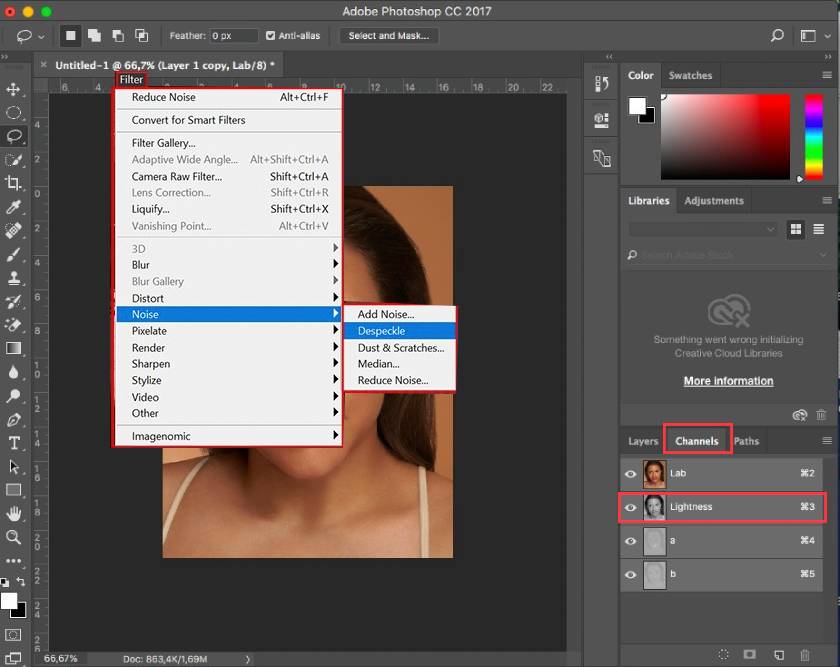 Step 4: At Channel Lightness, select Filter > Noise > Reduce Noise and adjust the parameters (depending on your photo, you can change the appropriate parameters)
 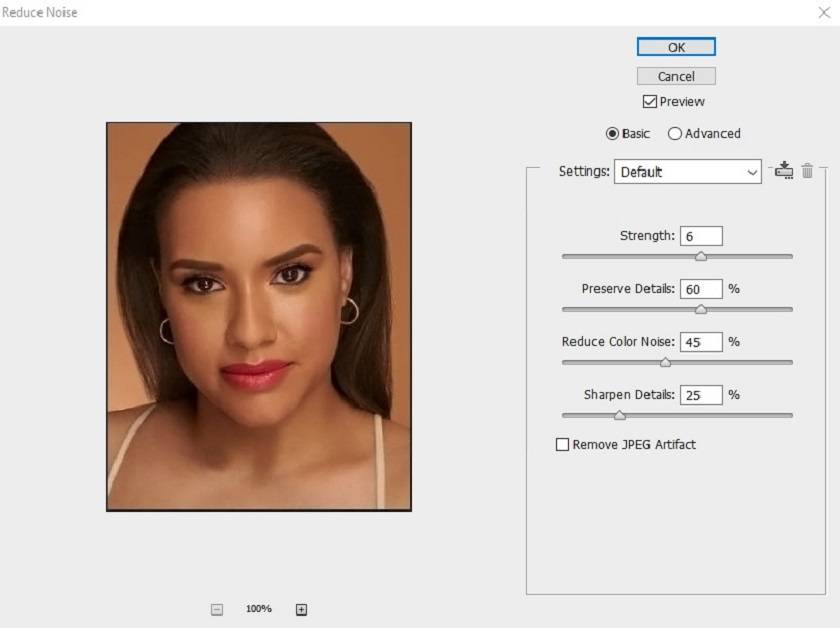 Step 5: Switch to Channel a => Filter => Blur => Gaussian Blur
 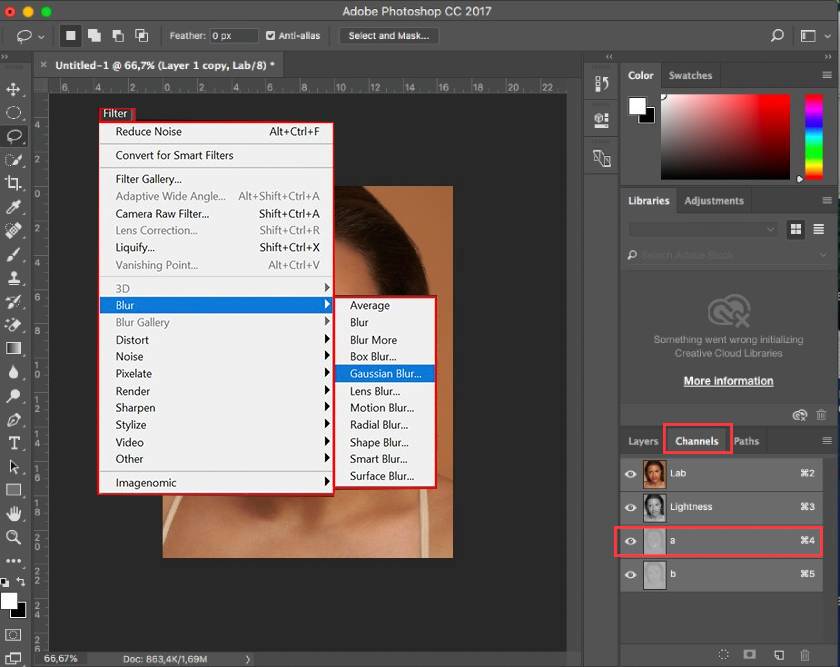 Step 6: In this step you will make noise on channels a and b. And adjust the parameters to balance from about 0.5 - 1 pixel. Note: because this is a blur parameter, if you set it too high, your image will be blurred. And you do the same for channel b. Step 7: Return to the layer tab > convert the color system to RGB and you're done.
 Method 2: Use the Noise Reduction Plugin in Photoshop
With this method 2 will help you manipulate faster and simpler, but its disadvantage is that you need to install more applications to do it. Step 1: Download the plugin at the homepage and log in with your email to download the plugin immediately. Step 2: Install the Noiseware Plugin on your device Turn on the downloaded file and install it => Next => Next => Install => Finish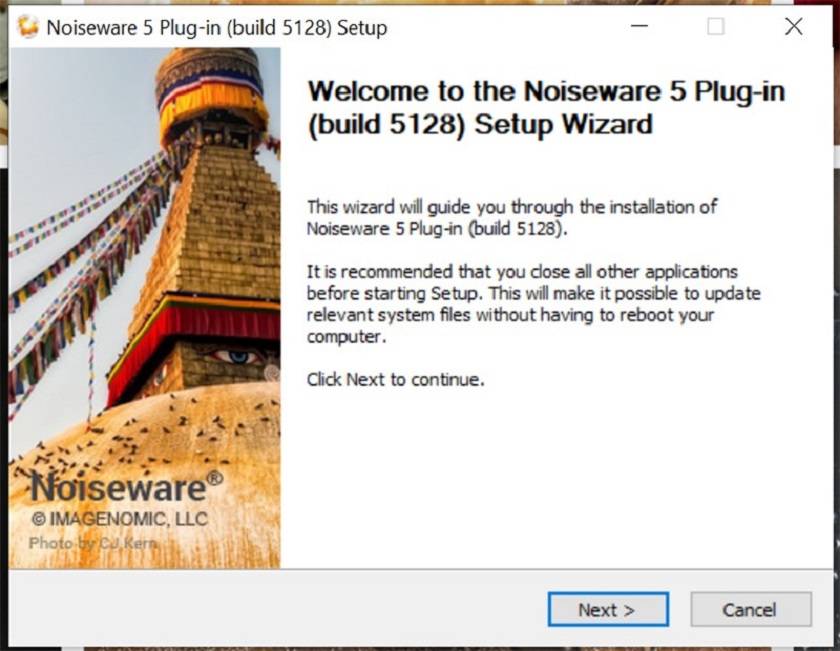 Step 3: After you have installed the plugin automatically in photoshop when you open the application. Next, you just need the image you want to denoise in Photoshop and access the Plugin according to the following instructions: Filter => Imagenomic => Noiseware.
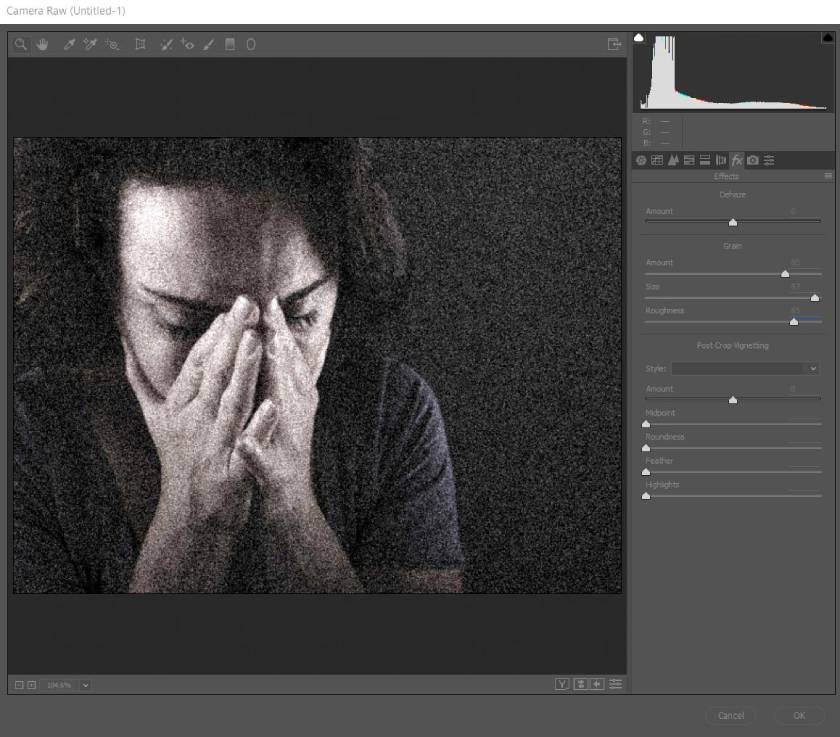
 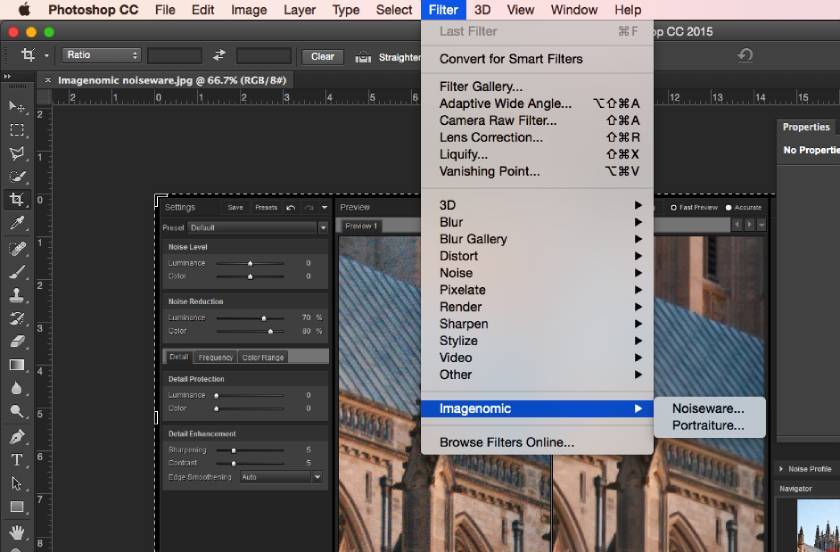 Step 4: It is an automatic function with self-adjusting parameters, you can also change the parameters if you are not satisfied with the photo in the left column. You can also view the simulation in the Preview pane. After adjusting the noise reduction parameter to your liking, just click OK.
 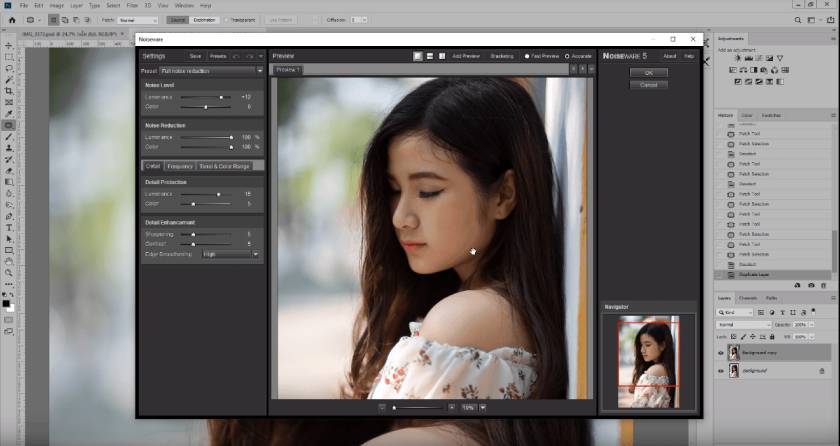 Note: the layer or the image that you need to remove the Noise will be changed without the duplication of the layer, so if you want to restore it, you need to open the history pane. Above are 2 ways that Sadesign Retouching wants to share with you on how to remove Noise in Photoshop in the simplest way. Hopefully, through this article, it will help you master the knowledge of Noise and how to edit and fix it in the simplest way.


VIP Products


Best Selling Products
Adobe Photoshop Copyright - Full App
120 USD
Capcut Pro 1 Year
39 USD
Adobe Premiere Pro Account
99 USD
Upgrade Genuine Office 365
49 USD
Upgrade Duolingo Super
29 USD
Genuine Cheap Canva Pro
39 USD
Upgrade genuine Capture One account
120 USD
Autodesk All App Account Copyright
120 USD
Copyright Adobe Lightroom Account
59 USD
Windows 10 & 11 Pro Key
36 USD
Genuine Adobe Illustrator account
99 USD
MidJourney Account
29 USD
Freepik Premium Account
59 USD
ChatGPT Plus Account (GPT-4)
16 USD
Plugin Retouch4me
69 USD