Best Selling Products

Adobe Premiere Pro Account
99 USD

Capcut Pro 1 Year
39 USD

Upgrade Genuine Office 365
49 USD

Upgrade Duolingo Super
29 USD

Autodesk All App Account Copyright
120 USD

MidJourney Account
29 USD

Upgrade genuine Capture One account
120 USD

ChatGPT Plus Account (GPT-4)
16 USD

Plugin Retouch4me
69 USD

Genuine Cheap Canva Pro
39 USD

Windows 10 & 11 Pro Key
36 USD

Freepik Premium Account
59 USD

Copyright Adobe Lightroom Account
59 USD

Genuine Adobe Illustrator account
99 USD

Adobe Photoshop Copyright - Full App
120 USD
Secrets to Taking Portrait Photos Under Harsh Sunlight Without Overexposure
Nội dung
Discover methods to reduce contrast, balance lighting, and preserve facial details when shooting in harsh lighting conditions.
1. Understanding the Characteristics of Harsh Sunlight
Harsh sunlight typically appears between 10 a.m. and 3 p.m., when the sun is at its highest position in the sky. At this time, the light shines almost directly downward onto the subject, creating a hard light source with extremely high contrast.
The most noticeable characteristic of this type of lighting is the presence of very bright highlights and very deep shadows. Areas receiving direct sunlight can become overexposed and lose detail, while shaded areas become very dark or may even disappear completely. This stretches the dynamic range of the image and makes balancing the light much more difficult.
For portrait photography, harsh sunlight often creates pronounced shadows beneath the eyes, nose bridge, and chin. These shadows make the face appear less soft, emphasize imperfections, and reduce overall visual appeal. In addition, strong light causes subjects to squint, appear tense, and lose natural facial expressions.
However, when viewed from a positive perspective, harsh sunlight offers a major advantage: the ability to create strong dimensionality. Clearly defined light and shadow areas help emphasize facial contours, adding depth and a distinct three-dimensional appearance.
(1).jpg)
Understanding the characteristics of harsh sunlight is the first and most important step. Once you know how it “works,” you will no longer be passive but can actively control the light according to your creative intentions.
2. Avoiding Direct Sunlight
One of the most common mistakes when photographing portraits under harsh sunlight is positioning the subject directly facing the sun. This causes the light to strike the face head-on, creating bright hotspots, loss of detail, and forcing the subject to squint.
Instead, you should change the direction of the light to gain better control over image quality. The two most effective options are backlighting and side lighting.
When shooting with backlighting, the sun is positioned behind the subject. The light no longer shines directly on the face but instead creates a rim light around the hair and body. This effect helps separate the subject from the background and creates a softer, more luminous appearance. However, you must pay attention to exposure settings to avoid underexposing the face.
Meanwhile, side lighting helps sculpt the face. One side illuminated and the other in shadow enhances facial structure, increases depth, and creates a stronger three-dimensional effect. This technique is highly effective for creating portraits with a bold and dramatic style.
(1).jpg)
Changing the shooting angle and light direction not only reduces harshness but also opens up many different creative styles. You can adjust these elements flexibly to match your artistic vision.
3. Taking Advantage of Natural Shade
Locations such as beneath tree canopies, beside buildings, under awnings, or in outdoor corridors can become ideal “natural studios.” In these places, direct sunlight is blocked, helping reduce harshness and soften bright areas on the face while minimizing hard shadows beneath the eyes and chin.
However, not all shade is suitable. You should prioritize areas with “open shade,” meaning locations that are shaded but still receive reflected light from the sky or surrounding environment. This type of light is typically soft, even, and easy to control, helping keep the subject’s face bright enough while maintaining natural skin tones and preventing the image from looking dark or lifeless.
(1).jpg)
Another important factor is the direction of the reflected light source. Even when standing in the shade, light still has a direction. You should position the subject facing the open light source (usually the brighter part of the sky) to make use of this reflected light on the face, creating a more natural and attractive appearance. If the subject turns away from the reflected light source, the face may become dark and lack emphasis.
Conversely, if you choose shade that is too deep or enclosed, the light can become weak and directionless, causing the image to appear “flat,” lacking depth and impact. In this situation, you can move the subject closer to the edge of the shaded area, where there is enough light to create dimension without becoming too harsh.
Additionally, pay attention to the colors of the surrounding environment. Light-colored walls, pavement, or reflective surfaces can act as natural fill light sources, improving facial illumination without the need for a reflector.
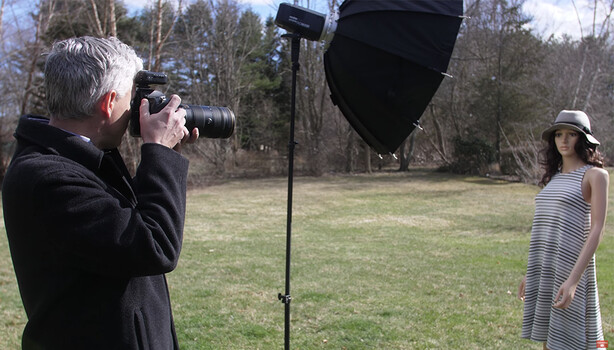
4. Using a Reflector to Balance Light
A reflector is one of the simplest yet most effective tools for portrait photography under strong sunlight. When the light creates deep shadows on the face, a reflector bounces light back into these areas, brightening them and reducing overall contrast.
Depending on your intended result, you can choose different types of reflectors. A white reflector provides soft and natural light, making it ideal for gentle portrait styles. A silver reflector delivers stronger illumination, helping increase brightness when reflected light is limited. Meanwhile, a gold reflector creates a warm tone that is excellent for enhancing skin color.
(1).jpg)
The placement of the reflector is equally important. Typically, it should be positioned opposite the main light source and directed toward the subject’s face. This helps distribute light more evenly and reduces shadows beneath the eyes and chin.
If you do not have a professional reflector, simple alternatives such as white foam boards, aluminum foil, or light-colored walls can work effectively as substitutes.
Using a reflector not only improves lighting quality but also provides greater professionalism and control during the shoot.
5. Adjusting Camera Settings Properly
In harsh sunlight conditions, setting up your camera correctly is crucial to image quality. Without proper control, photos can easily become overexposed or lose important details.
You should start with a low ISO setting, usually between 100 and 200, to ensure the best image quality and minimize noise. In bright conditions, using a low ISO is entirely practical.
The shutter speed should be increased to reduce the amount of light reaching the sensor. Common values range from 1/500 to 1/2000 second, depending on the intensity of the light and your shooting objectives.
(1).jpg)
The aperture can be adjusted flexibly. If you want to create a blurred background effect, a wide aperture such as f/2.8 is a suitable choice. However, under strong sunlight, you may need to stop down the aperture slightly to avoid overexposure.
Additionally, an ND filter is a useful tool for reducing incoming light without changing other camera settings. This is particularly beneficial when you want to maintain a wide aperture in bright sunlight.
Once you master these settings, you will be able to fully control the light and create high-quality photographs in any condition.
6. Using Shadows Creatively for Artistic Effects
Shadows cast by leaves, window frames, curtains, or architectural elements can create very interesting patterns on the subject’s face and body. These alternating areas of light and shadow not only enhance visual appeal but also add depth, making the image more dynamic and emotionally engaging.
To use this element effectively, you need to pay attention to the direction of the light and the distance between the shadow-producing object and the subject. As you change the subject’s position or the angle of the light, the shape and sharpness of the shadows will also change. Shadows closer to the light source tend to be sharper and more contrasty, while shadows farther away become softer and subtler, making them suitable for a more refined style.
(2).jpg)
In addition, composition control is extremely important. Shadows should be used intentionally as part of the frame rather than appearing randomly and creating visual distractions. You can use shadows to guide the viewer’s eye, create focal points, or emphasize specific facial features such as the eyes or jawline.
Another factor to consider is the subject’s expression. When using strong shadows, you should encourage the subject to maintain a natural expression and avoid stiffness, as high-contrast lighting can easily reveal facial details. The combination of light, shadow, and expression will determine the unique “character” of the photograph.
Taking portrait photos under harsh sunlight is not impossible. On the contrary, it is an opportunity to improve your skills and explore new creative styles. By understanding light, choosing the right shooting angles, making use of shade, using reflectors, and controlling camera settings effectively, you can create impressive photographs even under the most challenging conditions.


VIP Products


Best Selling Products
Adobe Premiere Pro Account
99 USD
Capcut Pro 1 Year
39 USD
Upgrade Genuine Office 365
49 USD
Upgrade Duolingo Super
29 USD
Autodesk All App Account Copyright
120 USD
MidJourney Account
29 USD
Upgrade genuine Capture One account
120 USD
ChatGPT Plus Account (GPT-4)
16 USD
Plugin Retouch4me
69 USD
Genuine Cheap Canva Pro
39 USD
Windows 10 & 11 Pro Key
36 USD
Freepik Premium Account
59 USD
Copyright Adobe Lightroom Account
59 USD
Genuine Adobe Illustrator account
99 USD
Adobe Photoshop Copyright - Full App
120 USD