Best Selling Products

Plugin Retouch4me
69 USD

Upgrade genuine Capture One account
120 USD

Capcut Pro 1 Year
39 USD

Upgrade Duolingo Super
29 USD

Autodesk All App Account Copyright
120 USD

Upgrade Genuine Office 365
49 USD

Adobe Photoshop Copyright - Full App
120 USD

Genuine Adobe Illustrator account
99 USD

Freepik Premium Account
59 USD

Adobe Premiere Pro Account
99 USD

Genuine Cheap Canva Pro
39 USD

ChatGPT Plus Account (GPT-4)
16 USD

MidJourney Account
29 USD

Windows 10 & 11 Pro Key
36 USD

Copyright Adobe Lightroom Account
59 USD
Simple But Effective Photo Collage Secret: Combine Two Photos Into One As You Wish
Nội dung
- 1. Overview of Photo Collage Techniques
- 1.1 Concept and Meaning of Photo Collage
- 1.2 Popular Photo Collage Support Tools
- 2. Instructions for Combining Photos Using Photoshop
- 3. Instructions for Collaging Photos Using Canva
- 4. Creative Tips When Collaging Photos
- 4.1. Combining Light and Color Effects
- 4.2. Using Textures and Overlays
- 4.3. Exploiting Masking Tools Creatively
- 4.4. Switching Perspectives and Creative Compositions
- 4.5. Integrating Graphic Elements and Typography
- 4.6. Always Test and Learn
- 5. FAQ Section – Answers to Common Questions
- 5.1 Which Software Should I Use to Combine Photos Quickly and Effectively?
- 5.2 What Are Common Mistakes When Combining Photos and How to Fix Them?
- 5.3 What Are The Final Tweaking Tips To Ensure Natural Photos?
Discover how to transform two separate photos into one outstanding work of art. This article will share the “hidden” secrets to help you master the technique of combining color, light and special effects, creating photos that are not only beautiful but also full of creative inspiration.
Unique and impressive photos are the key to attracting customers' attention. Photo collage is not just a combination of two images but also the art of storytelling through images, creating new and engaging visual experiences. When you know how to take advantage of small but effective tips, you can turn "normal" photos into creative works of art. In this article, SaDesign will share "little-known" secrets to combine two photos in an extremely easy way, helping you improve the quality of your design products.
1. Overview of Photo Collage Techniques
Before going into each step, we need to have an overview of the photo collage technique.
1.1 Concept and Meaning of Photo Collage
Photo collage is the process of combining two or more images together to create a new work, not just a simple "gluing" but also requires sophisticated processing techniques to ensure the naturalness and coherence of the final photo. When you know how to skillfully combine photos, you can create unique effects, tell stories or convey messages powerfully.
.png)
1.2 Popular Photo Collage Support Tools
Nowadays, there are many tools to support photo collage, from professional software to convenient online applications:
Adobe Photoshop: The "standard" tool of the design industry, fully supporting necessary features from background separation, color processing to blend mode effects.
GIMP: A free option with many features similar to Photoshop, suitable for those with limited budgets but still want to create quality products.
Canva: For those who need a quick, easy-to-use solution with a wide range of templates available.
Other online tools: Many websites offer online photo collage tools that help you do this without installing software.
.png)
These tools not only help you create quality collages, but also open up a world of new creative possibilities.
2. Instructions for Combining Photos Using Photoshop
Photoshop is the most powerful tool, giving you creative freedom with many diverse features. Here is how to combine two photos into one using Photoshop:
Step 1: Open Photoshop and Create a New Document
Open Photoshop: Launch the Photoshop software on your computer.
Create a new document: Go to File > New or press the shortcut Ctrl + N.
In the New Document window, set the document size. You can customize the width and height to fit the two photos you want to merge. For example, if each of your photos is 1000×1000 pixels, you can set the width to 2000 pixels and the height to 1000 pixels.
Select a Resolution of 300 dpi if you want to print the image, or 72 dpi if you are only using it on the web.
.png)
Step 2: Open Two Photos to Merge
Open photos: Go to File > Open or press Ctrl + O, select the two photos you want to combine.
Move the image to a new document:
Use the Move Tool (shortcut V) to drag each image from its working window into the new document.
As you drag images in, they will automatically be created as separate Layers in the new document.
Step 3: Align the Image
Select Layer: In the Layers Panel, make sure you have selected the correct Layer containing the image you want to align.
Align the image: Use the Move Tool to move and position the image in the desired position: You can use Free Transform by pressing Ctrl + T to resize or rotate the image. Drag the corners to adjust the size without distorting the image (hold down the Shift key while dragging to maintain the image's proportions).
.png)
Step 4: Fine-tune the Photo Collage
Layer Mask: If you want to soften the edges between two images or create a transition effect, you can use a Layer Mask.
Select the Layer you want to add a mask to and click the Add Layer Mask icon at the bottom of the Layers Panel.
Use the Brush Tool with black color to mask out unwanted parts of the image on the Layer mask. White color will restore the masked parts.
Color Correction: Use tools like Levels, Curves, or Hue/Saturation to adjust the colors so that the two photos match.
.png)
Step 5: Save Image
Once you're happy with the results, you can save your image by going to File > Save As. Choose an appropriate format like JPEG, PNG, or PSD if you want to save the layers for later editing.
3. Instructions for Collaging Photos Using Canva
If you're not familiar with complex software like Photoshop, Canva is a great choice for online photo collages:
Step 1: Create New Design
Go to Canva, log in or create an account. Select “Create a design” and choose a canvas size that fits your idea.
Step 2: Upload and Drag and Drop Photos
Use the “Uploads” tool to upload the two photos you want to combine. Then, drag and drop the photos onto the canvas and align them as you like.
Step 3: Add Effects and Text
Canva offers a variety of tools to add effects, borders, and text. You can use them to make your photos more interesting.
Step 4: Save and Share
When you’re done, click “Download” to save your image as a PNG or JPEG. You can also share it directly from Canva to social media.
.png)
4. Creative Tips When Collaging Photos
Once you have mastered the basics of photo collage, the next step is to get creative with your design. Here are some creative tips that you can use to create unique and impressive photo collages:
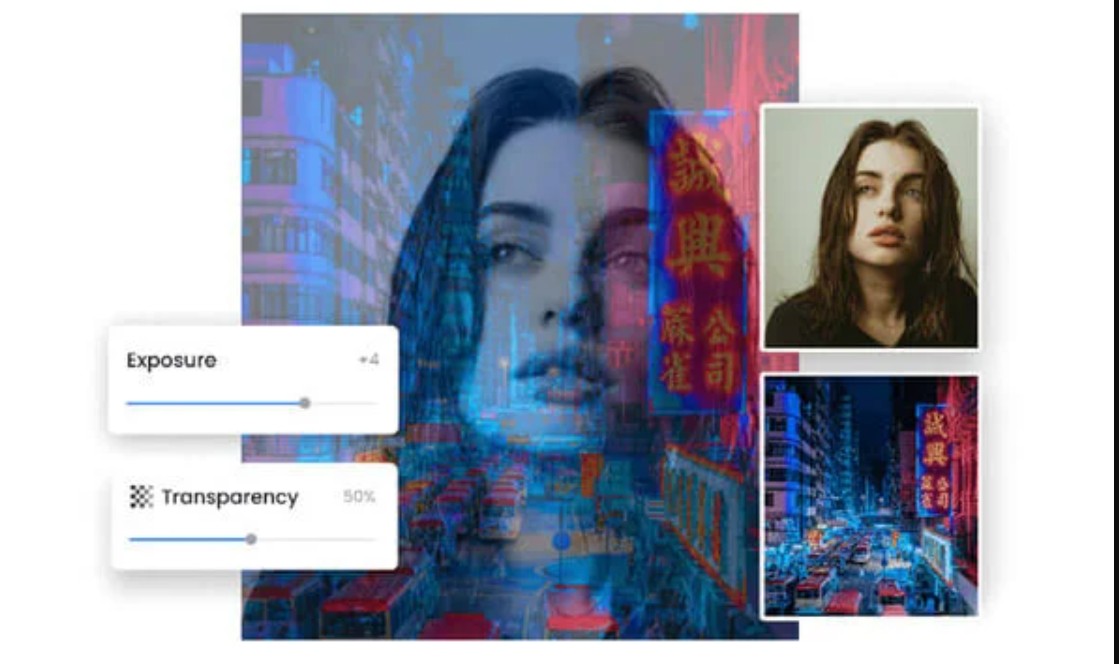
4.1. Combining Light and Color Effects
Create soft lighting effects: Use tools like “Gaussian Blur” or “Lens Flare” to create soft light trails that help connect parts of the photo naturally.
Color Shifting: Experiment with color adjustments to create interesting synchronicities or contrasts between elements, highlighting specific parts of the photo.
4.2. Using Textures and Overlays
Add texture: Applying textures like paper, metal or wood can add life and depth to your photos.
Overlay Mode: Combine photo layers with overlay or soft light mode to create smooth transitions between elements, giving your photos depth and style.
.png)
4.3. Exploiting Masking Tools Creatively
Detail Masking: Use masking techniques not only to isolate objects but also to create unique transformation effects. You can “paint” additional transitions between image areas to blur the boundaries naturally.
Layer Mask with Soft Brush : Use a soft brush with low opacity to refine the mask, helping the edges of the object blend into the background in the most natural way.
4.4. Switching Perspectives and Creative Compositions
Change the scale and perspective: Sometimes flipping, rotating, or changing the scale of individual parts of an image can create a unique photo that surprises the viewer. Don't be afraid to experiment with different angles to find interesting combinations.
Unique layout: Try arranging elements in an asymmetrical layout or creating a “break” effect. This not only draws the eye but also shows the designer’s personal stamp.
4.5. Integrating Graphic Elements and Typography
Incorporate Graphics: Don’t limit yourself to just images. Try adding graphic elements like vectors, icons, or textures to add an artistic touch to your photo.
Creative Typography: If your collage comes with a message or story, consider integrating typography with a harmonious design style that is both artistic and helps convey the message clearly.
.png)
4.6. Always Test and Learn
Stay up to date with new trends: Technology and design trends are always changing. Always look for and experiment with new plugins, filters, or cutting-edge techniques to stay current.
Experiment constantly: Don't be afraid to try different combinations even if the results don't turn out as expected at first. Each experiment is a step forward in perfecting your personal style.
The creative tips above not only help your collage stand out, but also show your personality and creativity in each piece.
5. FAQ Section – Answers to Common Questions
To help you better understand the photo collage process, here are some frequently asked questions with specific answers:
5.1 Which Software Should I Use to Combine Photos Quickly and Effectively?
If you are a beginner, Canva and other online tools with friendly and easy-to-use interfaces will be the right choice. However, if you require sophistication and detailed processing, Adobe Photoshop will be a "powerful assistant" with a series of professional tools.
.png)
5.2 What Are Common Mistakes When Combining Photos and How to Fix Them?
Some common errors include:
Color Inconsistency: Fix using color balance tools, adjust lighting and contrast.
Unnatural object edges: Use feather and refine edge techniques to smooth the edges.
Crisp collage effects: Apply blend modes and masking effects to smoothly combine photo layers.
5.3 What Are The Final Tweaking Tips To Ensure Natural Photos?
In addition to the tips mentioned, the best way to improve your skills is to continually experiment and learn from real projects. Staying up to date with new plugins and design trends will help you stay on top of the art of photo collages.
Successful photo collages are not simply a matter of “gluing” two photos together, but rather a process of creativity, artistic thinking, and practical experience accumulated over time. If you are looking to improve your design skills, start with the most basic steps shared in this article. Experiment, create, and share your results.


VIP Products


Best Selling Products
Plugin Retouch4me
69 USD
Upgrade genuine Capture One account
120 USD
Capcut Pro 1 Year
39 USD
Upgrade Duolingo Super
29 USD
Autodesk All App Account Copyright
120 USD
Upgrade Genuine Office 365
49 USD
Adobe Photoshop Copyright - Full App
120 USD
Genuine Adobe Illustrator account
99 USD
Freepik Premium Account
59 USD
Adobe Premiere Pro Account
99 USD
Genuine Cheap Canva Pro
39 USD
ChatGPT Plus Account (GPT-4)
16 USD
MidJourney Account
29 USD
Windows 10 & 11 Pro Key
36 USD
Copyright Adobe Lightroom Account
59 USD