Best Selling Products

Plugin Retouch4me
69 USD

Upgrade Duolingo Super
29 USD

Windows 10 & 11 Pro Key
36 USD

Capcut Pro 1 Year
39 USD

Copyright Adobe Lightroom Account
59 USD

Autodesk All App Account Copyright
120 USD

ChatGPT Plus Account (GPT-4)
16 USD

Upgrade Genuine Office 365
49 USD

MidJourney Account
29 USD

Adobe Photoshop Copyright - Full App
120 USD

Genuine Cheap Canva Pro
39 USD

Adobe Premiere Pro Account
99 USD

Upgrade genuine Capture One account
120 USD

Genuine Adobe Illustrator account
99 USD

Freepik Premium Account
59 USD
The Art of Restoring and Editing Old Photos Professionally Using Photoshop
Nội dung
- 1. Data Preparation Process for Digitization to Meet Input Standards
- 1.1 Image scanning techniques using specialized scanners
- 1.2 Re-capture using a mechanical camera when a scanner is unavailable.
- 2. Setting Up the Workspace and Assessing the Current Resource Situation
- 2.1 Analysis of damage zones on the structural surface
- 2.2 Rules for duplicating the original layer while preserving data
- 3. Procedure for Removing Tears and Physical Defects
- 3.1 Application of intelligent automated debugging tools
- 3.2 Surface Reconstruction using Manual Sampling Brush
- 3.3 Patching large lesions using localized techniques
- 4. Enhance your graphic design skills on the Appvip.ai platform.
- 5. Restore Contrast and Detail in Bright and Dark Areas
- 5.1 Adjusting the light chart using the leveling toolbar
- 5.2 Controlling transition area contrast using graphical curves
- 6. Techniques for Reconstructing Details in Severely Blurry Portraits
- 6.1 Recreating the character's eyes and expression
- 6.2 Treating leather materials to avoid patching
- 7. The Art of Colorizing Vintage Black and White Photos
- 7.1 Choosing skin tone that matches your race
- 7.2 Studying clothing colors and historical context
- 8. Artificial Intelligence Filters Support Breakthroughs in Processing Time
- 8.1 One-click automatic old photo restoration filter
- 8.2 Deep Machine Learning-Based Automatic Coloring Tools
- 9. Fatal Mistakes to Avoid During the Restoration Process
- 9.1 Over-smoothing the surface causes the photographic paper to lose its texture.
- 9.2 Using overly bright colors that distort reality
- 10. Steps to Export Files in Standard Formats for Printing and Archiving
- 10.1 Converting color systems to suit the intended use.
- 10.2 Selecting optimal data compression parameters
- 11. Conclusion
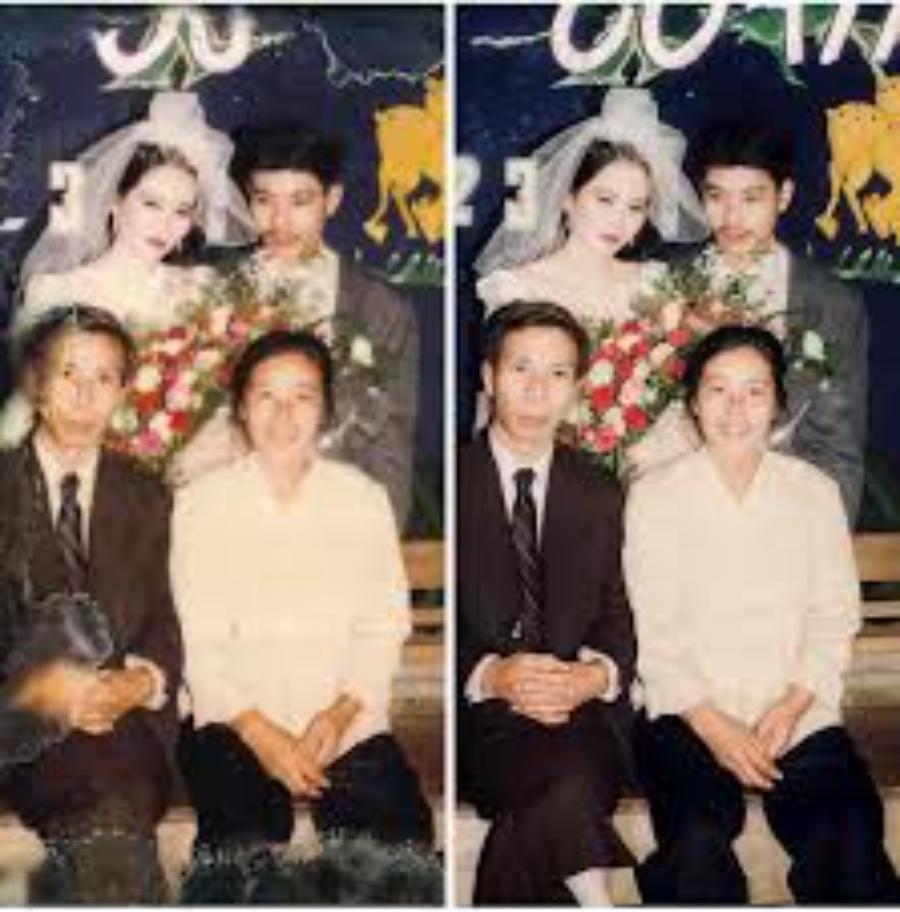
A detailed guide on how to professionally edit old photos using Photoshop. Discover the process of restoring torn, yellowed, or blurry old photos into sharp, vibrant images step-by-step, SEO-friendly versions.
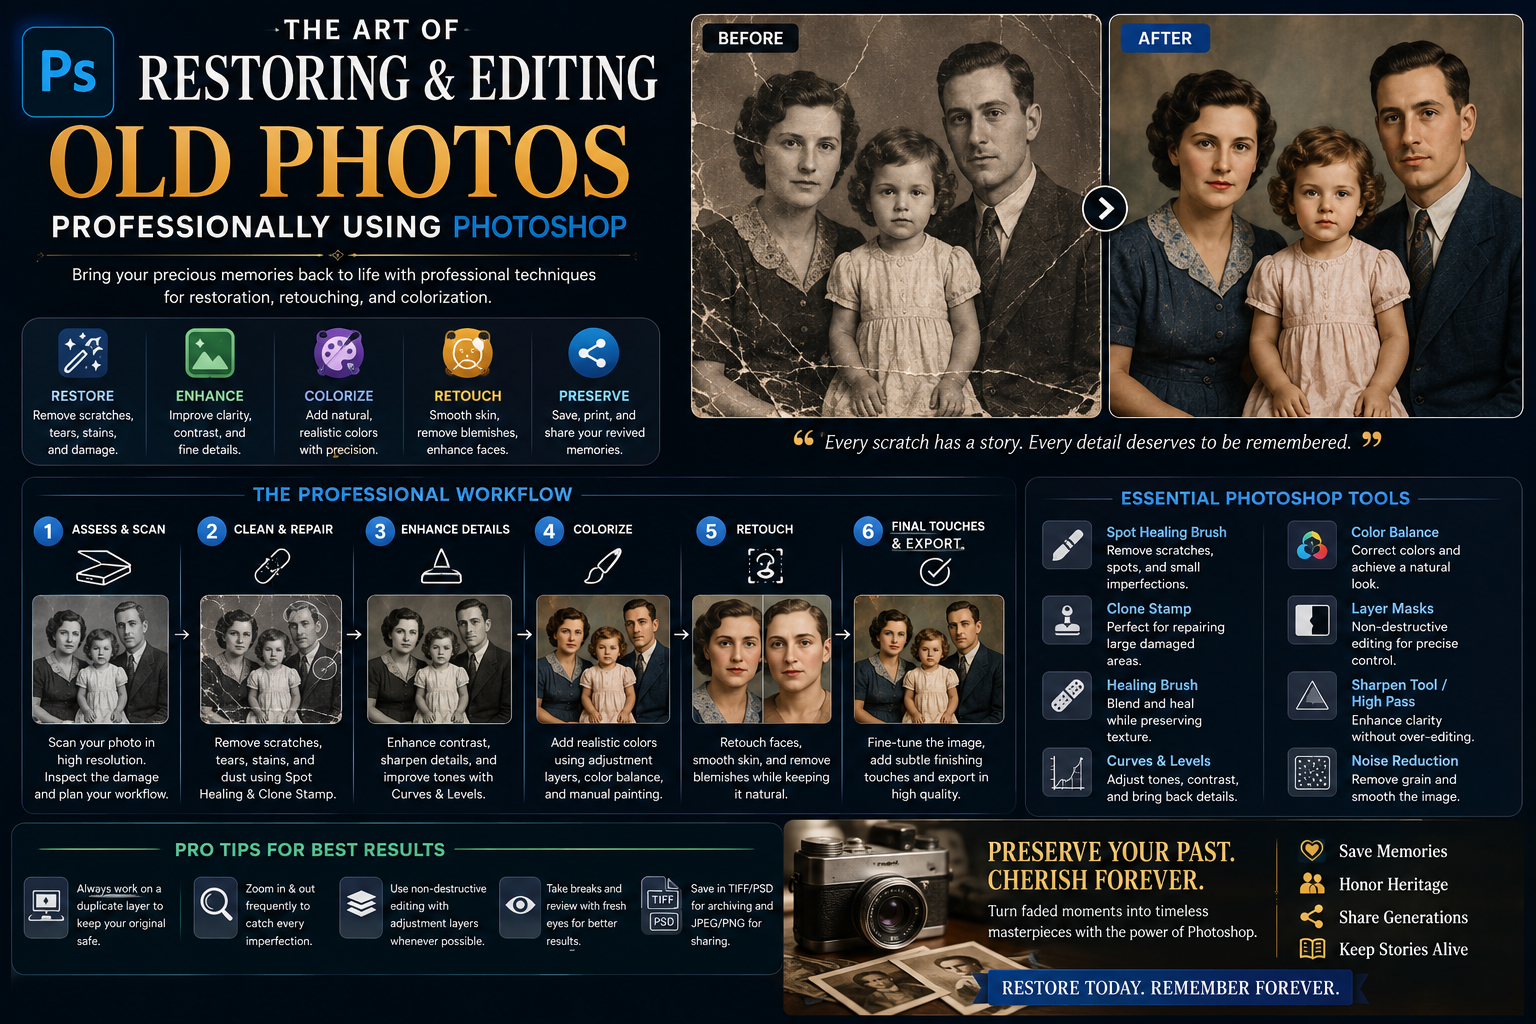
1. Data Preparation Process for Digitization to Meet Input Standards
The quality of the edited file depends entirely on this initial step. Improper digitization will result in the loss of detail in both dark and bright areas, making subsequent processing difficult.
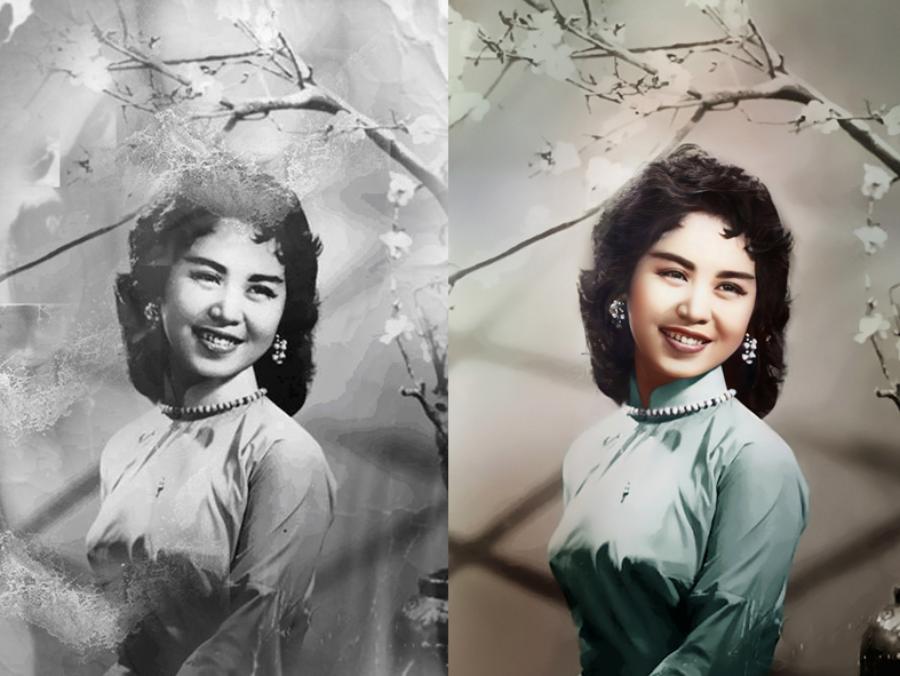
1.1 Image scanning techniques using specialized scanners
The scanning device should be set to a minimum resolution of 300 DPI to 600 DPI to preserve the original image grain structure. The user should prioritize exporting the file in TIFF format instead of JPEG to avoid data loss due to compression.
1.2 Re-capture using a mechanical camera when a scanner is unavailable.
The camera stand must be positioned perfectly parallel to the surface of the old photograph to avoid distortion of the viewing angle. The light source should be evenly distributed on both sides, completely eliminating shadows and light reflections on the glossy photographic paper.
2. Setting Up the Workspace and Assessing the Current Resource Situation
Each piece of artwork is damaged in a unique way, requiring the craftsman to have an overall view before intervening with tools.
2.1 Analysis of damage zones on the structural surface
The image needs to be broken down into specific error areas, including biological stains, crow's feet tears, and areas that have completely lost detail. This identification helps you plan the appropriate tool usage, avoiding smearing the subject's facial skin or eyes.
2.2 Rules for duplicating the original layer while preserving data
The first step when opening a file in the software is always to press the copy key combination to create a new working layer. Any previous photo edits in Photoshop must be done on separate layers, allowing users to compare results and correct errors at any time.
3. Procedure for Removing Tears and Physical Defects
This stage demands the utmost patience from the designer, where classic graphic design software tools come into play.
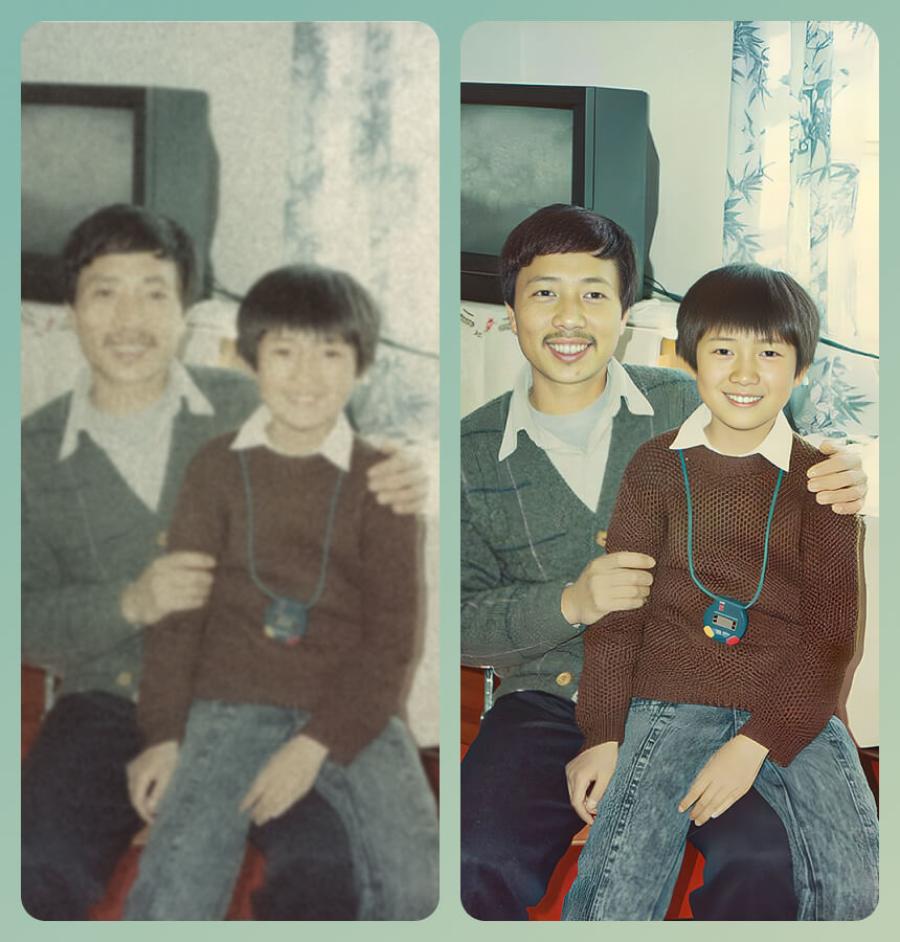
3.1 Application of intelligent automated debugging tools
Tiny dust particles and mold spots will be quickly cleaned up with the smart brush. The automatic neighborhood sampling mechanism helps clean the photo paper surface without leaving any editing marks.
3.2 Surface Reconstruction using Manual Sampling Brush
For large tears that cut across clothing or backdrops, a manual sampling brush is the ultimate tool. The craftsman needs to select an area with just the right amount of blurring at the edges, constantly changing the sampling point so that the surface structure looks natural and the texture isn't repeated.
3.3 Patching large lesions using localized techniques
Areas with missing corners or extensive damage will be treated by isolating intact areas with similar characteristics, then filling in the missing areas. Adjusting the edge blending ensures the patched area blends seamlessly into the original image background.
4. Enhance your graphic design skills on the Appvip.ai platform.
Appvip.ai is known as a comprehensive online portal providing premium account solutions and licensed graphic resources to best serve the design community in Vietnam. This site offers easy access to artificial intelligence tools, advanced photo editing software, and a high-quality resource library. With automated support services and a reliable warranty policy, it serves as a springboard for designers to optimize their work time, enhance their aesthetic sense, and elevate product quality in the digital age.
5. Restore Contrast and Detail in Bright and Dark Areas
Old photographs often appear blurry and flat, lacking depth due to the natural fading of ink and paper.
5.1 Adjusting the light chart using the leveling toolbar
The light level adjustment system helps redefine the absolute black and white points of the image. This operation instantly removes any hazy areas, restoring clarity and sharpness to the overall architectural space or portrait.
5.2 Controlling transition area contrast using graphical curves
Sinusoidal graphs allow designers to deeply manipulate the midtones, making facial features and clothing folds more visible. Skillfully increasing contrast transforms a flat image into a vibrant and spatially profound one.
6. Techniques for Reconstructing Details in Severely Blurry Portraits
The face is the soul of a portrait, but it's also the most difficult area to restore when the details of the facial features have faded or become damaged.
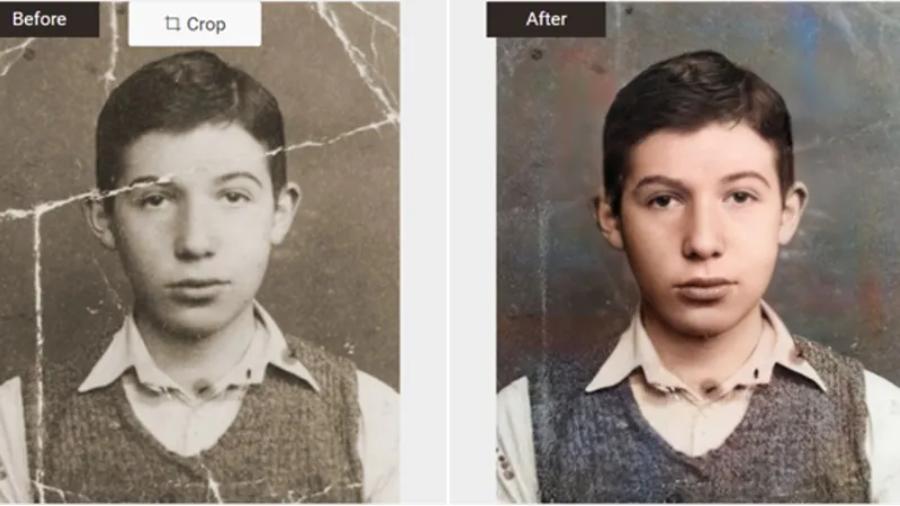
6.1 Recreating the character's eyes and expression
The artist needs to search for documents from blood relatives or other photographs from the same period for reference. Recreating the eye and pupil requires high accuracy in anatomical proportions and the original direction of light.
6.2 Treating leather materials to avoid patching
A common mistake is over-smoothing the skin, making the face look like a wax statue. The audio-visual frequency separation technique should be applied to both remove blemishes and preserve the natural grain texture of human skin.
7. The Art of Colorizing Vintage Black and White Photos
Transforming a black-and-white photograph into a vibrant color image is an advanced test of aesthetic thinking and historical understanding for a graphic designer.
7.1 Choosing skin tone that matches your race
Human skin tone is never a single color but a blend of pink, yellow, and visible blood vessels. Using color blending layers in Color mode combined with a soft brush mask helps the skin achieve a natural, rosy complexion.
7.2 Studying clothing colors and historical context
Editing old photos using Photoshop requires knowledge of the fashion, military uniforms, or architecture of that era. Accurately coloring a soldier's uniform, a mossy wall, or a vintage car helps preserve the valuable historical value of the work.
8. Artificial Intelligence Filters Support Breakthroughs in Processing Time
The emergence of next-generation AI features in software helps shorten hours of manual labor with just a few intelligent algorithms.
8.1 One-click automatic old photo restoration filter
The AI-integrated advanced restoration feature can automatically detect tiny scratches, smooth out noise, and intelligently rebalance human skin tones, creating a clean base before the artist can proceed with deeper work.
8.2 Deep Machine Learning-Based Automatic Coloring Tools
The algorithm analyzes the context of the image to make predictions about the colors of the trees, sky, and clothing. While not perfectly accurate, this is still an incredibly useful color suggestion for shaping the overall atmosphere of the photograph.
9. Fatal Mistakes to Avoid During the Restoration Process
Lack of experience or excessive use of tools often diminishes the core value and soul of ancient works.
9.1 Over-smoothing the surface causes the photographic paper to lose its texture.
Many people try to eliminate all the noise, making the photo look flat and lose its vintage feel. The smooth, textured surface of vintage photographic paper is an artistic value that should be respected and preserved.
9.2 Using overly bright colors that distort reality
Applying overly saturated modern color palettes makes the restored photograph look gaudy and completely detached from its historical context. Properly restored colors should have a subdued tone and smooth color transitions.
10. Steps to Export Files in Standard Formats for Printing and Archiving
After completing a graphic design project, the publishing process needs to be taken seriously to ensure optimal display quality across all media.
10.1 Converting color systems to suit the intended use.
If the product is only intended for digital storage and social media posting, the RGB color system is the default choice. Conversely, if the photo is to be printed in large sizes on photo paper, you must convert it to the CMYK color system to avoid color inaccuracies.
10.2 Selecting optimal data compression parameters
Export the file in the highest quality format with zero compression. Saving an additional original file containing all the edited layers is crucial to allow for further adjustments according to client requirements later.
11. Conclusion
The process of editing old photos using Photoshop is not simply a dry graphic technique, but a harmonious combination of modern technology, artistic thinking, and a deep appreciation for historical value. Each brushstroke and color blend is skillfully balanced to connect the past with the present, preserving the smiles and spirit of those who came before for future generations. Mastering these skills not only brings high economic value to the designer but also contributes a profound humanitarian act to the community and family.





















VIP Products








Best Selling Products
Plugin Retouch4me
69 USD
Upgrade Duolingo Super
29 USD
Windows 10 & 11 Pro Key
36 USD
Capcut Pro 1 Year
39 USD
Copyright Adobe Lightroom Account
59 USD
Autodesk All App Account Copyright
120 USD
ChatGPT Plus Account (GPT-4)
16 USD
Upgrade Genuine Office 365
49 USD
MidJourney Account
29 USD
Adobe Photoshop Copyright - Full App
120 USD
Genuine Cheap Canva Pro
39 USD
Adobe Premiere Pro Account
99 USD
Upgrade genuine Capture One account
120 USD
Genuine Adobe Illustrator account
99 USD
Freepik Premium Account
59 USD