Best Selling Products

Autodesk All App Account Copyright
120 USD

Plugin Retouch4me
69 USD

Adobe Premiere Pro Account
99 USD

Adobe Photoshop Copyright - Full App
120 USD

Genuine Cheap Canva Pro
39 USD

ChatGPT Plus Account (GPT-4)
16 USD

Upgrade Duolingo Super
29 USD

MidJourney Account
29 USD

Windows 10 & 11 Pro Key
36 USD

Capcut Pro 1 Year
39 USD

Freepik Premium Account
59 USD

Genuine Adobe Illustrator account
99 USD

Upgrade Genuine Office 365
49 USD

Upgrade genuine Capture One account
120 USD

Copyright Adobe Lightroom Account
59 USD
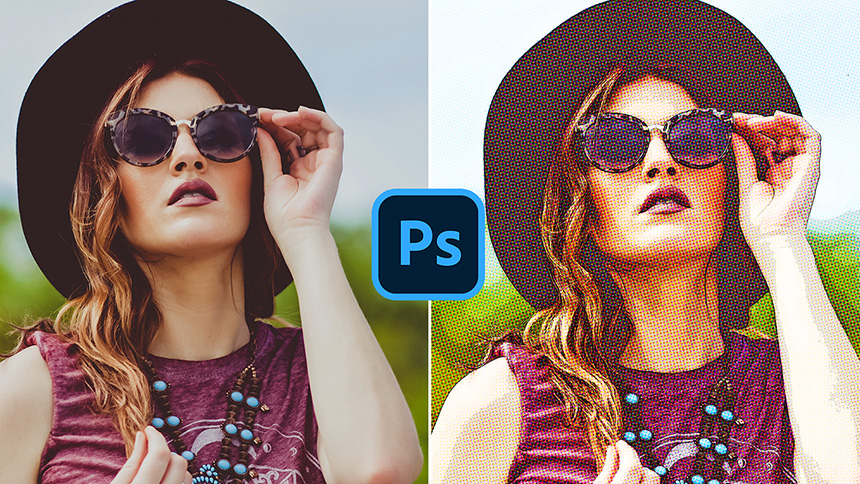
Turn Photos Into Cartoon Chibi Effect

Hi, welcome to SaDesign channel, today I’ll share with you technique to create cartoon filter in Photoshop.
After opening your photo, use Lasso tool to make the selection of his head. We will make the head a little bit bigger than the body.
Press SHIFT+F6 to add 1 pixel of feather radius to it.

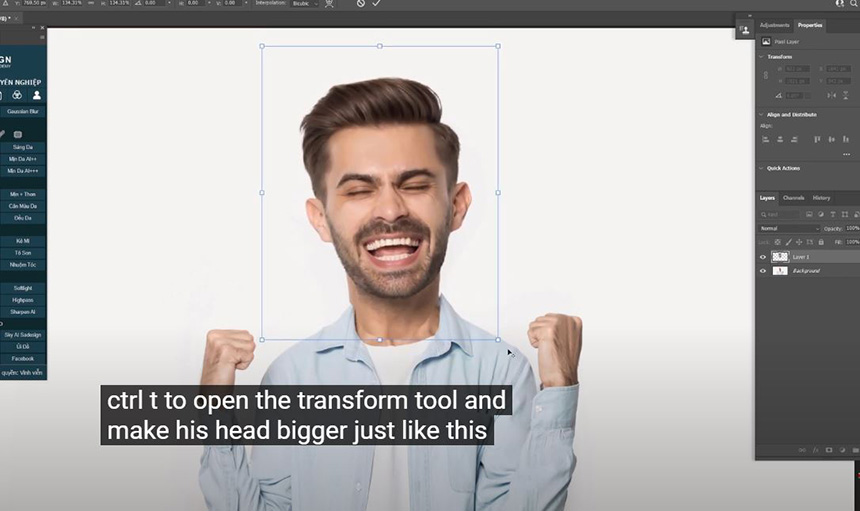
Now, take the selection to new layer with CTRL or CMD + J CTRL+T to open the transform tool and make his head bigger just like this.
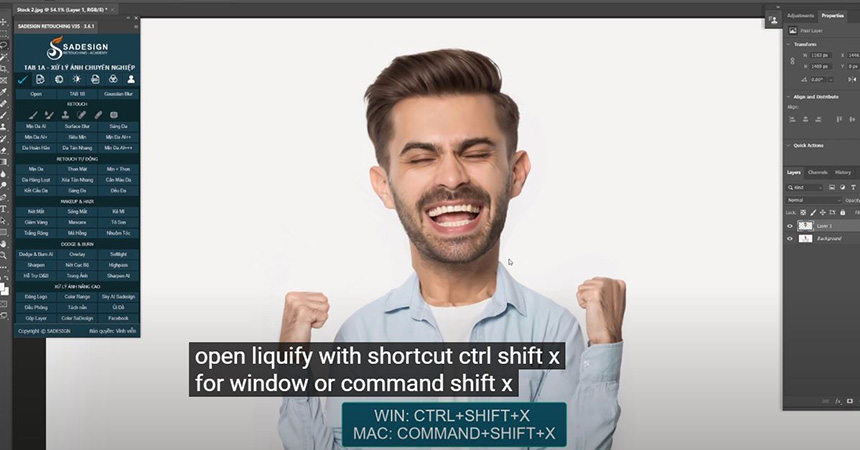
Open Liquify with shortcut CTRL+SHIFT+X for Window or CMD+SHIFT+X for MAC.
We will use forward warp tool to pinch his neck just to match with the body. Use bracket [ ] to increase or decrease brush size. Hit OK.
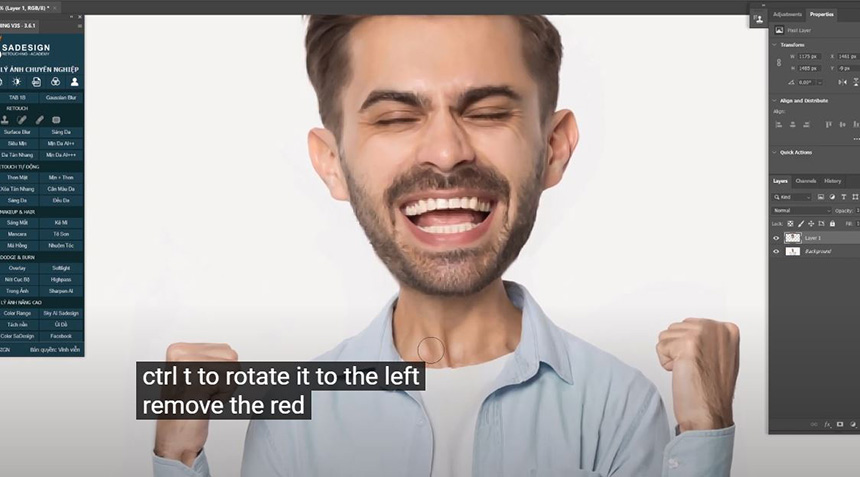
Adjust the opacity to 50% so we can see the below layer. Zoom in, use eraser tool to remove both sides of the neck, make sure opacity just around 50%. Fade a little bit in the middle. There you go! CTRL+T to rotate it to the left.
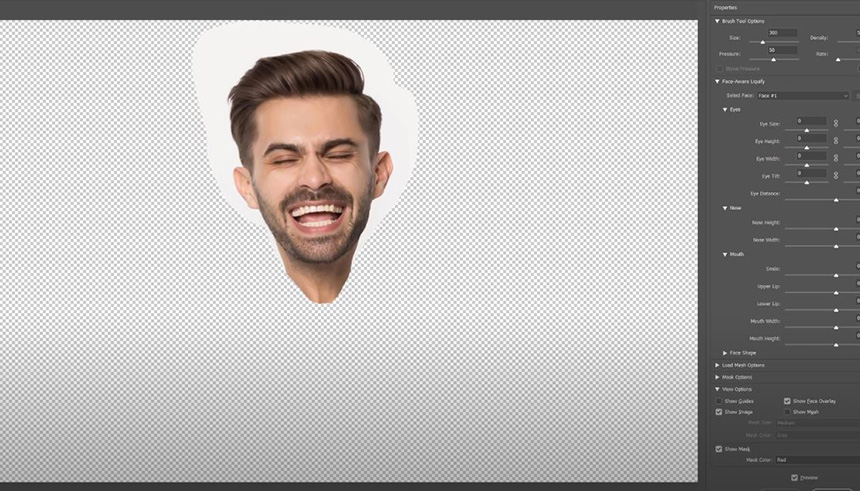
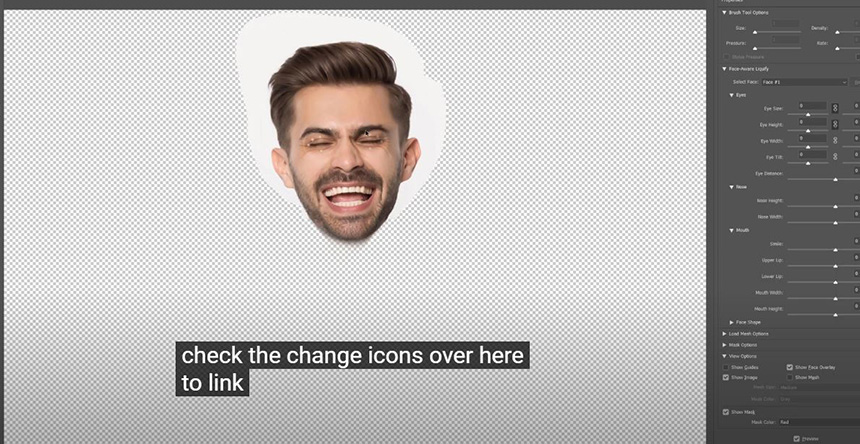
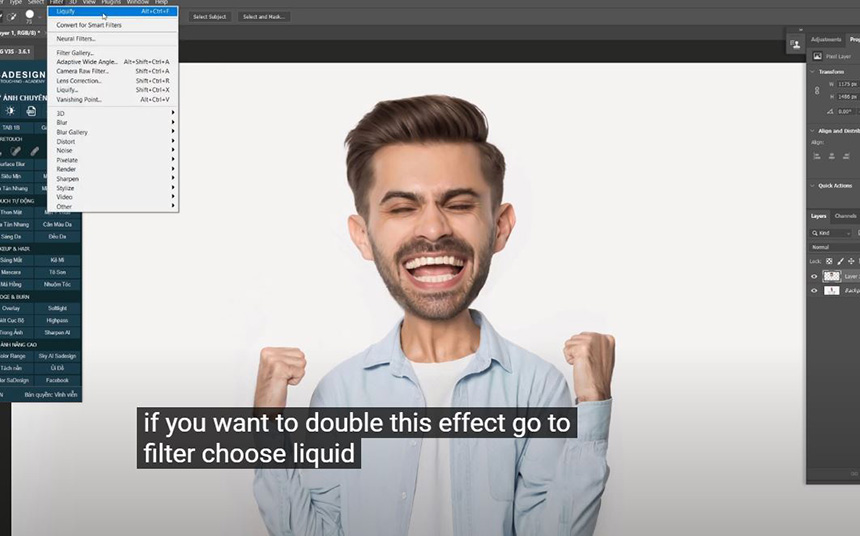
Remove the rest of his beard that is still left on the neck. Zoom out to have an overview before moving to the next step. It’s good. Now we are going to make some adjustments to the facial expression. CTRL+SHIFT+X to open Liquify again. Pick up Face tool, now, you can freely change the shape of eyes, nose, mouth or face. For the eyes, if you want to make changes for both eyes at a time, check these chain icons over here, to link the amount of the left and right eyes when you set. Now, let’s make his eyes, nose and mouth bigger, wider. OK
If you want to double this effect. Go to Filter and choose “Liquify”. This is before and this is after.
Select both layers and merge into one with shortcut CTRL or CMD+E Next, we are going to cut the subject out of the background. Head to Select > Subject. Since the background is pure white so Photoshop AI easily makes the selection quite accurate.
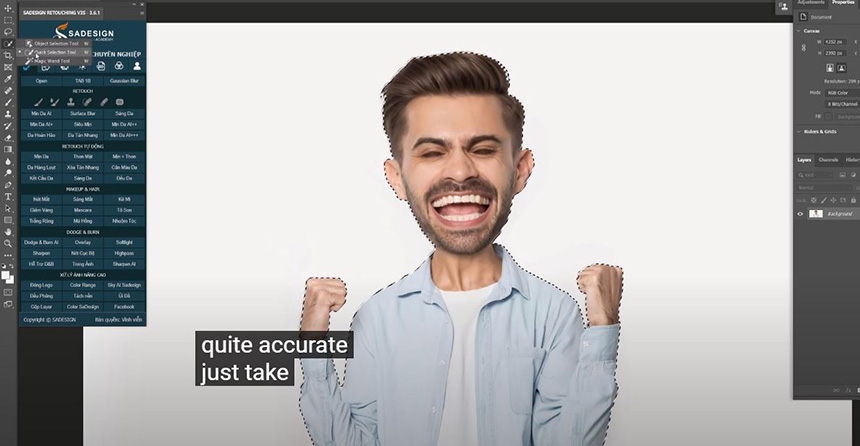
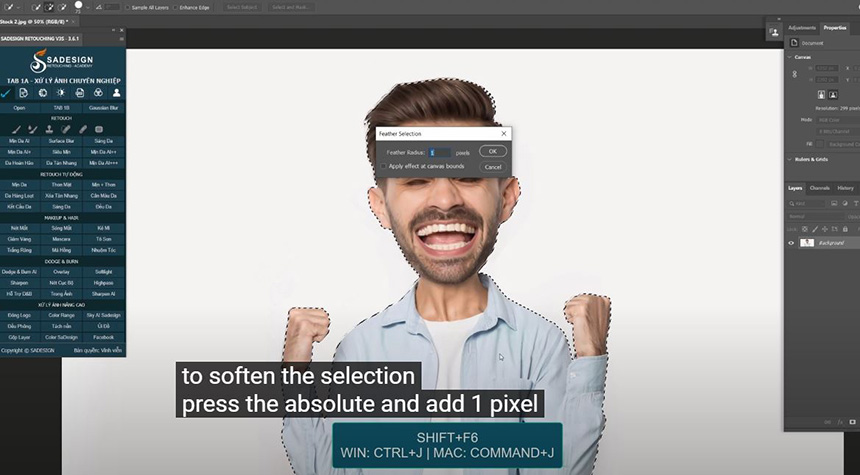
Just take quick selection tool to add a bit of his shirt.To soften the selection, press Shift+f6 and add 1 pixel of feather radius. CTRL or CMD +J to take it to new layer. Next, convert the subject layer into smart object so we can modify non-destructively.
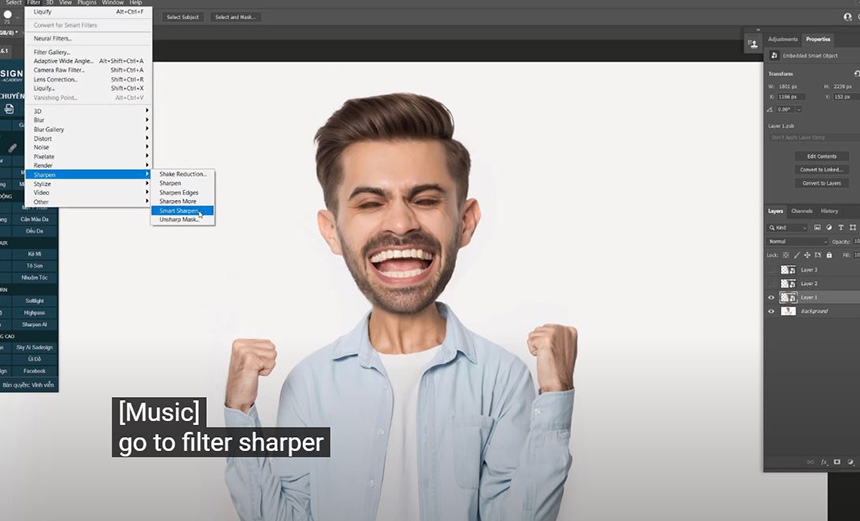
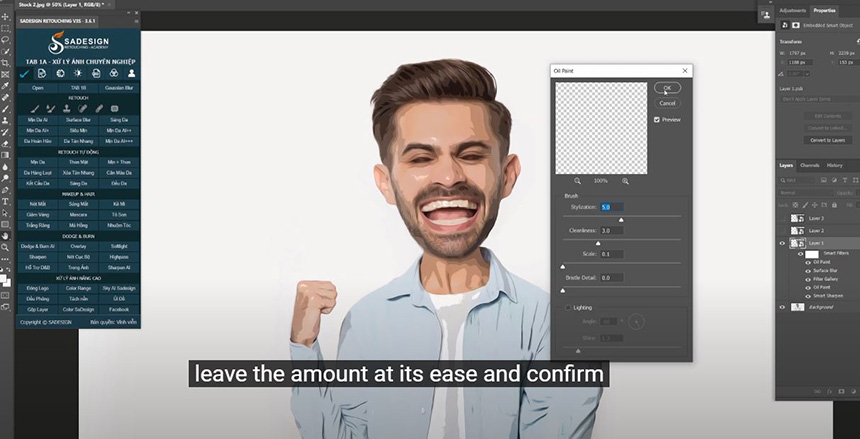
Duplicate it twice by pressing CTRL or CMD + J two times. Rename these copy layers to layer 2 and layer 3 so that we can easily to manage. Turn off layer 2 and 3, in Layer 1, go to Filter > Sharpen > Smart Sharpen > set values as below: Amount 200% Radius 1.5 pixels Reduce noise 10% Lens Blur in remove box. Confirm Then, filter > Stylize > Oil Paint > Stylization: 5 Cleanliness 3 Scale 0.1 OK
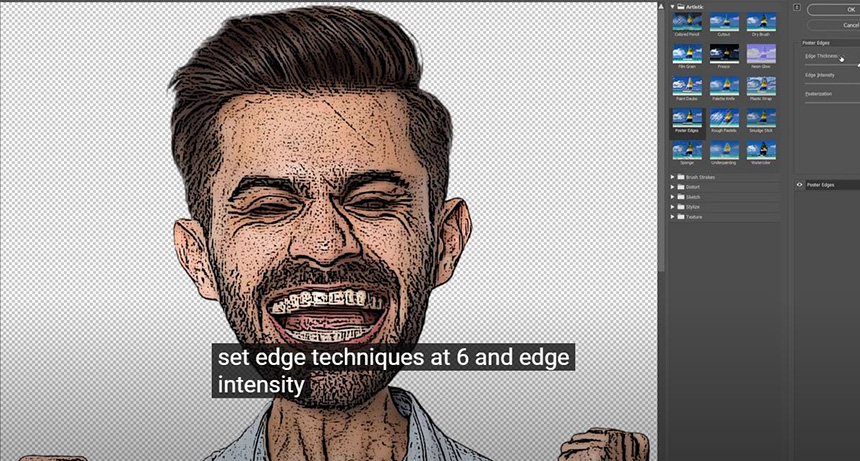
Change its blend mode to “Overlay” and opacity around 30% Press CTRL+J to duplicate Layer 2 In layer 2 copy, double click to “Filter Gallery” to change the amount. Set Edge Thickness at 6 and Edge Intensity at 7 OK
Change Overlay to “Pin light” in blend mode. Adjust opacity to 80% Finally, turn on layer 3, go to Filter > Other > High Pass > 2 pixels > OK Change blend mode to Overlay Increase color intensity with Vibrance adjustment layer, set vibrance at 46
Open Levels adjustment layer, increase black areas to 8. Alright! That’s all for this tutorial, hit like and leave comments if you have any questions. Thanks for watching!
Watch the video here:
REGISTER FOR FREE PHOTOSHOP LEARNING
============================
The most powerful Retouch tool processor
DOWNLOAD:
✅ SADESIGN PANEL ENGLISH: https://sadesign.ai/retouching/
✅ SADESIGN PANEL VIETNAM: https://www.retouching.vn/


VIP Products


Best Selling Products
Autodesk All App Account Copyright
120 USD
Plugin Retouch4me
69 USD
Adobe Premiere Pro Account
99 USD
Adobe Photoshop Copyright - Full App
120 USD
Genuine Cheap Canva Pro
39 USD
ChatGPT Plus Account (GPT-4)
16 USD
Upgrade Duolingo Super
29 USD
MidJourney Account
29 USD
Windows 10 & 11 Pro Key
36 USD
Capcut Pro 1 Year
39 USD
Freepik Premium Account
59 USD
Genuine Adobe Illustrator account
99 USD
Upgrade Genuine Office 365
49 USD
Upgrade genuine Capture One account
120 USD
Copyright Adobe Lightroom Account
59 USD