Best Selling Products

Autodesk All App Account Copyright
120 USD

Adobe Premiere Pro Account
99 USD

Upgrade genuine Capture One account
120 USD

Windows 10 & 11 Pro Key
36 USD

Upgrade Duolingo Super
29 USD

Capcut Pro 1 Year
39 USD

Freepik Premium Account
59 USD

Genuine Cheap Canva Pro
39 USD

Copyright Adobe Lightroom Account
59 USD

Upgrade Genuine Office 365
49 USD

Adobe Photoshop Copyright - Full App
120 USD

Plugin Retouch4me
69 USD

ChatGPT Plus Account (GPT-4)
16 USD

MidJourney Account
29 USD

Genuine Adobe Illustrator account
99 USD
Create water reflection effects in Photoshop with SaDesign
You can absolutely create photos with cool water reflection effects using Photoshop software. With a combination of many tools, you will get photos with extremely realistic shadows reflected in water ripples. Join us to learn about the steps to create water reflection effects in Photoshop right below.

You can absolutely create photos with cool water reflection effects using Photoshop software. With a combination of many tools, you will get photos with extremely realistic shadows reflected in water ripples. Join us to learn about the steps to create water reflection effects in Photoshop right below.
Steps to create water reflection effect in Photoshop
To be able to create a water reflection effect in Photoshop, we need to combine many tools, go through many different steps, specifically as follows:
Step 1: The first step is to open the image you want to create the effect reflection water in Photoshop.
On the menu bar, select File => Open => the image needs to create a water reflection effect => OK.
Or press the keyboard shortcut Ctrl+O => Select the photo and press OK.
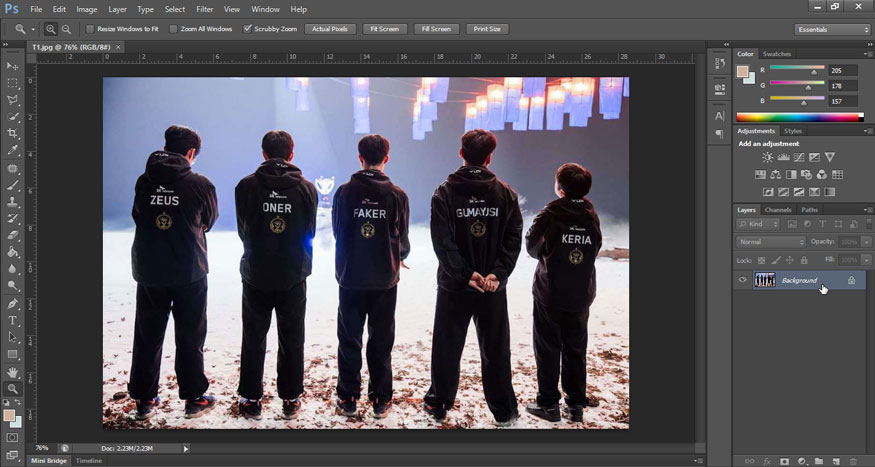
Step 2: In the Layers panel, you can see that the Background layer containing the image is locked, represented by the lock icon on the right side. We need to unlock this layer so we can place other layers below.
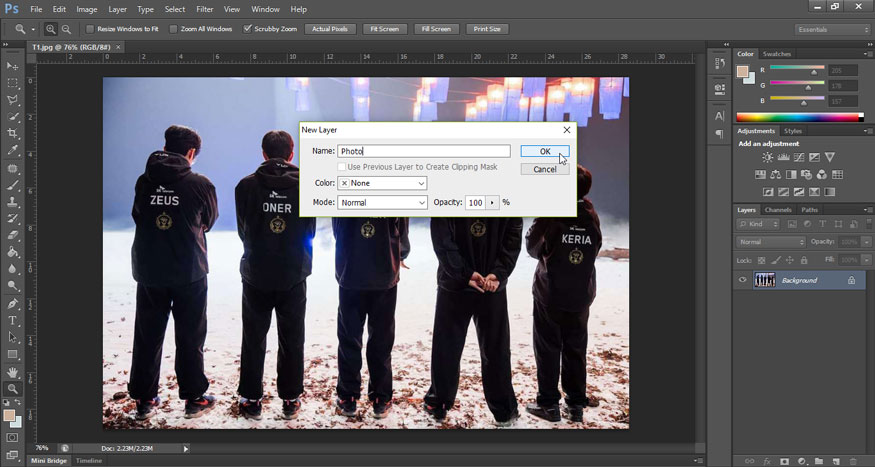
Double click on the Background layer and give it a name. For example, I named this layer as "Photo".
Step 3: Make a copy of the Photo layer. We will use this copy to create a water reflection effect in Photoshop. Hold down the Alt (Win) / Option (Mac) key on the keyboard and then drag the Photo layer down to the Create a new layer icon at the bottom of the layers panel. A dialog box appears, please name this copy layer. For example, I named it as “Reflection”.
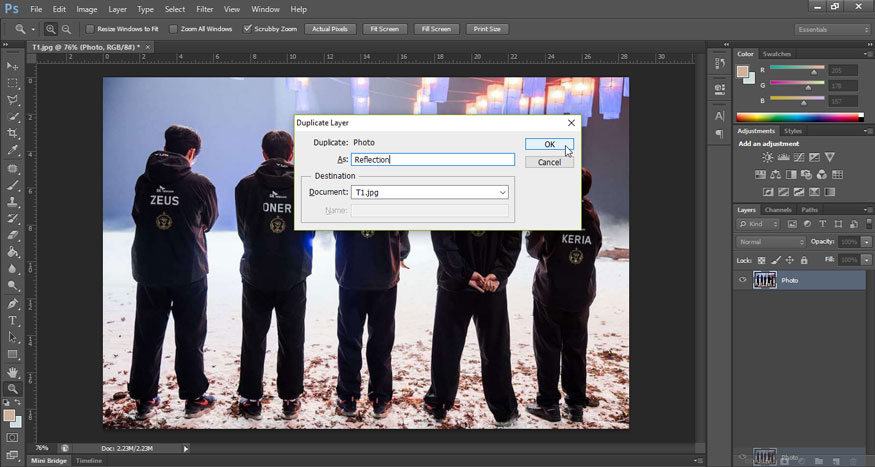
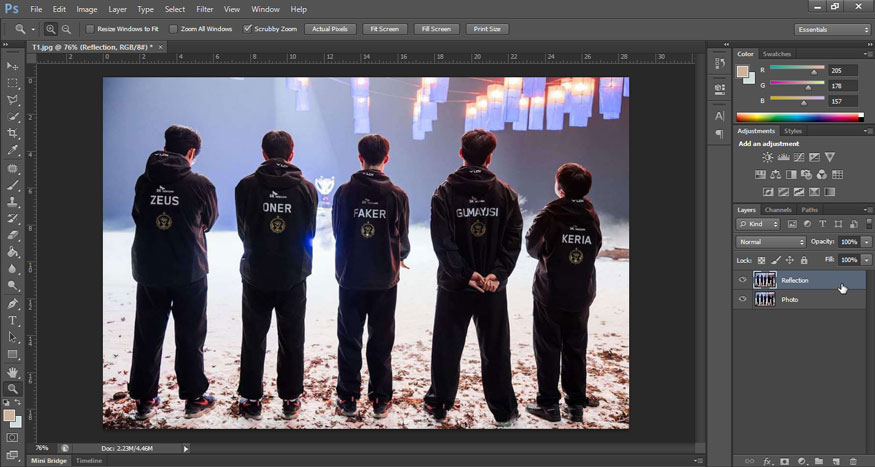
Now, the Reflection layer will appear above the Photo layer as shown below.
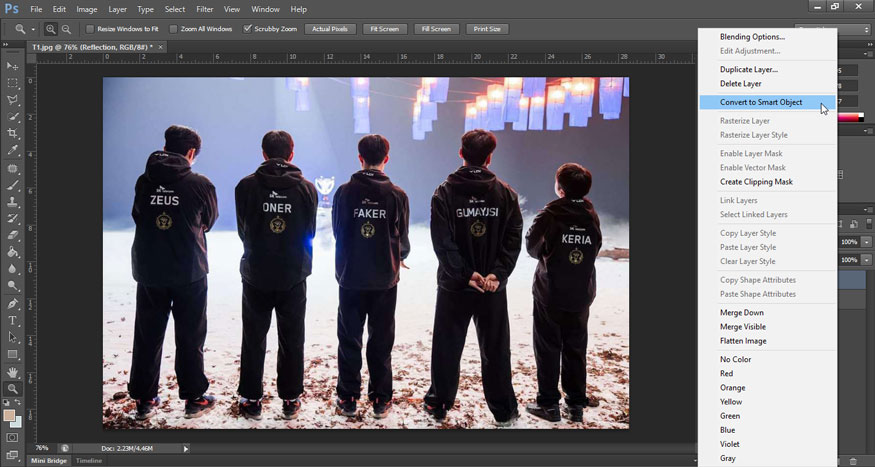
Step 4: Convert the Reflection layer to a Smart Object by right-clicking on the layer and then selecting Convert to Smart Object.
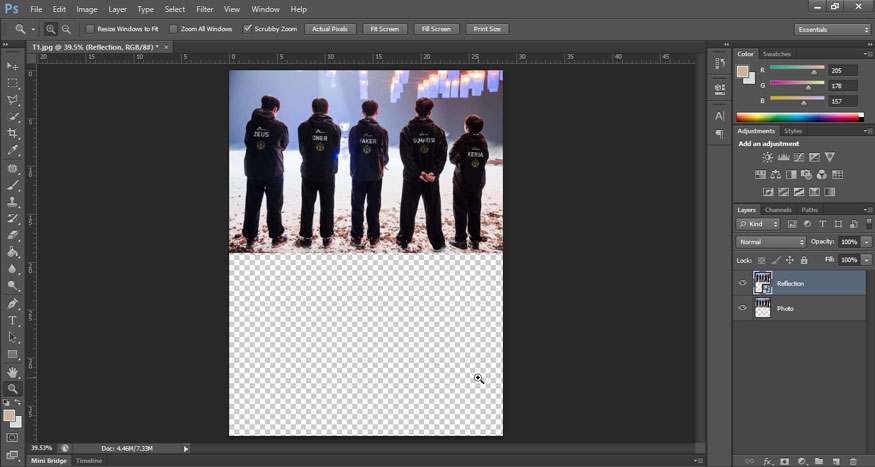
Step 5: We need to expand the canvas space below the image to make room for the water reflection. On the menu bar, select Image => select Canvas Size.
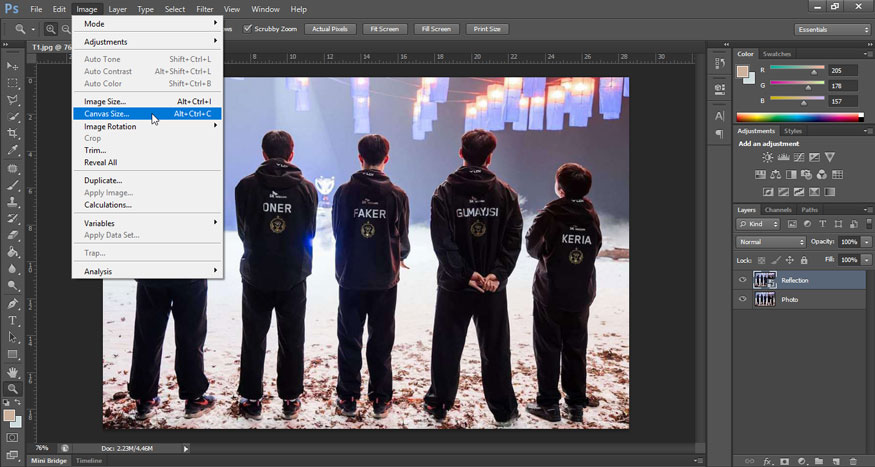
In the Canvas Size dialog box, set Width to 100% and Height to 200%. Uncheck the Relative box. To add all the extra space below the photo, click at the top in the Anchor grid, then click OK to close the dialog box.

Photoshop will automatically add extra space below the image. If the extra space extends out of your screen, then press Ctrl+0 (Win) / Command+0 (Mac) to execute Fit command.
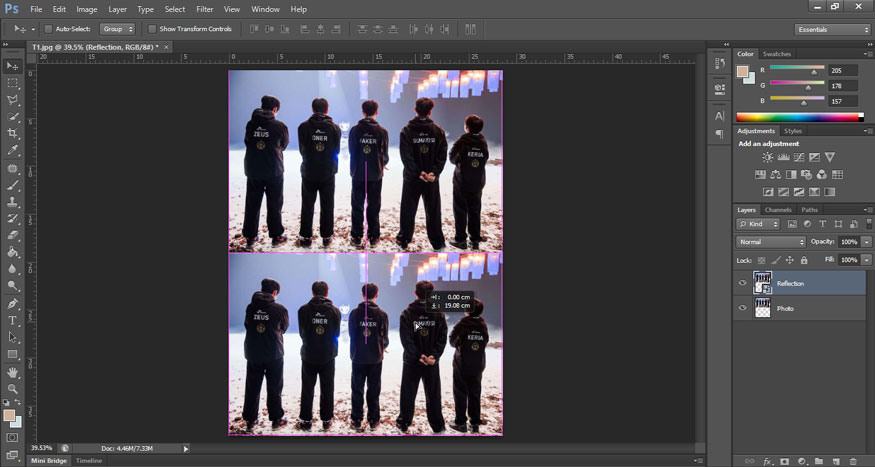
Step 6: Use the Move tool from the toolbar to move the reflection below the main image and into the new canvas space. You can press and hold the Shift key as you drag the image down to the new canvas area. The Shift key limits the direction you can move, making it easier to drag straight down.
Step 7: Flip the image on the Reflection layer vertically so that the water's reflection reflects the photo above it. On the Menu bar => Edit => Transform => Flip Vertical.
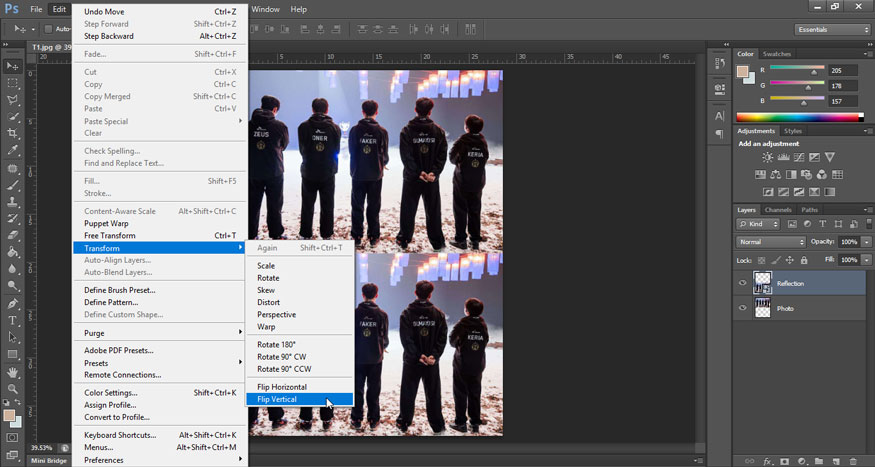
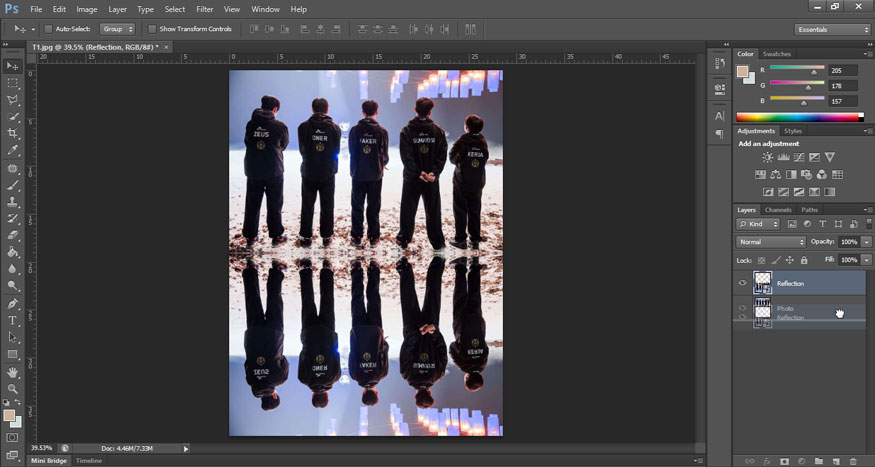
After flipping the Reflection layer, the bottom image will reflect upwards like the image below.
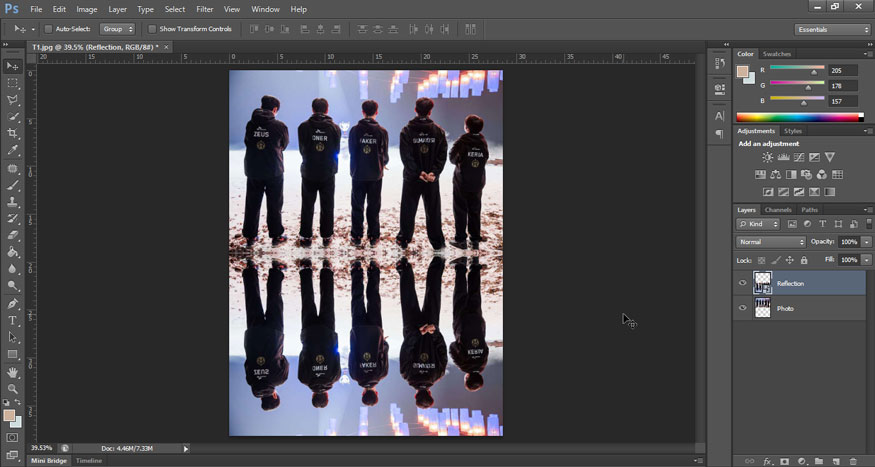
Step 8: In the Layers panel, click the Reflection layer and drag it below the Photo layer. When a white horizontal bar appears below the Photo layer, release the mouse to drop the Reflection layer into the correct position.
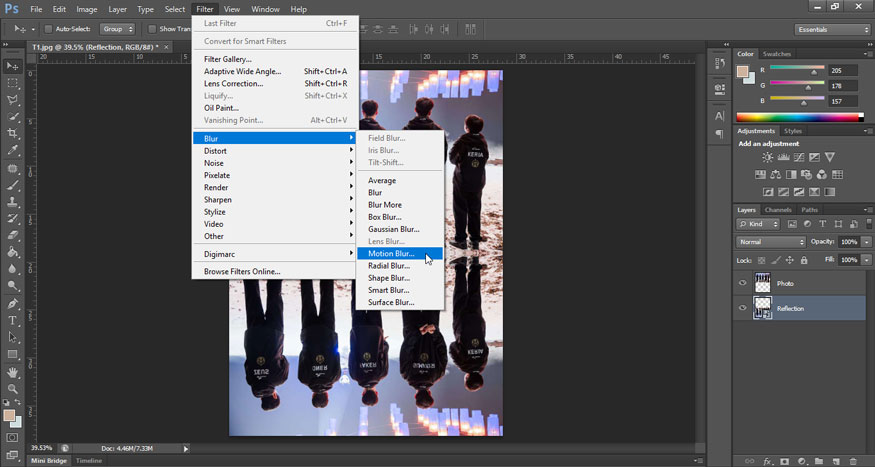
Step 9: Use the Motion Blur filter to add some motion blur to the water reflection. At the Reflection layer, on the menu bar, select Filter => Blur => Motion Blur.
In the Motion Blur dialog box, set the Angle to 90°, set the Distance to about 10-30 pixels depending on the size of your image (large images will need more blur). In this image I will choose 30 pixels. Click OK to close the dialog box.
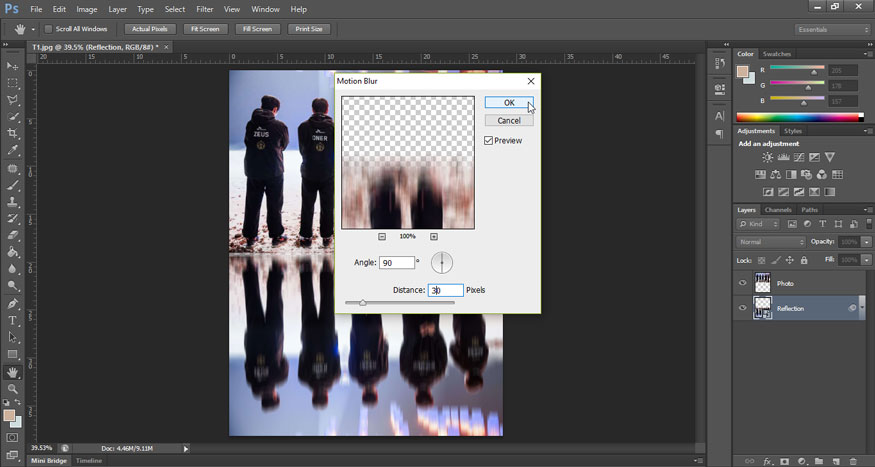
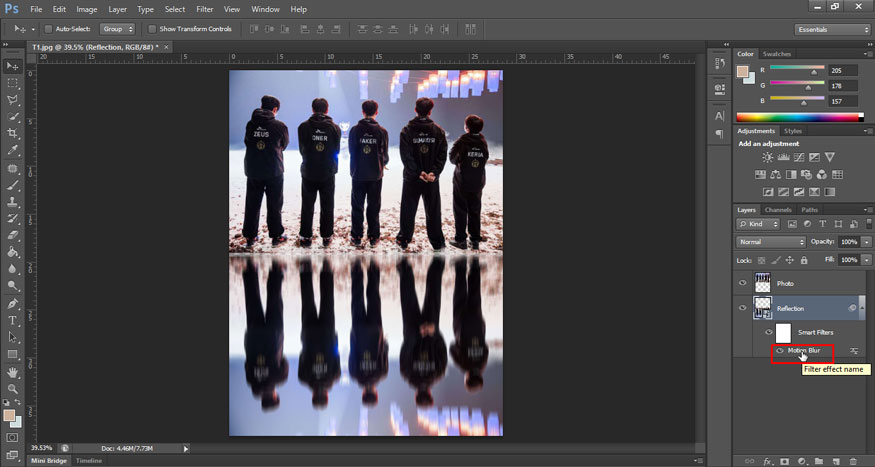
The image below has had a subtle motion blur added. After applying the Motion Blur filter, you can see there is a horizontal line running between the main image and the reflection. It's a component of the Motion Blur filter and we'll fix it later.
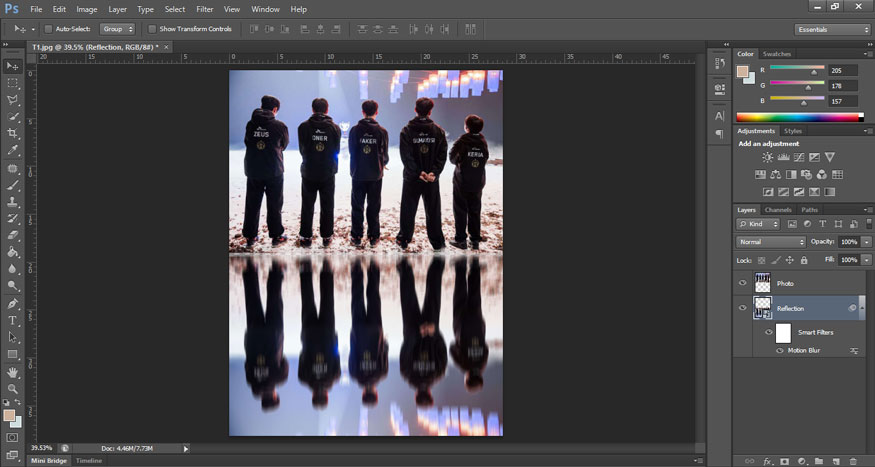
In the Layers panel, the Motion Blur filter appears as a Smart Filter below the Reflection layer. If you want to change the blur, double click on the Motion Blur text to reopen the filter dialog box and then adjust the Distance value if necessary.
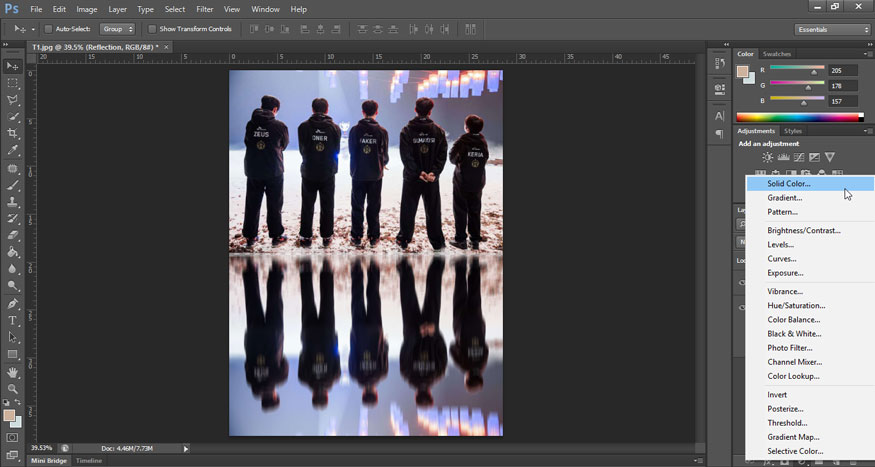
Step 10: Since the water bubble is blue, we need to add a blue tone to the reflection. Select the New Fill or Adjustment Layer icon at the bottom of the Layers panel (circle divided in half). Then select Solid Color.
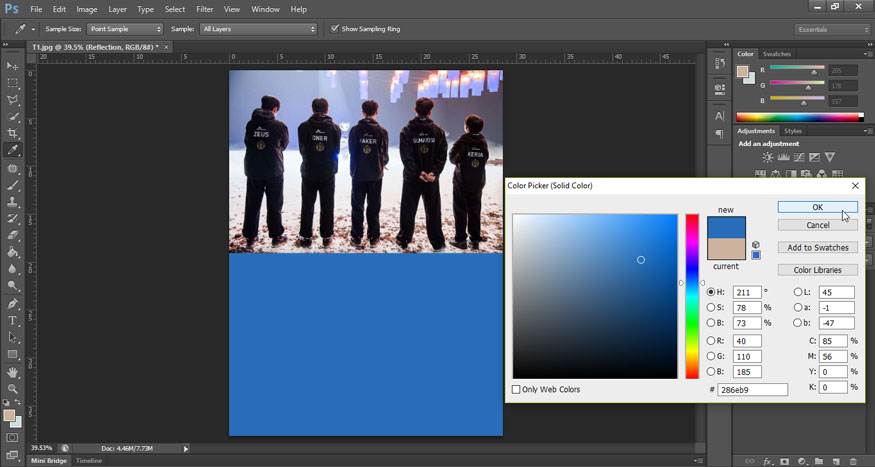
In the Color Picker, select the color blue by setting the R value: 40, G value: 110, and B value: 185, then click OK to close the Color Picker dialog box.
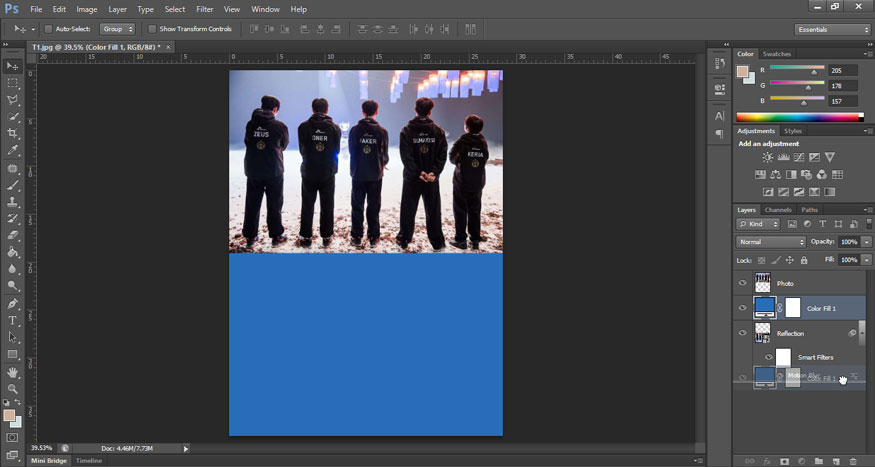
After adding the color fill layer, the reflection of the water in the bottom half of the document is temporarily covered in dark blue as shown.
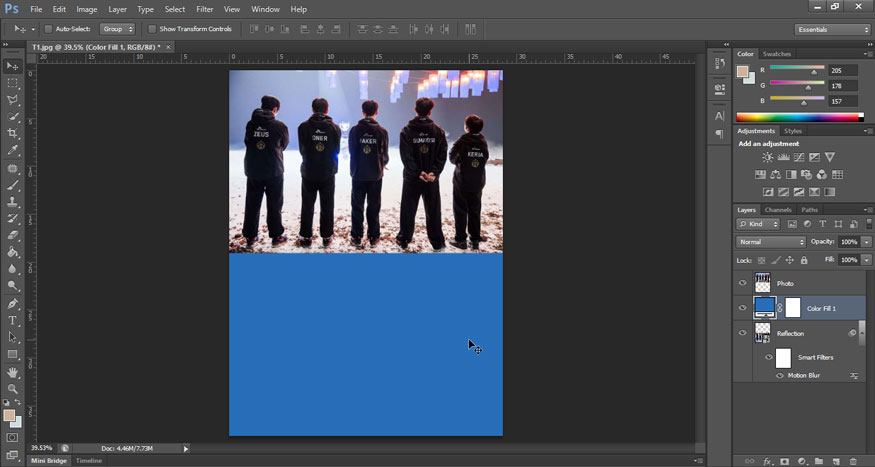
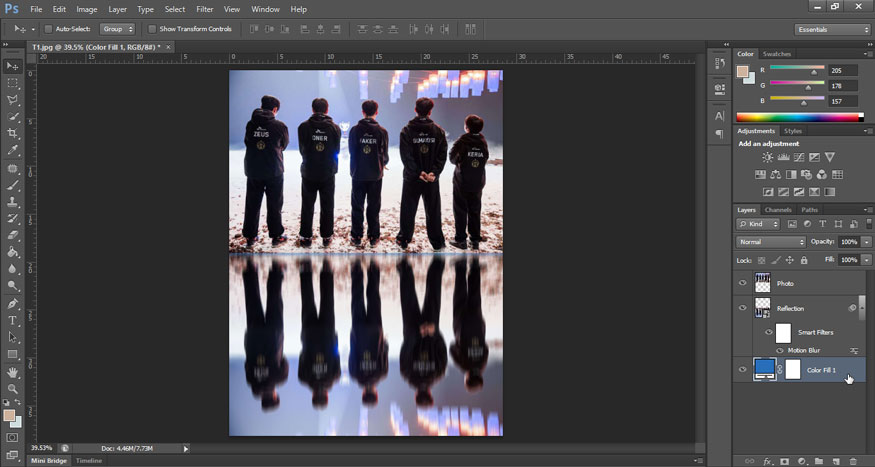
Step 11: The reason it is covered in blue is because Photoshop added a color fill layer, named as “Color Fill 1”, between the Photo layer and the Reflection layer. Click on the color fill layer and drag it below the Reflection layer. This will hide the blue fill layer, allowing the water reflection to reappear.
Now the working screen will look like the picture.
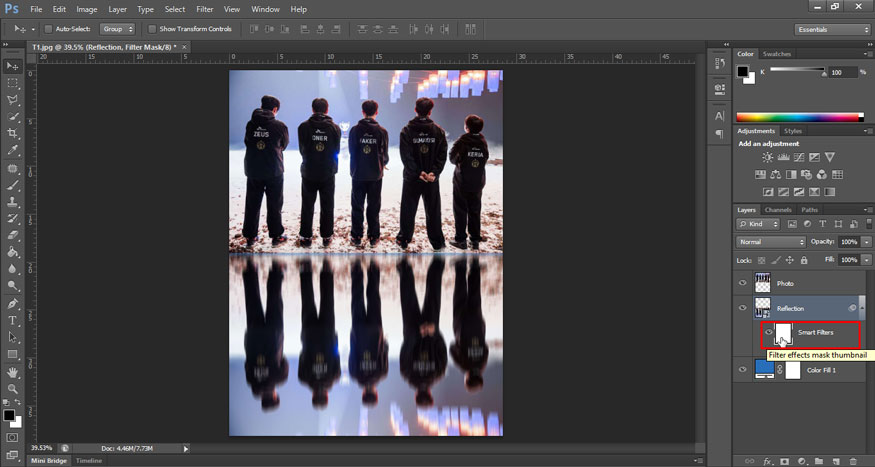
Step 12: Next, adjust the appearance of motion blur in the underwater reflection so that the blur effect gradually disappears as it moves farther from shore. Select the mask for the Smart Filters layer by clicking the layer mask thumbnail to the left of the word Smart Filters.
Step 13: On the toolbar select Gradient Tool to draw a black to white gradient on the layer mask. In options, click the small arrow to the right of the gradient swatch, then select the black-to-white gradient by double-clicking its thumbnail (third from the left, top row). This will select the gradient and close the Gradient Picker.
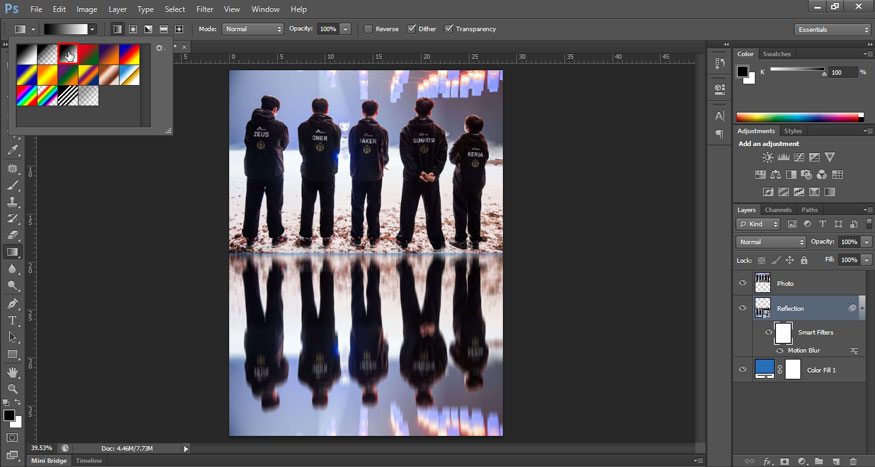
In the Gradient options, make sure to select the Linear gradient style by clicking on its icon (on the right of the gradient color).

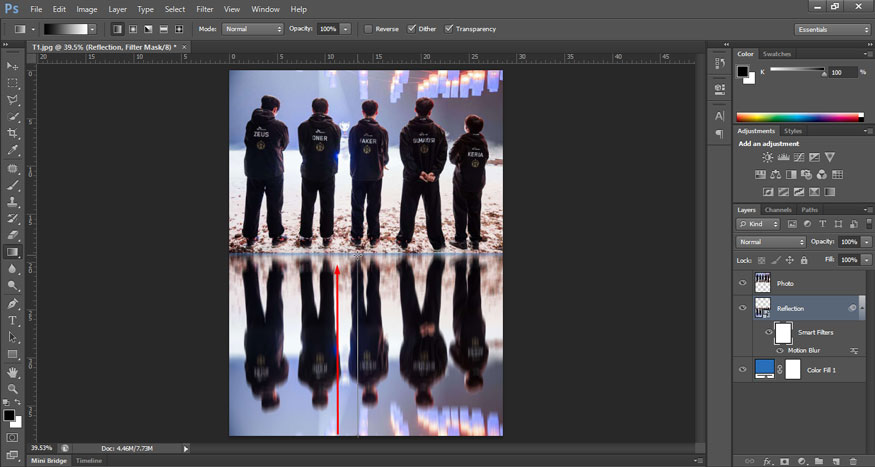
Click at the bottom of the document to set the starting point for the gradient. Hold the mouse and drag up towards the middle (to the top of the water reflection). Hold down the Shift key as you drag to make it easier to drag straight up vertically. Release the mouse button to complete the color change. The motion blur effect now fades as it moves from the top of the underwater reflection to the bottom.
Step 14: Now that we have the motion blur effect, let's blur the water reflection so it blends with our blue fill layer. We'll do that by adding an exact copy of the mask layer to the Reflection layer. Press and hold the Ctrl (Win) / Command (Mac) key on your keyboard and click the Smart Filters layer mask thumbnail. This will load the mask layer as a selection (the selection border will appear in the document).
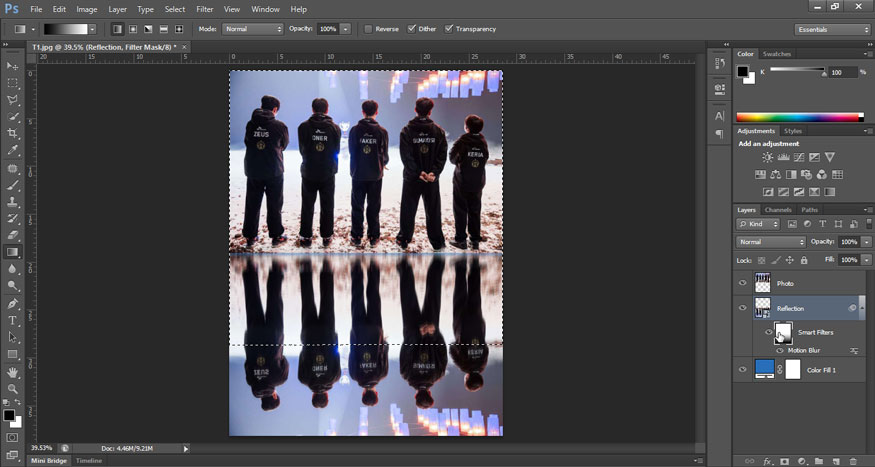
Step 15: Add Layer Mask to Reflection layer. At the Reflection layer, click the Add Layer Mask icon at the bottom of the Layers panel.
Photoshop converts the selection border into a new layer mask, giving us an identical mask with the same black to white gradient on the Reflection layer.

With the addition of the layer mask, the water reflection has now faded from top to bottom with the blue color from our Solid Color fill layer.
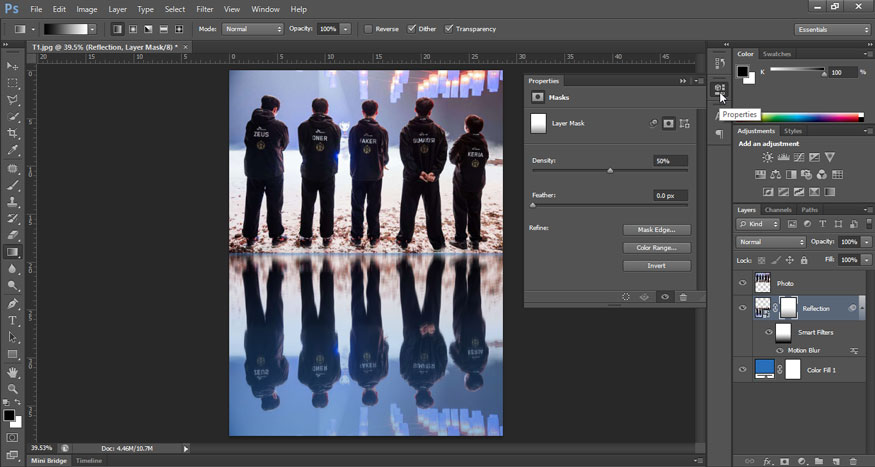
Step 16: Now we need to reduce the intensity of the blue color for the most realistic water balloon effect. Select the layer mask layer thumbnail on the Reflection layer, on the menu bar select Window => Properties. In the Properties panel, decrease the Destiny value by dragging the slider to the left. The lower you lower it, the dimmer the blue will be. For example, I will decrease it to 50%. And now the blue color looks more beautiful.
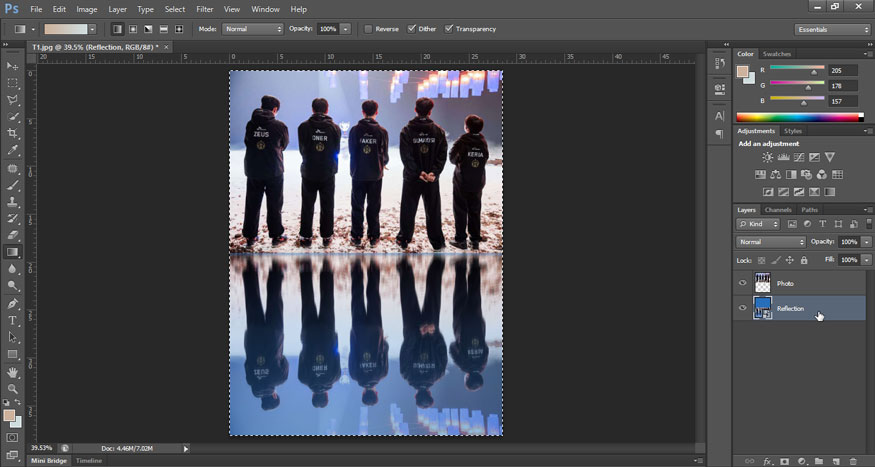
Step 17: We need to combine the Reflection layer and the color fill layer below it into a single Smart Object. With the Reflection layer selected, press and hold the Shift key and click on the color fill layer. This selects both layers at once. Then right-click and select Convert to Smart Object.

Both layers now appear in the Layers panel as a single Smart Object named “Reflection”.
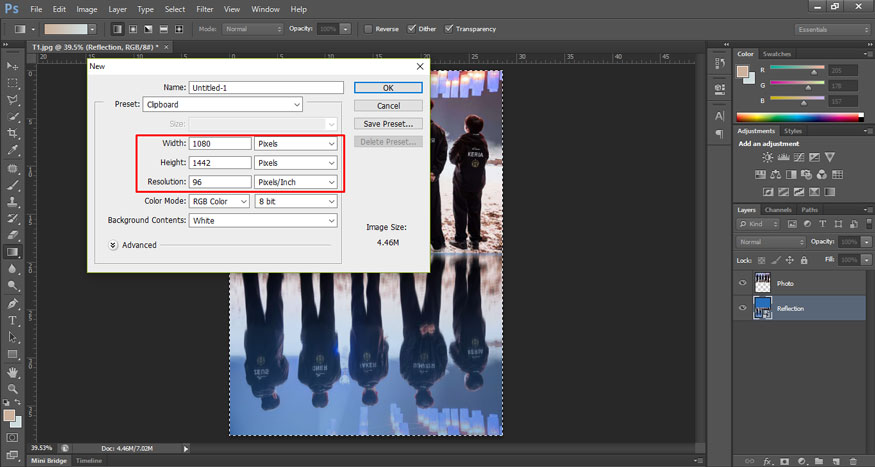
Step 18: To make the reflection look more like water, we will add ripples to it using a displacement map. The displacement map needs to be a separate Photoshop document and it needs to be the same size as our current document. Make sure the Reflection Smart Object is selected in the Layers panel, then go to the Select menu and choose All. Or you can press Ctrl+A. This places a selection border around the entire image. Then press Ctrl+C to copy to clipboard.
Then on the menu bar select File => New… or press the keyboard shortcut Ctrl+N. Since we copied our image to the clipboard, Photoshop will automatically set the new document's size and resolution to the same values as the original. Click OK to create the document.
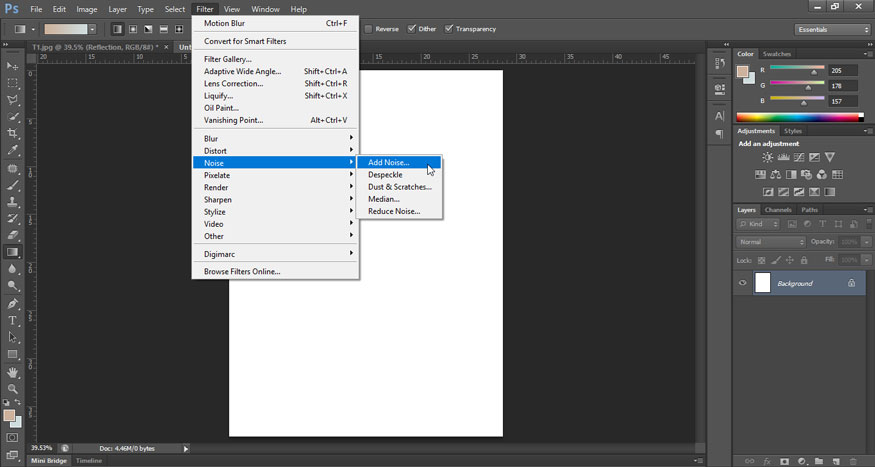
Step 19: The first thing we'll do with the displacement map is add some noise. In the new document, on the menu bar select Filter => Noise => Add Noise.
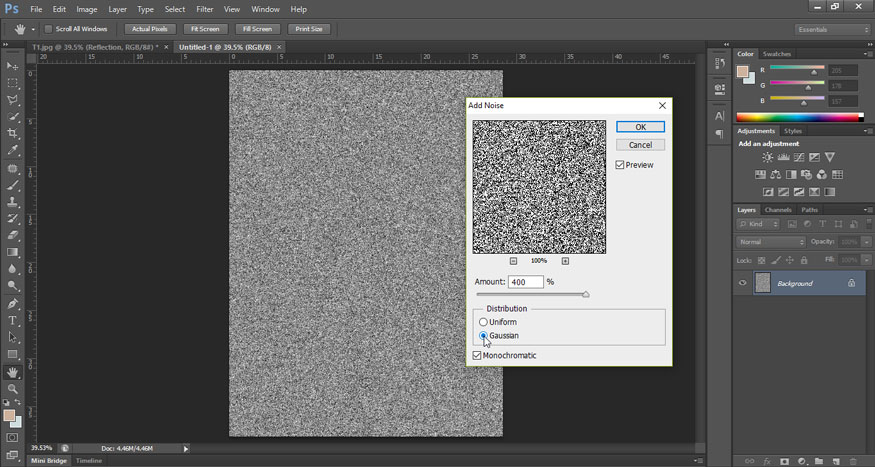
In the Add Noise dialog box, set the Amount to 400%, then select Gaussian and Monochromatic at the bottom. Click OK to close the dialog box. Photoshop fills the document with small black and white dots.
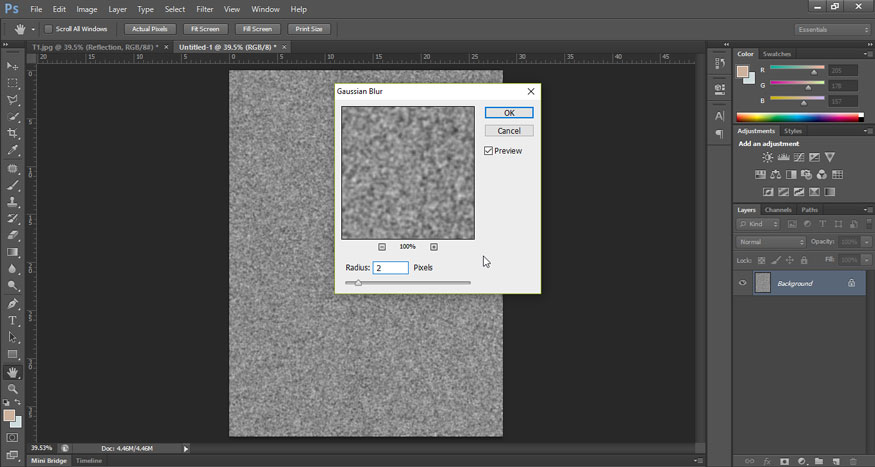
Step 20: Reduce noise with Gaussian Blur filter. Go to Filter => Blur => Gaussian Blur.
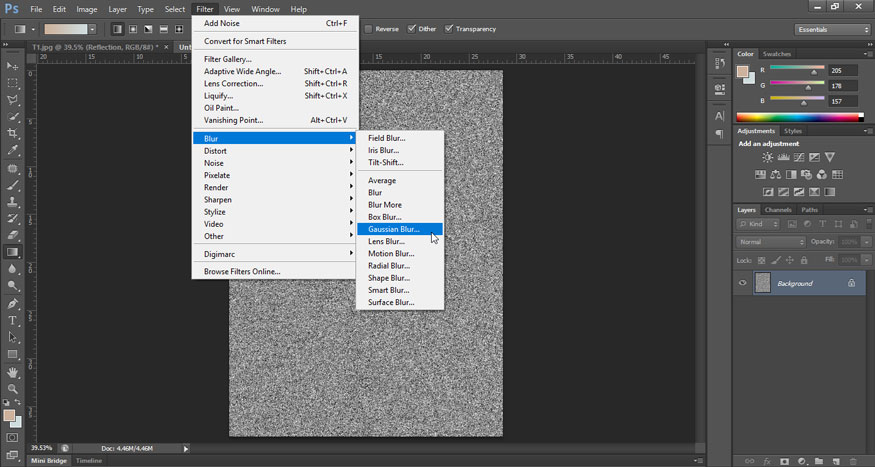
In Gaussian Blur box, set Radius value as 2 pixel and click OK.
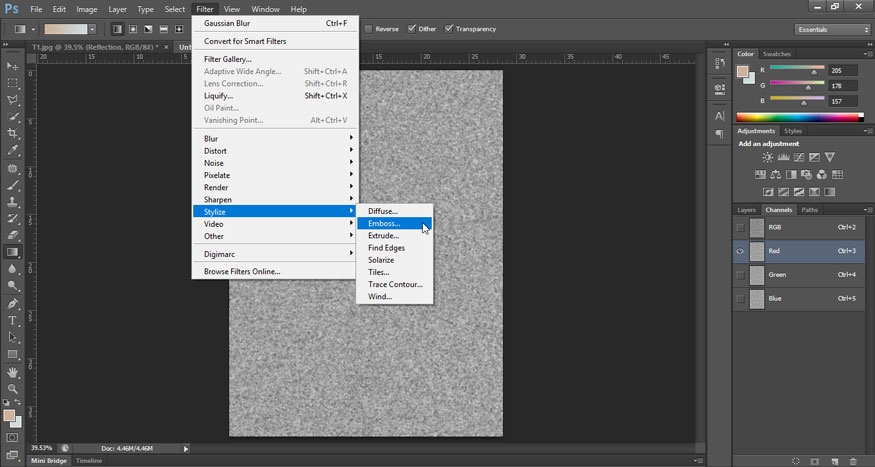
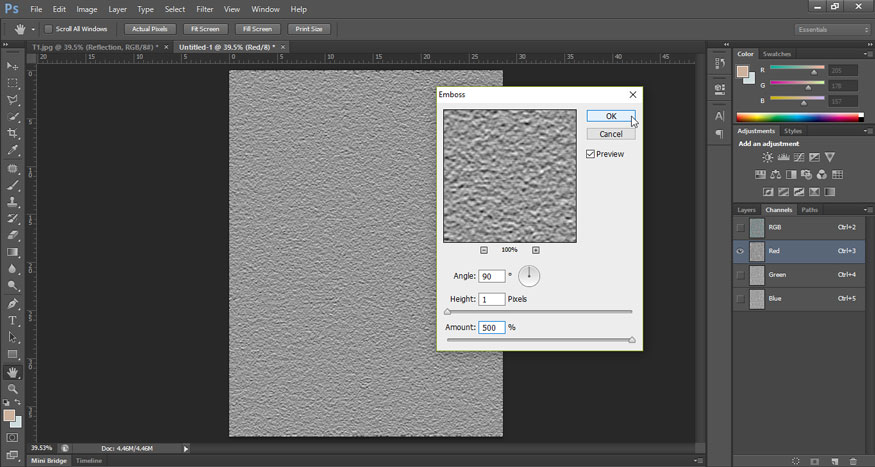
Step 21: Open the Channels panel by clicking its tab next to the Layers panel. Then select the Red channel. Go to the Filter menu => Stylize => Emboss.
In the Emboss dialog box, set Angle to 90°, Height to 1 pixel, and Amount to 500%.
Step 22: Still in the Channels panel, select the Green channel. Go back to the Filter menu, => Stylize => Emboss. Set Height to 1 pixel and Amount to 500%, Angle to 180°. Click OK.

Step 23: Click on the RGB channel at the top. This will turn on three color channels (Red, Green và Blue).
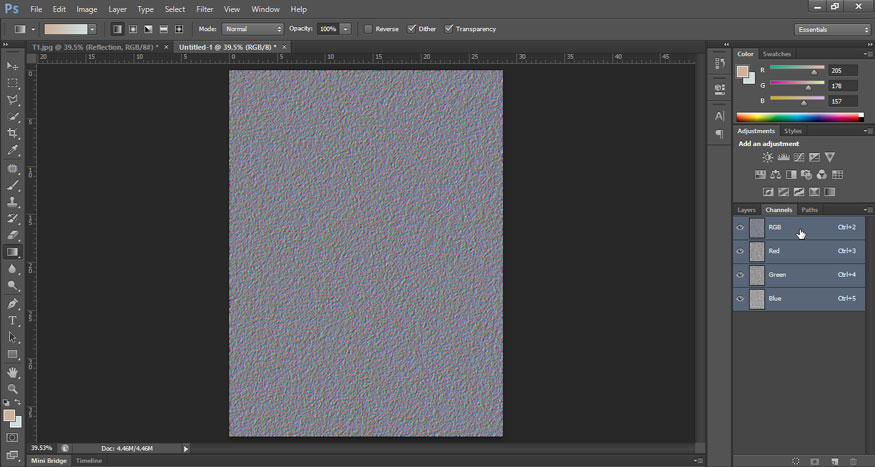
Then go back to the Layers panel right next to Channels.
Step 24: We need to unlock the Background layer so we can reshape it. In Photoshop CS6, press and hold the Alt (Win) / Option (Mac) key and then double-click the Background layer. This renames the layer to Layer 0 and the lock icon disappears.
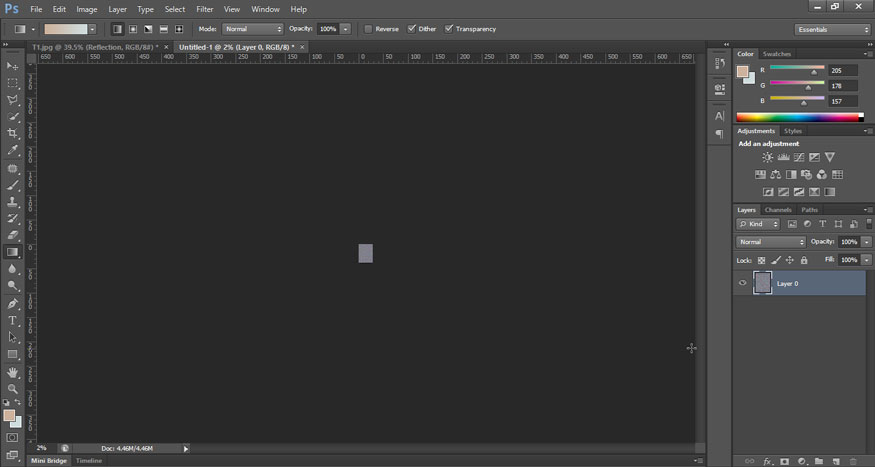
Step 25: Press Ctrl (Win) / Command (Mac) on the keyboard and press the minus key (-) repeatedly to shrink the document until the image appears very small in the center.
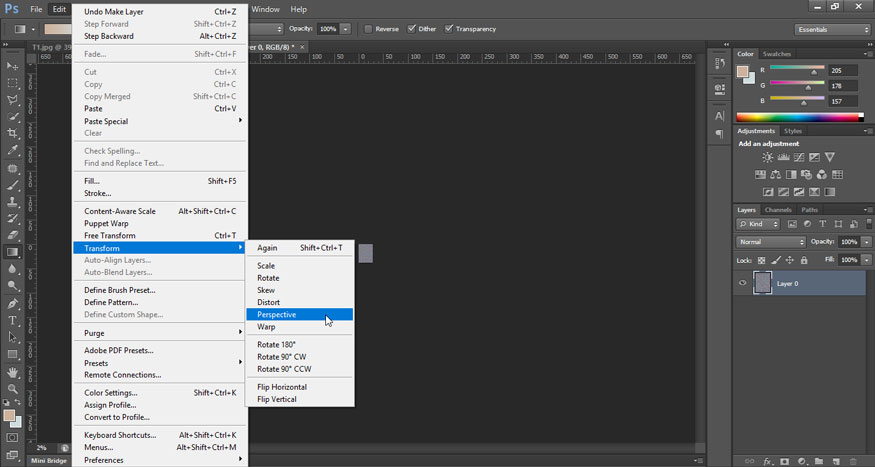
Step 26: On the menu, select Edit => Transform => Perspective.
Click the handle in the lower left or right corner and drag it away from the image. The further you drag, the greater the Perspective effect you will create.
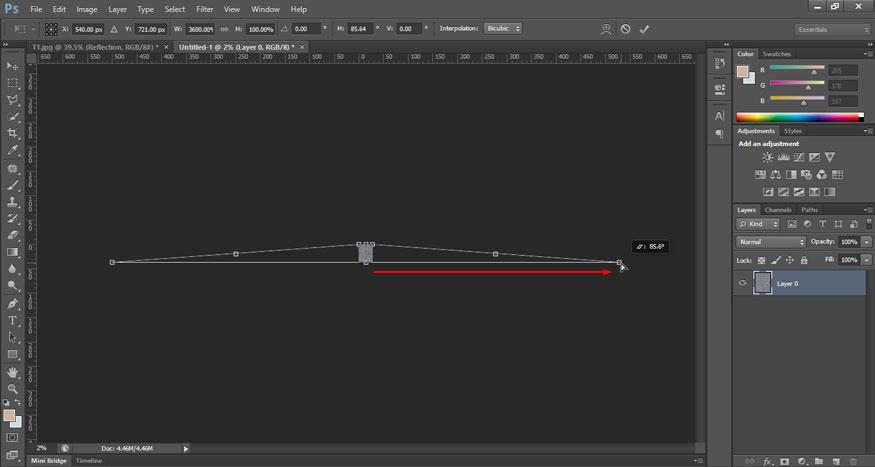
There is no specific value to use, but if you look at the options bar, you can see that you have dragged the Width (W) value to about 3600%. Press Enter (Win) / Return (Mac) on your keyboard to accept the conversion.
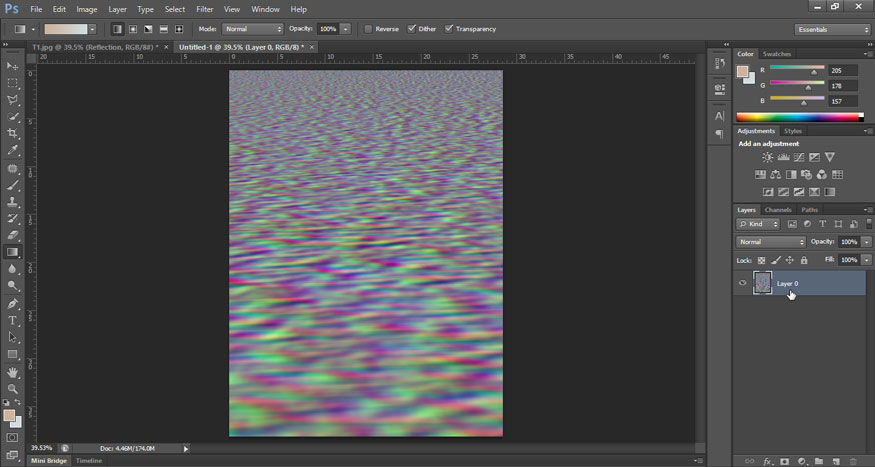
Step 27: To re-zoom the image, press and hold the Ctrl (Win) / Command (Mac) key on the keyboard while pressing the plus sign ( + ) repeatedly. In this closer view, we can see the perspective effect we created and the image looks like water ripples gradually moving further away.
Step 28: To keep the file size small and avoid any problems when we save it as a displacement map, cut out the hidden pixels on the sides. Press Ctrl+A, a selection border appears around the image. Then at Image select Crop. It looks like nothing happened but all the hidden areas on the sides have now been cut away.
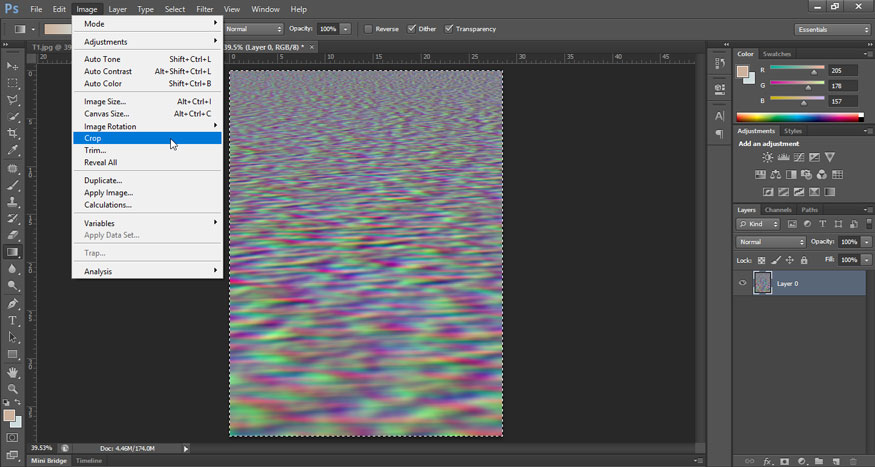
To delete the selection, press Ctrl+D.
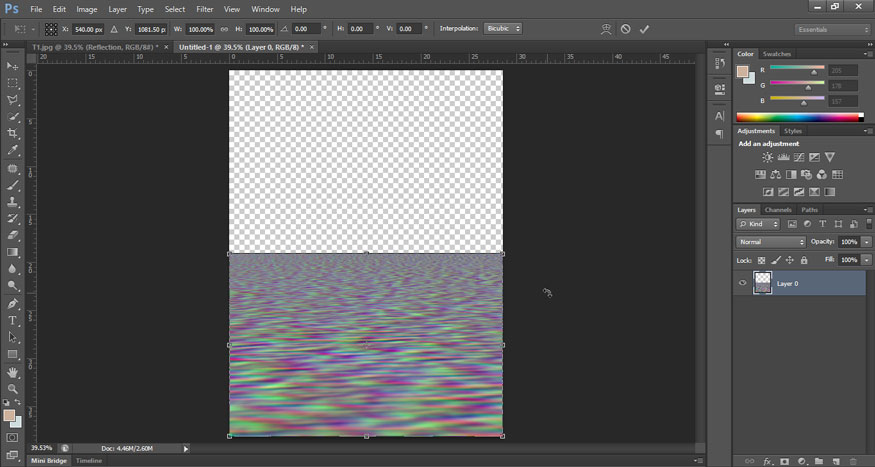
Step 29: Finally, since the displacement map only needs to affect the reflection of the water in the bottom half of the document, adjust the height scale of the image. This will also enhance the perspective effect further. Go to the Edit menu => select Free Transform. Click the top anchor point and drag it down to the middle of the document. As you get closer to the center, it will match the place. Press Enter (Win) / Return (Mac) on your keyboard to accept.
Step 30: Save this displacement map file as PSD.
Step 31: Let's switch to your main Photoshop water reflection effect working file. If the image still has a selection, press Ctrl+D to deselect it.
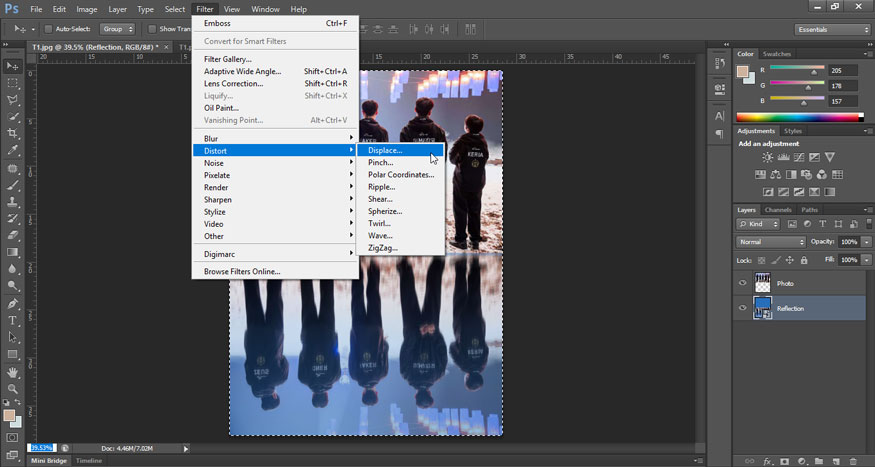
Step 32: Apply displacement map to the water reflection. At the Reflection Smart Object layer, go to the Filter menu => Distort => Displace.
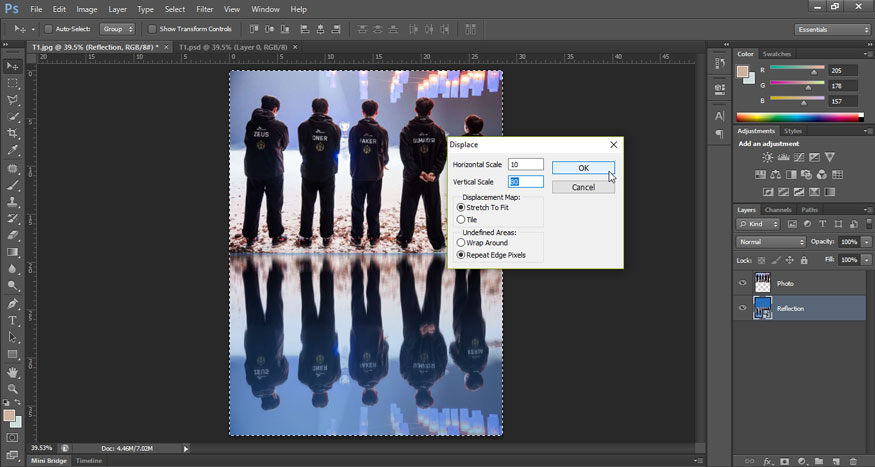
This will open the Displace dialog box. At the top are Horizontal Scale and Vertical Scale options. These two options control the displacement map. They will bend, warp, and reshape the image. Horizontal Scale controls the width of the distortion and Vertical Scale controls the height. To create beautiful water ripples you should use a low Horizontal Scale value and a higher Vertical Scale value.
In this case, I will set Horizontal Scale to 10 and Vertical Scale to 80. Set Displacement Map as Stretch To Fit and set Undefined Areas as Repeat Edge Pixels, then click OK.
Now a dialog box appears, select the PSD file displacement map you just saved earlier.
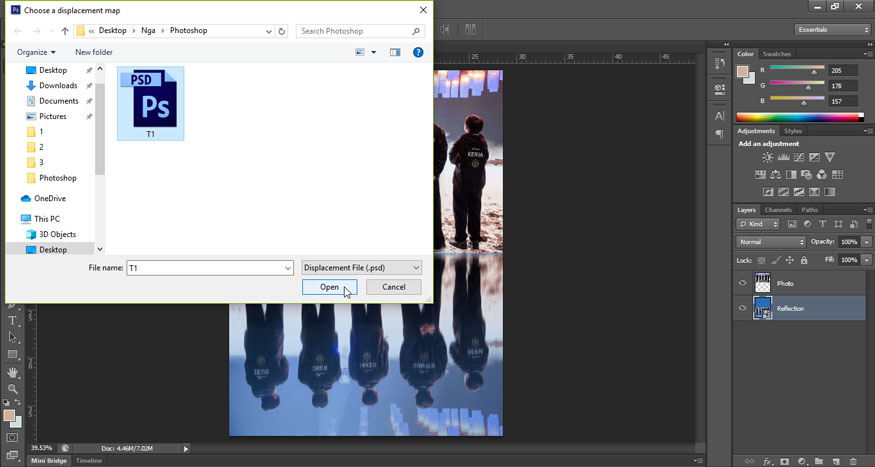
Photoshop applies a displacement map to the water's reflection with a beautiful Photoshop water reflection effect.
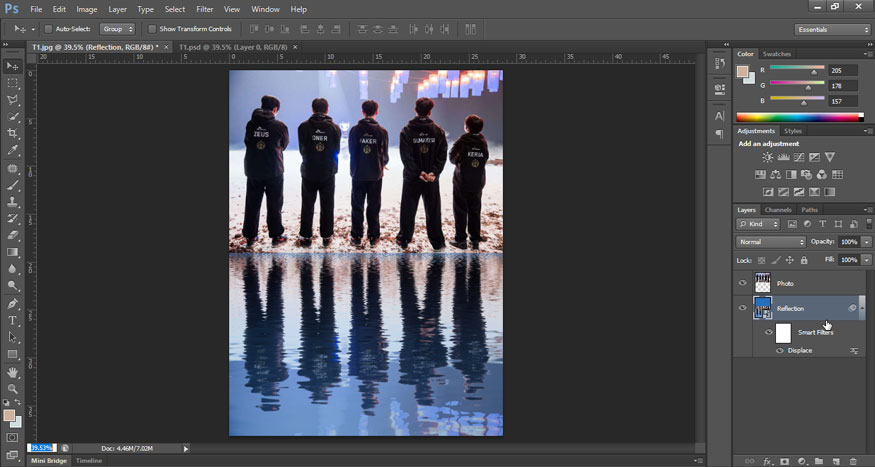
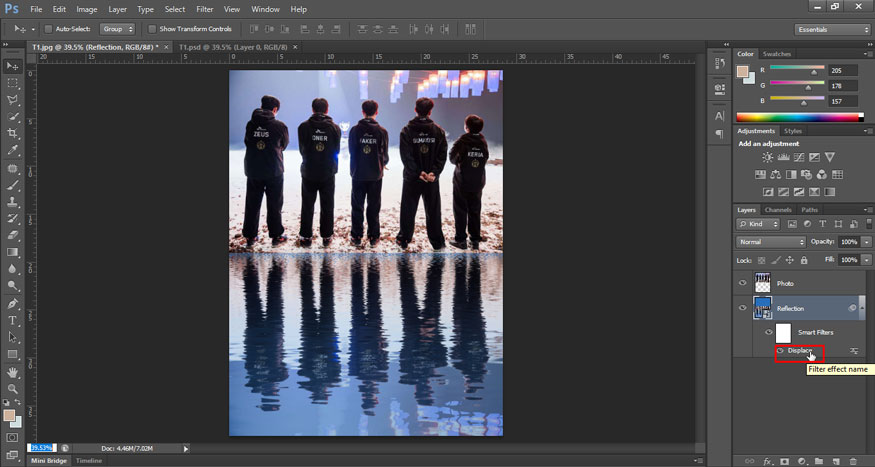
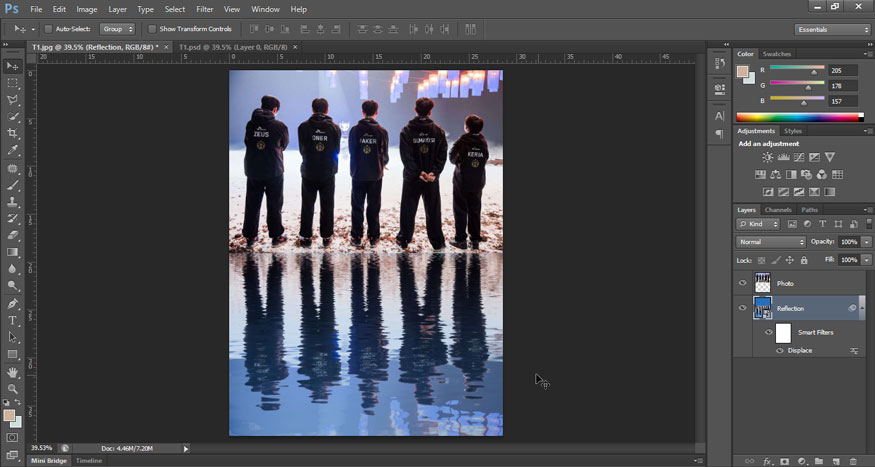
Step 33: In the layers panel, the Displace filter appears as a smart object under Reflection. To apply different Horizontal Scale and Vertical Scale values, double-click Displace to reopen the dialog box. Then set the appropriate parameters, click OK and select the PSD file to apply.
Step 34: Now we will delete the blue line in the middle of the image. At the Reflection layer, on the menu bar, select Edit => Free Transform. Photoshop will display a dialog box warning you that any Smart Filters you have applied will be turned off while you are in transform mode. Click OK.
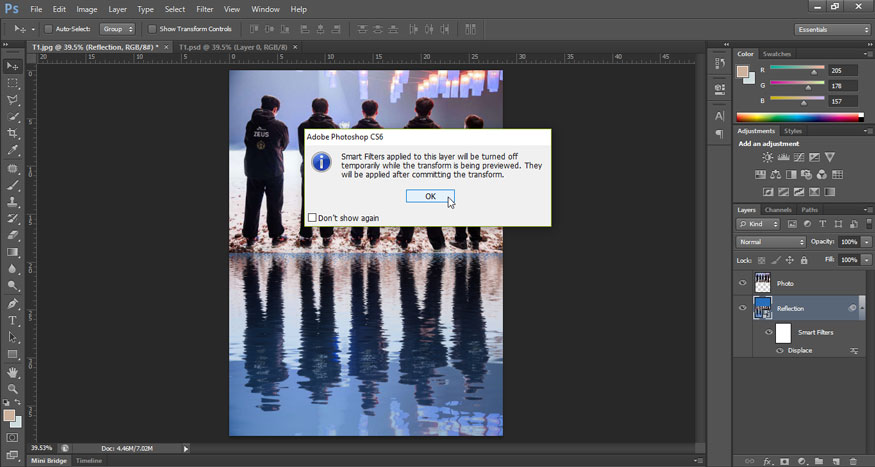
Click on the top anchor point and then drag it up a bit to stretch the underwater reflection until the blue line is hidden behind the main image. Press Enter (Win) / Return (Mac) on your keyboard when you're done.
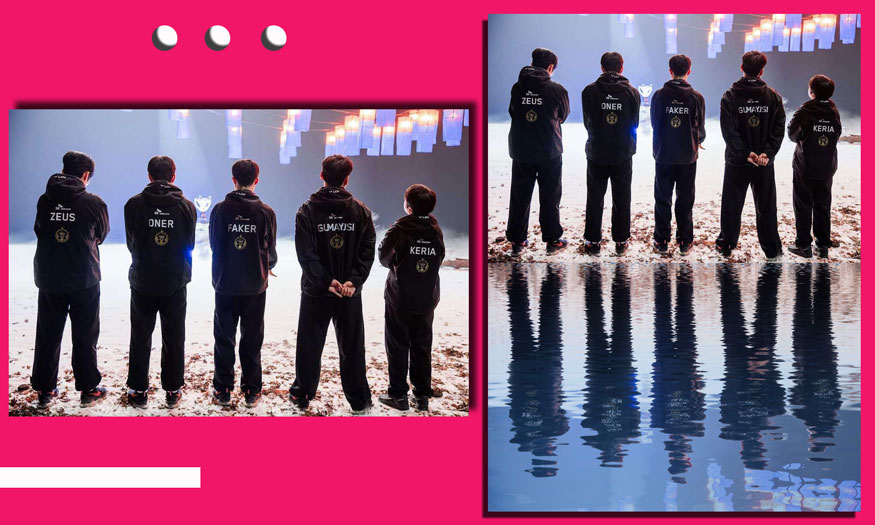
So, we have completed the steps to create a water reflection effect in Photoshop. Below is the image after creating the water shadow reflection effect.
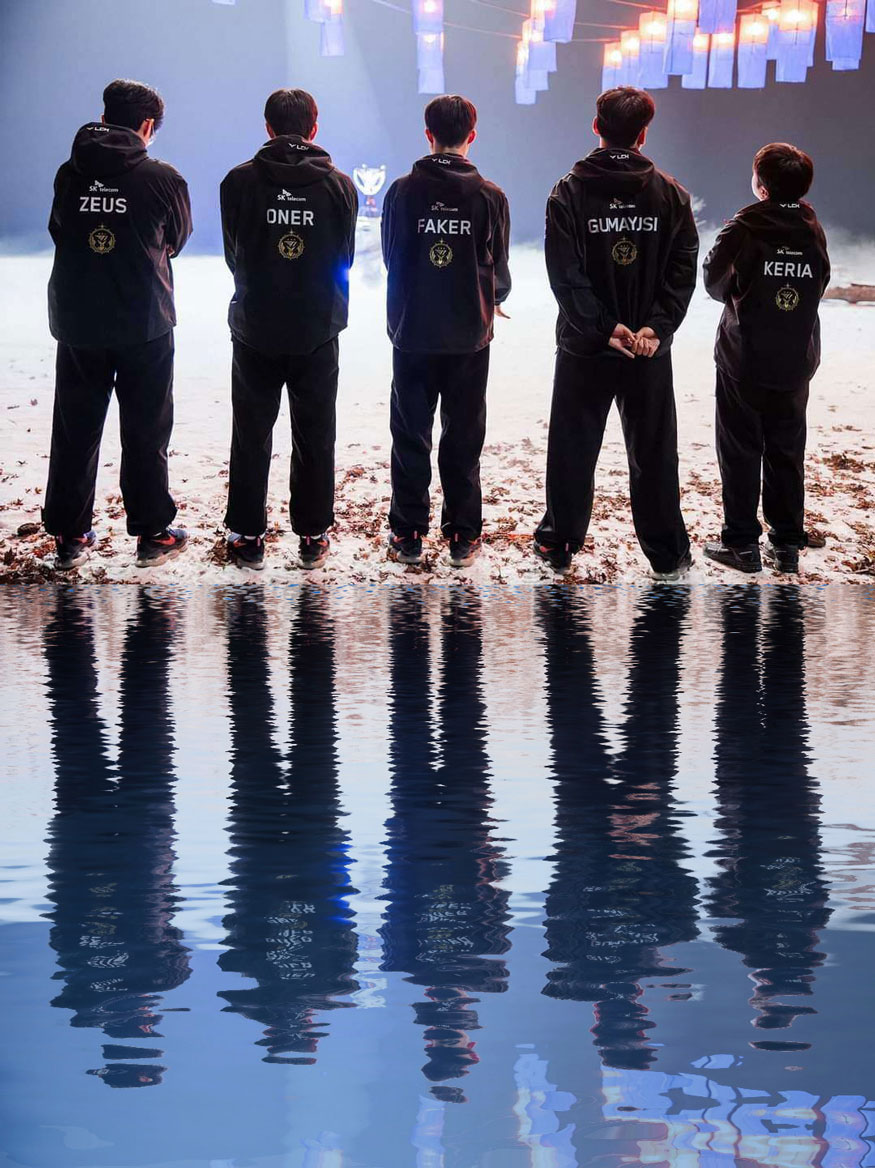
Above are detailed instructions on how to create a water reflection effect in Photoshop. The method includes many steps but is not complicated, you just need to follow the instructions exactly and you will be able to create the photo with the water balloons you want. Hopefully the above sharing from SaDesign can help you create vivid photos.


VIP Products


Best Selling Products
Autodesk All App Account Copyright
120 USD
Adobe Premiere Pro Account
99 USD
Upgrade genuine Capture One account
120 USD
Windows 10 & 11 Pro Key
36 USD
Upgrade Duolingo Super
29 USD
Capcut Pro 1 Year
39 USD
Freepik Premium Account
59 USD
Genuine Cheap Canva Pro
39 USD
Copyright Adobe Lightroom Account
59 USD
Upgrade Genuine Office 365
49 USD
Adobe Photoshop Copyright - Full App
120 USD
Plugin Retouch4me
69 USD
ChatGPT Plus Account (GPT-4)
16 USD
MidJourney Account
29 USD
Genuine Adobe Illustrator account
99 USD