Best Selling Products

Plugin Retouch4me
69 USD

Genuine Adobe Illustrator account
99 USD

Windows 10 & 11 Pro Key
36 USD

Upgrade genuine Capture One account
120 USD

Upgrade Genuine Office 365
49 USD

Capcut Pro 1 Year
39 USD

Copyright Adobe Lightroom Account
59 USD

Freepik Premium Account
59 USD

Upgrade Duolingo Super
29 USD

Adobe Photoshop Copyright - Full App
120 USD

ChatGPT Plus Account (GPT-4)
16 USD

Adobe Premiere Pro Account
99 USD

Genuine Cheap Canva Pro
39 USD

Autodesk All App Account Copyright
120 USD

MidJourney Account
29 USD
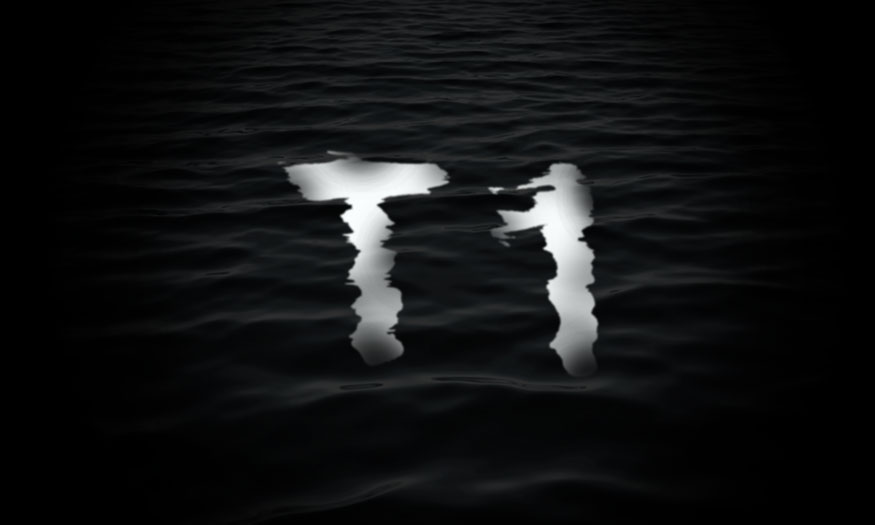
Create a beautiful underwater text effect in Photoshop with SaDesign
Do you want to create a design with an underwater text effect? Don't worry, we can completely do it by combining many tools in Photoshop. Join us to learn about the steps to create a beautiful underwater text effect in Photoshop with the Displace filter through the shares below.
Do you want to create a design with an underwater text effect? Don't worry, we can completely do it by combining many tools in Photoshop. Join us to learn about the steps to create a beautiful underwater text effect in Photoshop with the Displace filter through the shares below.
How to create a beautiful underwater text effect in Photoshop

To create a beautiful underwater text effect in Photoshop, we will use the Displace filter in Photoshop. This filter will use a PSD image called Displacement map to distort the pixels in the image. With this filter, we can create text effects under the water surface, shadows reflected in water,... extremely realistic.
The steps to create a beautiful underwater text effect in Photoshop are as follows:
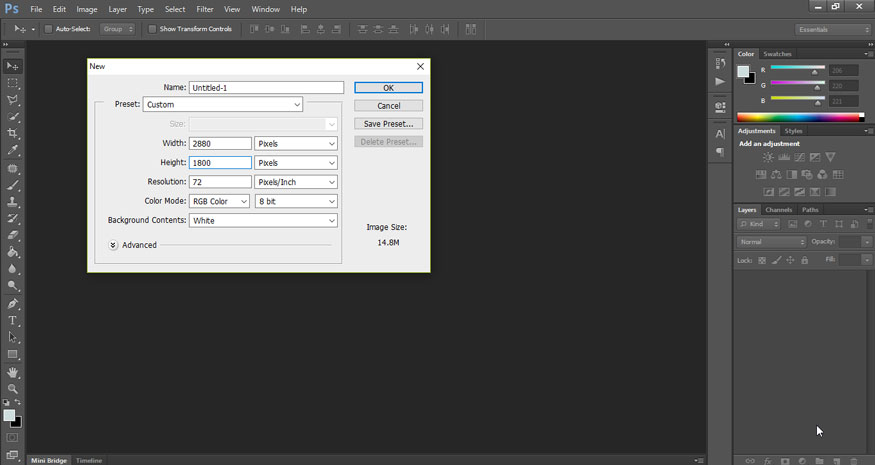
Step 1: First you need to create a new working document in Photoshop. On the menu bar, select File => Select New… => Fill in the appropriate parameters. For example, I use the size of 2880x1800 pixels.
You can also press the key combination Ctrl+N then fill in the appropriate parameters and click OK.
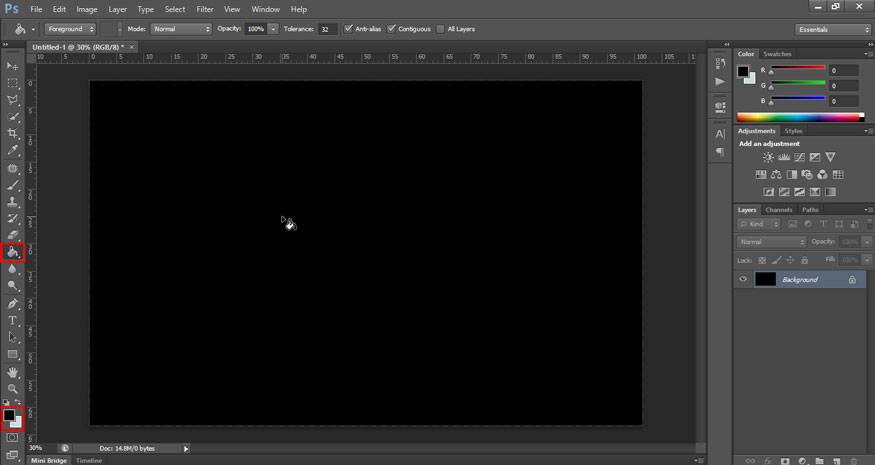
Step 2: On the toolbar, set the foreground color to black (black above). Then select Paint Bucket Tools and click on the background layer to fill the background with black.
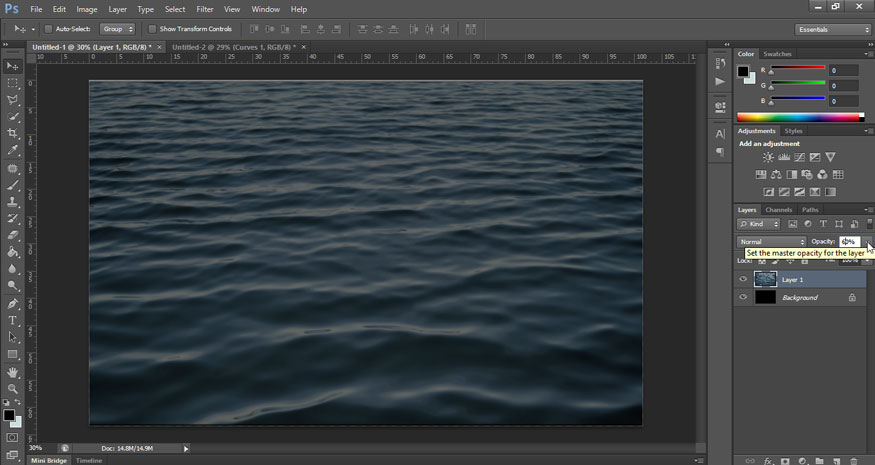
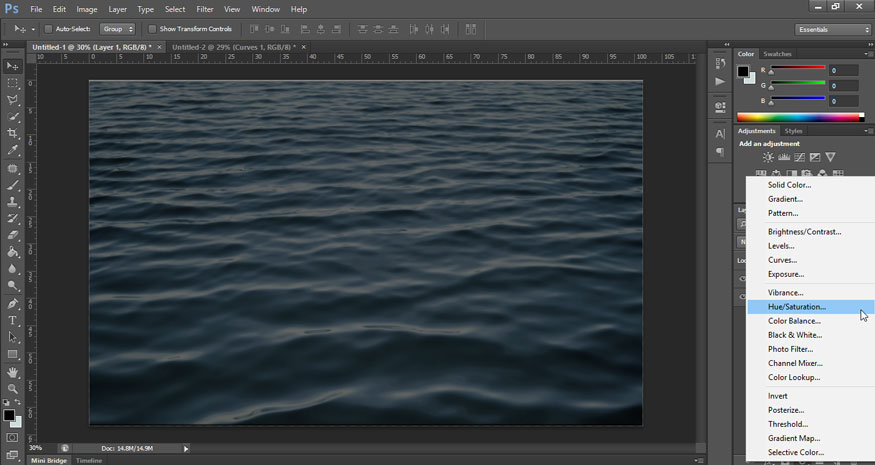
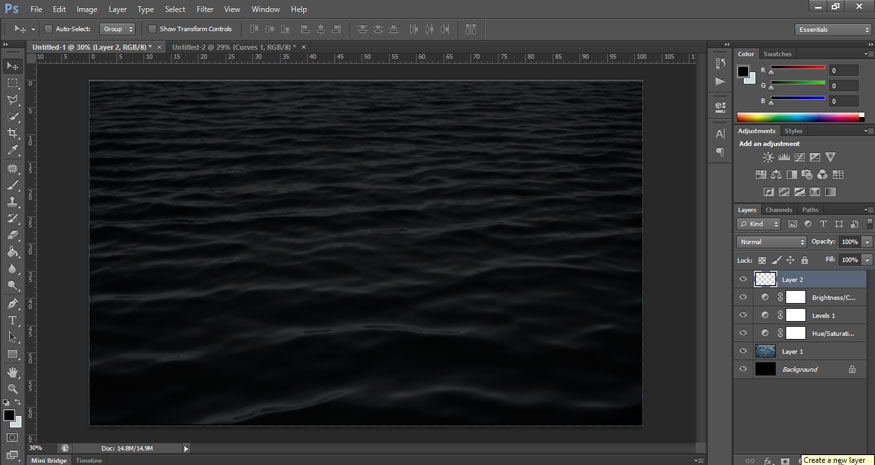
Step 3: Upload a photo of a beautiful water surface with ripples. Then drag this water photo into the new working document. Then reduce the Opacity of this layer to 60%.
Step 4: In the bottom right corner of the Layers panel, select the divided circle icon => Create a fill or new adjustment layer => select Hue and Saturation.
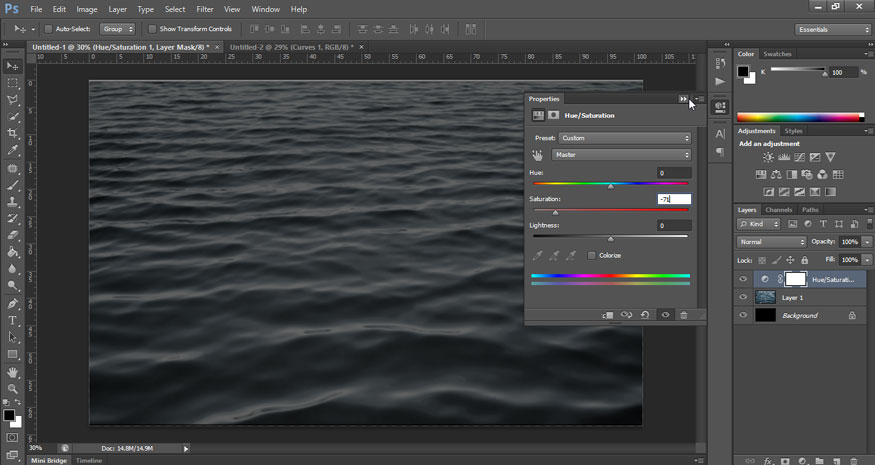
In the Hue/Saturation dialog box that appears, set Hue to 0, Saturation to -71, and Lightness to 0.
Step 5: Select Create a fill or new adjustment layer => Level.

Then set the Input level to 1 and 155 respectively

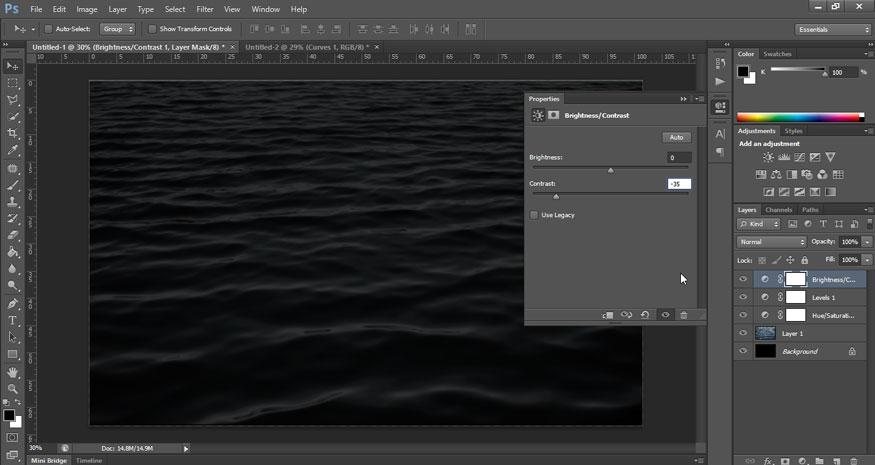
Step 6: Continue to select Create a fill or new adjustment layer => select Brightness and Contrast.
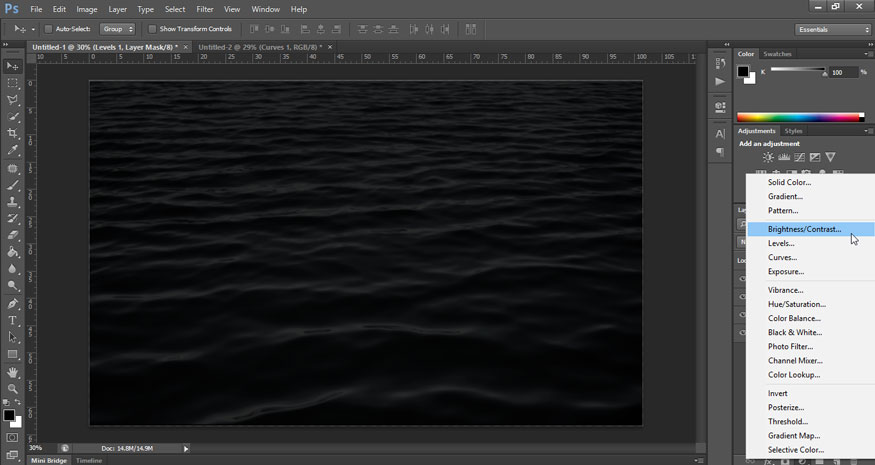
Then set Brightness to 0 and Contrast to -35.
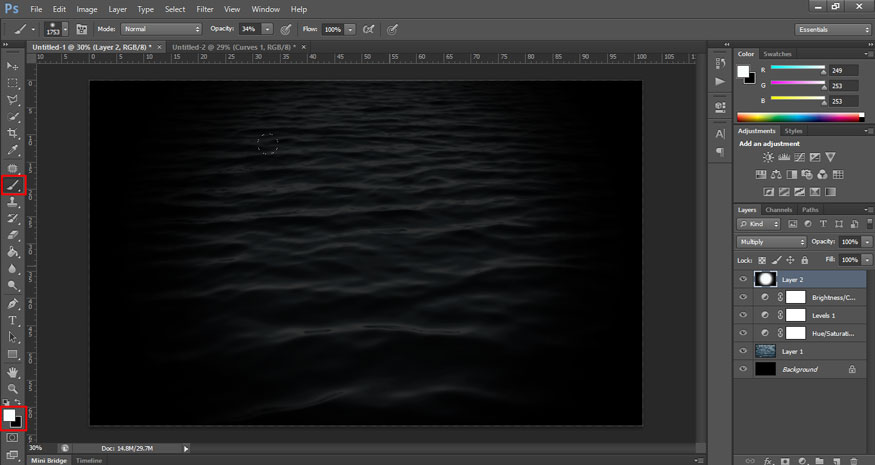
Step 7: In the bottom right corner of the layers panel, select Create a new layer to create a new layer above all other layers, including adjustment layers.
Use the Paint Bucket tool to fill this layer with black and then change the Blend Mode to Multiply.

On the toolbar, select Brush Tool (B), use a soft white brush to paint in the middle of the canvas. Then save this document as the name “Displace” in PSD format.
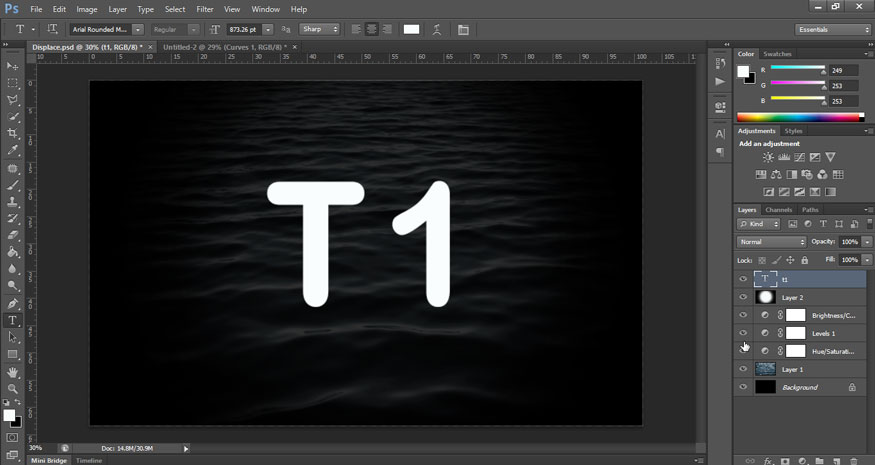
Step 8: On the toolbar, select the Horizontal Type Tool and then write the text that needs to create a beautiful underwater text effect in Photoshop. Select the font size, font style, color and align accordingly.
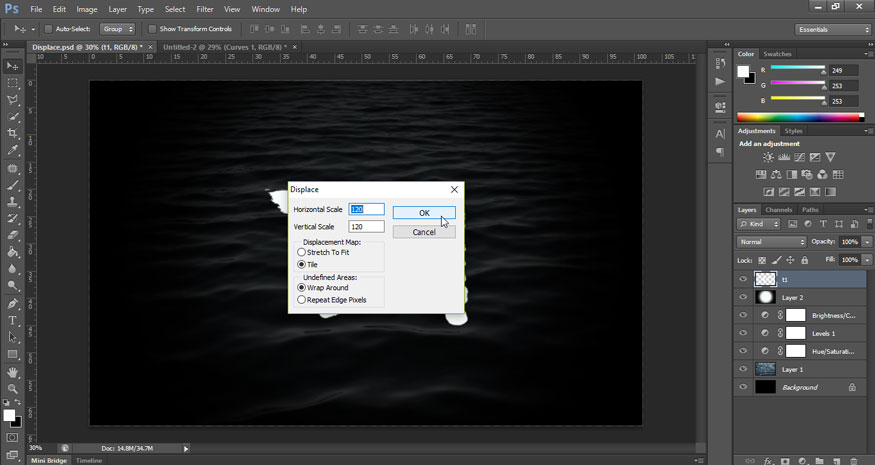
Step 9: At the layer containing the text, select Filter on the menu bar => Distort => Displace…
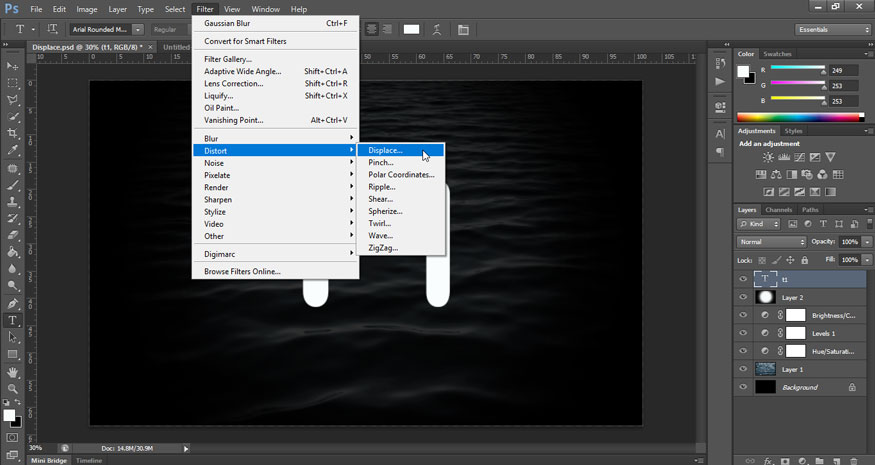
In the Displace dialog box, set Horizontal Scale and Vertical Scale. In this case, I will set the Horizontal Scale to and Vertical Scale to 120. Select Tile and Wrap Around. Then click OK. You can change the value arbitrarily to get the most suitable text distortion.
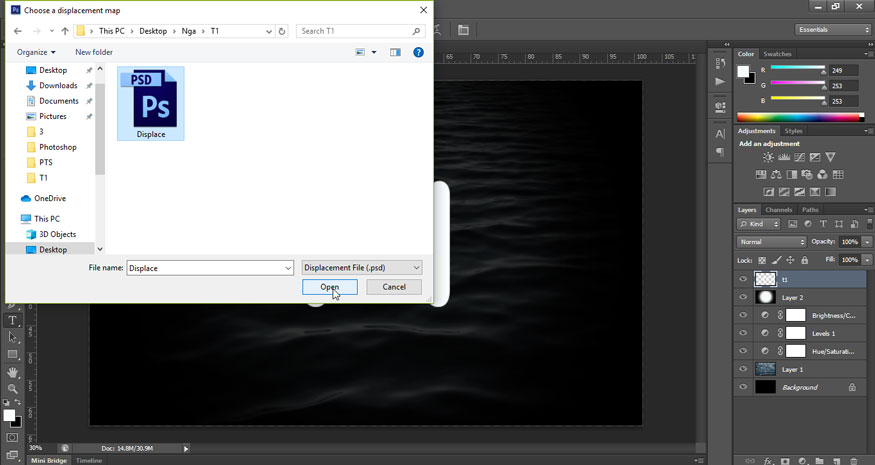
Step 10: Now a dialog box will appear, select the newly saved PSD Displace file and click Open.
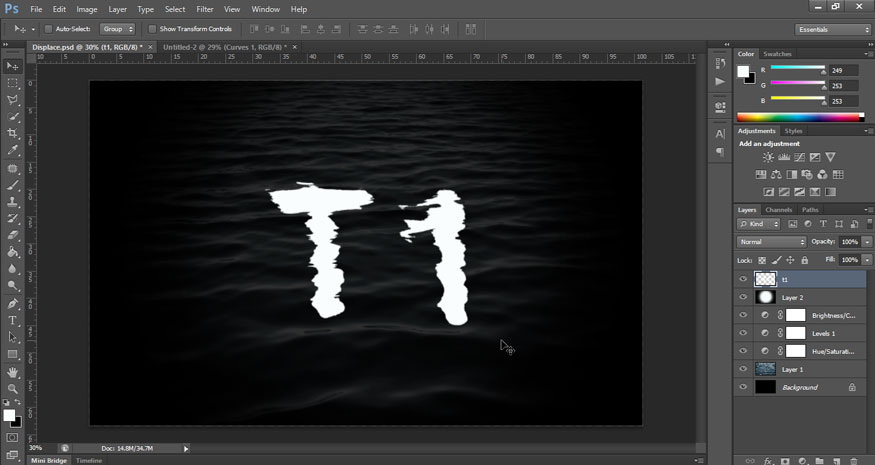
This is the result you get.
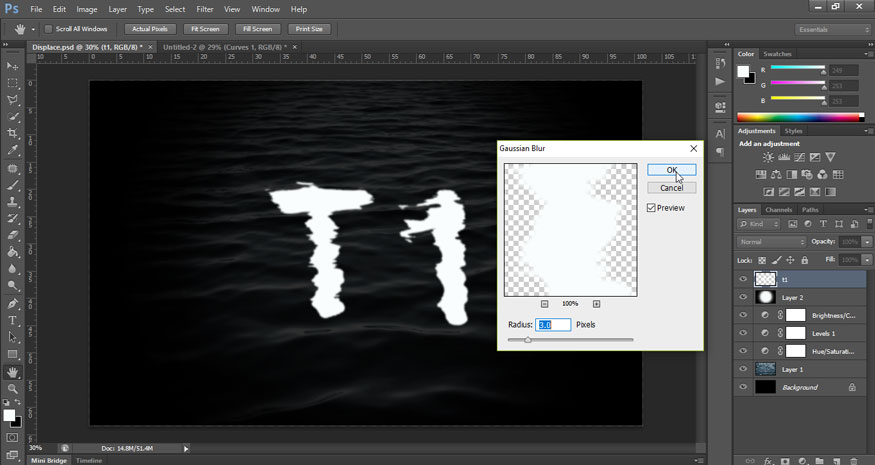
Step 11: On menu bar, select Filter => Blur => Gaussian Blur.
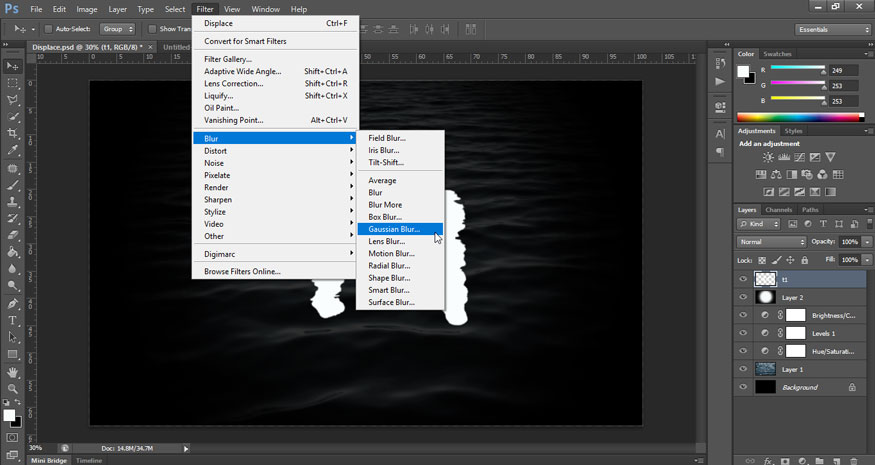
Set the value Radius as 3px.
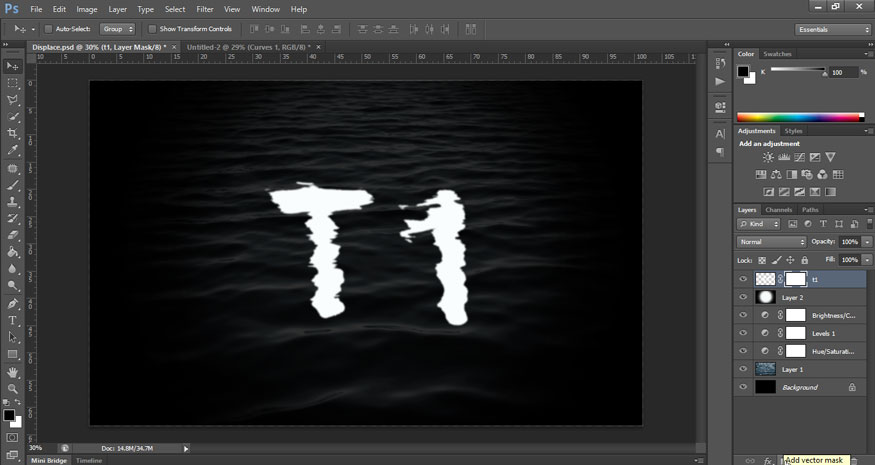
Step 12: Select Add layer mask at the bottom of the layers panel to add a mask to the text.
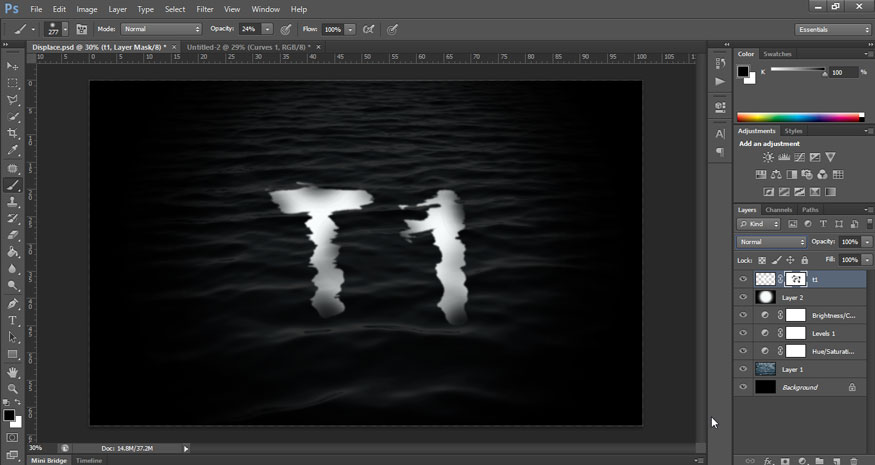
Then select the Brush Tool (B) and a soft black brush, start painting on the edges of the letter, top and bottom to make those parts darker when they are underwater. The final result we get will be as shown.
Above are the detailed steps to create a beautiful underwater text effect in Photoshop. Try many times, adjust the appropriate parameters to get the most beautiful effect. Hopefully the sharing from SaDesign in this article will help you do it successfully soon.


VIP Products


Best Selling Products
Plugin Retouch4me
69 USD
Genuine Adobe Illustrator account
99 USD
Windows 10 & 11 Pro Key
36 USD
Upgrade genuine Capture One account
120 USD
Upgrade Genuine Office 365
49 USD
Capcut Pro 1 Year
39 USD
Copyright Adobe Lightroom Account
59 USD
Freepik Premium Account
59 USD
Upgrade Duolingo Super
29 USD
Adobe Photoshop Copyright - Full App
120 USD
ChatGPT Plus Account (GPT-4)
16 USD
Adobe Premiere Pro Account
99 USD
Genuine Cheap Canva Pro
39 USD
Autodesk All App Account Copyright
120 USD
MidJourney Account
29 USD