Best Selling Products

Genuine Cheap Canva Pro
39 USD

Windows 10 & 11 Pro Key
36 USD

Copyright Adobe Lightroom Account
59 USD

ChatGPT Plus Account (GPT-4)
16 USD

Freepik Premium Account
59 USD

Capcut Pro 1 Year
39 USD

MidJourney Account
29 USD

Adobe Photoshop Copyright - Full App
120 USD

Upgrade Genuine Office 365
49 USD

Genuine Adobe Illustrator account
99 USD

Plugin Retouch4me
69 USD

Adobe Premiere Pro Account
99 USD

Upgrade genuine Capture One account
120 USD

Upgrade Duolingo Super
29 USD

Autodesk All App Account Copyright
120 USD
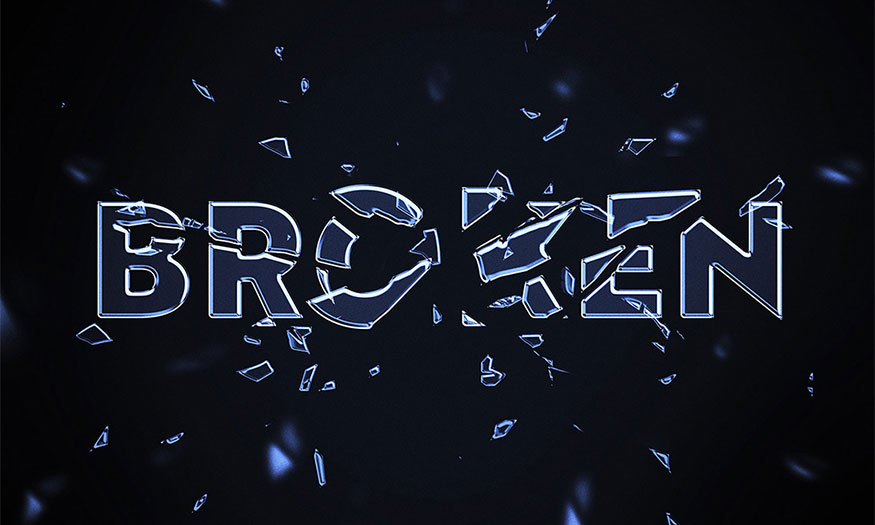
Create a unique broken glass text effect in Photoshop EASY
Nội dung
- 1. Create a background for the broken glass text effect in Photoshop
- 2. Create text for broken glass text effect in Photoshop
- 3. Apply the Layer Style feature to the original text layer.
- 4. Applying the Layer Style feature to the original text layer copy
- 5. Apply the Layer Style feature to the second copy of the original text
- 6. Creating broken pieces for text
Have you ever seen photos with text that looks like broken pieces of glass? It can absolutely be done in Photoshop. The broken glass text effect in Photoshop will help make the text in your design more unique, vivid, and impressive. Join Sadesign to see the steps to create the broken glass text effect in Photoshop below.

Have you ever seen photos with text that looks like broken pieces of glass? It can absolutely be done in Photoshop. The broken glass text effect in Photoshop will help make the text in your design more unique, vivid, and impressive. Join Sadesign to see the steps to create the broken glass text effect in Photoshop below.
To be able to create a broken glass text effect in Photoshop, we will need to combine many stages with different steps, specifically as follows:
1. Create a background for the broken glass text effect in Photoshop
First we need to create a background layer to then proceed to create the broken glass text effect in Photoshop on it.
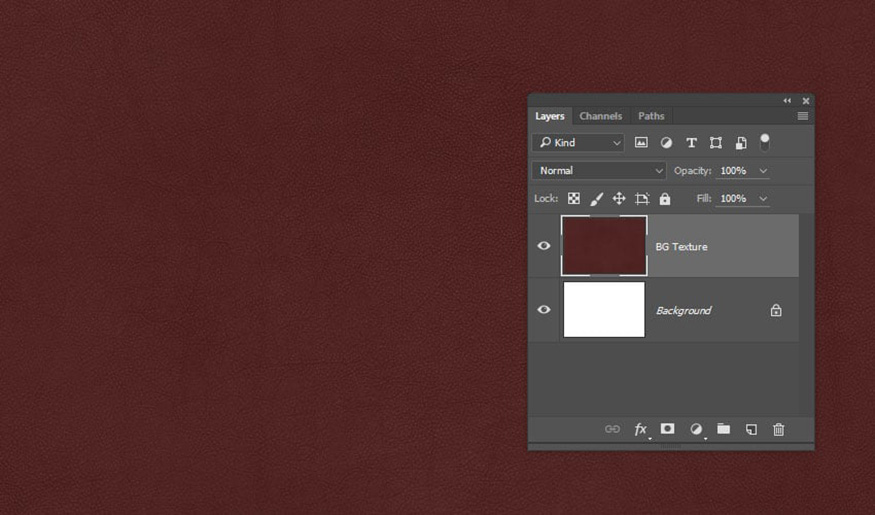
Step 1: First let's create a workspace with the appropriate size. Press Ctrl+N then enter parameters. Then go online and download the “Sorensen Leather - Campo-burgundy-20824” wallpaper and drag it above the Background layer. Then adjust the size accordingly. You can absolutely use different backgrounds.
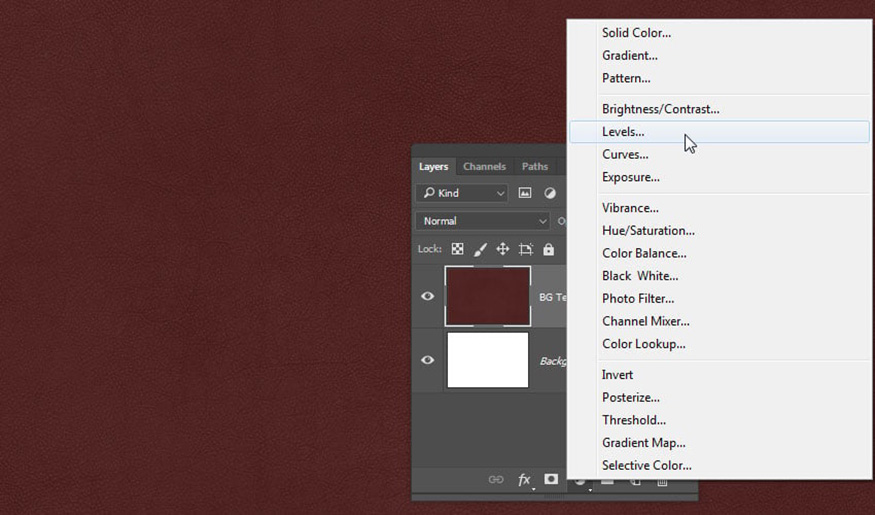
Step 2: Click on the circle icon divided in half in the bottom right corner of the layer panel - Create new fill or adjustment layer and select Levels.
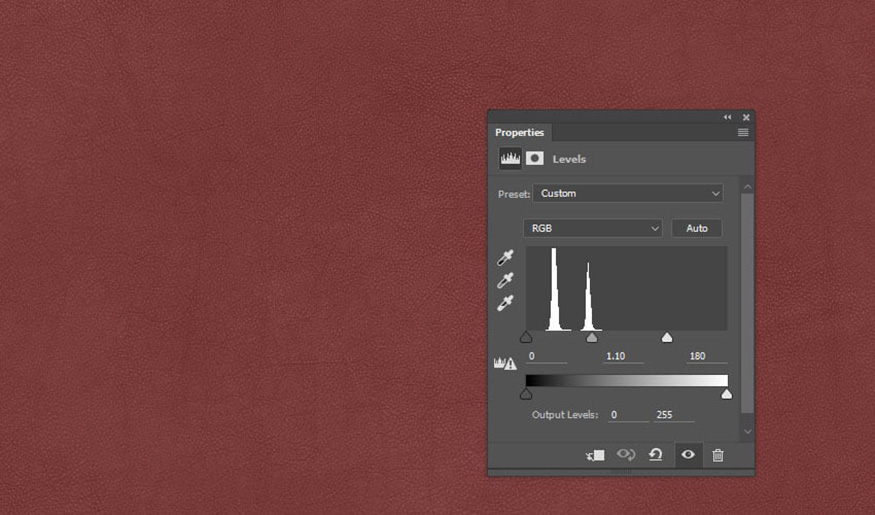
Step 3: Set the value of Gamma to 1.10 and the value of Highlights to 180.
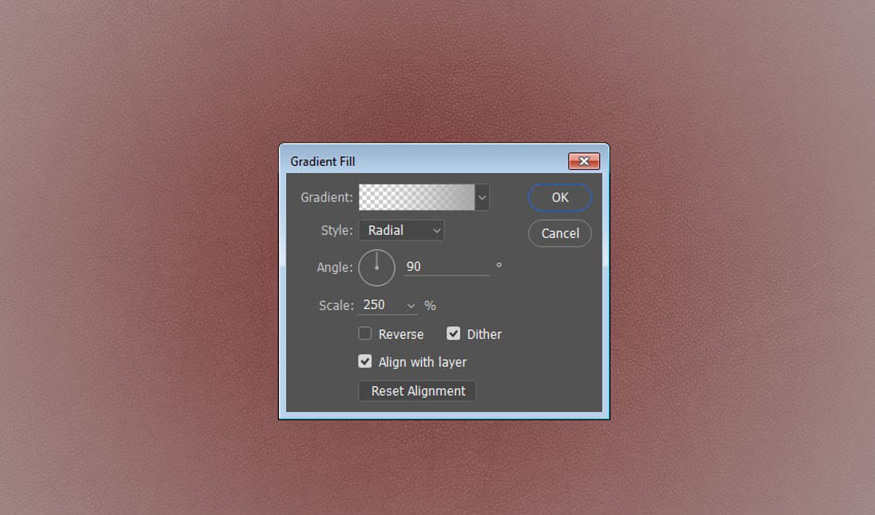
Step 4: Add Gradient layer - gradient from transparent to solid color above all other layers. To create a gradient, choose Create new fill or adjustment layer, then choose Gradient… In the Gradient Fill dialog box, use the colors “#d6d6d6” on the left and the color “#a6a6a6” on the right. Depending on the background color you use, choose the appropriate color code. Then change the Style to Radial. Set Scale to 250 and check the Dither check box.
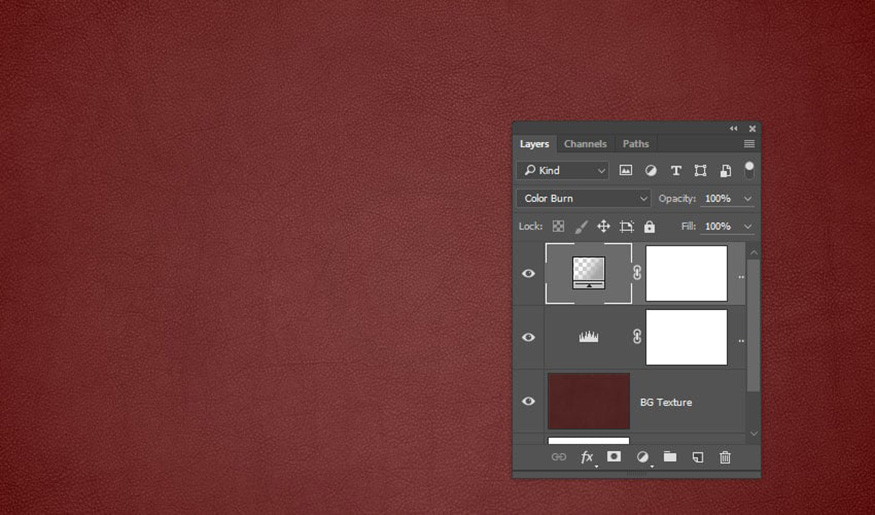
Step 5: Change the Blend Mode of the Gradient layer to Color Burn to create the background for the broken glass text effect in Photoshop.
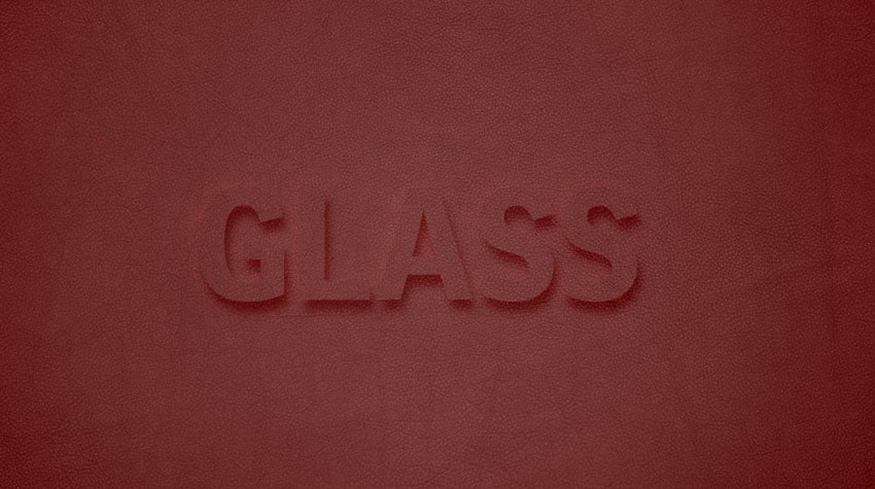
2. Create text for broken glass text effect in Photoshop
If you want to create broken glass text effect in Photoshop, you need text.
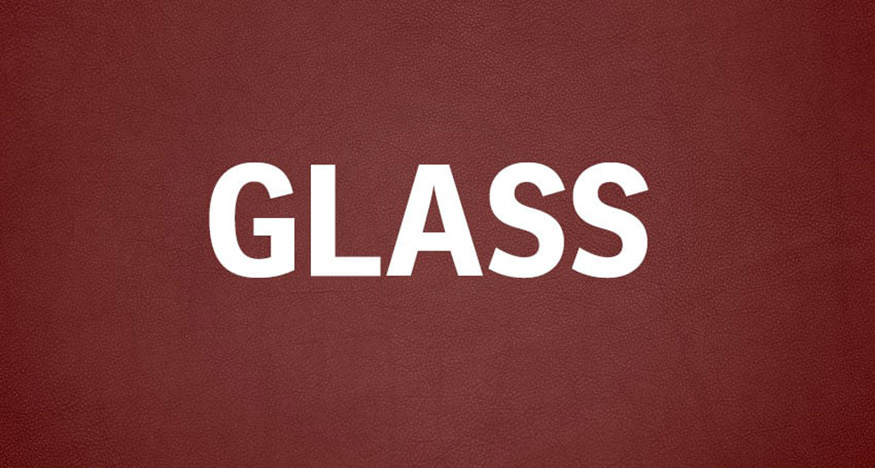
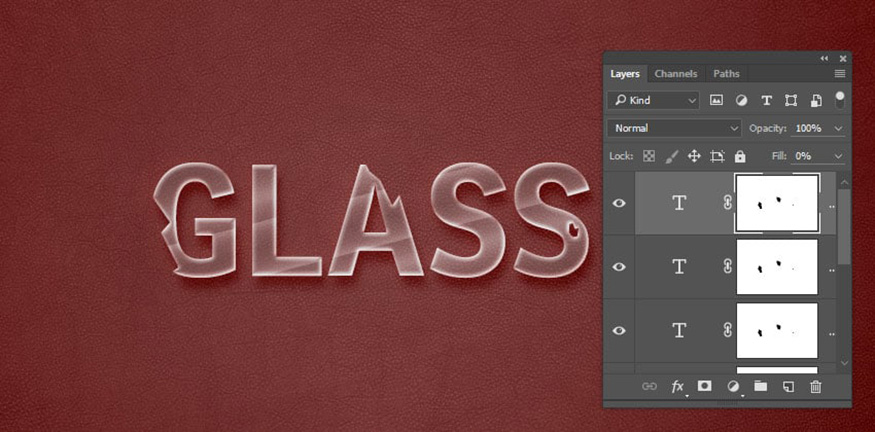
Step 1: On the toolbar, use the Horizontal Type Tool to write the text that needs to create the broken glass text effect in Photoshop. Keep the text color white, keep the text in capital letters, and the font should be a simple font, with a large font size so that the broken glass text effect in Photoshop is clearest.
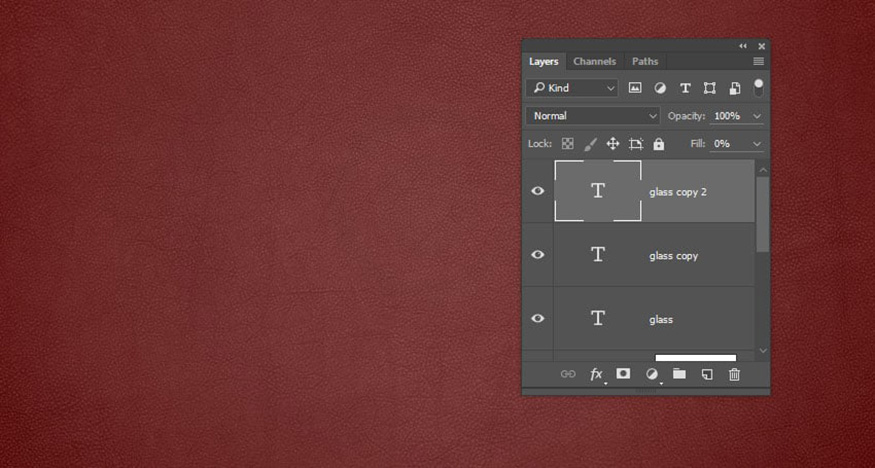
Step 2: Reduce the Fill value of the layer containing the text to 0, then press Ctrl+J twice to duplicate this layer twice.
3. Apply the Layer Style feature to the original text layer.
The Layer Style feature gives the ability to create many different effects. To apply Layer Style to the original text layer, double click on the original text layer. Now the Layer Style window will appear, you will do the following steps:
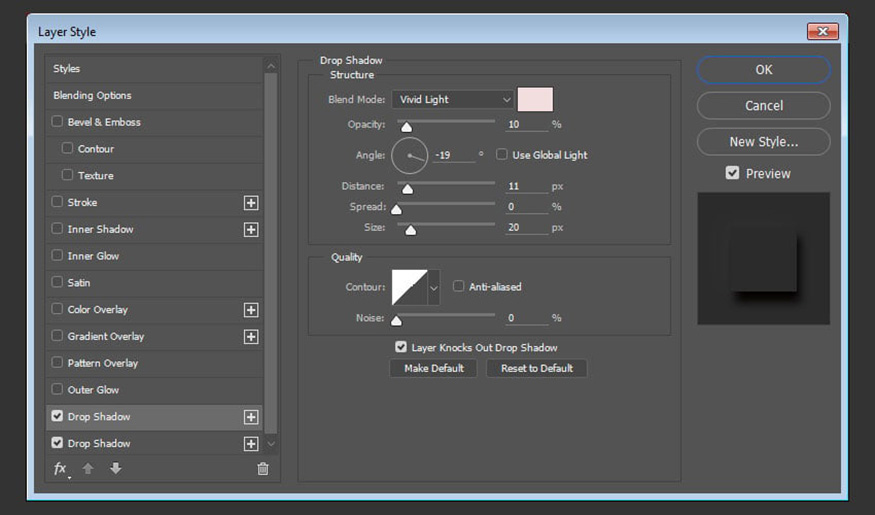
Step 1: Select Drop Shadow in the Layer Style window and set the following settings:
-
Blend Mode: Vivid Light
-
Color: #f2dede
-
Opacity: 10%
-
Uncheck Use Global Light box
-
Angle: -19
-
Distance: 11
-
Size: 20
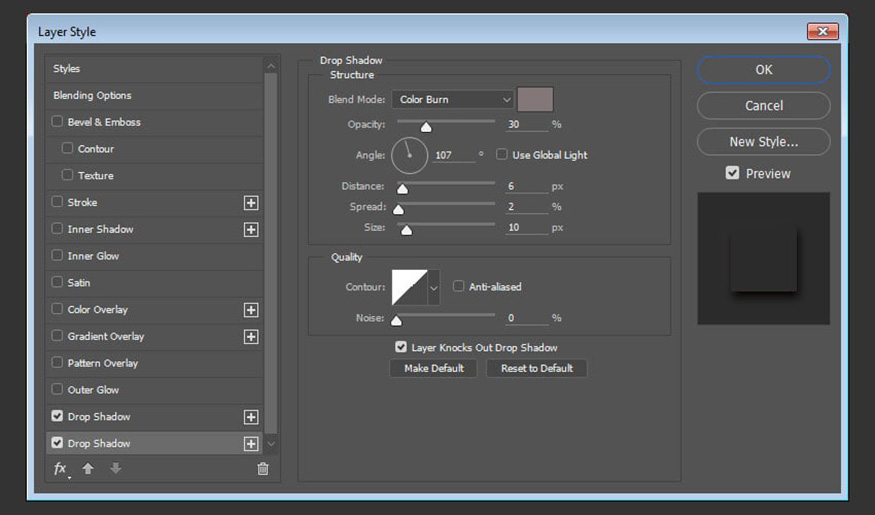
Step 2: Click the + sign to the right of the Drop Shadow tab to create another Drop Shadow effect, then set the following parameters:
-
Blend Mode: Color Burn
-
Color: #837777
-
Opacity: 30%
-
Uncheck Use Global Light box
-
Angle: 107
-
Distance: 12
-
Spread: 2
-
Size: 10

This will create the Drop Shadow and Highlight part of the effect.
4. Applying the Layer Style feature to the original text layer copy
We will double-click the first copy of the original text layer to apply the following Layer Style:
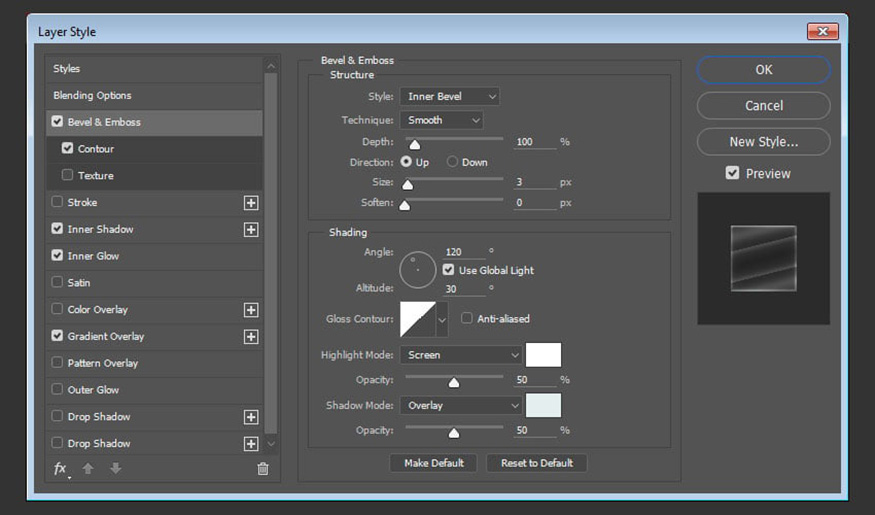
Step 1: Select Bevel and Emboss in the Layer Style window with the following settings:
-
Size: 3
-
Shadow Mode: Overlay
-
Color: #e4eeee
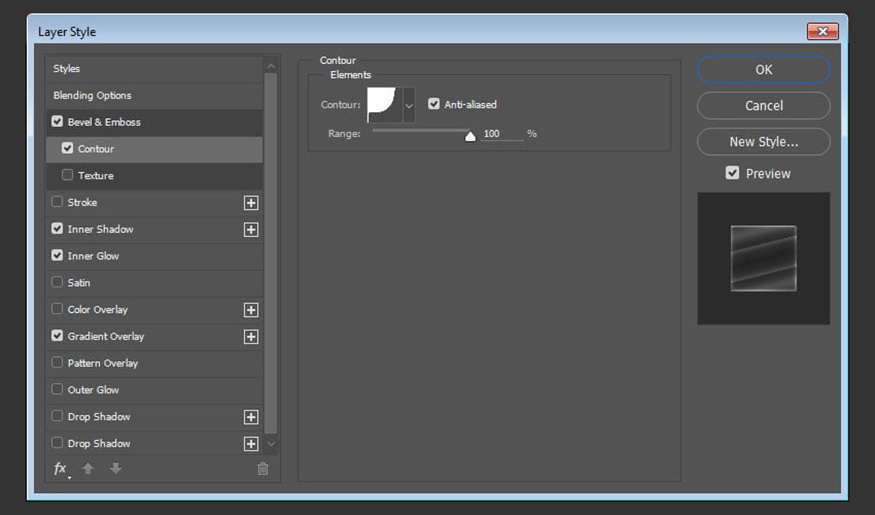
Step 2: Select Contour in the Layer Style window with the following settings:
-
Contour: Cove - Deep
-
Check Anti-aliased box.
-
Range: 100%
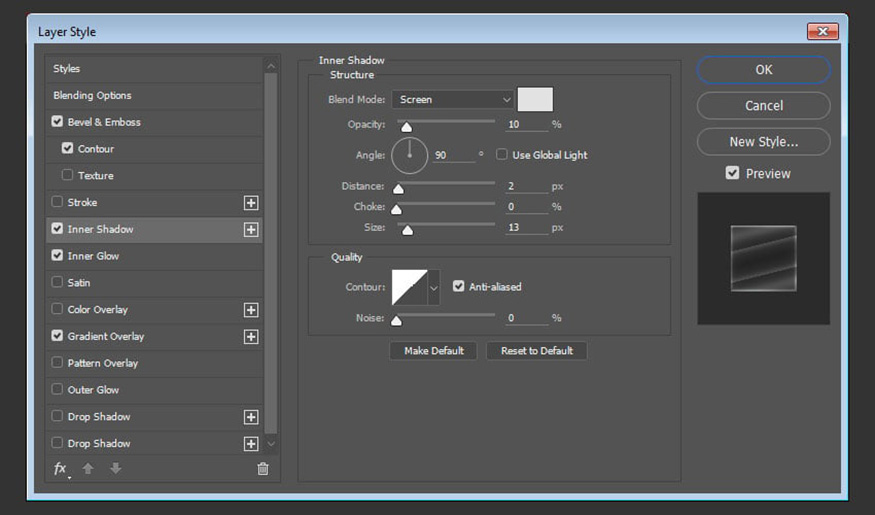
Step 3: Select Inner Shadow and set the following settings:
-
Blend Mode: Screen
-
Color: #e2e2e2
-
Opacity: 10%
-
Uncheck Use Global Light box
-
Angle: 90
-
Distance: 2
-
Size: 13
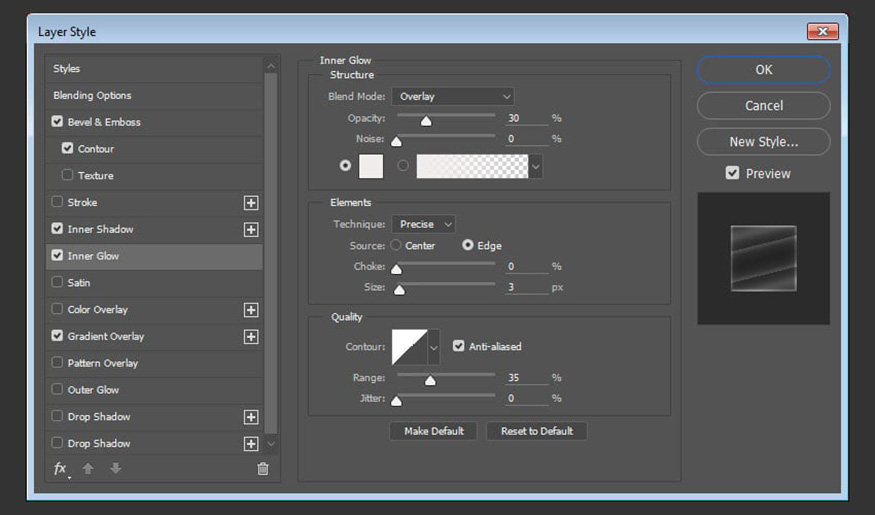
Step 4: Select Inner Glow and set the following settings:
-
Blend Mode: Overlay
-
Opacity: 30%
-
Color: #f1ecec
-
Technique: Precise
-
Size: 3
-
Uncheck Anti-aliased box
-
Range: 35
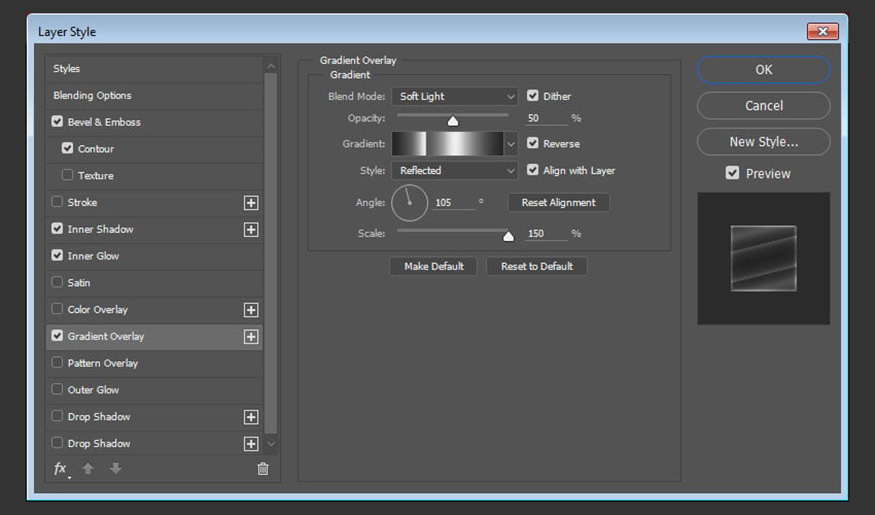
Step 5: Select Gradient Overlay and set the following settings:
-
Check Dither box
-
Blend Mode: Soft Light
-
Opacity: 50%
-
Style: Reflected
-
Angle: 105
-
Scale: 150%
-
Check Reverse box
-
Select Gradient box to change color.
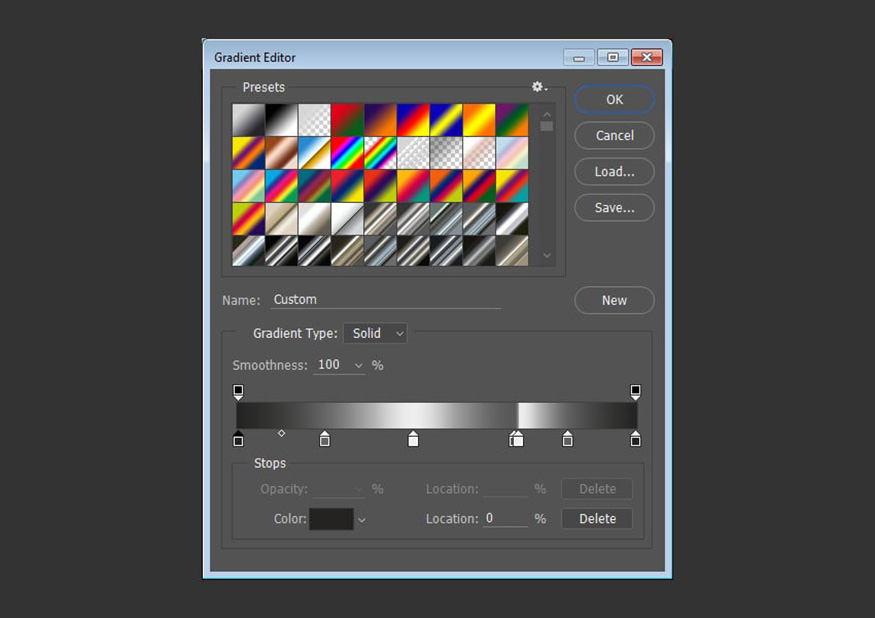
Step 6: To create a Gradient, you will need to select below the Gradient bar to add Color Stops. When you click on each Color Stop, you can change the Color and Location values. Please set the Color Stop values in order from left to right as follows:
Color - Location
-
#252321 - 0%
-
#656565 - 22%
-
#eeeeee - 44%
-
#585858 - 69%
-
#eeeeee - 70%
-
#606060 - 83%
-
#252321 - 100%
Step 7: Decrease Fill of the first copy layer to 0.

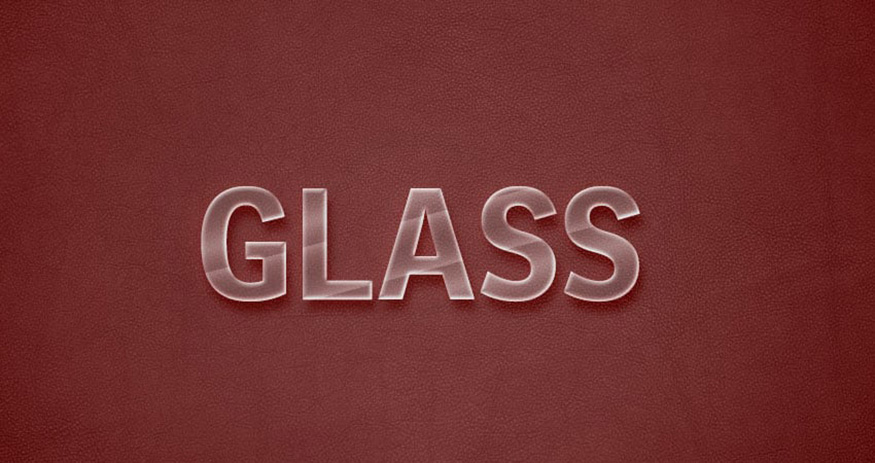
5. Apply the Layer Style feature to the second copy of the original text
We also double-click on the second copy of the text layer to open the Layer Style, then do the following steps:
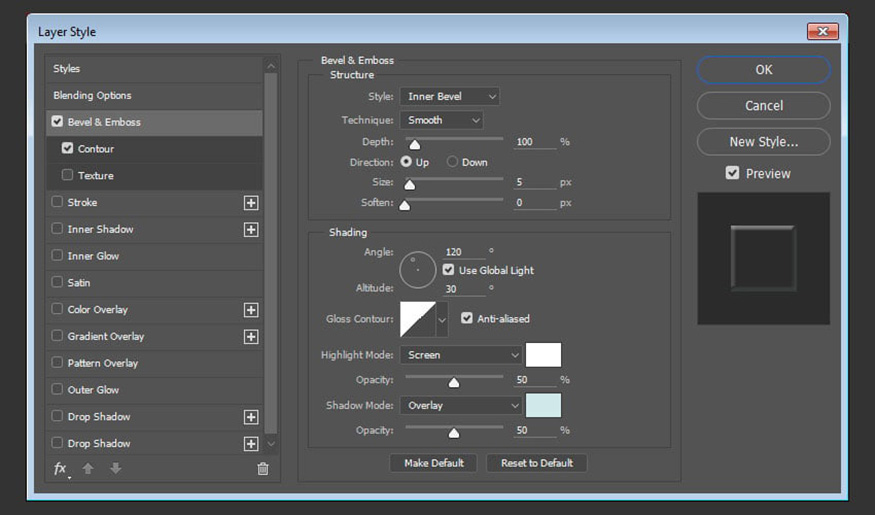
Step 1: In the window Layer Style, select Bevel and Emboss and set the following settings:
-
Size: 5
-
Check Anti-aliased box
-
Shadow Mode: Overlay
-
Color: #d0e8e9
Step 2: Select Contour and set the following settings:
-
Check Anti-aliased box.
-
Range: 70%
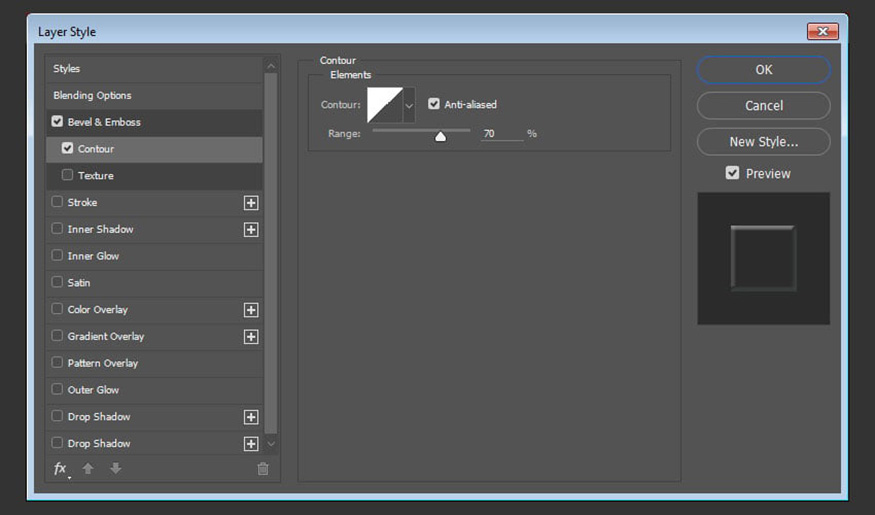
This will define the style for the end of the broken glass text effect in Photoshop.
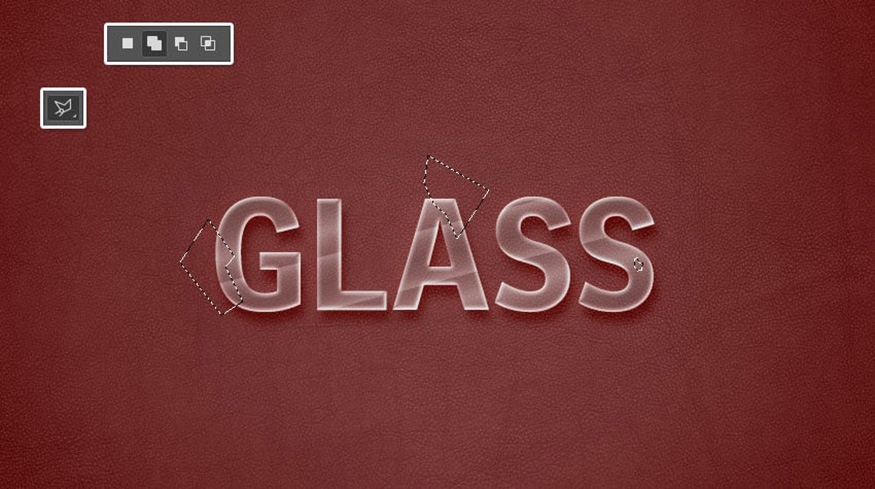
6. Creating broken pieces for text
Once we have the glass effect text, we need to create the broken glass text effect in Photoshop.
Step 1: Select the Polygonal Lasso Tool and then circle areas on the text to create sharp shapes. Make a small, angular area that resembles the broken glass area as much as possible.
Step 2: Once you've created the selection, hold down the Alt key (Option for Mac) and select Add layer mask at the bottom of the Layers panel.
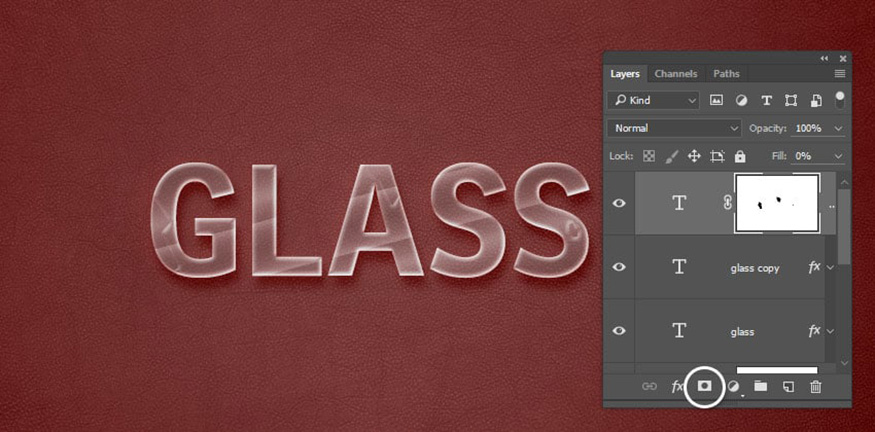
Step 3: Hold down the Alt key (Option for Mac) again while dragging the mask to each copy of the text layers.
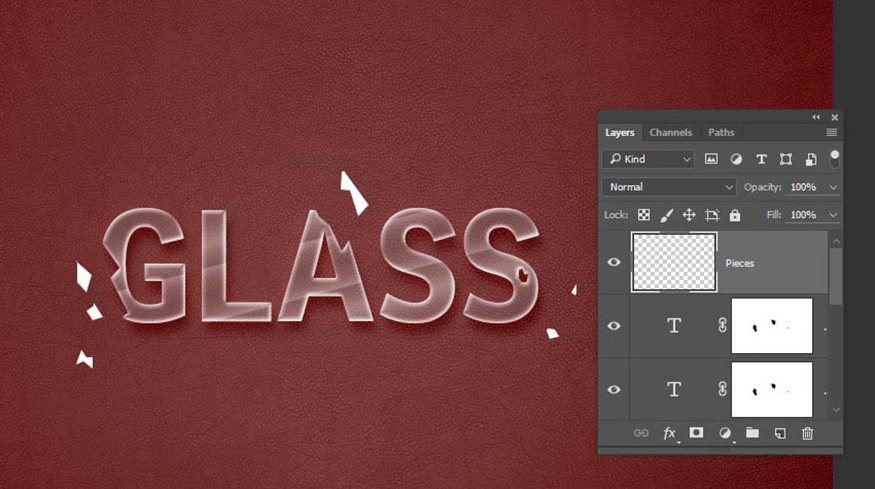
Step 4: With the Polygonal Lasso Tool, continue creating some sharp selections that resemble fragment shapes around the text. Once done, create a new layer above all the other layers, here I named it “Pieces”. Then fill the “Pieces” selection with white. Press Ctrl+R (Command-D for Mac) to delete the selection.
Step 5: Press Ctrl+J twice to duplicate the Pieces layer twice.
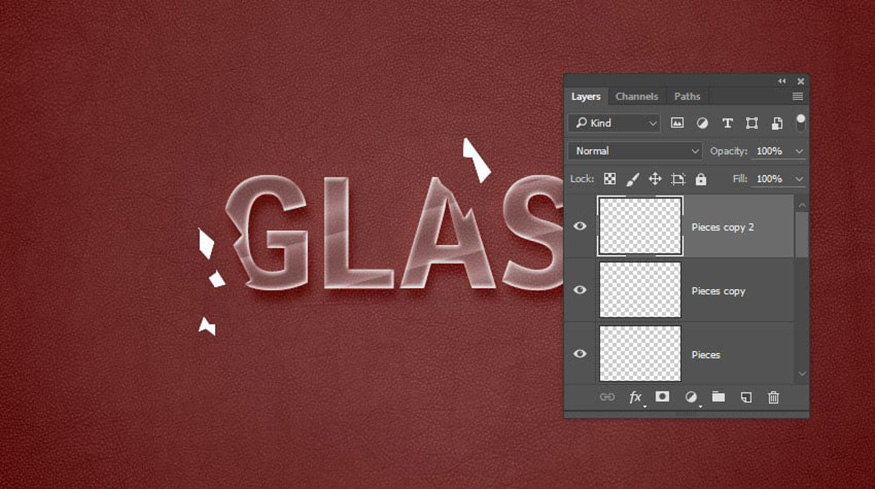
Step 6: Click on the first text layer and select Ctrl+C. Then click on the Pieces layer and select Ctrl+V.
Repeat this step for the first and second copies of the text layer and the “Pieces” layer.

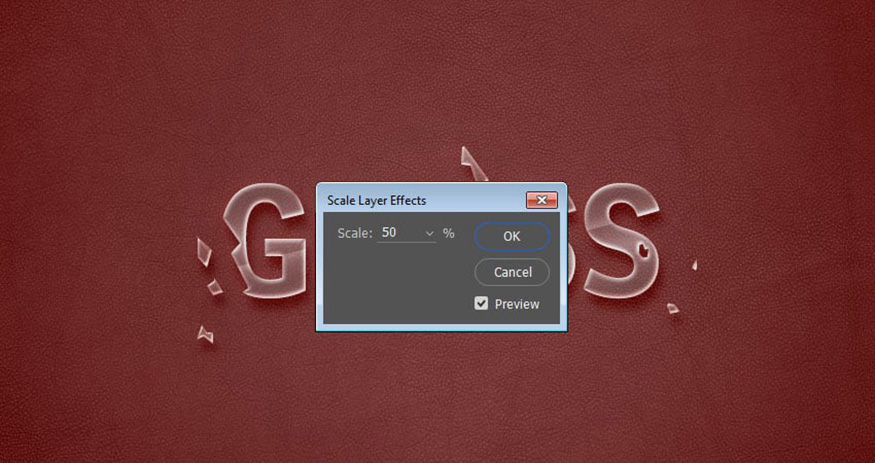
Step 7: Right-click on the “fx” icon to the right of the Pieces layer and select Scale Effect.
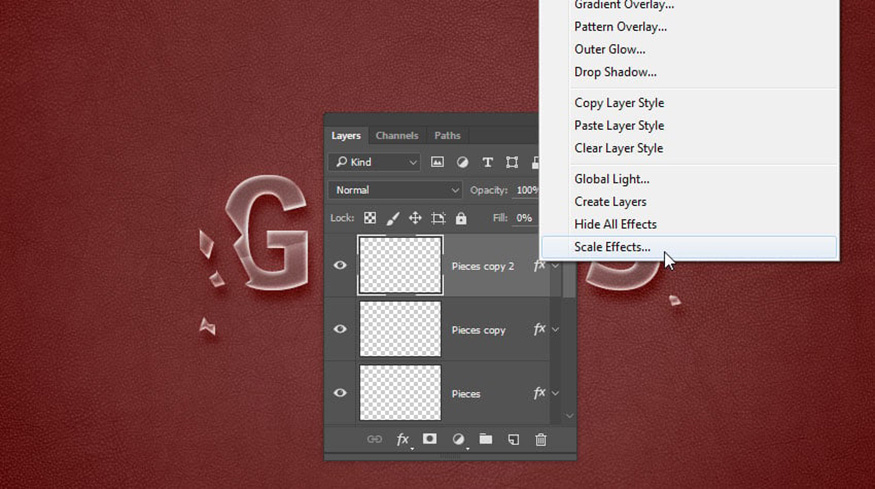
Step 8: Set the Scale value to 50%. Repeat that for the “Pieces” layer copies.
Step 9: Double click on the “Pieces” layer and change the Size value of the Drop Shadow effect to 10.
This ensures the shadow is the same size as all text.
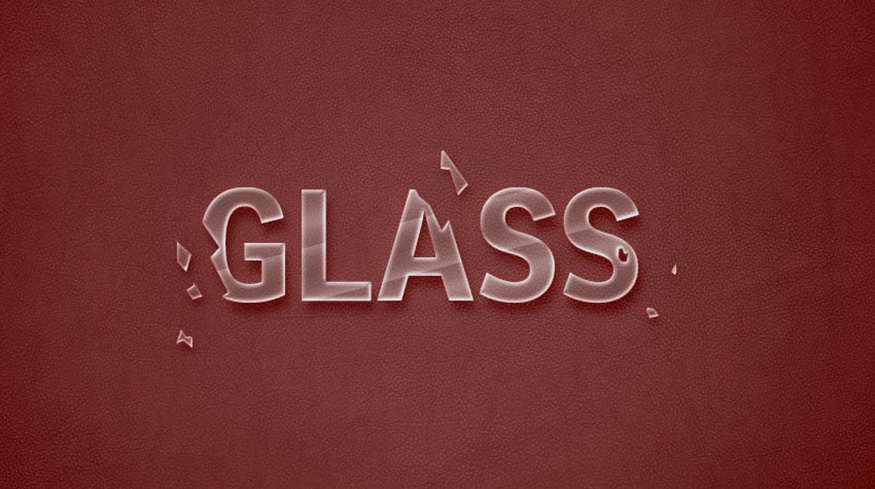
So we have completed the steps to create a broken glass text effect in Photoshop.
Above are instructions on how to create a broken glass text effect in Photoshop. This effect is not simple, it requires a combination of many tools, so try it many times to get the best results. Note, depending on your design, set the colors and parameters to best suit your needs.


VIP Products


Best Selling Products
Genuine Cheap Canva Pro
39 USD
Windows 10 & 11 Pro Key
36 USD
Copyright Adobe Lightroom Account
59 USD
ChatGPT Plus Account (GPT-4)
16 USD
Freepik Premium Account
59 USD
Capcut Pro 1 Year
39 USD
MidJourney Account
29 USD
Adobe Photoshop Copyright - Full App
120 USD
Upgrade Genuine Office 365
49 USD
Genuine Adobe Illustrator account
99 USD
Plugin Retouch4me
69 USD
Adobe Premiere Pro Account
99 USD
Upgrade genuine Capture One account
120 USD
Upgrade Duolingo Super
29 USD
Autodesk All App Account Copyright
120 USD