Best Selling Products
Blend film colors in Photoshop easy with SaDesign
Nội dung
Film colors are old colors, giving your photos a nostalgic look. Blending film colors in Photoshop appropriately will create color effects, changing the context, making your photo more vibrant and conveying meaning more easily. So do you know how to blend film colors in Photoshop? Join us to find out through the shares below.
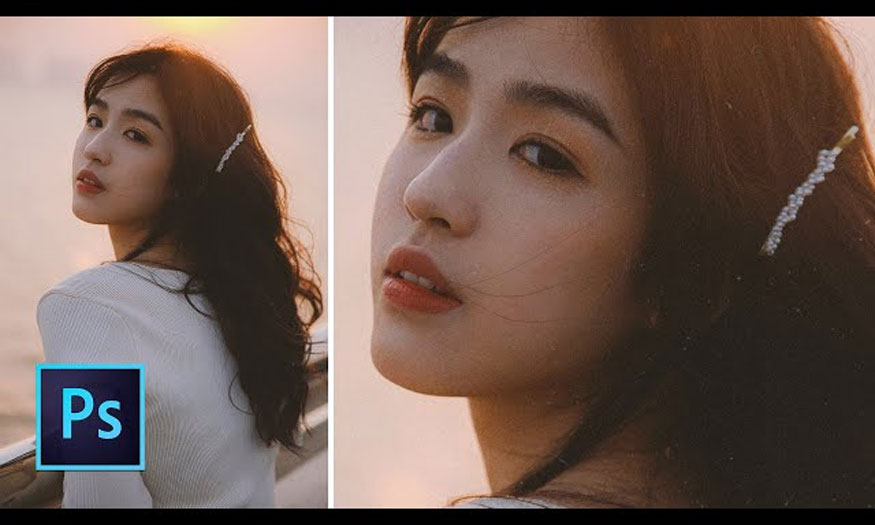
Film colors are old colors, giving your photos a nostalgic look. Blending film colors in Photoshop appropriately will create color effects, changing the context, making your photo more vibrant and conveying meaning more easily. So do you know how to blend film colors in Photoshop? Join us to find out through the shares below.
1. What is film color blend?
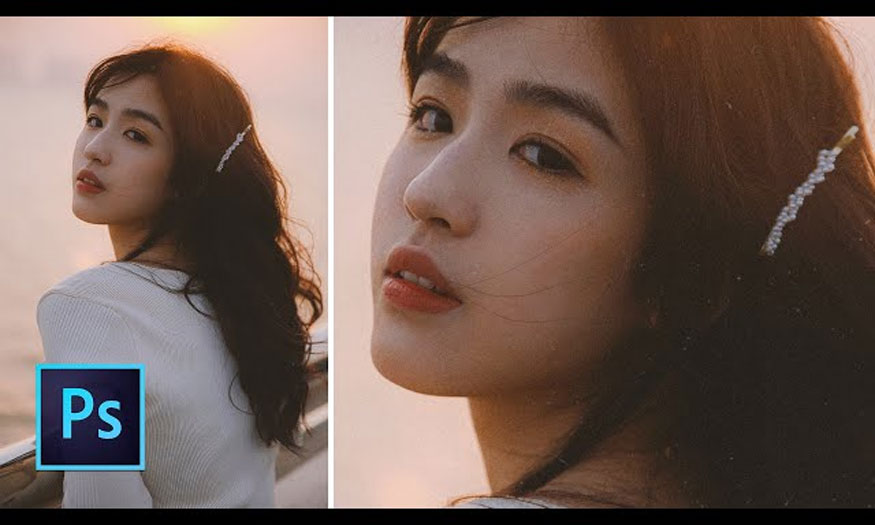
Film color is not just a specific color, but it is a perception of color. Film color or film image color are images with classic, nostalgic colors, usually blue or old yellow tones.
Film color blending is a technique of adjusting and mixing colors for photos in an old, nostalgic style. We will mix and combine many colors with different shades to create a new photo with the "breath" of classic film colors.
2. Blending film colors in Photoshop manually
You can blend film colors in Photoshop manually. It means you will manually adjust the color parameters to get a desired film color photo. Manually blending film colors in Photoshop has many different adjustments. You can try to refer to the following 2 ways.
2.1. Blending vintage film colors
To change the color of your photo to a gentle vintage style, we can proceed with the following steps:
Step 1: First we need to open the image that needs to be blended with film colors in Photoshop.
On the menu bar, select File => Select Open => Select the image to blend color => OK. Or press the keyboard shortcut Ctrl+O => Select the photo and press OK.
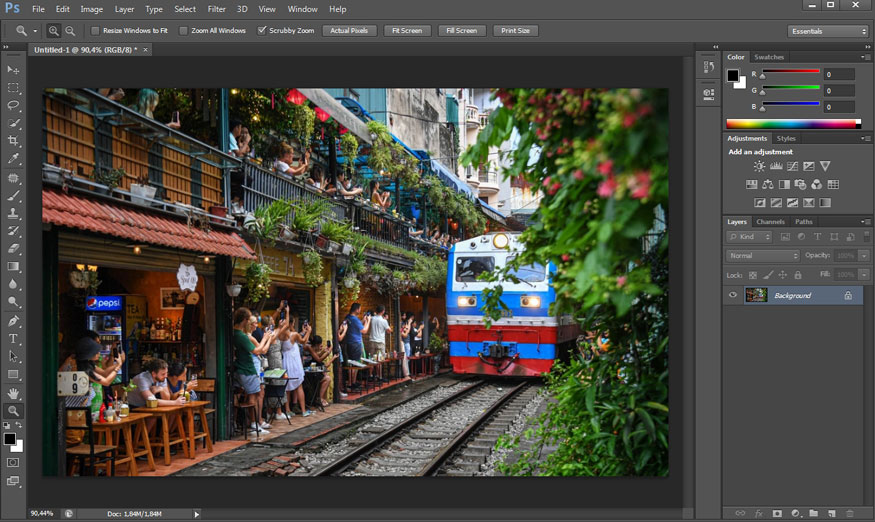
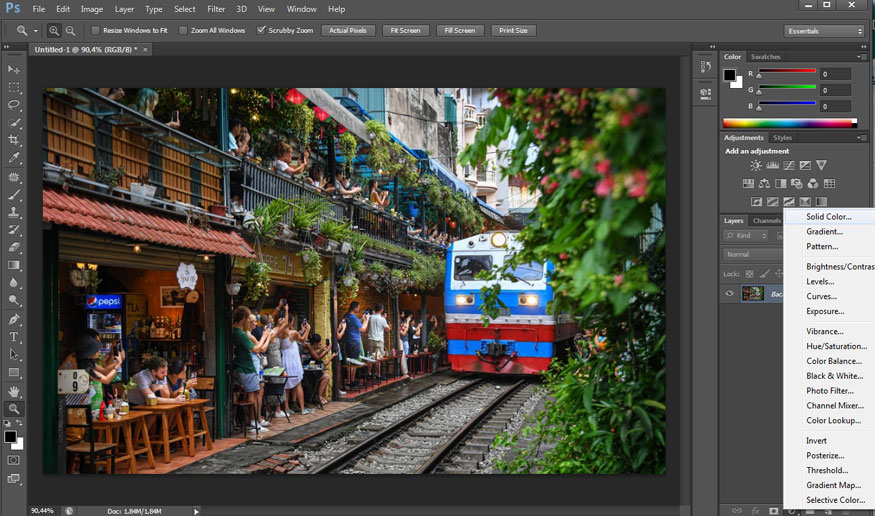
Step 2: After opening the image, you need to add an Adjustment Layer. At the bottom right of the screen, click on the circle icon and select Solid Color.
Step 3: Now the Color Picker (Solid Color) dialog box will display. Choose a blue color with appropriate saturation or you can use the color code “#0161b2” and then click OK.
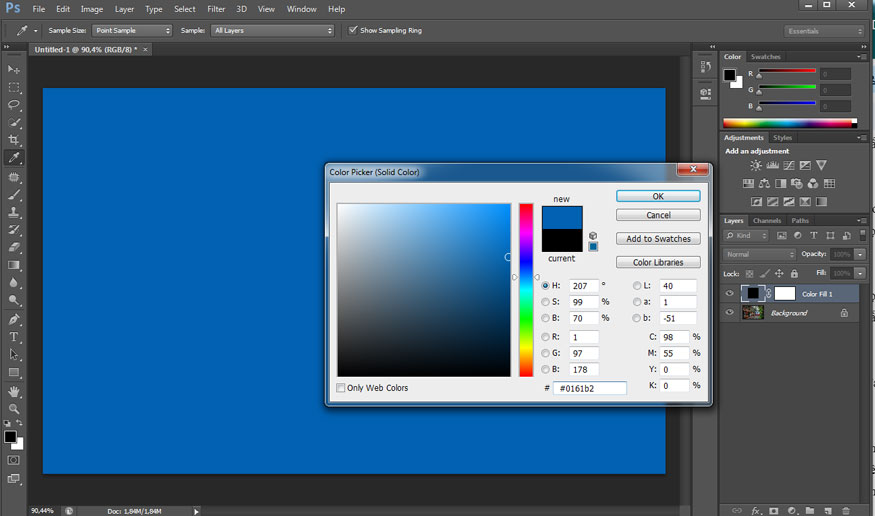
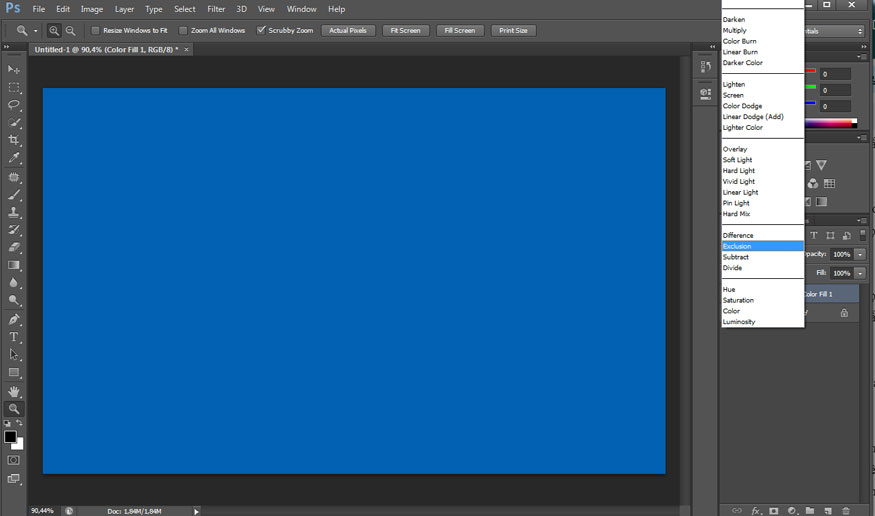
Step 4: Now we will change the Blending Mode of the Color Fill. At the Blending Mode of the photo, choose Exclusion.
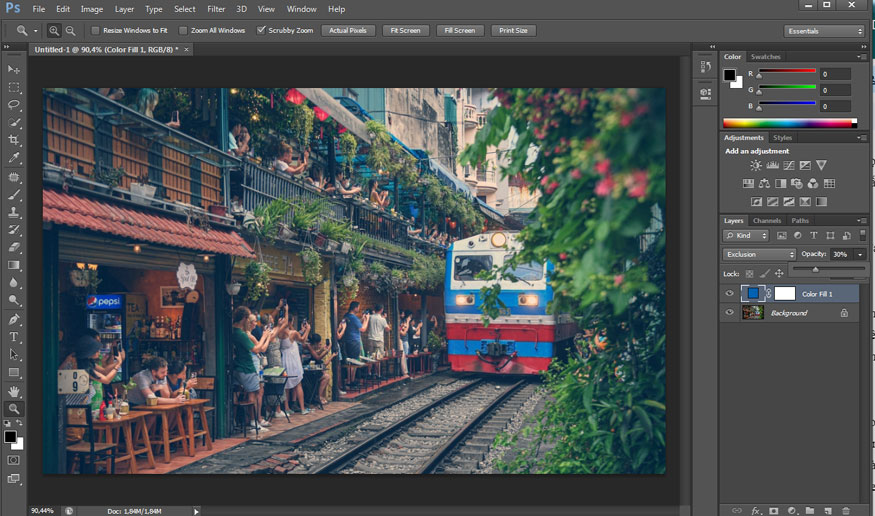
Step 5: Now the blue color will be mixed into the photo. Please reduce the Opacity to about 25% - 35% depending on each photo. However, the Opacity level considered most suitable for this type of color film image is about 30%.
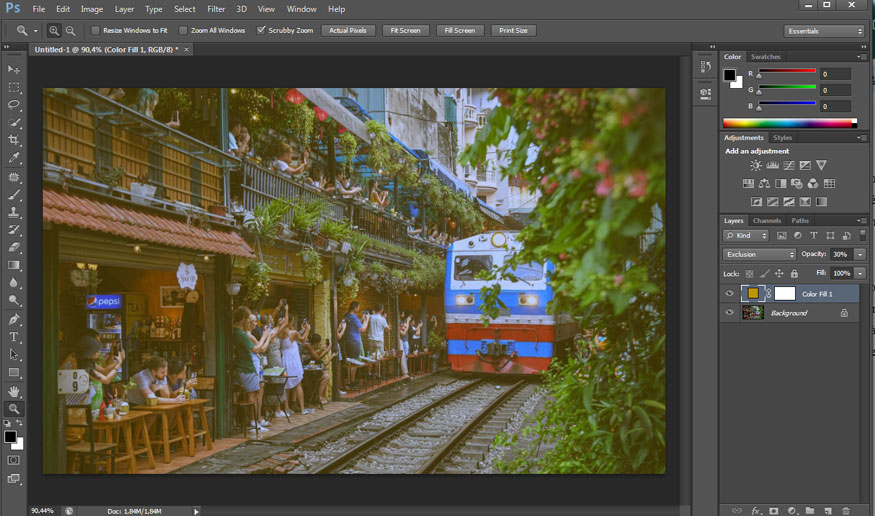
Step 6: So we have manually blended film colors in Photoshop. Now just double click on Adjustment Layer Color in your Layer window to choose any color to blend appropriately for the photo. Below is a photo I chose to blend in orange to see the color change.

2.2. Blending ancient film colors
With a more ancient photo color style, we can perform film color blends in Photoshop through some basic steps as follows:
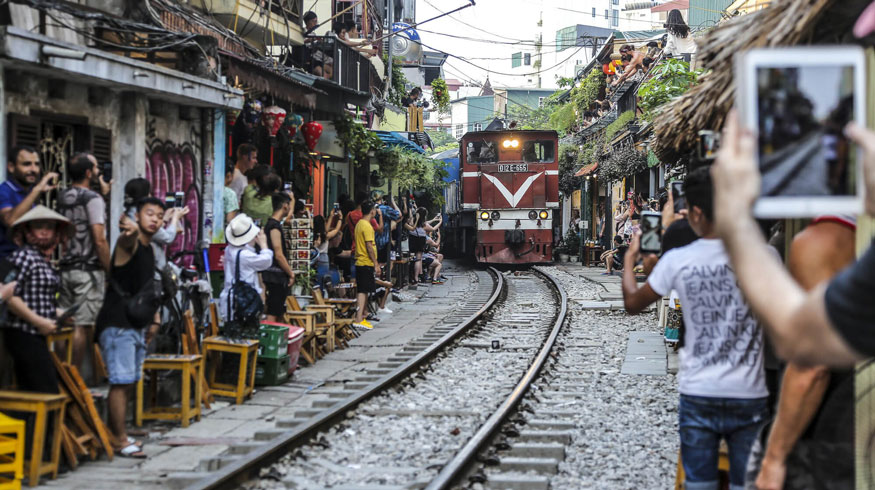
Step 1: Open the photo that needs to be blended.
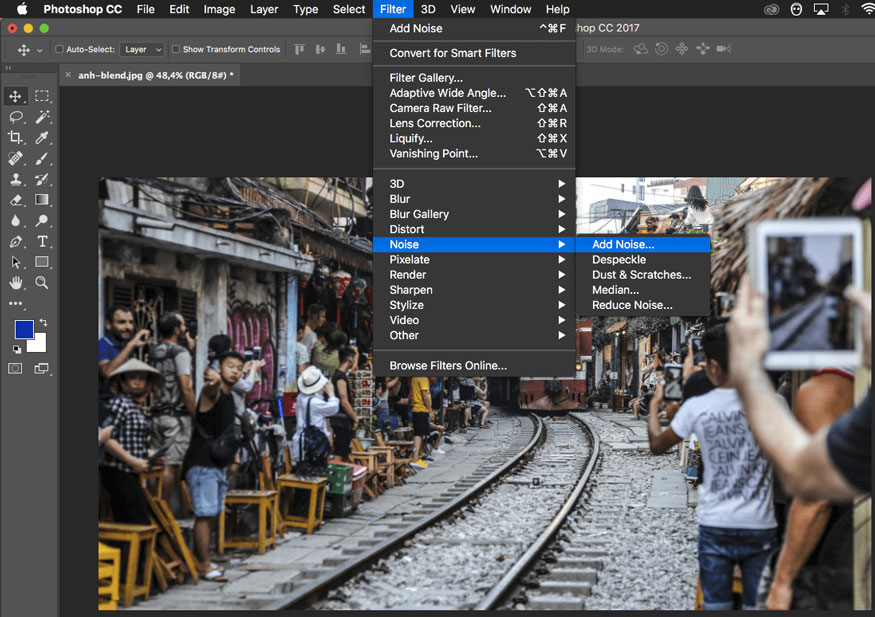
Step 2: On menu bar. select Filter => Noise => Add noise.
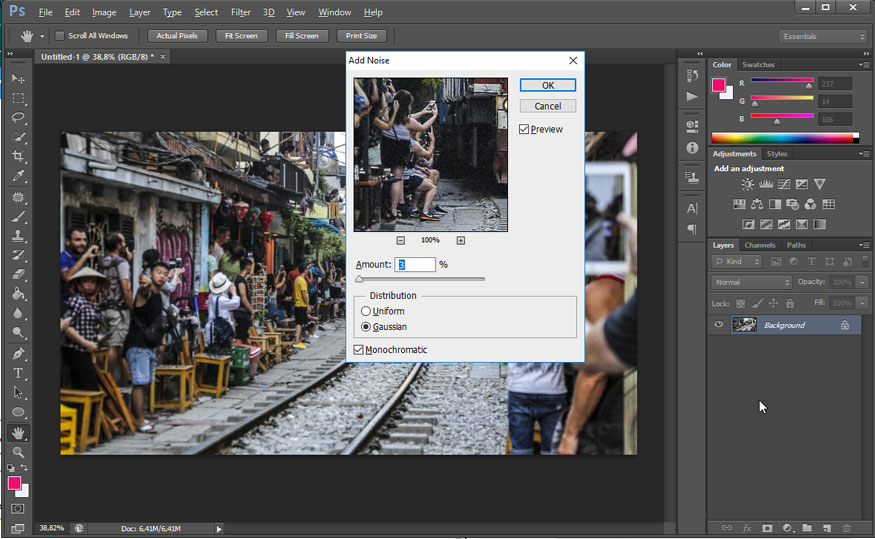
Step 3: In the Add Noise dialog box, adjust the parameters as shown:
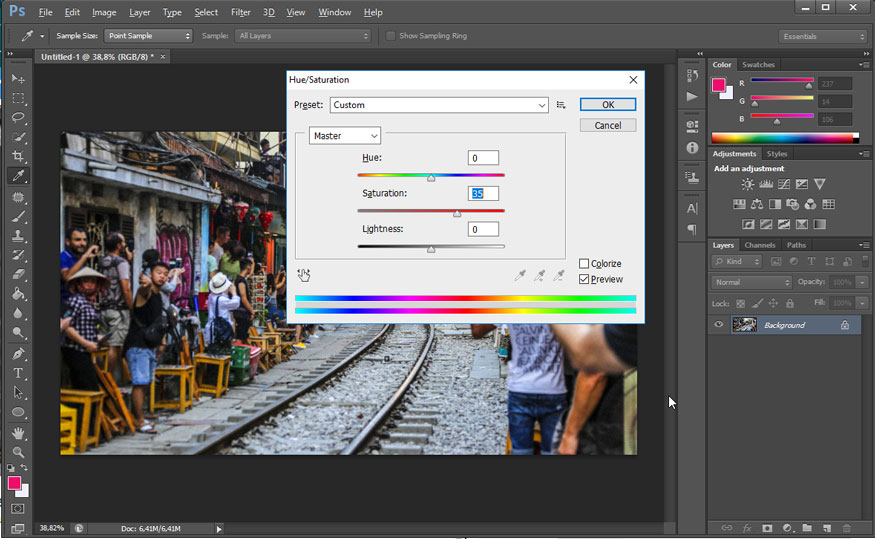
Step 4: Press the key combination Ctrl+U, now the Hue/Saturation adjustment panel will display on your work screen, you can adjust to increase the freshness of the photo's colors.
Step 5: At the bottom of the Layer tab, click the circle icon and then select Exposure.
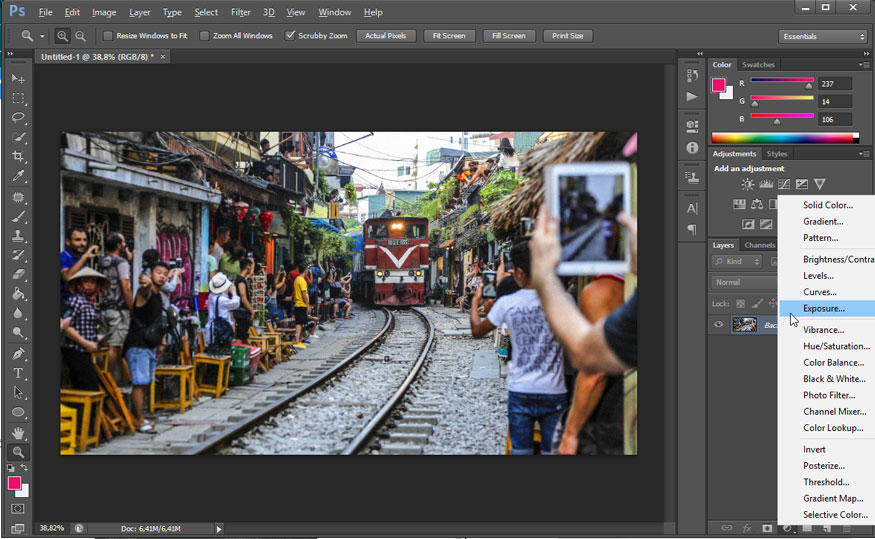
Step 6: Adjust Exposure parameters depending on your photo. You can refer to the parameters as shown in the picture:
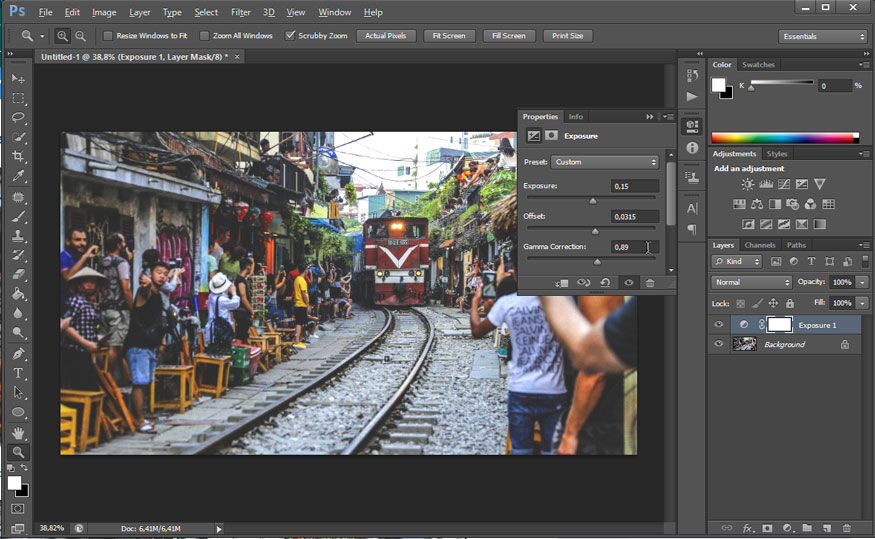
At this point we will get the following temporary image:
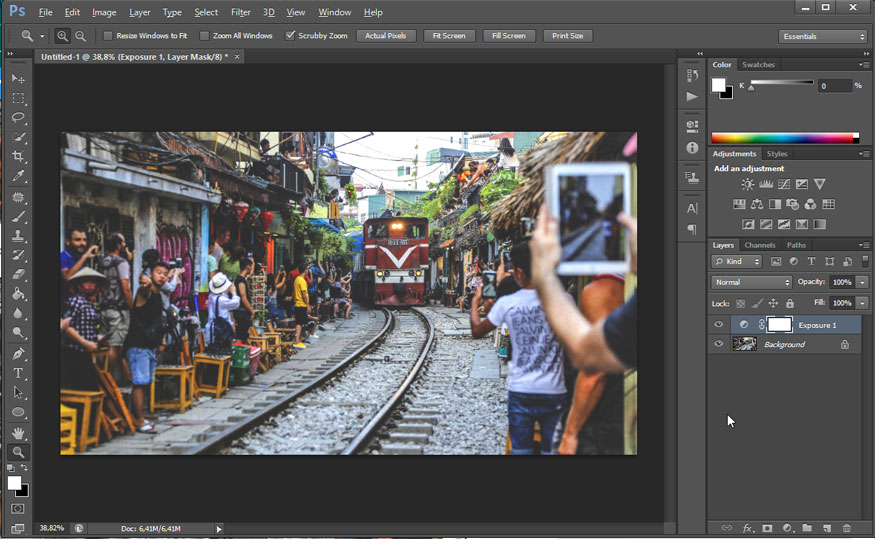
Step 7: On the menu bar, select Edit => Select Fill or press the keyboard shortcut Shift + F5. The screen will now display the Color Fill panel.
- Contents: Select Color => Select color code “#0161b2” => Click OK.
- Blending: Select Mode Exclusion and Opacity at about 40% for old film images.
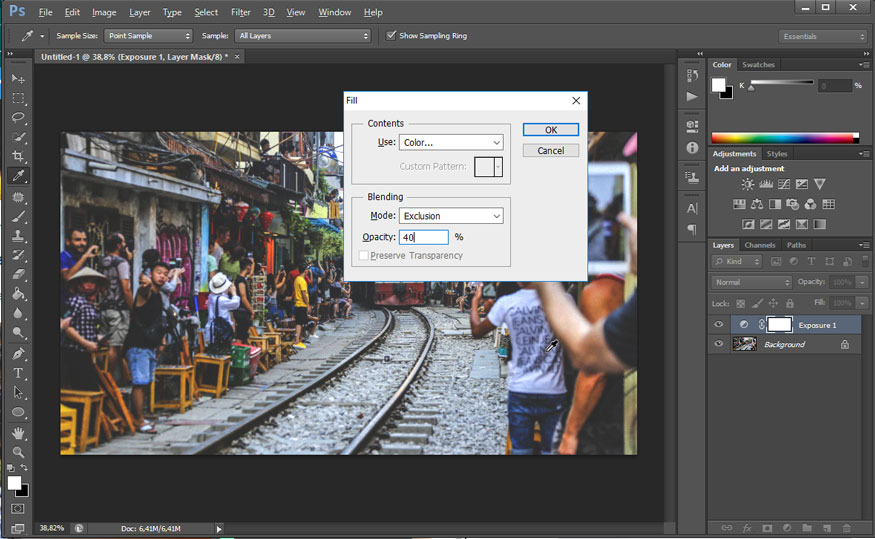
Step 8: We will do the same as step 7 above, also go to Edit => Select Fill then adjust the parameters in the Fill menu.
- Contents: Select Color => Select color code “#d5d3d2” => Click OK.
- Blending: Choose Mode Multiply and Opacity at about 40 - 50% for old film images.
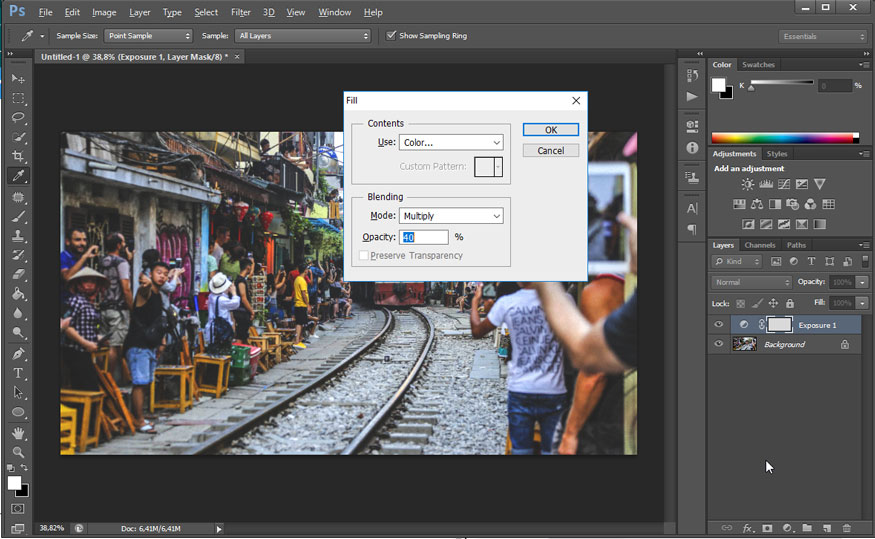
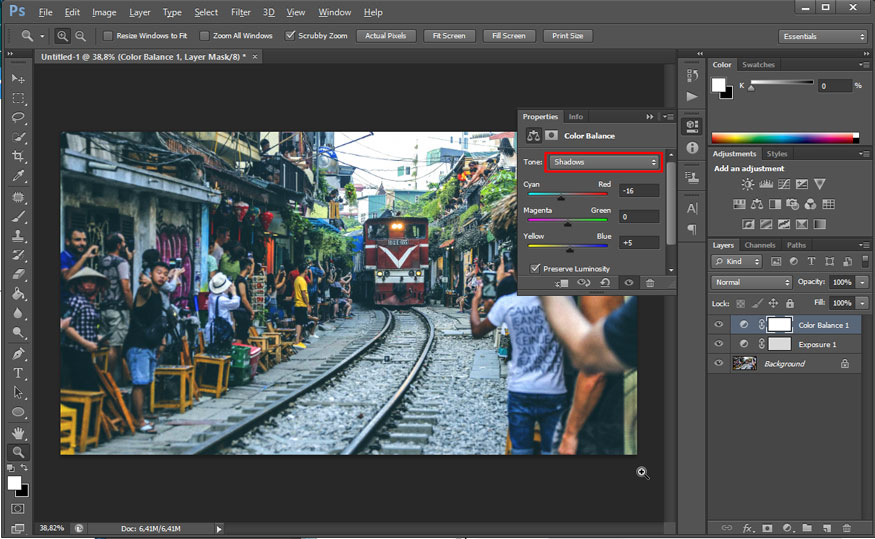
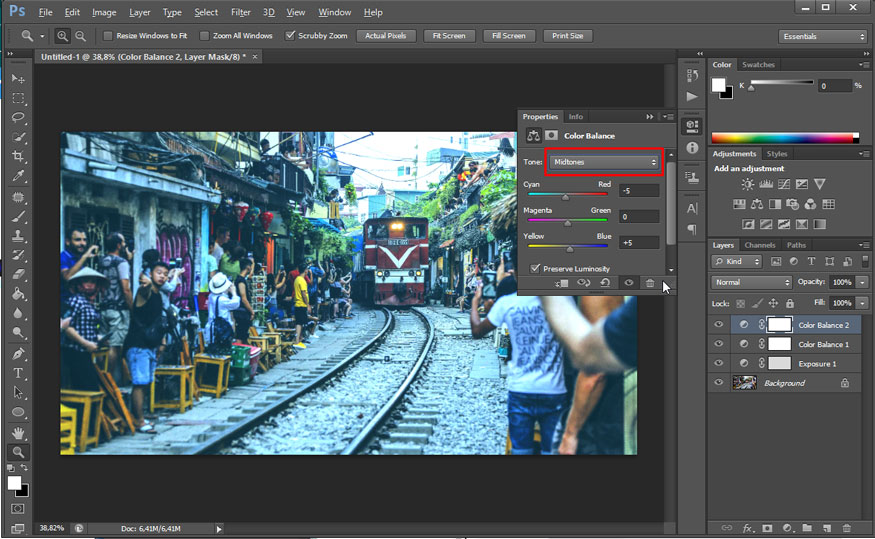
Step 9: Select the circle icon (Adjustment Layer) in the bottom toolbar of the Layer tab => Select Color Balance. Then adjust the 3 color modes as follows:
Shadows mode
Midtones mode
Highlight mode
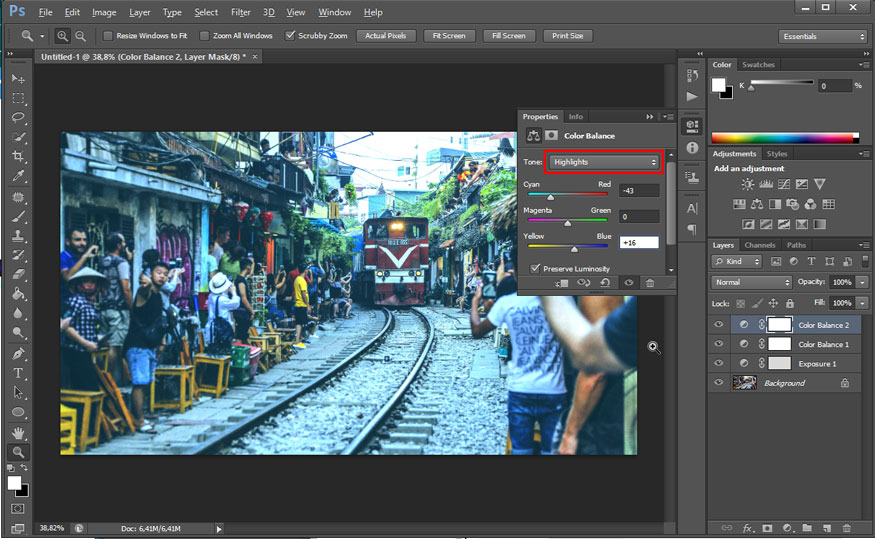
Step 10: After finishing the operations, if your photo is still not as desired, you can use the keyboard shortcut Ctrl + M or Ctrl + L to make further adjustments to make the photo more beautiful. The result we get will be:
.jpg)
3. Blend film colors in Photoshop using Action
Besides blending film colors in Photoshop manually, we can use the action tool. This means you will apply someone else's film color blending method to your photo. The photo adjustment parameters will be saved in the action file, you just need to download that action file and apply the color blend to your photo.
The steps are:
Step 1: First you need to download the Photoshop Action file to your computer at the link below: https://phlearn.com/tutorial/create-a-cinematic-look-in-photoshop-realistic -color-film-effect/
Before downloading, you must register an account first.
Step 2: Open the image that needs to be blended with film color in Photoshop.
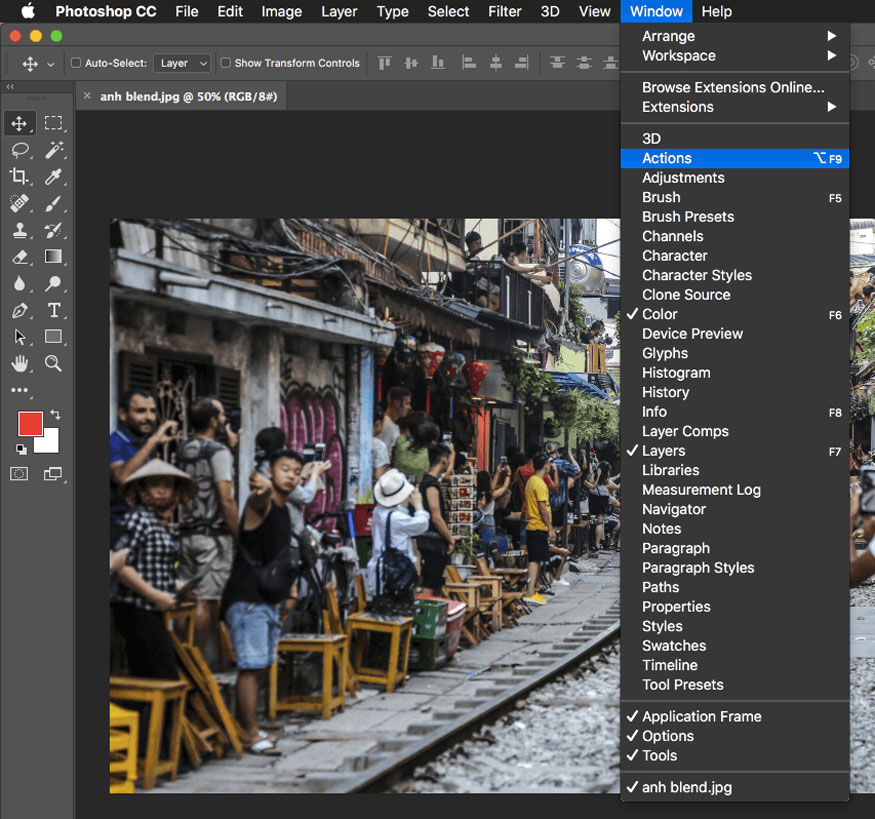
Step 3: On the menu bar, select Windows => Actions. Or press the keyboard shortcut Alt+F9. The Action panel will display in your working file.
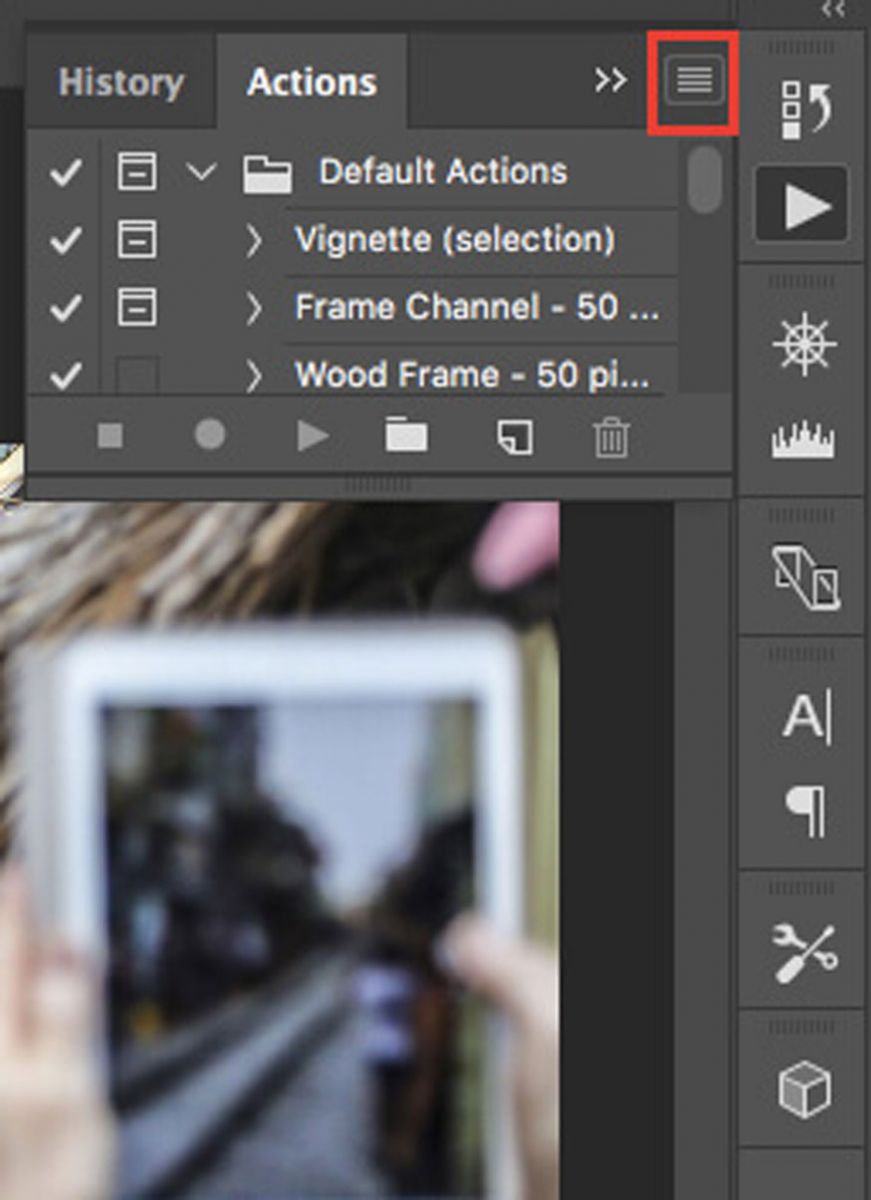
Step 4: In the Action panel, click on the menu (4 small dash lines icon in the top right corner).
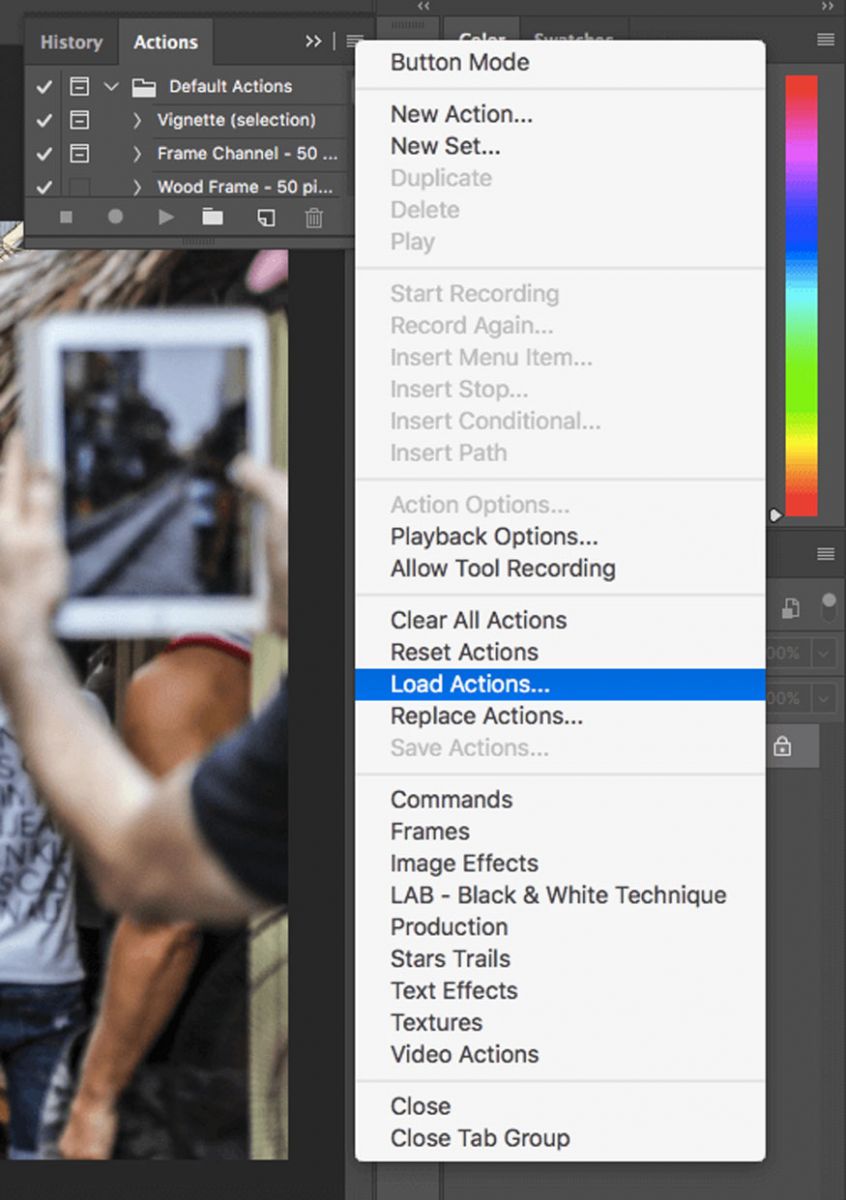
Step 5: Select Load Actions
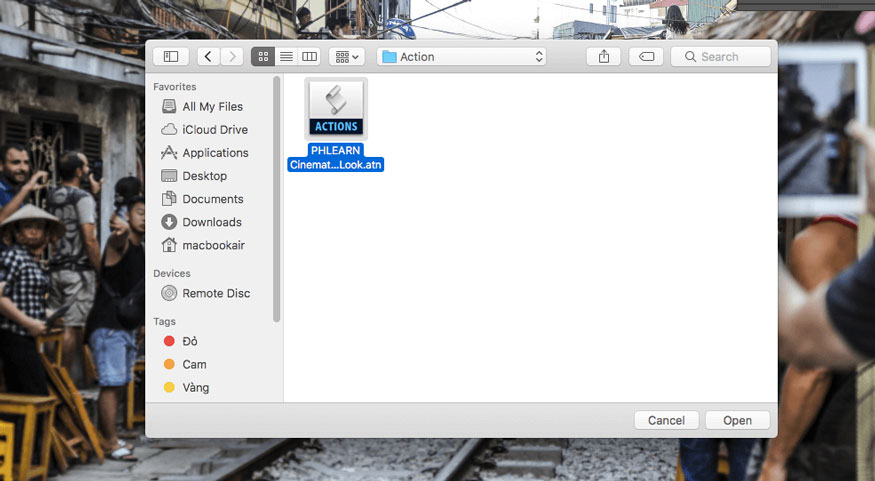
Step 6: A window will now appear on your work screen. Find the Action file "PHLEARN Cinematic Look.atn" you just downloaded and click Open to load this Action into Photoshop software.
Step 7: The new Action file will automatically display in the Action panel.
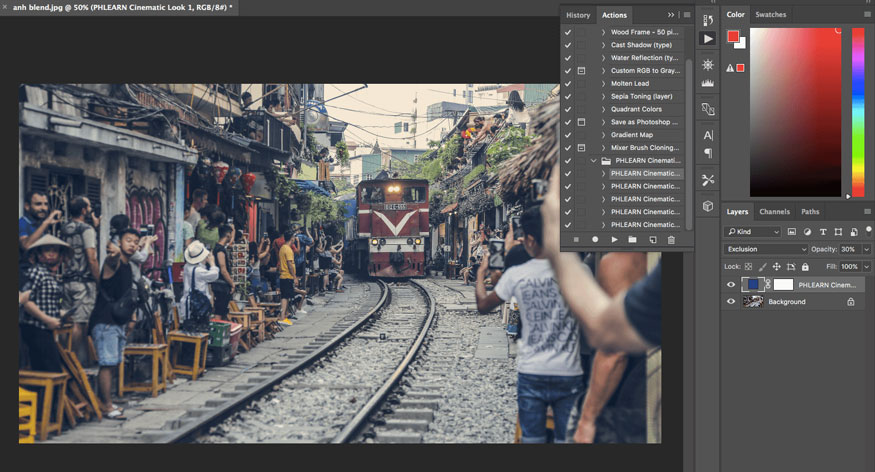
Then, select the photo you want to blend with film color in Photoshop and click the Play icon at the bottom of the Action panel. Now the film color effect you choose will be applied to your image.

Step 8: Continue if you want your photo to look like a movie image, you should add two black bars at the beginning and end of the photo to shrink the photo to a 16:9 ratio - This is the ratio most common with television and computer screens.
To insert black bars on the image, proceed as follows: File => Open => Find and select the Action file you just downloaded to your computer => Select Image => Select the file “Cinematic-Look-Film-Bars.png” and then click Open.
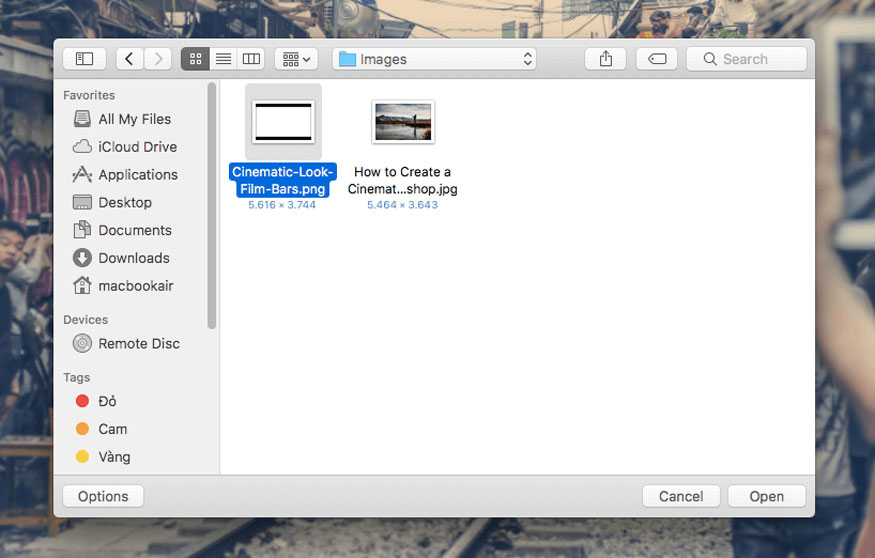
This png file only contains 2 black bars top and bottom, so you need to use the Move Tool to move “Cinematic-Look-Film-Bars.png” into your image so that it is most symmetrical.
If you want to change the size of the bar larger or smaller, you can drag the mouse and then hold down Shift + Alt while switching to aspect ratio and resizing around the center of the image.
The final image we get will be:
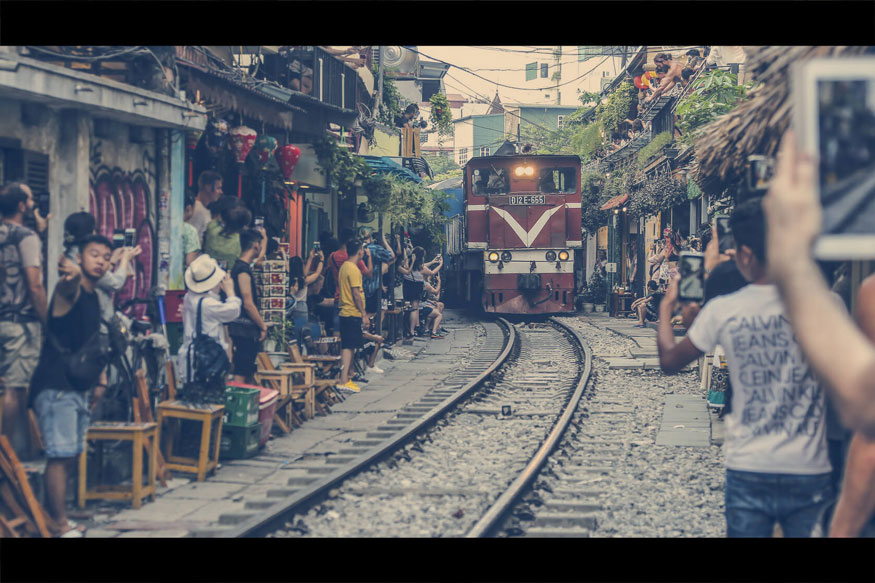
So you have blended film colors in Photoshop using actions. Above is a summary of some simple ways to blend film colors in Photoshop. Hopefully the above sharing from SaDesign can help you create the most satisfactory color film photos.


