Best Selling Products

Plugin Retouch4me
69 USD

Upgrade genuine Capture One account
120 USD

Genuine Adobe Illustrator account
99 USD

Freepik Premium Account
59 USD

Copyright Adobe Lightroom Account
59 USD

MidJourney Account
29 USD

Windows 10 & 11 Pro Key
36 USD

Adobe Photoshop Copyright - Full App
120 USD

Capcut Pro 1 Year
39 USD

ChatGPT Plus Account (GPT-4)
16 USD

Upgrade Duolingo Super
29 USD

Upgrade Genuine Office 365
49 USD

Adobe Premiere Pro Account
99 USD

Genuine Cheap Canva Pro
39 USD

Autodesk All App Account Copyright
120 USD
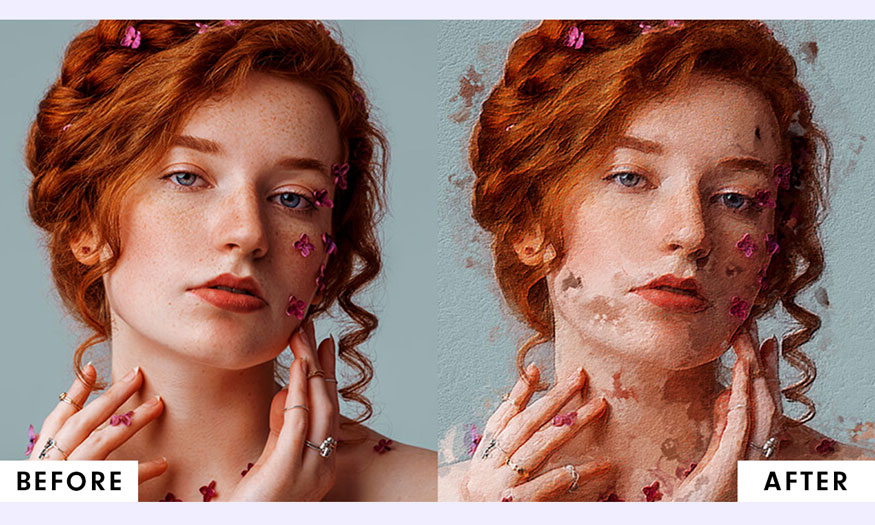
How to turn photos into oil paintings with Photoshop
Photos can be turned into oil paintings with just a few steps in Photoshop software. The combination of many different tools gives your original photo a completely new, very "artistic" look. So do you know how to convert photos into oil paintings using Photoshop? Join us to immediately learn the steps to convert photos into oil paintings in Photoshop through the following shares.

Photos can be turned into oil paintings with just a few steps in Photoshop software. The combination of many different tools gives your original photo a completely new, very "artistic" look. So do you know how to convert photos into oil paintings using Photoshop? Join us to immediately learn the steps to convert photos into oil paintings in Photoshop through the following shares.
Steps to convert photos into oil paintings using Photoshop
Converting photos into oil paintings using Photoshop will help your photos look more "artistic" and more impressive. To be able to convert a photo into an oil painting using Photoshop, let's refer to some basic steps as follows:
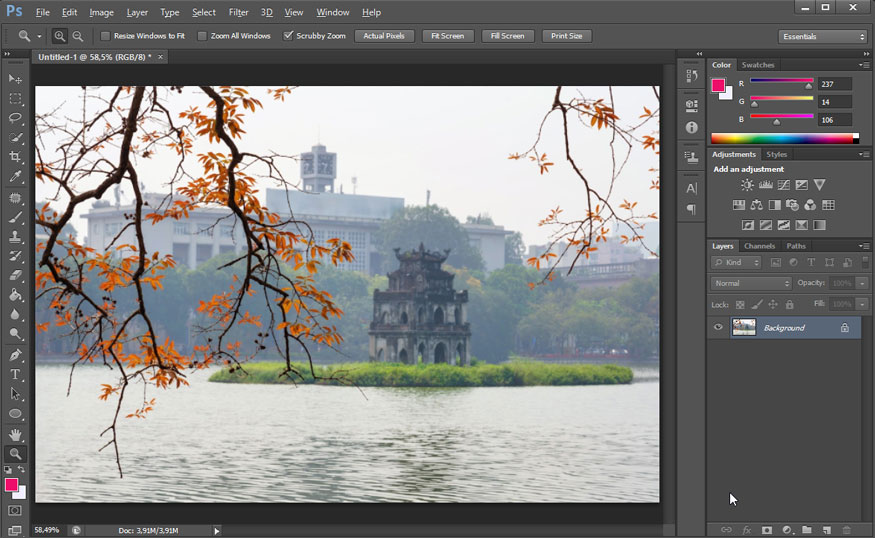
Step 1: First we need to open the photo we want to convert into an oil painting using Photoshop. The photo should have high contrast for the best effect when converted into a painting.
Please select File on the menu bar => Open => select the image to open => select Open. Or you can press the key combination Ctrl+N.
Step 2: Duplicate the Background layer by right-clicking on Background and selecting Duplicate Layer. Or you can use the keyboard shortcut Ctrl+J (Cmd+J for MacOS).

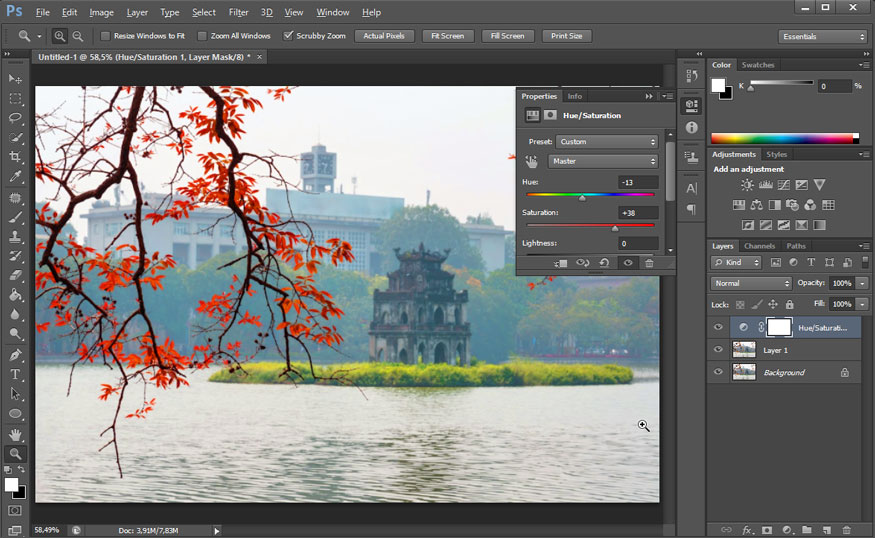
Step 3: At the new layer, select Create new fill or adjustment layer (circle icon at the bottom right corner of the screen), then select Hue/Saturation to add some color intensity to the photo. Or you can use the keyboard shortcut Ctrl+U (Cmd+U for MacOS).

Drag the Saturation slider above the Hue/Saturation dialog box to your preference. Don't pull too much because it can cause the photo to lose light balance and contrast.
Step 4: On the toolbar, select Layer => New adjustments => Brightness/Contrast to set the brightness and contrast parameters of the photo.
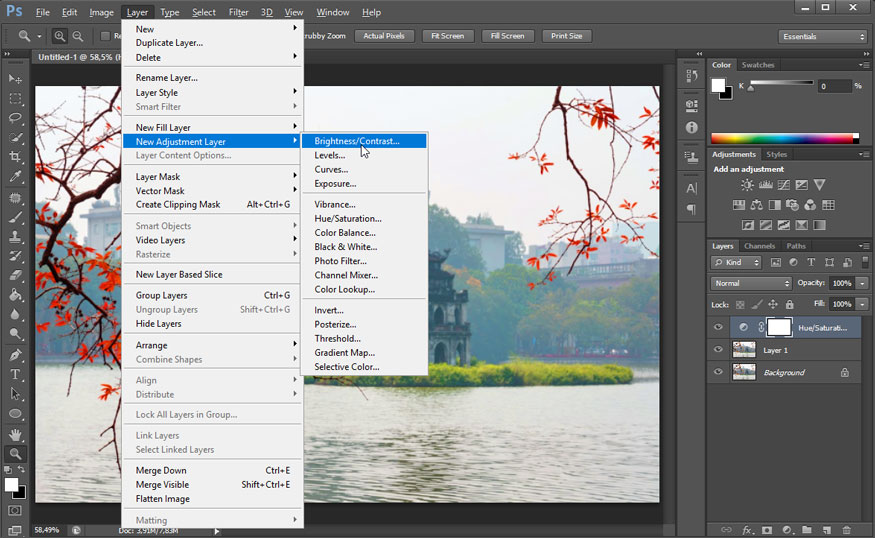
Adjust the parameters to suit your vision. If the photo is satisfactory, you can skip this step.
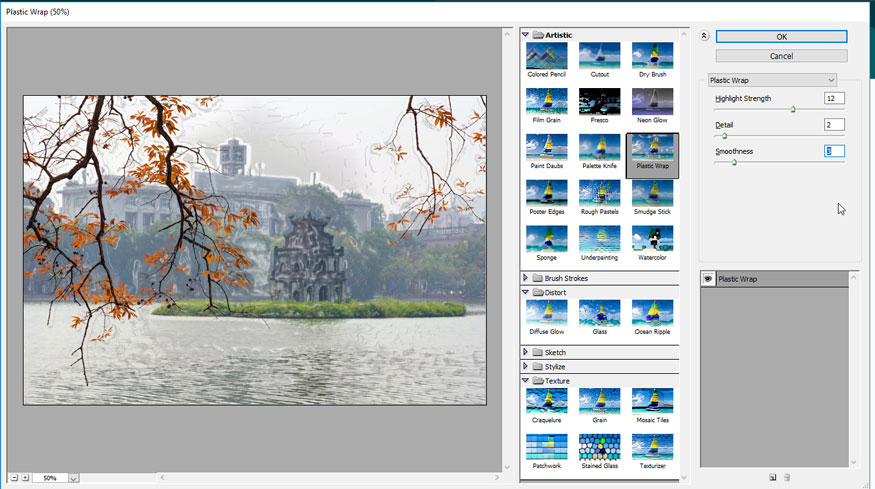
Step 5: On the menu bar, select Filter => Filter Gallery.

Then click on Artistic => select Plastic Wrap and then observe the details on the image. You will see that these details have become more blurred.
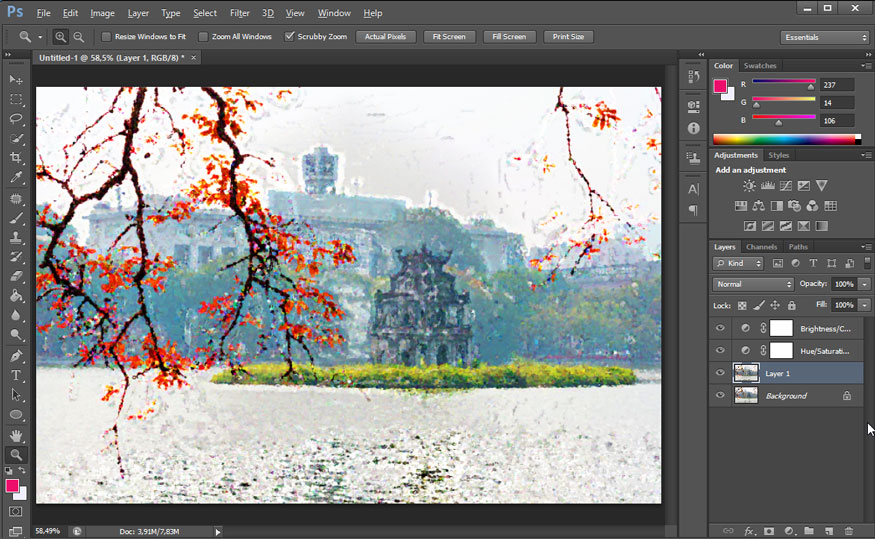
Step 6: Create another Effects layer by clicking on the icon as shown in the image below.
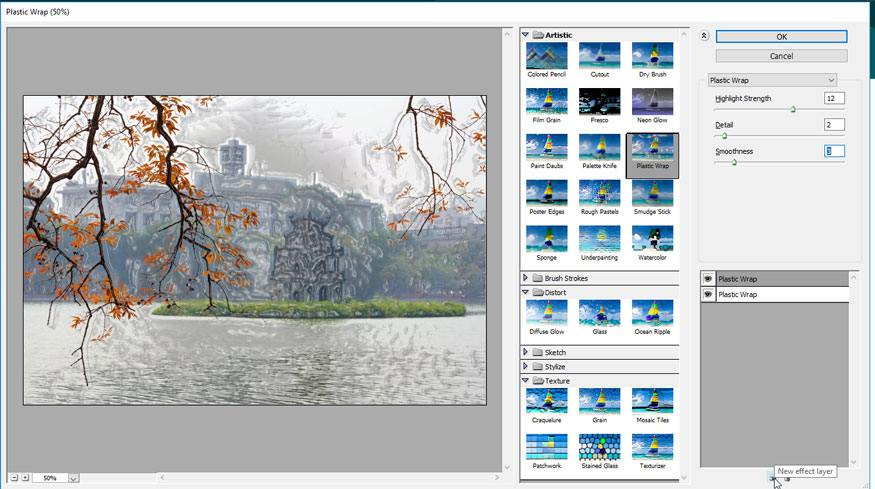
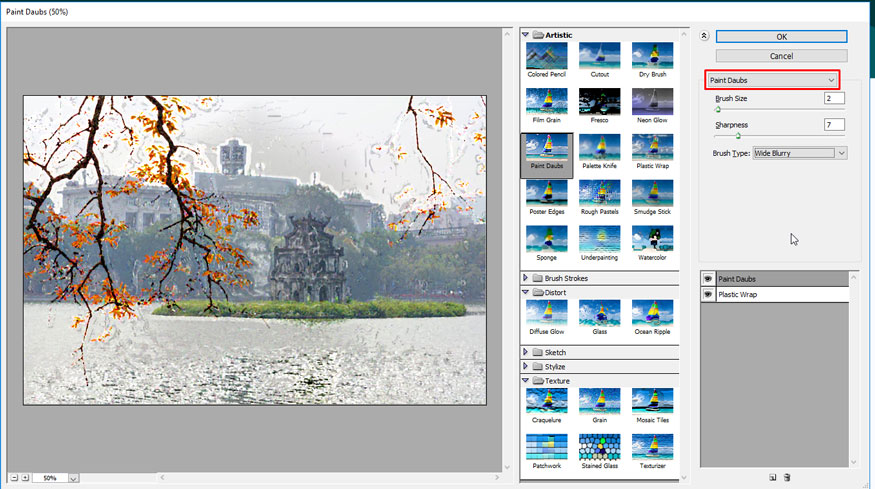
On the new Effect layer, select the Paint Daubs tool and adjust the parameters appropriately.
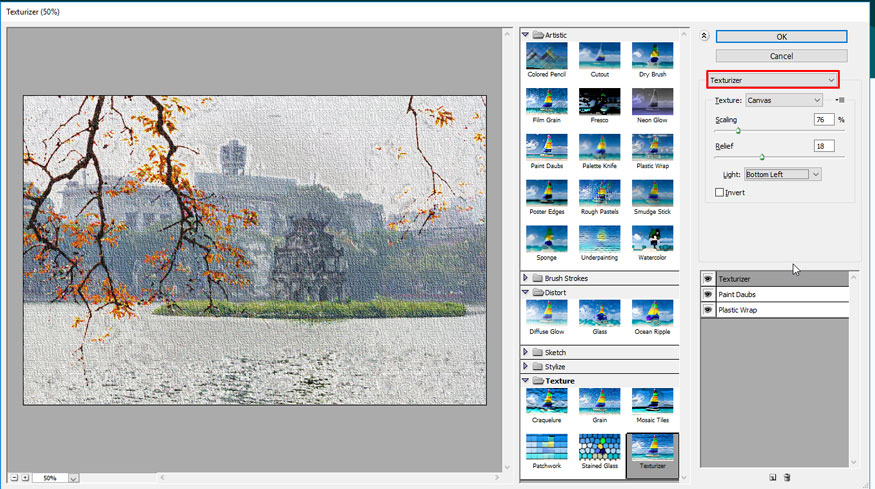
Similarly, still in this menu, create a new Effect layer then click on the Texturizer tool and adjust the parameters accordingly to create the veins of the canvas.
Continue doing the same as above with the Glass tool and adjust the parameters moderately to avoid causing image distortion or blurring.
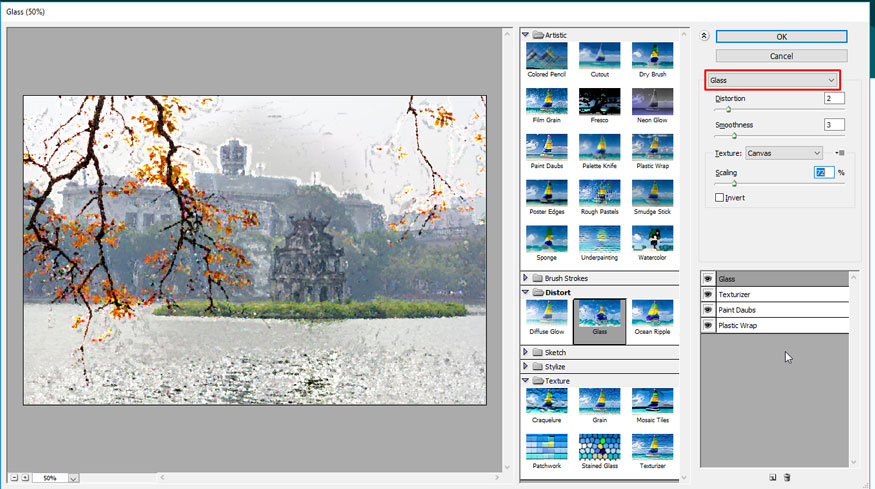
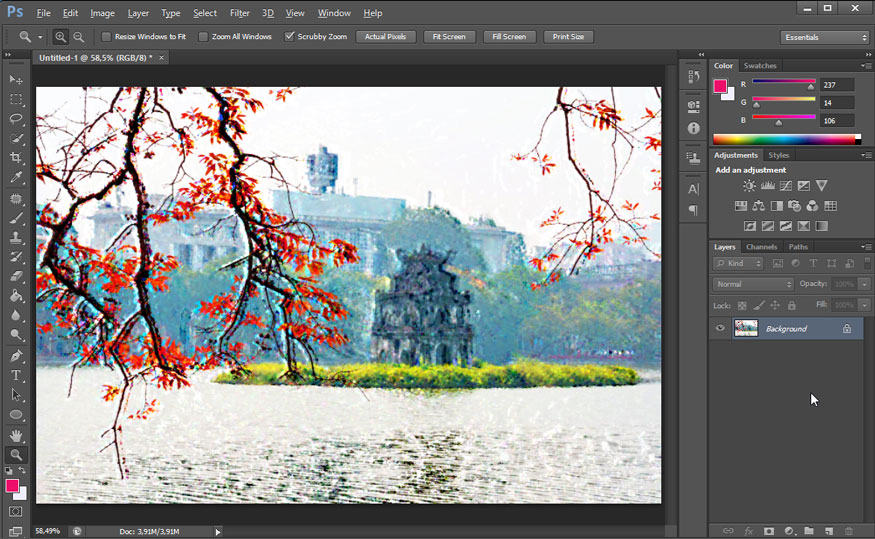
After you have finished adjusting the parameters of the new Effect layers, click OK to complete. Your temporary result will be an image like the one below.
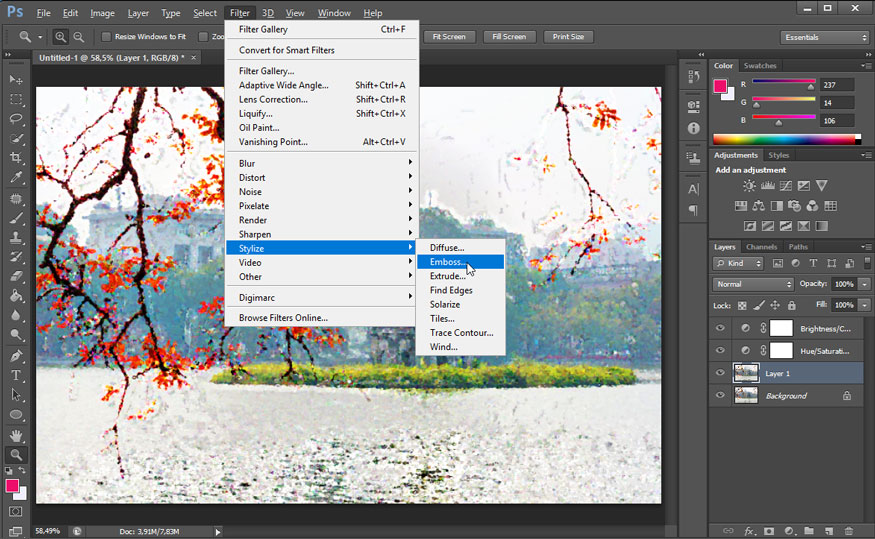
Step 7: Now, on the menu bar, select Filter => select Stylize => select Emboss and then proceed to set the appropriate parameters. Then click OK.
Step 8: Then change the layer's Blending mode to Vivid Light to blend with the layers below. Then use the keyboard shortcut Ctrl+Shift+E (Cmd+Shift+E for MacOS) to merge the new layers into one.
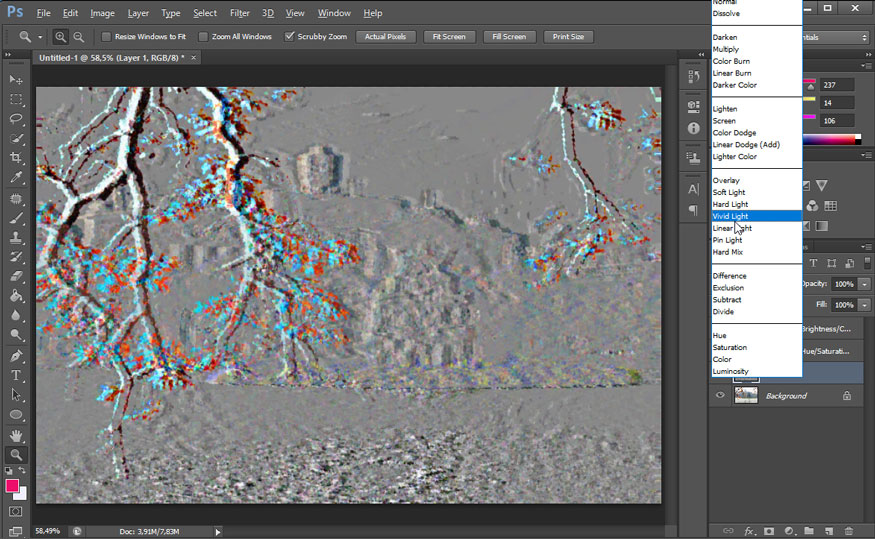
So you have completed how to convert photos into oil paintings using Photoshop. The original photo now looks more unreal, like an oil painting.
Above is detailed instructions on the steps to convert photos into oil paintings using Photoshop. The above method is not at all complicated. Hopefully our sharing above can help you convert photos into oil paintings using Photoshop.


VIP Products


Best Selling Products
Plugin Retouch4me
69 USD
Upgrade genuine Capture One account
120 USD
Genuine Adobe Illustrator account
99 USD
Freepik Premium Account
59 USD
Copyright Adobe Lightroom Account
59 USD
MidJourney Account
29 USD
Windows 10 & 11 Pro Key
36 USD
Adobe Photoshop Copyright - Full App
120 USD
Capcut Pro 1 Year
39 USD
ChatGPT Plus Account (GPT-4)
16 USD
Upgrade Duolingo Super
29 USD
Upgrade Genuine Office 365
49 USD
Adobe Premiere Pro Account
99 USD
Genuine Cheap Canva Pro
39 USD
Autodesk All App Account Copyright
120 USD